Introduction
Are you struggling to download photos from Google Drive to your iPhone? Look no further! In this article, we will guide you through the step-by-step process of downloading photos from Google Drive to your iPhone. With just a few simple taps, you’ll have your favorite memories saved directly on your device.
Google Drive is a popular cloud storage service that allows you to store and access your files from anywhere. One of the great features of Google Drive is the ability to store photos and share them with others. However, if you want to have these photos readily available on your iPhone for offline viewing or to share them on social media platforms, you’ll need to download them first.
Although the process might seem daunting at first, it is actually quite straightforward. You don’t need any technical expertise or special tools to get the job done. By following the steps outlined in this guide, you’ll be able to quickly and easily download your photos from Google Drive to your iPhone.
So, whether you have a collection of precious moments captured on your smartphone or important work-related images stored in Google Drive, let’s dive in and learn how to download them to your iPhone.
Next, we will walk you through each step of the process, providing clear instructions and tips to ensure a smooth and successful photo download.
Step 1: Open the Google Drive App
The first step to downloading photos from Google Drive to your iPhone is to open the Google Drive app. If you haven’t already installed the app, you can easily download it from the App Store. Once installed, locate the app on your iPhone’s home screen and tap on it to open.
Upon opening the Google Drive app, you will be prompted to sign in to your Google account. If you already have a Google account, simply enter your login credentials and tap on the “Sign In” button. If you don’t have an account, you can create one by selecting the “Create account” option and following the on-screen instructions.
After successfully signing in, you will be greeted with the main interface of the Google Drive app. The interface is clean and user-friendly, making it easy to navigate and locate your stored photos.
It’s worth noting that the Google Drive app provides various views for browsing your files and folders. By default, it displays the “My Drive” view that shows all the files and folders you have stored in your Google Drive account. You can switch to different views like “Recent”, “Starred”, or “Shared” by tapping on the corresponding tabs at the bottom of the screen.
Now that you have the Google Drive app open and are familiar with the interface, you’re ready to move on to the next step and locate the photos you want to download.
Step 2: Locate the Photos you want to download
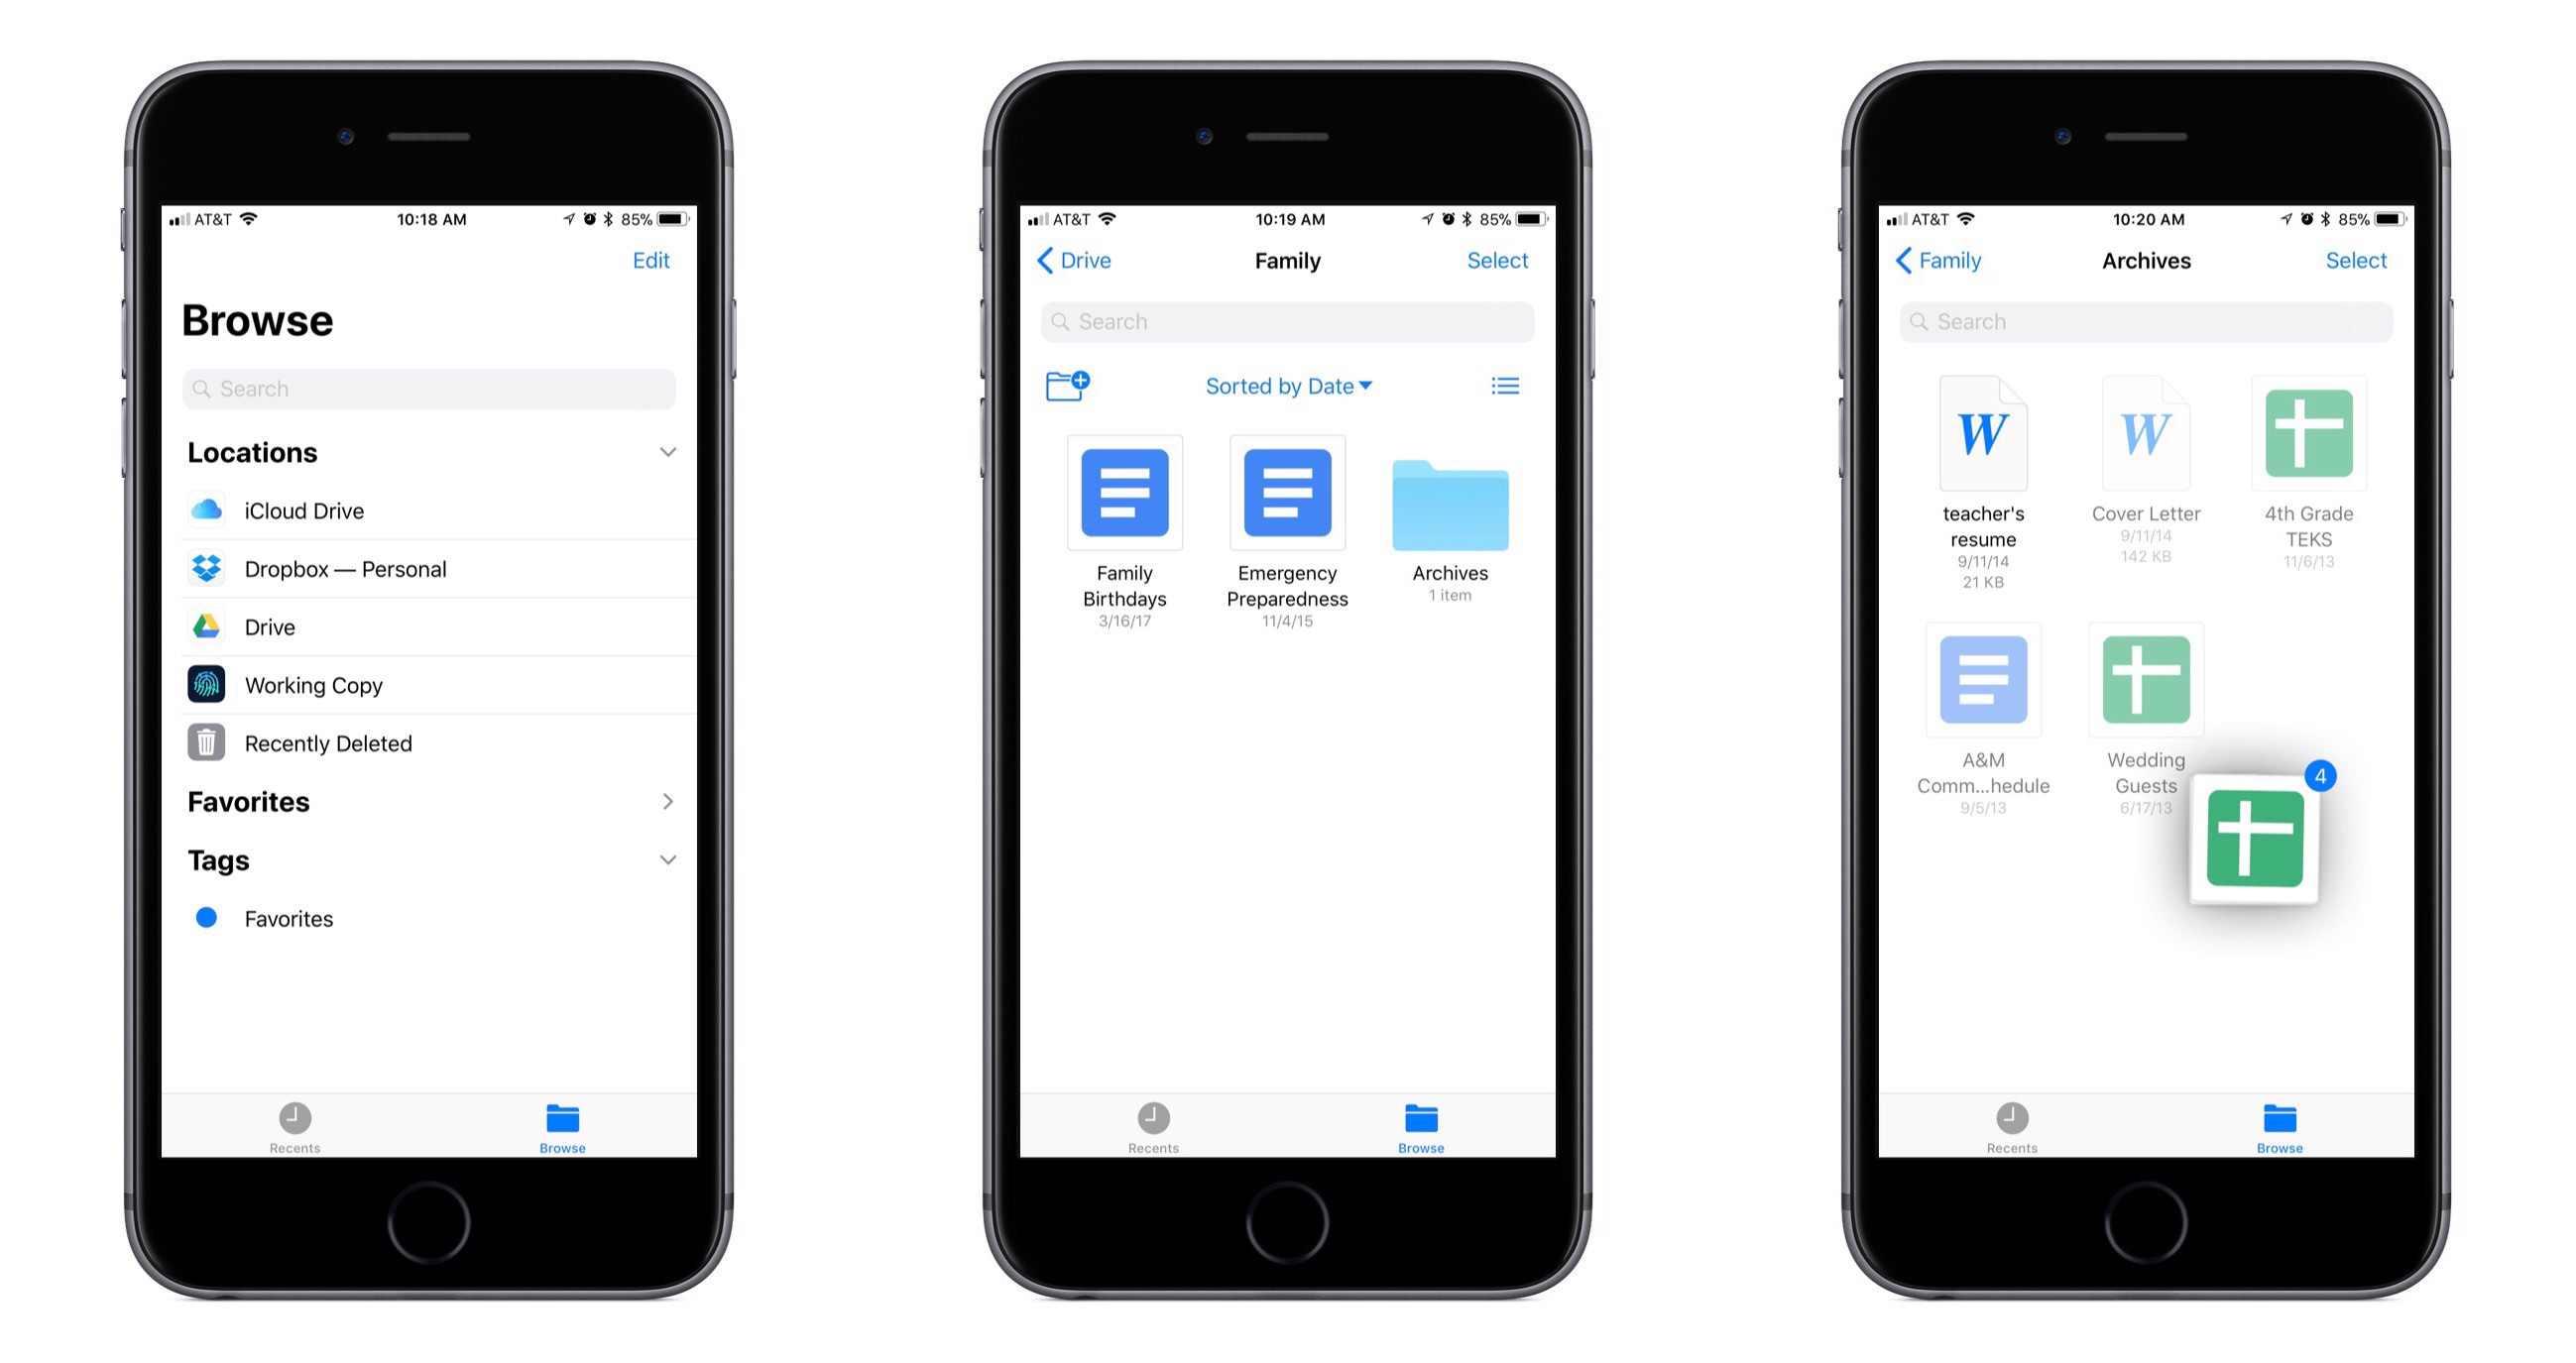
Once you have successfully opened the Google Drive app on your iPhone, it’s time to locate the photos you wish to download. With Google Drive’s organized file management system, finding your desired photos is a breeze.
To begin, navigate through the folders in your Google Drive until you reach the folder that contains the photos you want to download. You can tap on the folders to expand them and reveal any subfolders they may contain.
If you know the specific name of the photo you’re looking for, you can use the search bar at the top of the screen to quickly locate it. Simply enter the name of the photo and tap the search icon. Google Drive will display any matching results for you to choose from.
Another helpful feature of the Google Drive app is the ability to sort and filter your files. By tapping on the “Sort” button, you can arrange your files by name, date modified, file size, or other criteria. This can help you quickly find the photos you’re looking for if you have a large number of files in your Google Drive account.
Additionally, you can use the “Filter” option to narrow down your search based on specific file types. If you’re only interested in photos, you can select the “Photos” filter option, and Google Drive will display only the image files available.
Once you have located the folder containing the photos you want to download, or if you have found the specific photo through search or filtering, you’re ready to move on to the next step: selecting the photos for download.
Step 3: Select the Photos you want to download
Now that you have found the folder or specific photo you want to download from Google Drive, it’s time to select the photos you wish to save to your iPhone. The Google Drive app provides a simple and intuitive selection process.
To select a single photo, simply tap on it. You will notice a blue checkmark appearing on the selected photo to indicate that it has been chosen. If you want to select multiple photos, you can tap on each of them individually to add a checkmark. The selected photos will be highlighted with the blue checkmark.
If you want to select all the photos within a folder, you can tap on the “Options” button located at the top-right corner of the screen. From the options menu, select the “Select All” option, and all the photos within that folder will be selected automatically. This is highly convenient if you have a large number of photos to download.
Furthermore, if you want to select a range of photos, you can tap and hold on one photo, then swipe your finger across the subsequent photos to create a selection range. All the photos within that range will be selected, and you can release your finger once you have made the desired selection.
It’s important to note that while selecting the photos, you can always review your choices and deselect any photos that you no longer wish to download. Simply tap on the selected photo to remove the checkmark and deselect it.
Once you have made your selections, you’re ready to proceed to the next step and initiate the download process by tapping on the download icon.
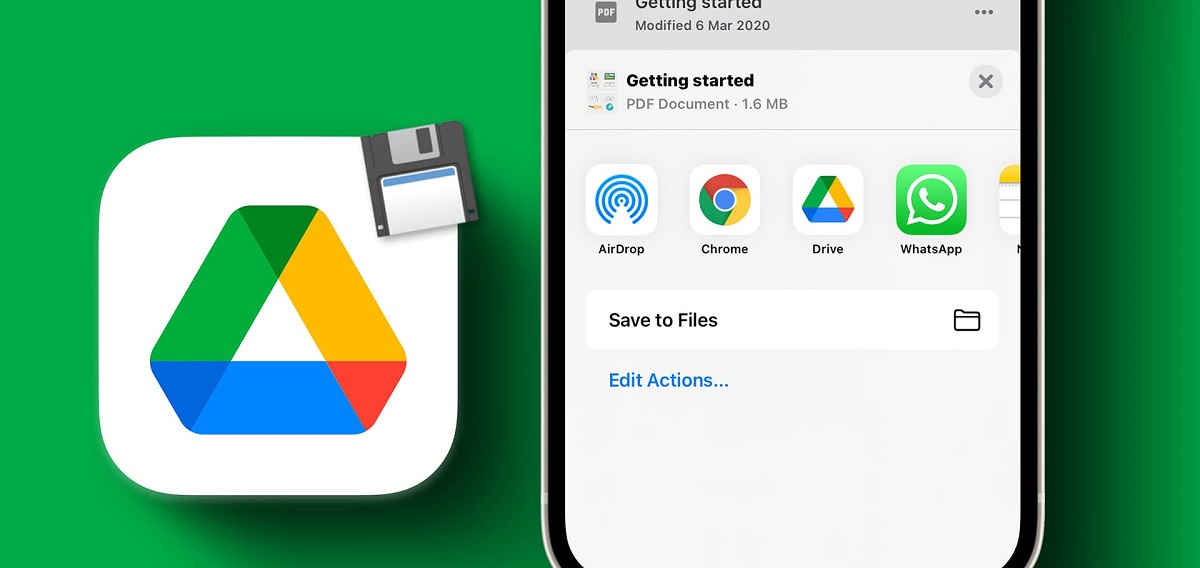
Step 4: Tap on the Download icon
After selecting the photos you want to download from Google Drive to your iPhone, it’s time to initiate the actual downloading process. Fortunately, the Google Drive app makes this step quick and easy with a simple tap on the download icon.
Once you have made your selections, look for the download icon, which is represented by a downward-facing arrow or a cloud with a downward arrow inside it. The location of this icon may vary slightly depending on the version of the Google Drive app you are using, but it is typically found in the top toolbar or within the options menu.
When you have located the download icon, tap on it to begin the download process. Google Drive will initiate the transfer of the selected photos from the cloud to your iPhone. The time it takes to download the photos will depend on various factors such as the size of the files and the speed of your internet connection.
While the download is in progress, you will see a progress indicator or a spinning icon to signify that the photos are being downloaded. It’s important to ensure that you have a stable internet connection during this process to avoid any interruptions that may affect the download speed or successful completion.
Once the download is complete, the selected photos will be saved directly to your iPhone’s internal storage or the designated download folder. You can now access these photos even without an internet connection.
With the download process complete, you can move on to the final step of checking the Downloads folder on your iPhone to locate the downloaded photos.
Step 5: Check the Downloads folder on your iPhone
Once you have successfully downloaded the photos from Google Drive to your iPhone, it’s time to locate and access them. By default, the photos are typically saved in the Downloads folder on your device. Here’s how you can check the Downloads folder:
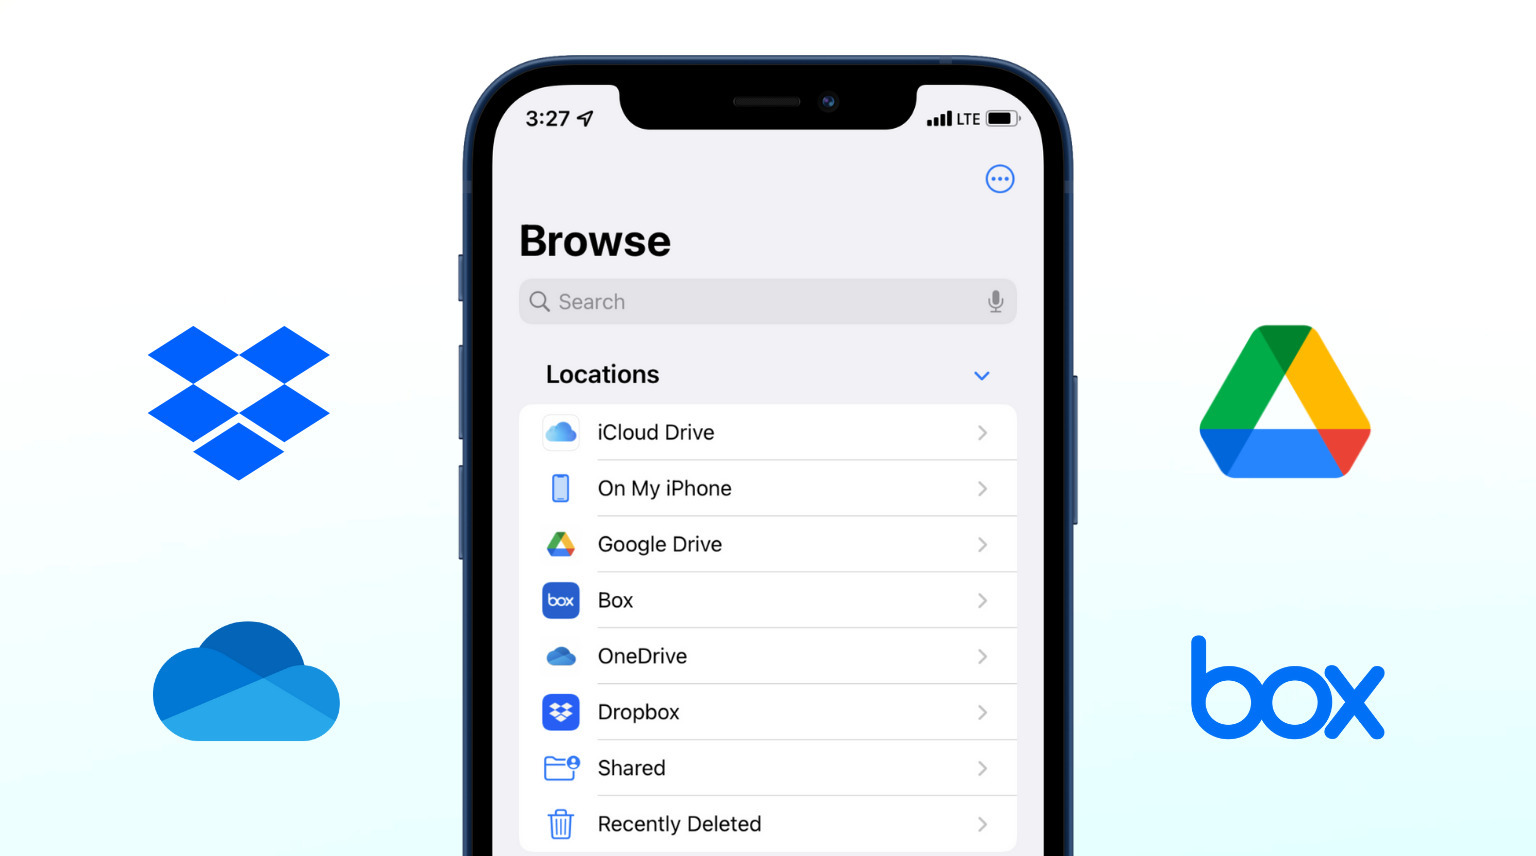
1. Start by accessing the Files app on your iPhone. This app is pre-installed on most iOS devices and can usually be found on the home screen.
2. Once you have opened the Files app, you will see different options such as iCloud Drive, On My iPhone, and various third-party cloud storage services. Tap on “On My iPhone” to access files stored locally on your device.
3. Within the “On My iPhone” section, you will see a list of folders. Look for and tap on the “Downloads” folder. This is where your downloaded photos from Google Drive will be located.
4. Upon opening the Downloads folder, you will see all the files that you have downloaded, including the photos from Google Drive. Scroll through the list to find the photos you just downloaded or use the search feature at the top of the screen to search for a specific file name.
5. Once you have located the downloaded photos, you can tap on them to view, share, or organize them within the Files app. From there, you can further manage your photos by moving them to different folders or sharing them with others through various channels like messaging apps or social media platforms.
It’s important to note that depending on your device’s settings, the Downloads folder may have a different location or name. If you are unable to find the Downloads folder, you can try using the search function within the Files app and search for the specific file names or extensions of the downloaded photos.
With the downloaded photos successfully located within the Downloads folder on your iPhone, you can now enjoy your cherished memories, edit them, and share them with friends and family at your convenience.
Conclusion
Downloading photos from Google Drive to your iPhone can be a hassle-free process if you follow the steps outlined in this guide. By opening the Google Drive app, locating the desired photos, selecting them for download, tapping on the download icon, and checking the Downloads folder on your iPhone, you can easily access and enjoy your favorite memories on the go.
Google Drive offers a convenient way to store and organize your photos in the cloud, making them easily accessible from any device. Whether it’s a collection of personal photos or work-related images, having the ability to download them to your iPhone allows for easy offline viewing, sharing, and editing.
Throughout the process, it’s important to ensure that you have a stable internet connection. This will help facilitate a smooth and uninterrupted download experience. In addition, familiarizing yourself with the Google Drive app and its various features, such as search, sorting, and filtering, can greatly assist in efficiently locating the photos you want to download.
Once downloaded, the photos are stored in the Downloads folder on your iPhone’s local storage. From there, you can access, manage, and share them using the Files app or other applicable photo management applications on your device.
With these steps in mind, you now have the necessary knowledge to effortlessly download photos from Google Drive to your iPhone. Whether you’re preserving precious memories or accessing important images for work, this process will help you stay organized and have your photos readily available whenever and wherever you need them.
So, go ahead and start downloading those beautiful moments captured in your Google Drive, and enjoy the convenience of having them accessible on your iPhone!