Introduction
Welcome to the wonderful world of Facebook, where you can share your life’s moments and memories with friends and family. One of the most popular features of Facebook is the ability to create photo albums and share them with your network. But what happens when you want to download those photo albums and keep them for yourself? In this article, we will guide you through the process of downloading photo albums from Facebook.
Downloading photo albums allows you to preserve your cherished memories, whether it’s a collection of vacation photos, a milestone celebration, or simply pictures of your everyday adventures. By having these albums on your own device, you can access them offline, create backups, or even share them on other platforms. Perhaps you want to create a physical photo album or create a slideshow for a special occasion. Whatever your reasons may be, learning how to download photo albums from Facebook gives you the freedom to do so.
Now, before we dive into the step-by-step process, it’s worth mentioning that Facebook provides a built-in option to download your information, including photo albums. However, this option may include other data beyond just the albums, such as your posts, messages, and more. If you’re solely interested in downloading the photo albums, we’ll guide you through a direct method that focuses specifically on the albums.
So, if you’re ready to embark on this journey of downloading your favorite Facebook photo albums, let’s get started with our step-by-step guide. Whether you’re a tech-savvy individual or a beginner, these instructions are designed to be easy to follow, ensuring that you can save your precious memories with just a few clicks.
Step 1: Log into your Facebook account
The first step to downloading photo albums from Facebook is logging into your Facebook account. Launch your web browser and navigate to the Facebook website. Enter your login credentials – your email or phone number, followed by your password. Once you’ve entered the correct information, click on the “Log In” button.
If you haven’t signed up for a Facebook account yet, you’ll need to do so before you can proceed. Simply click on the “Create New Account” button and follow the instructions to create your account.
It’s essential to ensure that you log into the correct Facebook account that contains the photo albums you want to download. Sometimes, people may have multiple Facebook accounts, whether for personal and professional use or due to other reasons. Double-check that you’re logging into the account that has the desired photo albums.
If you have trouble accessing your account or have forgotten your password, Facebook provides options to recover your account. Click on the “Forgot Password?” link on the login page, and Facebook will guide you through the process of resetting your password or recovering your account.
Once you’ve successfully logged into your Facebook account, you’re ready to proceed to the next step of downloading your photo albums. Remember to keep your login credentials secure and avoid sharing them with anyone to protect the privacy of your Facebook account.
Step 2: Go to the photo album you want to download
Now that you’re logged into your Facebook account, it’s time to navigate to the specific photo album that you want to download. On your Facebook homepage or timeline, you’ll find various sections such as “News Feed,” “Friends,” and “Groups” on the left-hand side. Scroll down until you see the “Photos” section, and click on it.
When you click on the “Photos” section, you’ll be directed to a page that displays all the photo albums you have created or ones that you’ve been tagged in. Depending on your privacy settings, you may also see albums shared by your friends. Take a moment to browse through the albums and locate the one you wish to download.
If you have a large number of photo albums or find it difficult to spot the specific album you want, you can use the search bar at the top of the page to search for the album by its name or any keywords related to it. This will help you quickly locate the desired album without having to scroll through numerous photos and albums.
Once you’ve identified the photo album you want to download, click on it to open it. The album will display all the pictures contained within it, allowing you to preview the images and ensure that it’s the correct album before proceeding to download it.
It’s important to note that if the album is private or shared with a limited audience, you may not be able to access it or download it. Ensure that you have the necessary permissions to view and download the album. If you encounter any issues accessing the album, you may need to request access from the album owner or adjust your privacy settings.
With the photo album open, you’re now one step closer to downloading your cherished photos. Let’s move on to the next step to learn how to download the album from Facebook.
Step 3: Open the album options
Now that you have opened the photo album you want to download, it’s time to access the album options. In order to download the entire album, you need to open the settings or options menu for the album. This menu will provide you with the necessary tools to initiate the download process.
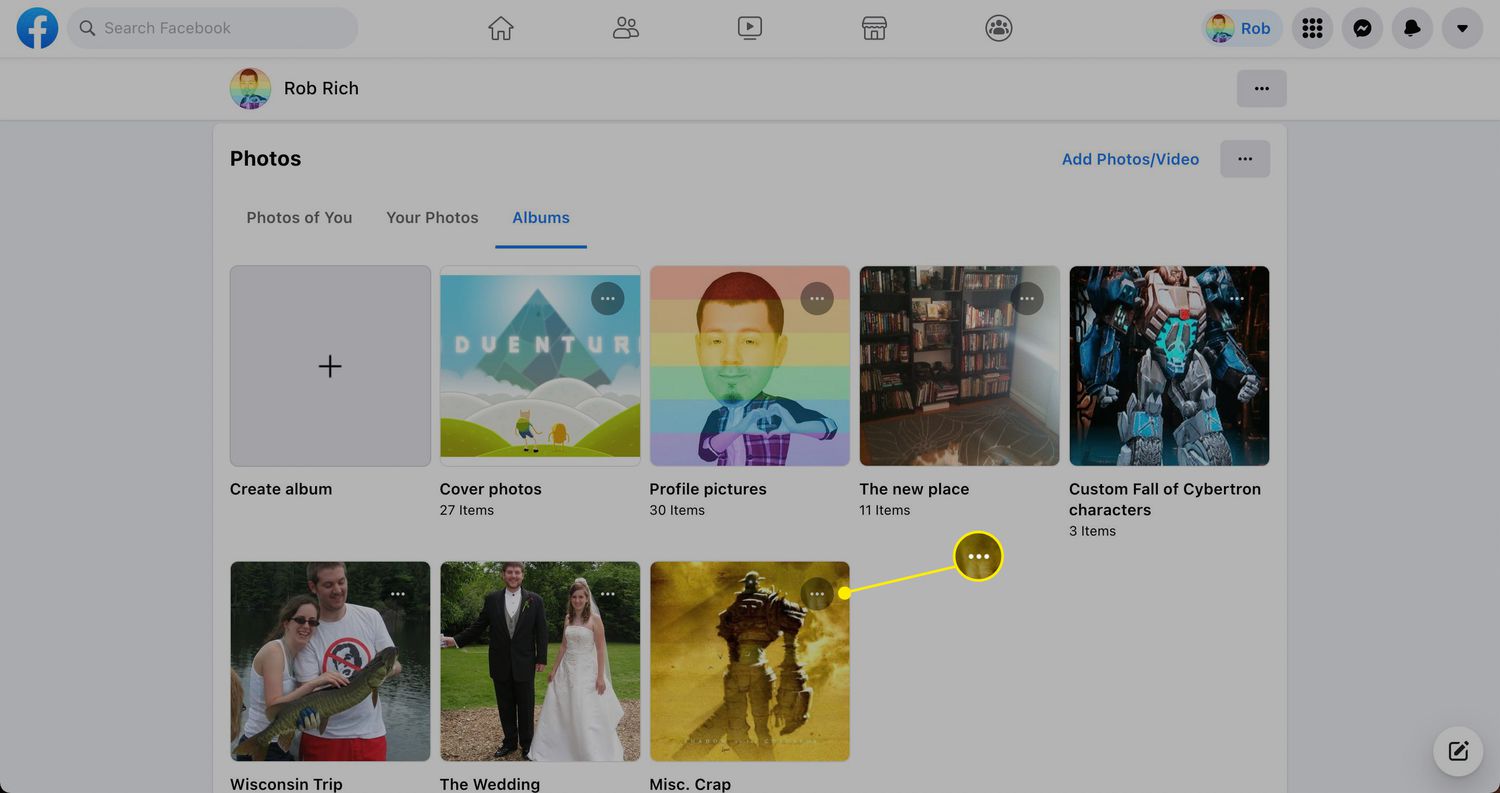
In the top-right corner of the album page, you should see a button or icon that represents the options menu. This icon is typically represented by an ellipsis (…) or three horizontal dots. Click on this icon to open the album options.
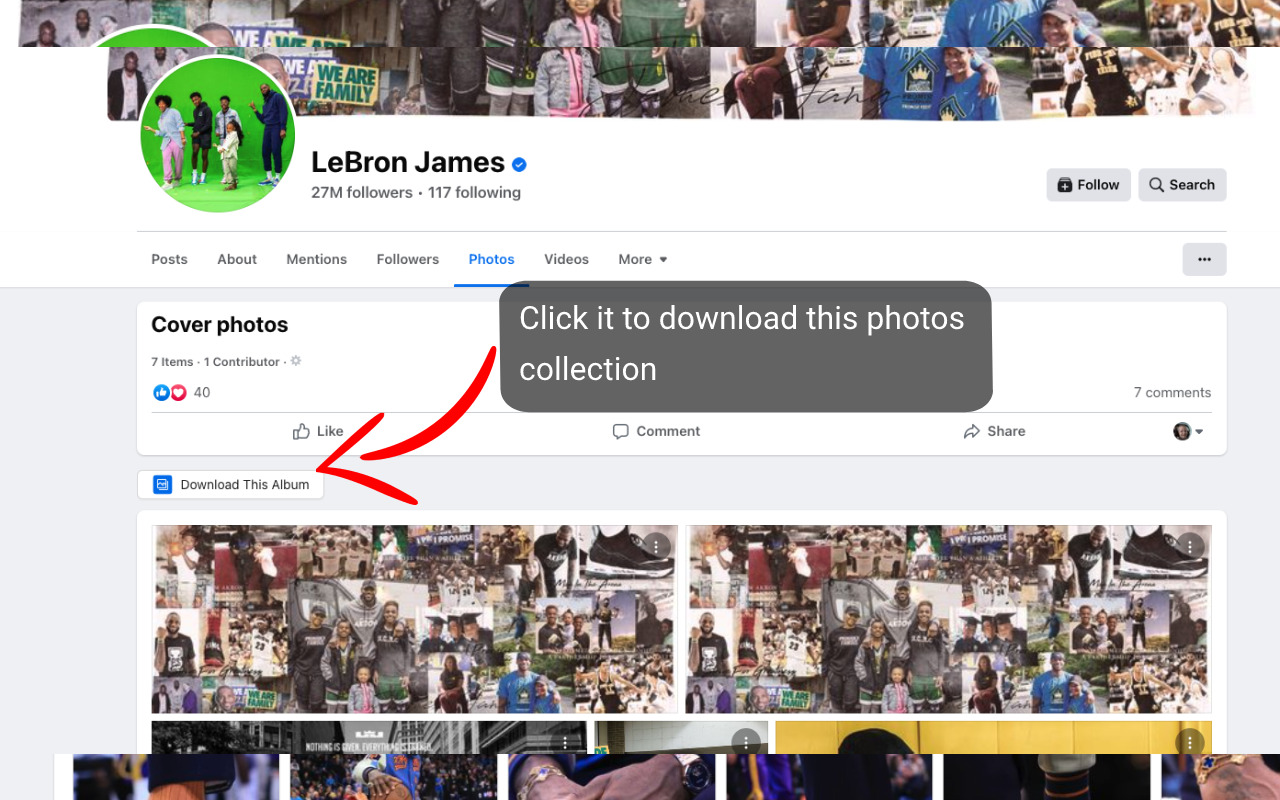
Upon clicking the options menu, a dropdown or popup menu will appear, containing a list of actions you can perform on the album. These actions may include options to edit the album, share it, delete it, or download it. Locate and select the option that allows you to download the album. In most cases, it will be labeled “Download Album” or something similar.
Some photo albums may have additional options or settings related to the album’s privacy, sharing, or organization. Feel free to explore these options if you want to make any changes before downloading the album. However, for the purpose of downloading the album, focus on finding the option specifically meant for downloading it.
If you’re having trouble locating the album options, double-check that you’ve clicked on the correct icon or button in the top-right corner of the album page. The appearance of the options menu may vary slightly depending on your device and the version of Facebook you’re using, but it should be easily identifiable by its icon or label.
Now that you’ve successfully accessed the album options, it’s time to proceed with the next step in the process: choosing the “Download Album” option. Let’s move on to step four to learn how to initiate the download of the album from Facebook.
Step 4: Choose the “Download Album” option
With the album options menu open, the next step is to select the “Download Album” option. This is the crucial step that triggers the download process and allows you to save the entire photo album to your device.
Scan the options available in the album menu until you find the specific option labeled “Download Album” or something similar. Click on this option to proceed with downloading the album.
It’s important to note that the wording or placement of the “Download Album” option may vary slightly depending on your device and the version of Facebook you are using. However, it should be easily identifiable within the album options menu. Look for any option that indicates the ability to download the entire album to your device.
Ensure that you have selected the correct option to download the entire album. Sometimes, there may be other download options available within the menu, such as downloading individual photos or a specific selection of photos. Be careful not to accidentally select the wrong option, as this may result in downloading only a portion of the album.
Once you have located and clicked on the “Download Album” option, Facebook will begin preparing the album for download. Depending on the size of the album and your internet connection speed, this process may take a few seconds or several minutes. Facebook will create a downloadable file containing all the photos and associated data from the album.
Now that you have successfully chosen the “Download Album” option, you’re one step closer to getting your hands on the precious memories stored within the album. In the next step, we will guide you through confirming the download and saving the album on your device. Let’s move on to step five!
Step 5: Confirm the download
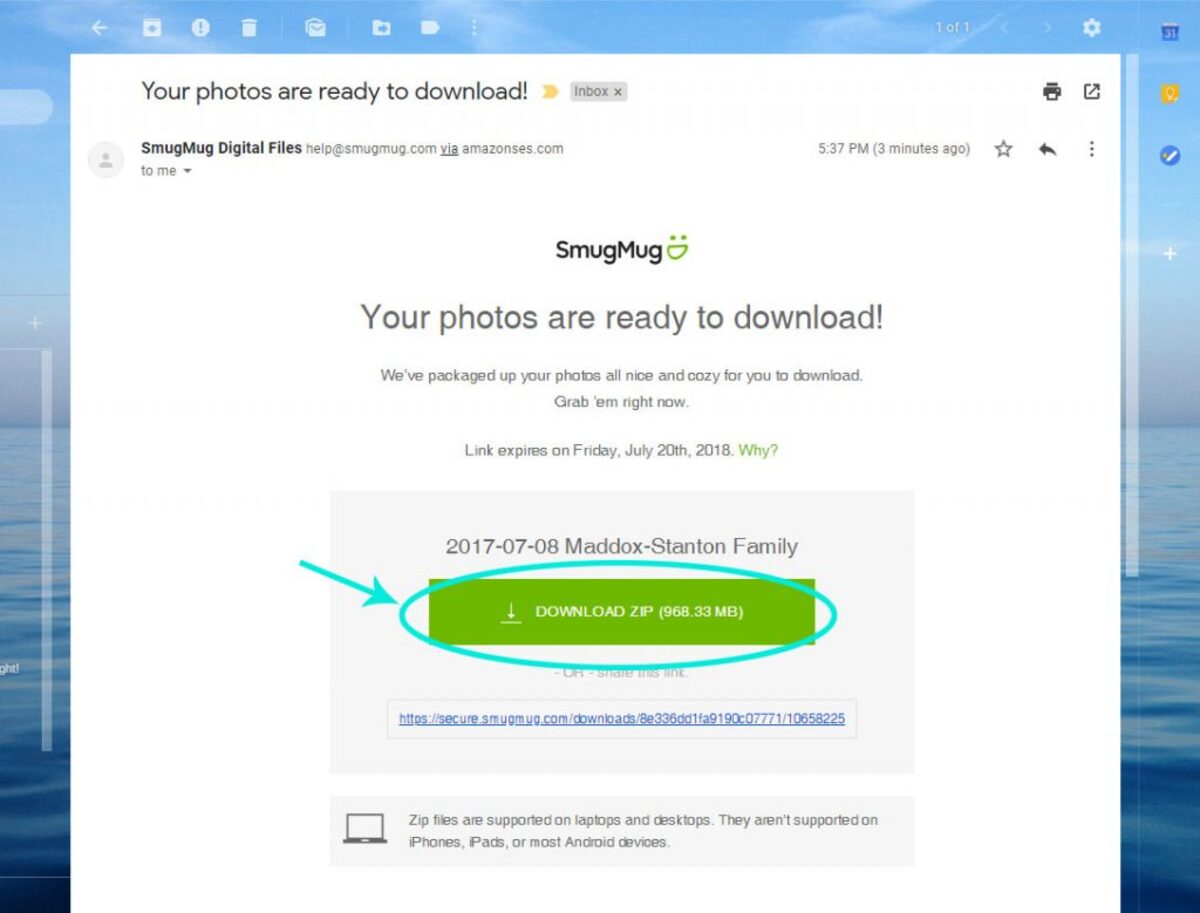
After selecting the “Download Album” option, Facebook will prepare the album for download. Once the preparation process is complete, you will need to confirm the download to proceed with saving the album on your device.
A confirmation prompt or dialog box will appear on your screen, asking you to confirm the download. This prompt usually includes information about the album size, the number of photos included, and an estimated download time. Take a moment to review these details and ensure that everything is in order.
Double-check that the download prompt displays the correct album name and that the size corresponds to your expectations. This is particularly important if you have multiple photo albums or if some albums have similar names. You want to make sure that you are downloading the intended album.
If you’re satisfied with the details presented in the confirmation prompt, go ahead and click on the “Download” or “Confirm” button to initiate the download process. This will start the actual downloading of the album to your device.
During the download process, it’s crucial to keep your internet connection stable and avoid interrupting the download. Disconnecting from the internet or closing the browser window may result in an incomplete download or force you to restart the process from the beginning.
Depending on the size of the album and your internet speed, the download time can vary. Larger albums with more photos may take longer to download, while smaller albums may complete in just a few seconds. Be patient and allow the download to progress until completion.
Once the download is finished, you can move on to the next step, where we will guide you on how to locate the downloaded album on your device. Let’s continue to step six to complete the process of downloading your Facebook photo album.
Step 6: Wait for the download to complete
After confirming the download of the album, you will need to wait for the download process to complete. The duration of this step will depend on the size of the album and the speed of your internet connection.
While the album is downloading, it’s important to be patient and avoid interrupting the process. Make sure that your device remains connected to the internet and avoid closing the browser window or navigating away from the page until the download is finished.
Keep an eye on the progress of the download, which is usually indicated by a progress bar or percentage counter. This will give you an idea of how much time is remaining until the download is complete.
Depending on the size of the album and your internet speed, the download process may take a few seconds, a few minutes, or even longer for large albums. It’s advisable to have a stable internet connection during this time to ensure the smooth and uninterrupted download of the album.
While waiting for the download to complete, you can use this time to prepare for the next step of the process. Ensure that you have enough storage space on your device to accommodate the downloaded album. Clearing up some space or organizing your existing files can help in this regard.
Remember, the download progress may be slower or faster depending on various factors, so don’t be alarmed if it takes longer than expected. Stay patient and let the download run its course until it reaches 100% or indicates that it’s finished.
Once the download is complete, you can proceed to the next step to locate the downloaded album on your device. In the following section, we will guide you on how to find the album and access your cherished photos. Let’s move on to step seven!
Step 7: Locate the downloaded album on your device
After the download of the album is complete, it’s time to locate and access the downloaded files on your device. The location of the downloaded album will depend on your browser settings and the default download location on your device.
If you’re using a computer, open the default download folder or the folder you have specified for downloads. This is usually located in the “Downloads” folder on your computer. Look for a folder with the same name as the downloaded album or a compressed zip file containing the album.
If you’re using a mobile device, such as a smartphone or tablet, open the file manager app on your device. Navigate to the download folder or the default storage location for downloaded files. Similar to the computer, look for a folder with the album name or a zip file containing the album.
Once you have located the downloaded album folder or zip file, open it to access the photos. If the album was downloaded as a zip file, you may need to extract the files using a file extraction tool or app. This will restore the individual photos within the album folder.
Inside the downloaded album folder, you should find the photos from the album in their original resolution and format. You can now browse through the photos, view them, and organize them as desired on your device.
Depending on your preference, you can either keep the downloaded album as a backup on your device or transfer it to another location, such as an external hard drive or cloud storage service, for further storage and backup purposes.
Congratulations! You have successfully downloaded and located the album on your device. Now you can enjoy and cherish your memories, even when offline or outside of the Facebook platform.
Keep in mind that it’s important to maintain the privacy and security of the downloaded album. Avoid sharing the album files with unauthorized individuals and ensure that your device and storage locations are secure.
With the album safely stored on your device, you can now reminisce about those special moments captured within the photos at any time you desire.
Tips for downloading multiple photo albums
If you have multiple photo albums that you want to download from Facebook, there are a few tips and strategies that can help streamline the process and make it more efficient. Follow these tips to save time and ensure a smooth downloading experience:
- Organize your albums: Before starting the download process, take some time to organize your albums on Facebook. Group them by theme, event, or category to make it easier to locate and download specific albums.
- Download one album at a time: To avoid any confusion or mix-ups, focus on downloading one album at a time. This will ensure that you have all the photos from each album properly organized and easily accessible on your device.
- Plan for sufficient storage: Downloading multiple albums can take up a significant amount of storage space on your device. Make sure you have enough available storage to accommodate all the albums you plan to download.
- Use a download manager: If you have a large number of albums to download, consider using a download manager software or browser extension. These tools can help automate and streamline the download process, allowing you to queue multiple albums for downloading.
- Check your internet connection: Downloading multiple albums can be time-consuming, so it’s essential to have a stable and reliable internet connection. Ensure that you are using a strong and consistent Wi-Fi connection for a smooth downloading experience.
- Monitor the download progress: Keep an eye on the download progress for each album to ensure that they are completed successfully. This will help identify any issues or interruptions in the download process.
- Be patient: Downloading multiple albums may take some time, especially if they contain a large number of photos. Stay patient and allow the download process to complete for each album before moving on to the next one.
- Organize and label your downloaded albums: Once you have downloaded multiple albums, take the time to organize and label them on your device. Create separate folders or directories for each album to maintain a well-organized collection of your downloaded photos.
By following these tips, you can download multiple photo albums from Facebook efficiently and ensure that your treasured memories are safely stored on your device for easy access.
Conclusion
Downloading photo albums from Facebook allows you to preserve and enjoy your cherished memories in a more personal and offline manner. Throughout this step-by-step guide, we have walked you through the process of downloading photo albums, from logging into your Facebook account to locating the downloaded albums on your device.
By following these instructions, you can easily save your photo albums and access them at any time, even without an internet connection. Whether you want to create physical copies, back up your photos, or organize them in a different way, downloading Facebook photo albums gives you the freedom to do so.
Remember, when downloading multiple albums, it’s important to stay organized and plan for sufficient storage space on your device. Utilize download manager tools and ensure a stable internet connection to make the process smoother and more efficient.
Additionally, always keep in mind the privacy and security of your downloaded albums. Avoid sharing them with unauthorized individuals and take necessary measures to safeguard your device and storage locations.
Now, armed with the knowledge of how to download photo albums from Facebook, you can embark on your journey of preserving and enjoying your special moments captured within the photos. So, go ahead, log into Facebook, download those albums, and relive the memories that hold a special place in your heart.