Introduction
Facebook is undoubtedly one of the most popular social media platforms, allowing users to connect with friends, share updates, and post photos. Over the years, we have captured countless cherished memories in the form of photos on our Facebook profiles. However, what happens when we want to save all those photos and keep them safe on our devices?
In this article, we’ll guide you through the process of downloading all your photos from Facebook, ensuring you have a backup copy of your precious memories. Whether you’re planning to deactivate your account, switch to a different platform, or simply want to have an offline collection of your photos, downloading them from Facebook is a simple and straightforward process you can accomplish in just a few steps.
Before we dive into the step-by-step instructions, it’s important to note that downloading your photos from Facebook will also include the photos in which you are tagged. Additionally, the process will encompass all the photos you have uploaded, including those from albums and timeline posts. Now, let’s get started!
Step 1: Accessing Your Facebook Settings
The first step to download all your photos from Facebook is to access your account settings. This is where you’ll find the option to download a copy of your data, including your photos. Follow these simple instructions to get there:
- Open Facebook on your web browser and log into your account.
- Click on the downward arrow in the top-right corner of the Facebook page. This will open a dropdown menu with various options.
- From the dropdown menu, select “Settings & Privacy” and then click on “Settings.” This will take you to the main settings page.
- In the left-hand sidebar, you’ll see a list of different settings categories. Look for and click on the “Your Facebook Information” option. This will expand a submenu with additional options.
- Click on “Download Your Information.” This will open the download settings page.
By following these steps, you have successfully accessed the settings page where you can initiate the process of downloading your Facebook information, including your photos. In the next step, we’ll guide you through the process of actually downloading your data.
Step 2: Downloading Your Facebook Data
Now that you’re on the Download Your Information settings page, it’s time to select the specific data you want to download, which in this case are your photos. Here’s how you can proceed:
- On the Download Your Information page, you’ll see an overview of the data categories available for download. By default, all categories are selected, but since we’re focusing on downloading photos, you can deselect the other categories if you wish.
- Next, click on the “Deselect All” option at the top of the data categories. This will unselect all the categories.
- Scroll down the page until you find the “Your Photos” category. Check the checkbox next to it to select it for download. You’ll notice that the selected category will be highlighted.
- Optionally, if you want to include other photo-related data such as videos or albums, you can select those as well.
- Once you’ve selected the desired photo-related categories, click on the “Create File” button at the bottom of the page. Facebook will start preparing your data for download.
By following these steps, you have successfully chosen the specific photo-related data you want to download. In the next step, we’ll guide you through configuring the format in which you want to receive your downloaded photos.
Step 3: Selecting the Photos You Want to Download
After initiating the data download process in the previous step, Facebook will prepare your data for download. Once your data is ready, you’ll receive a notification or an email containing a download link. Follow these steps to select the specific photos you want to download:
- Check your email or Facebook notifications for the download link. Click on the link to be directed to the download page.
- On the download page, you’ll see an overview of the data categories you selected for download. Look for the “Photos” category and click on it to expand the options.
- Here, you have the option to select the photos you want to download based on the date range, albums, or tags. Choose the appropriate option based on your preferences.
- If you want to download photos within a specific date range, click on the “Date Range” option and select the start and end dates accordingly.
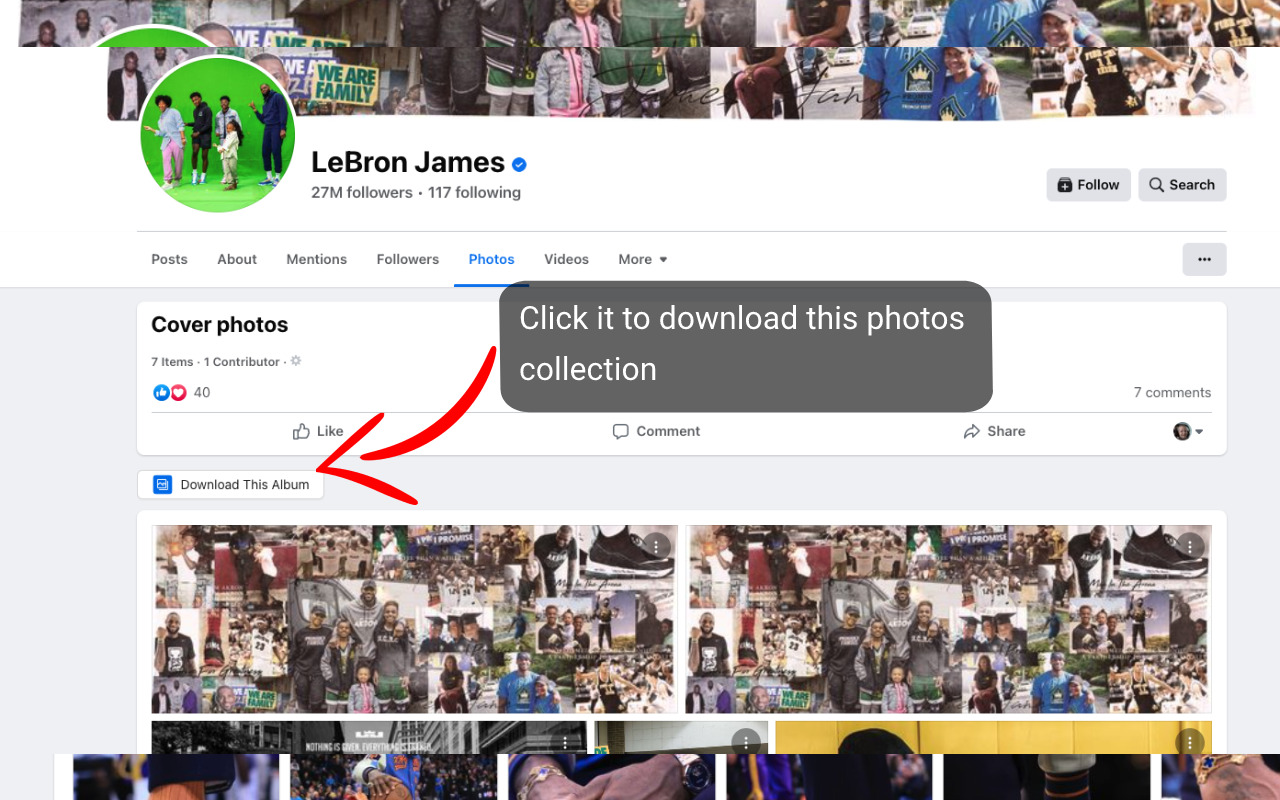
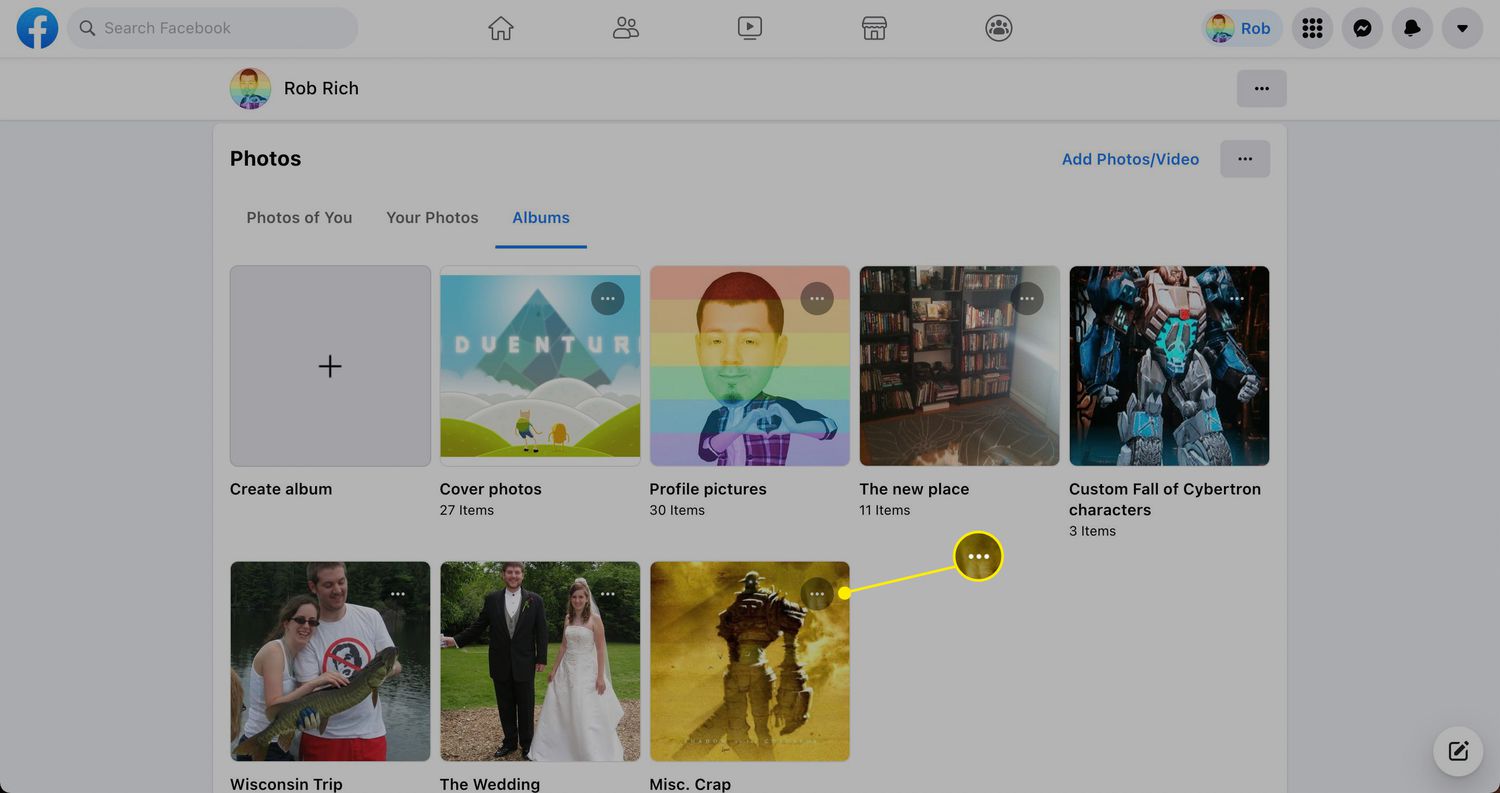
- If you want to download photos from specific albums, click on the “Albums” option and select the albums you wish to include.
- Similarly, if you want to download photos in which you are tagged, click on the “Tags” option and choose the desired tags.
- Once you have made your selections, click on the “Create File” button. Facebook will generate a download file containing the selected photos.
By following these steps, you have successfully selected the specific photos you want to download. In the next step, we’ll guide you through configuring the download format of your photos.
Step 4: Configuring Your Photo Download Format
Once you have selected the photos you want to download, it’s time to configure the format in which you would like to receive your downloaded photos. Follow these steps to customize your photo download format:
- On the download page, you’ll see the option to choose the format of your downloaded photos. By default, Facebook selects the “HTML” format, which is a web page format.
- If you prefer a different format, click on the dropdown menu next to the “Format” option. You’ll have two other options to choose from: “JSON” and “CSV”.
- If you’re comfortable with the default HTML format, you can proceed to the next step. However, if you want to choose a different format, select the desired format from the dropdown menu.
It’s important to note that the HTML format is recommended for most users, as it provides an interactive web page where you can easily navigate through your downloaded photos. JSON and CSV formats, on the other hand, are more suitable if you want to import the data into other applications for further analysis or processing.
By following these steps, you have successfully configured the format in which you want to receive your downloaded photos. In the next step, we’ll guide you through initiating the photo download process.
Step 5: Initiating the Photo Download
Now that you have selected the desired photos and configured the download format, it’s time to initiate the download process. Follow these steps to start downloading your photos from Facebook:
- On the download page, review your selected options, including the format and the photos you have chosen.
- If everything looks good, click on the “Create File” or “Start My Archive” button, depending on the wording used on the download page.
- Facebook will begin the process of creating your download file. This may take some time, depending on the number of photos you have selected for download.
- Once your download file is ready, Facebook will notify you via email or by displaying a download link on the page itself.
- Click on the provided download link to start the download. Your browser will prompt you to choose a location on your device to save the file.
- Select a suitable location on your device and click “Save” or “Download” to initiate the download process.
- Wait for the download to complete. The time it takes will depend on the size of your photo collection.
By following these steps, you have successfully initiated the download process for your selected photos. In the next step, we’ll guide you through accessing your downloaded photos.
Step 6: Accessing Your Downloaded Photos
Once the download of your photos from Facebook is complete, you can now access and view them on your device. Here’s how you can access your downloaded photos:
- Locate the downloaded file on your device. The file will be in the format you selected during the download process.
- Open the file using your preferred web browser or the appropriate application for the selected format.
- If you downloaded the photos in HTML format, the web page will open, displaying your photos organized in albums or chronological order.
- Use the navigational options provided on the web page to browse through your photos, view individual photos, or access specific albums.
- If you downloaded the photos in JSON or CSV format, you can import the data into the respective applications to view and organize your photos.
- For JSON files, you can use compatible applications or programming languages to parse and extract the photo information.
- For CSV files, you can use spreadsheet applications such as Microsoft Excel or Google Sheets to open and manipulate the photo data.
By following these steps, you have successfully accessed and viewed your downloaded photos from Facebook. You now have a copy of your precious memories offline and can enjoy them at your convenience.
Downloading all your photos from Facebook is not only a way to preserve your memories but also provides you with the freedom to share them on other platforms or keep them safe as a backup. Whether you’re transitioning to a new social media platform or simply want to have control over your photos, this process ensures that you have your digital memories at your fingertips.
Now that you know how to download all your photos from Facebook, you can confidently take the necessary steps to safeguard and cherish your precious moments captured over the years.
Conclusion
The process of downloading all your photos from Facebook may seem intimidating at first, but with the step-by-step instructions provided in this article, it becomes a simple and achievable task. By accessing your Facebook settings, downloading your data, selecting the desired photos, configuring the download format, initiating the download, and accessing the downloaded photos, you can ensure that your valuable memories are safely stored offline.
Having a backup of your Facebook photos allows you to preserve your memories, even if you decide to deactivate your account or if any unexpected event occurs that affects your access to the platform. It also gives you the freedom to share your photos on other platforms or devices, or simply keep them as a personal collection.
Remember that the process of downloading your photos from Facebook includes not only the photos you uploaded but also those in which you are tagged, giving you a comprehensive collection of your digital memories.
Now that you have learned how to download all your photos from Facebook, take a moment to celebrate and appreciate the memories you have captured throughout your time on the platform. Whether it’s a trip with loved ones, a special event, or everyday moments that bring a smile to your face, these photos are a reflection of your life’s journey.
So go ahead, follow the steps outlined in this article, and download your treasured photos from Facebook. Preserve, enjoy, and share them, allowing those memories to continue to bring joy and nostalgia in the years to come.