Introduction
Facebook is a popular social media platform that allows users to connect with friends, share photos, and engage with online communities. Over the years, you may have uploaded countless photos to your Facebook account, capturing precious moments and memories. However, retrieving all these photos from Facebook can be a daunting task.
In this guide, we will walk you through the step-by-step process of downloading all your photos from Facebook effortlessly. Whether you’re looking to create a backup or simply want to have your photos readily accessible offline, this tutorial will help you achieve just that.
By following these instructions, you’ll be able to retrieve your entire photo collection from Facebook, granting you the freedom to organize, store, and share your cherished memories as you see fit.
Please note that the process may take some time to complete, depending on the number of photos you have uploaded to your Facebook account. So sit back, relax, and let’s get started on this exciting journey of preserving your valuable photo memories.
Step 1: Accessing Your Facebook Account Settings
The first step in downloading all your photos from Facebook is to access your account settings. To do this, follow the steps below:
- Login to your Facebook account using your username and password.
- Once logged in, locate the small arrow icon at the top right corner of the Facebook page. Click on it to open a dropdown menu.
- In the dropdown menu, select “Settings & Privacy” and then click on “Settings”.
- You will be redirected to the Facebook Settings page. Here, you can customize various aspects of your account.
- On the left-hand side of the Settings page, you will see a list of different options. Scroll down and click on “Your Facebook Information”.
- In the “Your Facebook Information” section, you will find several options, including “Download Your Information”. Click on it to proceed.
By following these steps, you have successfully accessed the account settings of your Facebook profile. Now, let’s move on to the next step to request a copy of your Facebook data, which will include all your photos.
Step 2: Requesting a Copy of Your Facebook Data
Once you have accessed your Facebook account settings, the next step is to request a copy of your Facebook data. This data will include all your photos, as well as other information associated with your account. Here’s how you can do it:
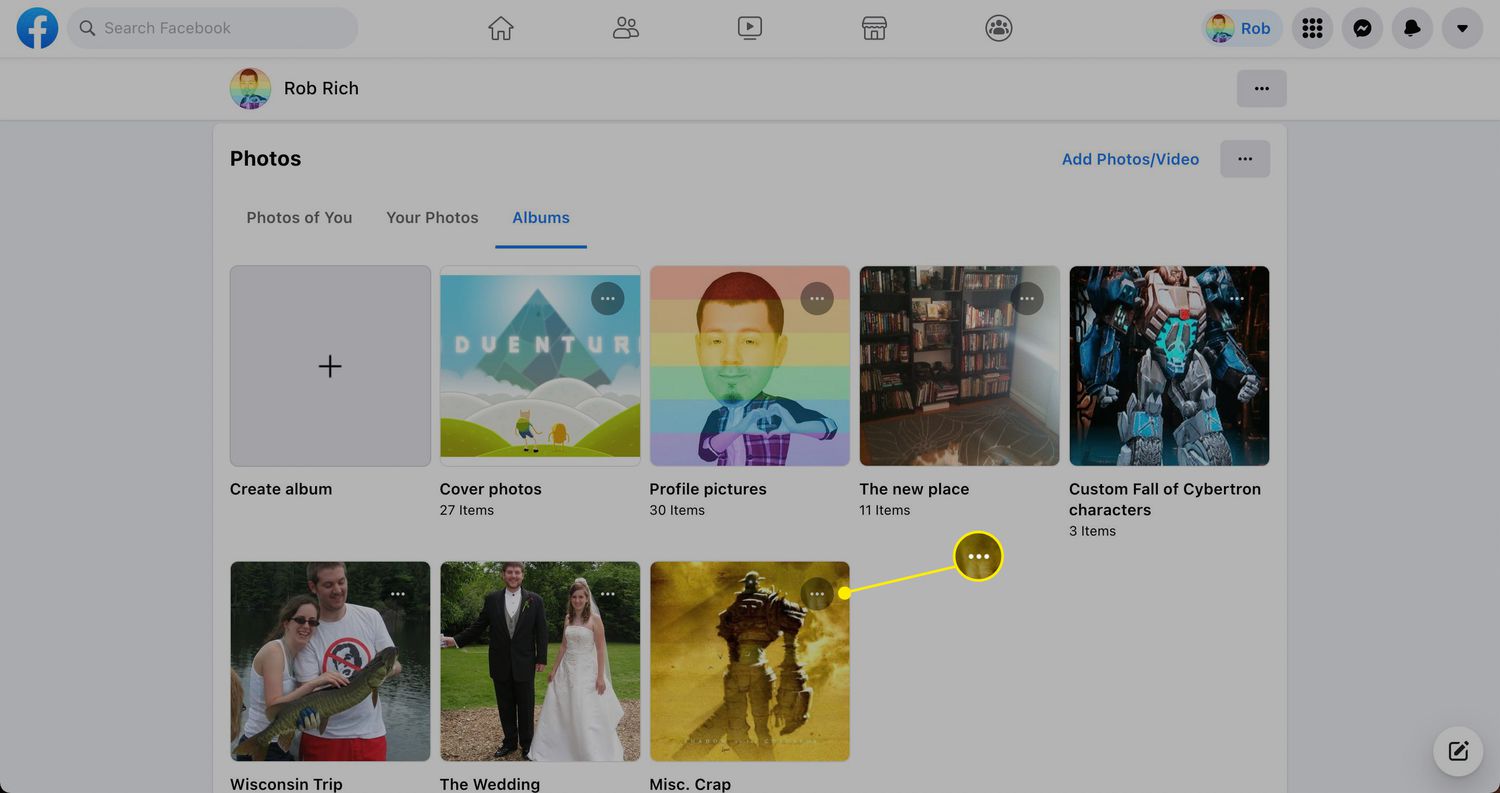
- In the “Download Your Information” section, you will see a list of different categories that you can include in your download. To proceed with downloading your photos, uncheck all the boxes except for “Photos and Videos”.
- You can also customize the date range, format, media quality, and other options according to your preference. However, if you want to download all your photos, it is recommended to leave the defaults as they are.
- Scroll down to the bottom of the page. Here, you will find options to choose the file type and size of your download. Select your desired options.
- When you are ready, click on the “Create File” button. Facebook will start preparing your data for download. Depending on the size of your data, this process may take some time.
- Once your data is ready, Facebook will send you an email notification with a download link. This may take a while, so be sure to check your email periodically.
By following these steps, you have successfully requested a copy of your Facebook data, including all your photos. Now, let’s move on to the next step to check your email for the Facebook download link.
Step 3: Checking Your Email for the Facebook Download Link
After requesting a copy of your Facebook data, it’s time to check your email for the download link. Facebook will send you an email notification when your data is ready for download. Follow these steps to locate the download link:
- Open your email account that is associated with your Facebook profile.
- Look for an email from Facebook with the subject line similar to “Your Facebook information is ready to download”.
- Open the email and scroll through its contents until you find the download link.
- Click on the download link provided in the email. This will redirect you to the Facebook website.
It is important to note that the email may take some time to arrive, depending on the size of your data. If you don’t see the email in your inbox, check your spam or junk mail folder as it may have been filtered there.
Once you have located the email and clicked on the download link, you are now ready to proceed to the next step and download your photos from Facebook.
Step 4: Downloading Your Photos from Facebook
Now that you have the download link for your Facebook data, it’s time to download your photos. Follow these steps to retrieve all your photos from Facebook:
- Click on the download link provided in the email from Facebook. This will take you to the Facebook website where you can access your data.
- On the download page, you’ll see a summary of the data and options to choose the format and quality of your photos.
- Scroll down to the “Media Quality” section and select your preferred settings. It is recommended to choose the highest quality available to ensure you get the best version of your photos.
- Once you’ve selected your options, click on the “Download” button.
- Facebook will now start preparing your download. The time it takes to prepare the download will depend on the size of your data. You can keep track of the progress on the download page.
- Once the download is ready, click on the “Download Archive” button to save the file to your computer.
It is important to note that the download file will be in a compressed format, such as a ZIP file. You will need to extract the contents of the ZIP file to access your photos.
Congratulations! You’ve successfully downloaded all your photos from Facebook. Now, let’s move on to the final step, where we’ll discuss how to organize and save your downloaded photos.
Step 5: Organizing and Saving Your Downloaded Facebook Photos
Now that you have downloaded all your photos from Facebook, it’s time to organize and save them on your computer. Follow these steps to ensure your photos are well-organized and easily accessible:
- Locate the downloaded ZIP file on your computer and extract its contents. This will create a folder containing all the photos and videos you downloaded from Facebook.
- Open the extracted folder and review the files. You will find all your photos in their original file formats, such as JPEG or PNG.
- Create a new folder on your computer’s hard drive or any external storage device where you want to store your Facebook photos.
- Copy and paste all the photos from the extracted folder into the newly-created folder. This will ensure that all your photos are organized in one place.
- Consider creating subfolders within the main folder to further categorize your photos. You can create folders based on date, specific events, or any other criteria that make sense to you.
- Rename the photos if needed. If the original file names are not descriptive enough, you can give them new names that will help you identify the contents of the photos.
- Once you have organized and renamed your photos, make sure to create regular backups to prevent any data loss. You can use cloud storage services or external hard drives for this purpose.
By following these steps, you have successfully organized and saved your downloaded Facebook photos. Now, you can easily browse through your collection and share your memorable moments with friends and family.
Conclusion
Congratulations! You have successfully learned how to download all your photos from Facebook. By following the steps outlined in this guide, you now have a backup of your entire photo collection and the freedom to access your cherished memories offline.
Remember that downloading your photos from Facebook is not only a great way to preserve your precious memories but also ensures that you have control over your own data. Whether you’re looking to create backups, organize your photos for easy access, or simply want peace of mind knowing that your photos are safe, this guide has provided you with the necessary steps to make it happen.
Make sure to keep your downloaded photos in a safe location and consider creating regular backups to prevent any potential data loss. It’s also a good idea to keep your Facebook account up to date with the latest privacy and security settings to protect your personal information.
Now that you have successfully downloaded your photos from Facebook, take some time to reminisce, share, and enjoy your precious memories. Whether it’s reliving a vacation, celebrating a special event, or simply scrolling through moments of happiness, you have complete control over your photo collection.
We hope this guide has been helpful to you on your journey to download all your photos from Facebook. Should you ever need assistance or have any further questions, remember that the internet is filled with resources and communities eager to help.
Thank you for following this step-by-step guide, and we wish you many happy memories to come!