Introduction
Welcome to our guide on how to download iTunes on Chrome. iTunes is a popular media player and library application developed by Apple Inc. that allows you to manage and play your music, movies, TV shows, and more. While iTunes is primarily designed for macOS and Windows operating systems, with the help of Google Chrome, you can now access iTunes on your Chromebook or any other device running Chrome OS.
Google Chrome is a widely-used web browser known for its speed, security, and user-friendly interface. By utilizing the Chrome Web Store, you can easily add various apps and extensions to enhance your browsing experience. With just a few simple steps, you’ll be able to download and install iTunes on Chrome, granting you access to a vast library of music and entertainment.
In this tutorial, we will provide you with a comprehensive guide on how to download iTunes on Chrome. We’ll walk you through each step of the process, ensuring that you have a seamless installation experience. Whether you’re a music enthusiast or simply want to explore the world of iTunes, this guide will help you get started.
Before we proceed, please ensure that your device meets the system requirements necessary to run iTunes on Chrome. This will ensure that you can enjoy a smooth and uninterrupted user experience. Once you have verified the compatibility, let’s dive into the step-by-step instructions to download iTunes on Chrome and begin enjoying your favorite media.
System Requirements
Before you proceed with downloading iTunes on Chrome, it is important to ensure that your device meets the necessary system requirements. This will ensure compatibility and ensure that you can enjoy all the features and functionalities of iTunes without any issues.
Here are the minimum system requirements for running iTunes on Chrome:
- A device running Chrome OS or Google Chrome browser
- A stable internet connection
- Sufficient free storage space to accommodate the iTunes installation
- Adequate RAM to support the smooth functioning of iTunes
- Compatible audio and video codecs to play media files
It’s worth noting that while Chromebooks are designed to be lightweight and efficient, some older models may not meet the necessary requirements to run iTunes smoothly. In such cases, it is recommended to check the compatibility of your specific Chromebook model and seek alternative methods for accessing iTunes.
Additionally, ensure that you have the latest version of Google Chrome installed on your device. This will not only provide the best performance but also ensure compatibility with the Chrome Web Store, where we will be downloading iTunes.
Now that you have confirmed that your device meets the system requirements, let’s move on to the step-by-step process of installing iTunes on Chrome.
Step 1: Install Google Chrome
In order to download iTunes on Chrome, the first step is to have the Google Chrome browser installed on your device. Chrome is widely regarded as one of the most popular and reliable web browsers, offering a seamless browsing experience with its speed, security, and user-friendly interface. If you already have Google Chrome installed, you can proceed to the next step. If not, follow the instructions below to install it:
- Open your current web browser on your device.
- Go to the official Google Chrome website (https://www.google.com/chrome/).
- Click on the “Download Chrome” button.
- Read and accept the Terms of Service and Privacy Policy.
- Choose the appropriate version of Chrome for your operating system (Windows, macOS, or Linux) and click on the “Download” button.
- Once the download is complete, locate the downloaded file and double-click on it.
- Follow the on-screen instructions to install Chrome on your device.
After the installation process is complete, you can launch Google Chrome and proceed to the next step to download iTunes.
Note: Google Chrome is regularly updated to provide users with the best browsing experience. It is recommended to keep Chrome up to date by enabling automatic updates. This will ensure that you have the latest features, bug fixes, and security enhancements.
Step 2: Open the Chrome Web Store
Once you have Google Chrome installed on your device, the next step to download iTunes on Chrome is to access the Chrome Web Store. The Chrome Web Store is an online store or marketplace where you can find various applications, extensions, themes, and more to enhance your browsing experience.
To open the Chrome Web Store, simply follow these steps:
- Launch the Google Chrome browser on your device.
- Click on the three-dot menu icon located in the top-right corner of the browser window.
- In the dropdown menu, hover over the “More Tools” option.
- In the expanded submenu, click on “Extensions”.
- The Chrome Web Store will open in a new tab.
Alternatively, you can also directly access the Chrome Web Store by typing “chrome://extensions” in the Chrome address bar and hitting Enter.
Once you are on the Chrome Web Store page, you can browse through the various categories or use the search bar to find specific apps or extensions. In the next step, we will search for iTunes and locate the official iTunes website within the Chrome Web Store.
Note: The Chrome Web Store is a trusted source for downloading apps and extensions. However, it is always recommended to read user reviews and check the ratings of the applications before proceeding with the installation.
Step 3: Search for iTunes
Now that you are on the Chrome Web Store, it’s time to search for iTunes. The Chrome Web Store has a vast collection of apps and extensions, so using the search bar will make it easier to find and download the specific app you’re looking for.
Here’s how you can search for iTunes:
- Click on the search bar located at the top-left corner of the Chrome Web Store page.
- Type “iTunes” in the search bar and hit Enter or click on the magnifying glass icon.
- The search results will display various apps and extensions related to iTunes.
Make sure to look for the official iTunes app offered by Apple Inc. This is the legitimate and trusted source for downloading iTunes on Chrome.
While browsing through the search results, you can also take a moment to read the app’s description, check its reviews, and review the ratings to get an idea of its quality and user feedback.
Once you have located the official iTunes app, it’s time to move on to the next step, where we will download iTunes for Windows.
Step 4: Locate the Official iTunes Website
After searching for iTunes on the Chrome Web Store, the next step is to locate the official iTunes website within the store. This is where you will find the authorized download link for iTunes and ensure that you are installing the legitimate software.
Follow these steps to locate the official iTunes website:
- Review the search results for iTunes on the Chrome Web Store.
- Look for the app with the official Apple logo or the app published by Apple Inc.
- Click on the app to access its details and description.
- Read through the description to confirm that it is the official iTunes app.
- Check if the developer name is Apple Inc., which is the authentic creator of iTunes.
- Verify the ratings and reviews to gauge user satisfaction and feedback.
- Ensure that the app has a significant number of installations, indicating its popularity and trustworthiness.
By taking these steps, you can be sure that you are downloading iTunes from the official source and minimizing the risk of downloading counterfeit or potentially harmful software.
Once you have confirmed that it is the official iTunes app, it’s time to proceed to the next step, where we will download iTunes for Windows.
Step 5: Download iTunes for Windows
Now that you have located the official iTunes website within the Chrome Web Store, it’s time to download iTunes for Windows. Follow the steps below to initiate the download process:
- On the official iTunes app page, look for the “Download” or “Add to Chrome” button.
- Click on the button to start the download.
- A pop-up window may appear, asking for confirmation to add the app or extension to Chrome. Click on “Add” or “Install” to proceed.
- The download process will begin, and you will be able to monitor the progress in the Chrome browser’s download bar.
- Once the download is complete, you will see a notification indicating the successful installation of iTunes for Windows.
It’s important to note that the actual installation of iTunes will occur in the next step. At this stage, you have successfully downloaded the iTunes installer file. The file will be saved in your designated download folder or the location specified in your Chrome browser’s settings.
Now that you have downloaded the iTunes installer, let’s move on to the next step where we will check the download progress and prepare for the installation process.
Step 6: Check the Download Progress
After initiating the download of iTunes for Windows, it’s important to keep track of the download progress to ensure that it completes successfully. Checking the download progress also allows you to estimate the time it will take for the download to finish.
Here’s how you can check the download progress:
- In the Google Chrome browser, locate the download bar at the bottom of the window. The download bar displays the progress of the current download.
- Look for the iTunes installer file in the download bar. It will have a distinctive icon representing iTunes.
- Next to the iTunes installer file, you will see a progress indicator that shows the percentage of the download completed.
- You can hover your mouse over the iTunes installer file to view additional details, such as the file size and estimated time remaining.
- If the download appears to be taking longer than expected or if there are any issues encountered during the download, you can cancel and restart the download from the Chrome Web Store.
- Once the download reaches 100% and completes successfully, you’re ready to move on to the next step and begin the installation process.
Checking the download progress ensures that you have successfully obtained the necessary iTunes installer file for Windows. This prepares you to proceed with the installation in the upcoming steps.
Now that you have confirmed that the download is complete, let’s move on to the next step where we will launch the iTunes installer.
Step 7: Open the iTunes Installer
After the successful download of the iTunes installer for Windows, the next step is to locate and open the installer file to begin the installation process. The iTunes installer contains all the necessary files and instructions to install iTunes on your Windows system.
Follow the steps below to open the iTunes installer:
- Go to the designated download folder or the location where you saved the iTunes installer file.
- Locate the iTunes installer file, which typically has a filename like “iTunesSetup.exe” or similar.
- Double-click on the iTunes installer file to open it. This will launch the installation wizard.
- A security warning may appear, asking for your permission to run the installer. Click on “Run” or “Yes” to proceed.
- The iTunes installer window will open, and you will be presented with various installation options and prompts.
By opening the iTunes installer, you are one step closer to enjoying the features and functionalities of iTunes on your Windows device. The next step will guide you through the installation wizard and provide instructions on how to complete the installation process.
Before proceeding to the next step, ensure that you have closed any other running applications to avoid any conflicts during the installation of iTunes.
Now that the iTunes installer is open, let’s proceed to the next step and follow the installation wizard to install iTunes on your Windows system.
Step 8: Follow the Installation Wizard
Now that you have opened the iTunes installer, it’s time to follow the installation wizard that will guide you through the process of installing iTunes on your Windows system. The installation wizard provides step-by-step instructions and options to customize the installation according to your preferences.
Here’s how you can follow the installation wizard:
- Review the introductory screen of the installation wizard, which provides important information about the iTunes installation process. Read through the details and click on the “Next” or “Continue” button to proceed.
- Read and accept the End User License Agreement (EULA) that outlines the terms and conditions for using iTunes. Check the box or click on the “Agree” button to indicate your acceptance.
- Choose the installation destination for iTunes. By default, the installation path is usually set to the Program Files folder on your Windows system drive. If you wish to change the destination folder, click on the “Browse” button and select a different location.
- Select the additional components you would like to install alongside iTunes. These components may include additional Apple software, such as Apple Mobile Device Support or Bonjour. You can choose to install or exclude these components based on your preferences.
- Customize the installation options per your preference. The wizard may provide options such as creating desktop shortcuts, automatically launching iTunes after installation, and checking for updates automatically. Adjust the options according to your needs.
- Click on the “Install” or “Next” button to initiate the installation process. The progress bar will indicate the installation status, and you may be prompted to enter your administrator password for certain system changes.
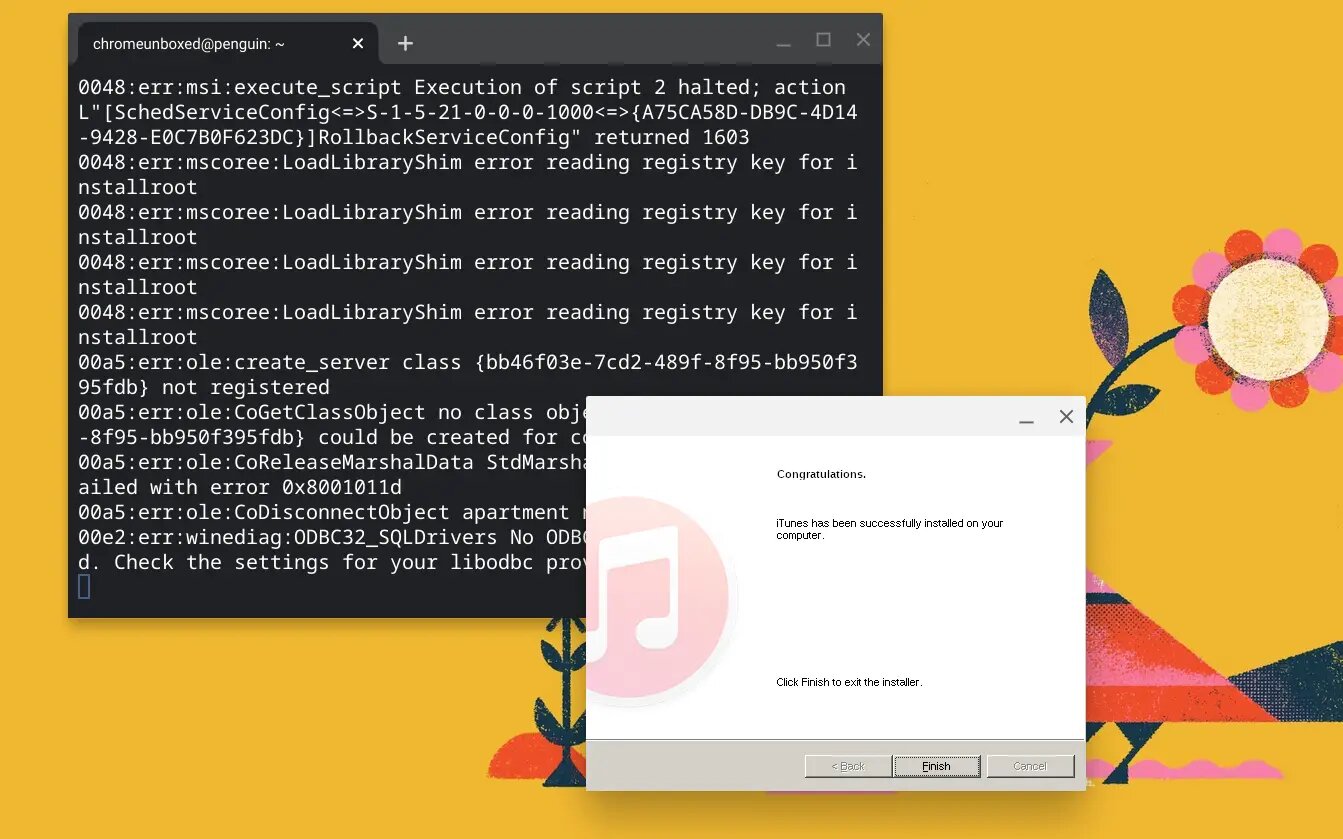
- Once the installation is complete, you will see a confirmation message stating that iTunes has been successfully installed. Click on the “Finish” or “Close” button to exit the installation wizard.
By following the installation wizard, you ensure that iTunes is installed correctly on your Windows system, and all necessary components are properly configured for optimal performance.
In the next step, we will learn how to launch iTunes on Chrome and start enjoying your favorite music and media.
Step 9: Launch iTunes on Chrome
Congratulations! You have successfully installed iTunes on Chrome. Now, it’s time to launch iTunes and start exploring its wide array of music, movies, TV shows, podcasts, and more.
To launch iTunes on Chrome, follow these simple steps:
- Open the Google Chrome browser on your device.
- Type “chrome://apps” in the address bar and hit Enter. This will take you to the Chrome Apps page.
- Locate the iTunes app icon among your installed Chrome apps. It should be displayed along with your other installed apps.
- Click on the iTunes app icon to launch iTunes on Chrome.
Alternatively, you can also access iTunes by typing “itunes.apple.com” in the Chrome address bar and hitting Enter. This will take you directly to the iTunes web player, where you can listen to music and access other media content.
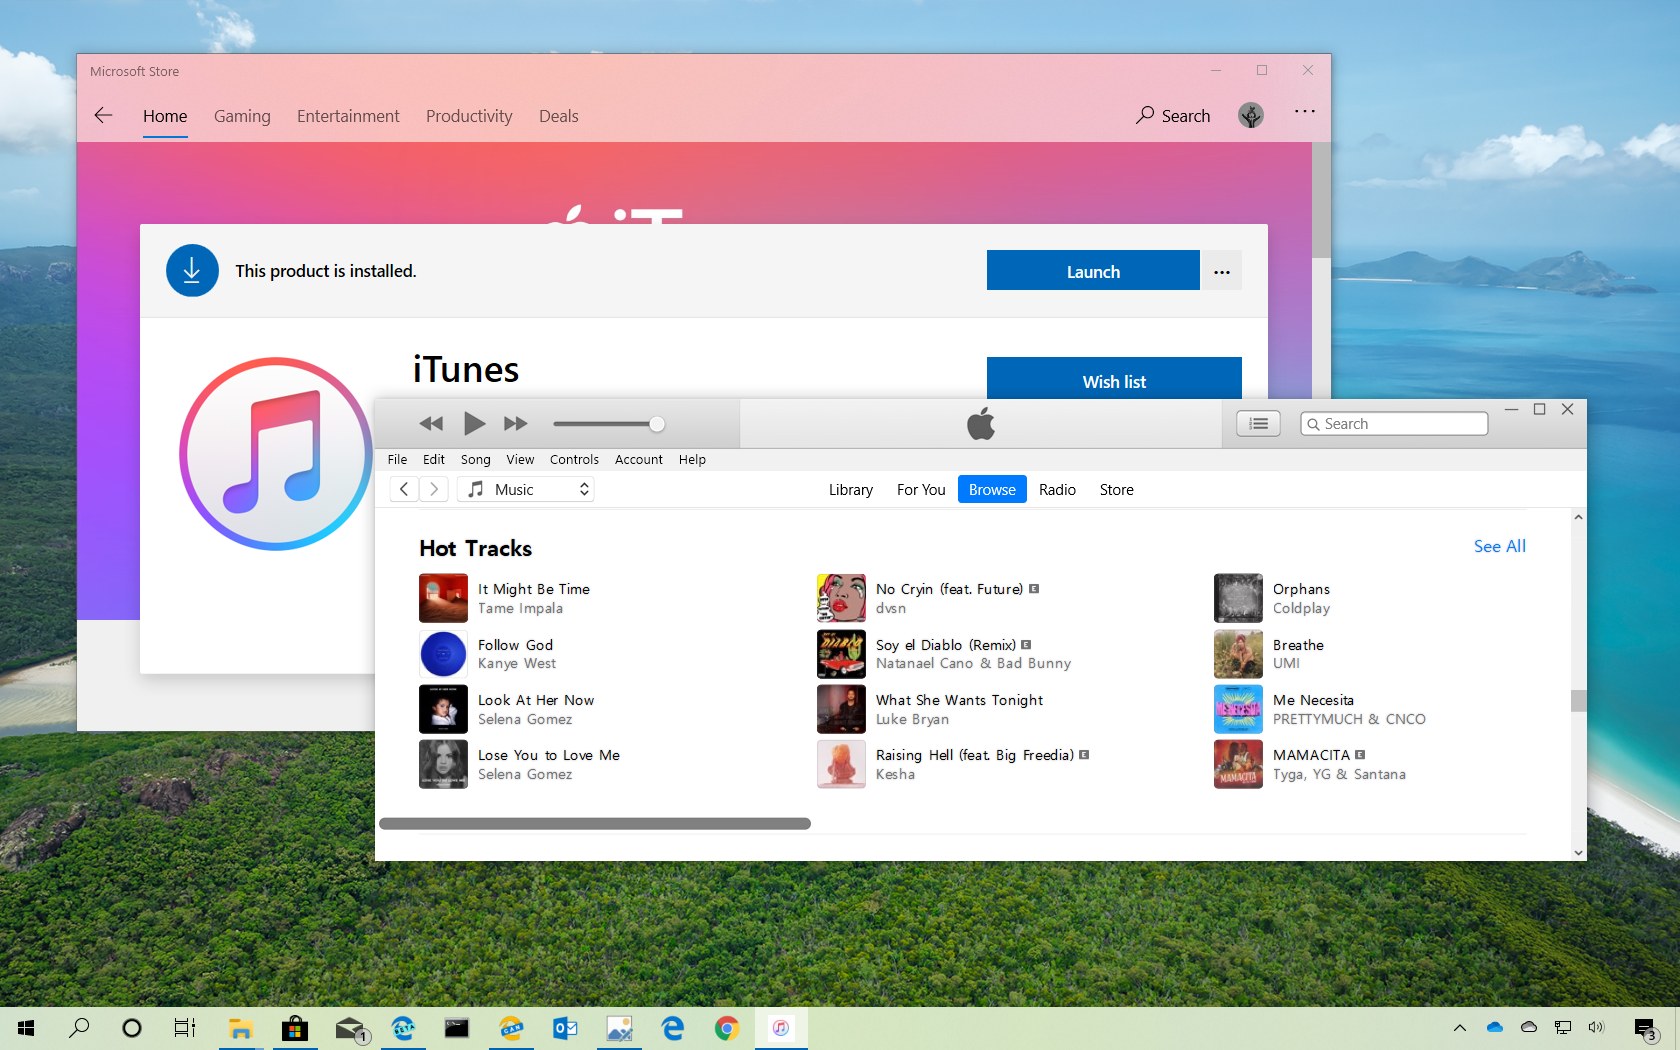
Once iTunes is launched, you can sign in with your Apple ID or create a new Apple ID if you don’t already have one. This will allow you to access your previously purchased content and sync your iTunes library across devices.
Now that you have successfully launched iTunes on Chrome, you can explore the vast library of music, movies, TV shows, and more. You can also purchase new content, create playlists, and enjoy personalized recommendations based on your preferences.
Enjoy the seamless integration of iTunes with Chrome, and have a great time discovering and experiencing all that iTunes has to offer!