Introduction
Transferring files from your phone to your computer can be a useful and efficient way to free up storage space on your device or access important files on a larger screen. Whether you need to transfer photos, videos, documents, or any other type of file, there are multiple methods you can use to easily download your files from your phone to your computer.
In this article, we’ll explore different ways to transfer files from your phone to your computer, including using a USB cable, cloud storage services, email or messaging apps, as well as various software and file sharing apps.
Regardless of your device’s operating system – Android or iOS – you’ll find suitable methods that can be easily implemented for a seamless file transfer experience.
So, if you’re ready to learn how to download files from your phone to your computer, let’s dive into the step-by-step process and explore the different methods available!
Step 1: Connect Phone to Computer
The first step in transferring files from your phone to your computer is to establish a physical connection between the two devices. This can be done in several ways, depending on the available ports and compatibility of your devices.
If you have an Android phone or a device with a USB-C port, you can use a USB-C to USB-A cable to connect it to your computer. On the other hand, if you have an iPhone or a device with a Lightning port, you’ll need a Lightning to USB cable.
Once you have the appropriate cable, follow these steps:
- Connect one end of the cable to your phone’s charging port.
- Connect the other end of the cable to an available USB port on your computer.
- Your phone and computer should recognize the connection, and you may see a prompt on your phone’s screen asking for permission to access files on your computer.
- Allow the connection by following the on-screen instructions.
If your computer has Bluetooth capabilities and your phone supports Bluetooth file transfer, you can try connecting them wirelessly. However, keep in mind that Bluetooth transfer speeds are generally slower than wired options, so it may take longer to transfer large files.
Once your phone is connected to your computer, you are ready to move on to the next step and select the appropriate file transfer method.
Step 2: Choose Transfer Method
After connecting your phone to your computer, the next step is to choose the most suitable transfer method based on your preferences and the available options. There are various methods you can use to transfer files from your phone to your computer, each with its own advantages and limitations.
Here are three common transfer methods:
- Method 1: USB Cable: This method allows you to directly transfer files between your phone and computer using a USB cable. It is a straightforward and reliable option that offers fast file transfer speeds. It is especially useful for transferring large files or a large number of files.
- Method 2: Cloud Storage: Cloud storage services like Google Drive, Dropbox, or iCloud provide a convenient way to sync and access your files across multiple devices. You can upload files from your phone to the cloud storage and then download them onto your computer. This method is ideal if you have limited physical storage on either your phone or computer.
- Method 3: Email or Messaging Apps: Another option is to send the files from your phone to your computer through email or messaging apps. You can attach the files to an email or message and send them to yourself. This method is suitable for smaller files, and it provides a quick way to transfer files without needing additional software or apps.
Consider your specific needs, such as file size, convenience, and file privacy, when choosing the appropriate transfer method. Depending on the method you select, you will follow different steps to successfully transfer files from your phone to your computer.
Now that you have an understanding of the available transfer methods, let’s move on to the next steps and explore how to locate and transfer files from your phone to your computer.
Method 1: USB Cable
Using a USB cable is one of the most common and straightforward methods to transfer files from your phone to your computer. It allows for a direct and fast connection between the two devices, enabling seamless file transfer. Here’s how to transfer files using a USB cable:
- Ensure that your phone is connected to your computer via the USB cable, as explained in the previous steps.
- On your phone, swipe down from the top of the screen to access the notification panel, and then look for a notification related to the USB connection.
- Tap on the notification and select the option that allows file transfer, such as “File Transfer” or “Media device.”
- On your computer, open the File Explorer (Windows) or Finder (Mac) to browse the contents of your phone.
- In the File Explorer or Finder, you should see your connected phone listed as a storage device. Click on it to access the files on your phone’s internal storage or SD card (if applicable).
- Navigate to the desired files or folders you want to transfer to your computer.
- To transfer files, select them and either drag and drop them to a folder on your computer or use the copy-paste function.
- Wait for the files to complete the transfer process. The time it takes depends on the file size and transfer speed.
Remember to safely disconnect your phone from your computer after the file transfer is complete. This can be done by right-clicking on the phone icon in the File Explorer or Finder and selecting “Eject” or “Disconnect.”
Using a USB cable is efficient for transferring large files or a significant number of files quickly. It provides a direct connection between your phone and computer, ensuring reliability and faster transfer speeds compared to other methods. However, keep in mind that you may need to install specific device drivers or enable USB debugging on your phone, depending on your device and computer’s requirements.
Now that you know how to transfer files using a USB cable, let’s explore another method – using cloud storage services – in the next section.
Method 2: Cloud Storage
Cloud storage services offer a convenient and flexible method to transfer files from your phone to your computer. By utilizing services such as Google Drive, Dropbox, or iCloud, you can easily sync and access your files across multiple devices. Here’s how to transfer files using cloud storage:
- Ensure that you have the respective cloud storage app installed on your phone. If not, go to the app store and download the desired cloud storage app.
- Open the cloud storage app on your phone and sign in to your account or create a new account if needed.
- Upload the files you want to transfer to the cloud storage app. This can usually be done by tapping on the “Upload” or “Add” button within the app and selecting the files from your phone’s storage.
- Wait for the files to finish uploading to the cloud storage. The time it takes depends on the file size and your internet connection speed.
- On your computer, open a web browser and navigate to the website of the cloud storage service you are using.
- Sign in to your cloud storage account using the same credentials you used on your phone.
- Navigate to the uploaded files within the cloud storage interface on your computer.
- Select the files you want to download to your computer.
- Click on the download or similar option within the cloud storage interface to initiate the download of the selected files to your computer.
Once the file transfer is complete, you will have the files accessible on your computer. Cloud storage allows for easy file management, as you can organize files into folders, share them with others, and even collaborate on documents.
One advantage of using cloud storage is that it provides a backup of your files, ensuring that you can access them even if your phone is lost or damaged. Additionally, it allows for cross-device synchronization, enabling you to access your files from multiple devices such as your phone, tablet, or computer.
Now that you are familiar with the cloud storage method, let’s move on to the next method – transferring files using email or messaging apps.
Method 3: Email or Messaging Apps
If you’re looking for a quick and straightforward method to transfer files from your phone to your computer, using email or messaging apps can be a convenient option. This method allows you to attach files to an email or message and send them to yourself. Here’s how to transfer files using email or messaging apps:
- Open the email or messaging app on your phone.
- Create a new email or message.
- Attach the files you want to transfer by tapping on the attachment icon within the app and selecting the desired files from your phone’s storage.
- Enter your email address or phone number as the recipient.
- Send the email or message.
On your computer, open your email client or messaging app and access the email or message you sent to yourself.
Download the attached files by clicking on the download link or the attachment icon within the email or message interface. Choose a location on your computer to save the files.
This method is suitable for transferring smaller files, such as documents, images, or audio files. It does not require any additional software or apps, as most smartphones come with built-in email and messaging apps. It’s a convenient way to transfer files when you don’t have access to a USB cable or cloud storage services.
Keep in mind that there may be limitations on file size when using email or messaging apps, so it may not be the ideal method for large files.
Now that you know how to transfer files using email or messaging apps, you have a range of options to choose from. Depending on your needs and preferences, you can select the most suitable method for transferring files from your phone to your computer.
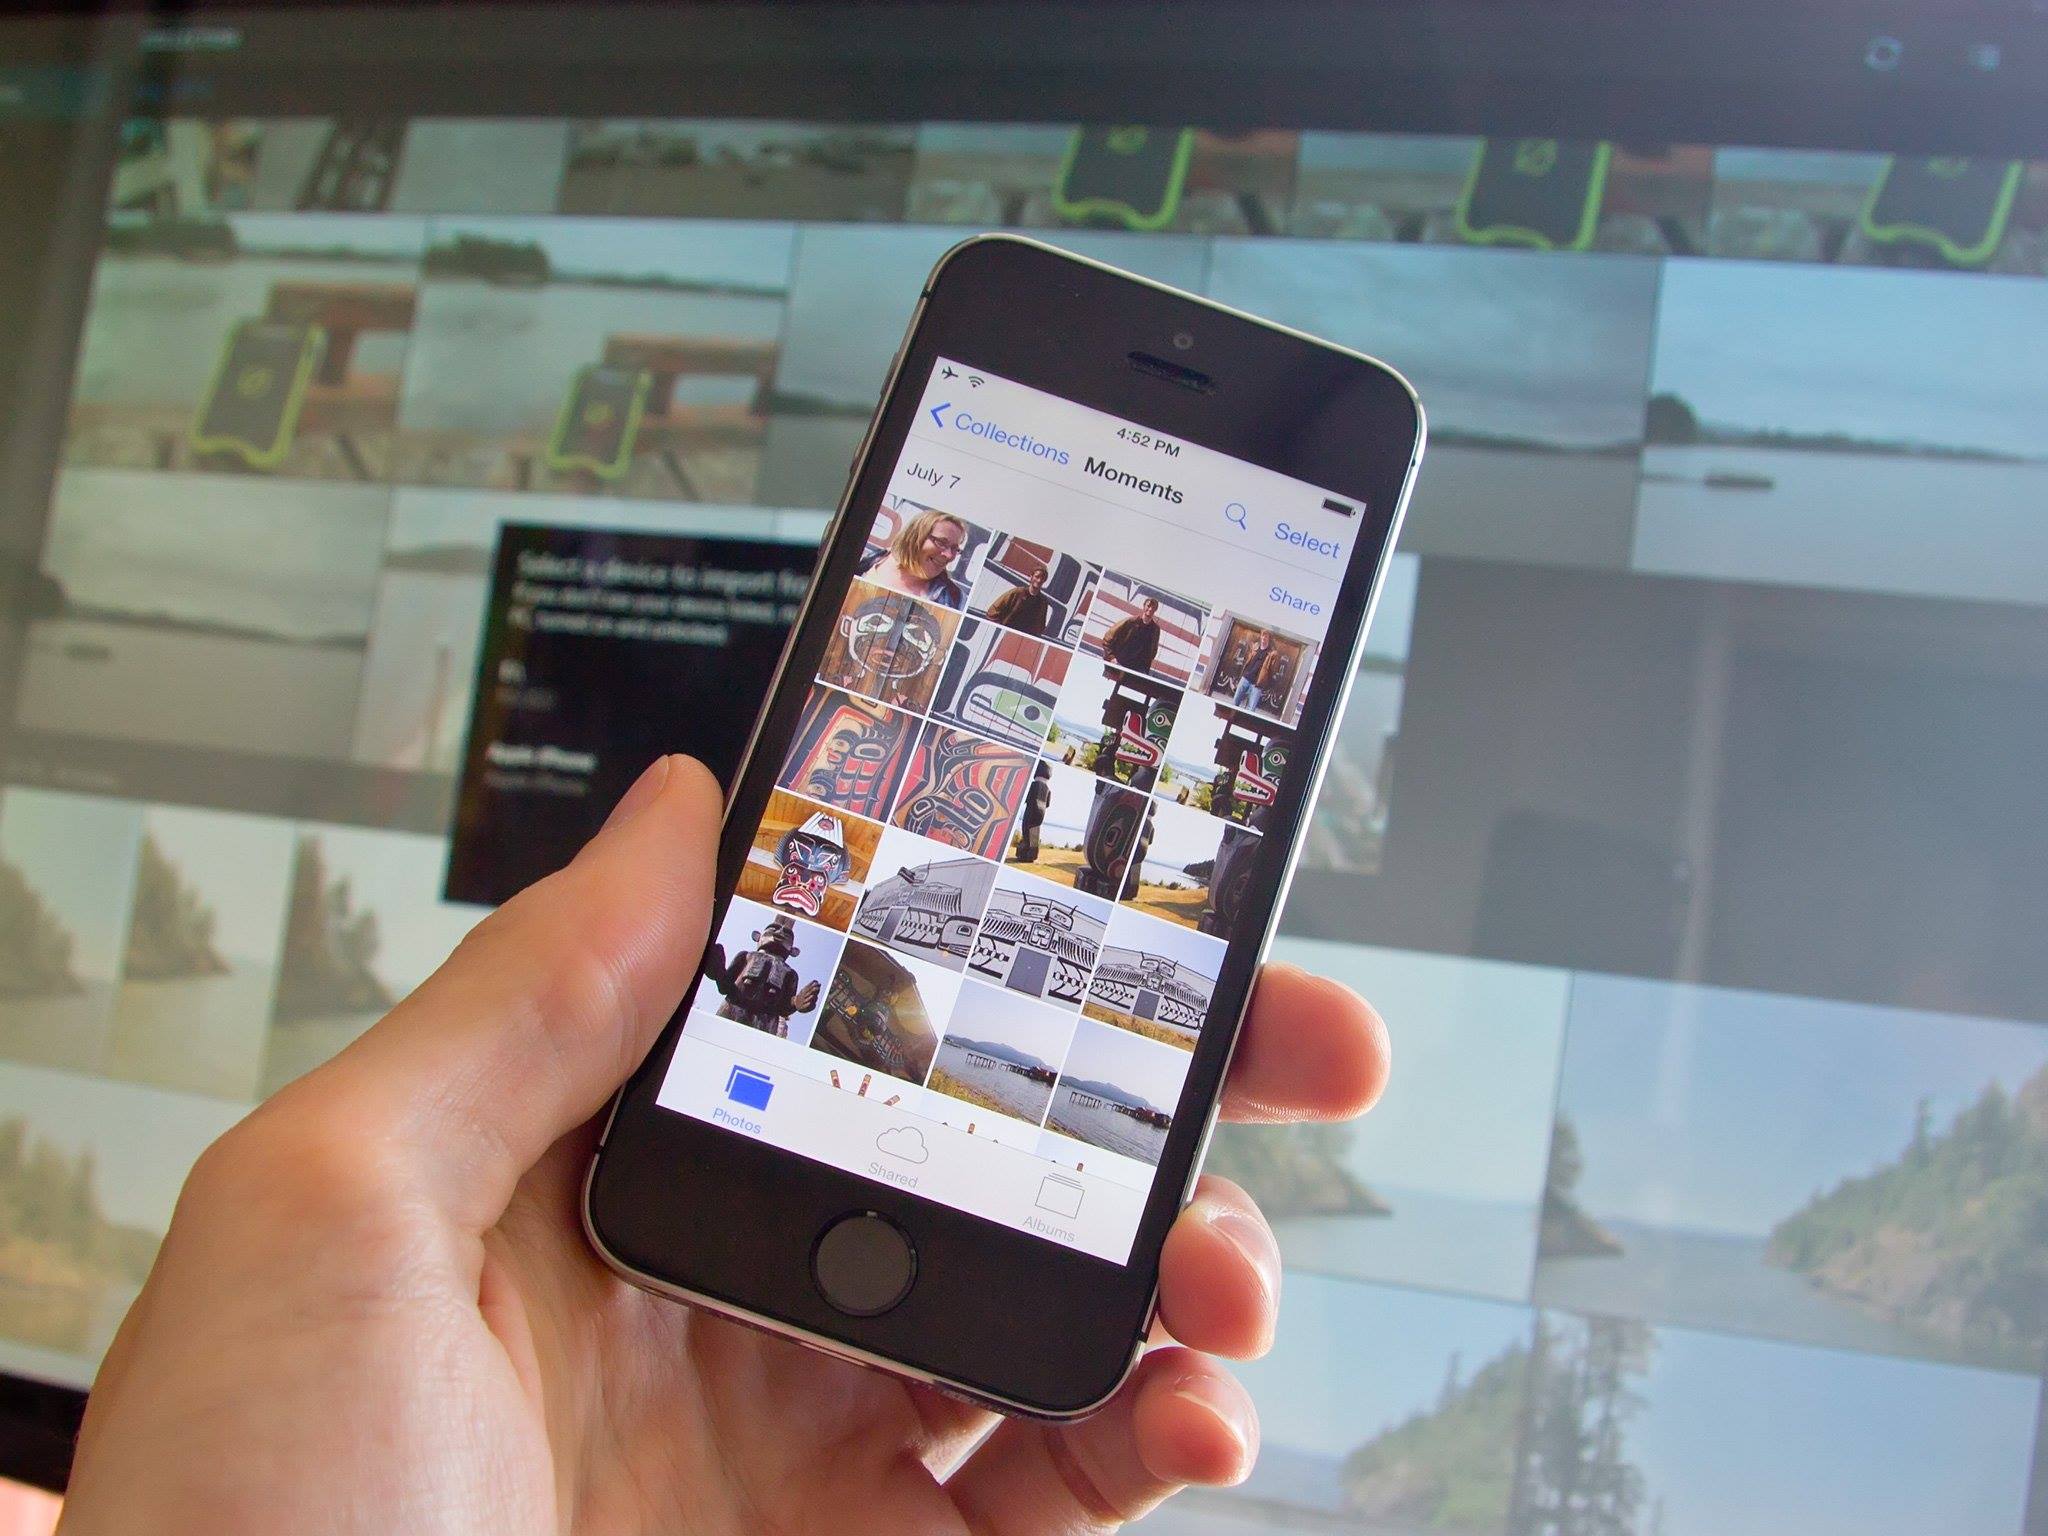
Step 3: Locate Files on Phone
Before transferring files from your phone to your computer, you need to locate the files you want to transfer. The location of files may vary depending on the type of file and your device’s operating system. Here’s how to locate files on your phone:
- Open the file manager app on your phone. This app may be pre-installed on your device or can be downloaded from the app store.
- Browse through the different folders to find the specific files you want to transfer. Common file locations on your phone may include the “Downloads” folder, “Documents” folder, or specific folders for different media types like “Photos,” “Videos,” or “Music.”
- Alternatively, you can use the search function within the file manager app and enter keywords to find specific files.
- If you are unable to find the files you want to transfer using the file manager app, you may need to check if the files are stored in specific apps. For example, photos and videos captured using the camera app may be stored in the “Camera” folder. Documents created using office apps may be saved within the respective app’s folder.
- Note the location of the files you want to transfer, as you will need to navigate to these locations when using the file transfer methods mentioned in the upcoming steps.
It’s important to be aware of the file formats and sizes you’re looking for, as this will help you quickly locate the specific files you want to transfer.
If you have a large number of files scattered across various folders, you can also consider organizing them into specific folders to simplify the transfer process. This can be done within the file manager app by creating new folders and moving the files accordingly.
Now that you have located the files you wish to transfer, we can proceed to the next step and explore different methods to transfer files from your phone to your computer.
Step 4: Transfer Files to Computer
Once you have located the files on your phone that you want to transfer, it’s time to initiate the file transfer process to your computer. There are multiple methods you can use to transfer files, each with its own advantages and ease of use. Let’s explore three common methods:
- Method 1: Drag and Drop: This method is applicable when using a USB cable or accessing your phone’s files through a file sharing app. To transfer files using drag and drop, follow these steps:
- On your computer, open the File Explorer (Windows) or Finder (Mac) to browse the contents of your phone or the file sharing app interface.
- Navigate to the location where the files are saved on your phone.
- Select the files you want to transfer by either dragging a selection box over them or individually clicking on each file.
- Drag and drop the selected files to a folder on your computer. You can create a new folder specifically for the transferred files or use an existing folder.
- Wait for the transfer process to complete. The time it takes will depend on the file size and the transfer speed.
- Method 2: Import through Software/App: Some devices have specific software or apps that facilitate file transfer between the phone and computer. This is common for devices from manufacturers like Apple or Samsung. Follow these steps to transfer files using this method:
- Ensure that the required software or app is installed on your computer.
- Connect your phone to the computer using a USB cable or establish a wireless connection as instructed by the software or app.
- Open the software or app on your computer and follow the prompts to import or transfer the selected files.
- Choose the destination folder on your computer where you want the files to be saved.
- Wait for the transfer process to complete.
- Method 3: File Sharing Apps: If you are using file sharing apps like SHAREit or Xender, you can transfer files wirelessly between your phone and computer. Here’s how to do it:
- Ensure that both your phone and computer have the file sharing app installed.
- Open the file sharing app on your phone and select the files you want to transfer.
- Choose the “Send” or “Share” option within the app.
- On your computer, open the file sharing app or access the web interface provided by the app.
- Follow the instructions to receive the files on your computer.
- Select the destination folder where you want the files to be saved.
- Wait for the transfer process to complete.
Choose the method that is most convenient for you based on your device and preferences. Once the file transfer is completed, you can access and use the transferred files on your computer.
Now that you have successfully transferred the files from your phone to your computer, you can proceed to the final step to verify the successful transfer.
Method 1: Drag and Drop
One of the simplest and most versatile methods to transfer files from your phone to your computer is by using the drag and drop method. This method is particularly useful when using a USB cable or a file sharing app. Here’s how you can transfer files using drag and drop:
- Connect your phone to your computer using a USB cable or establish a wireless connection through a file sharing app.
- On your computer, open the File Explorer (Windows) or Finder (Mac) to browse the contents of your phone or the file sharing app interface.
- Navigate to the location on your phone where the files you want to transfer are stored.
- Select the files you wish to transfer by either dragging a selection box over them or individually clicking on each file.
- Drag and drop the selected files to a folder on your computer. You can create a new folder specifically for the transferred files or use an existing folder.
- Wait for the transfer process to complete. The duration will depend on the file sizes and the transfer speed.
The drag and drop method allows for a seamless and efficient transfer process. By directly moving files from your phone to your computer, you have full control over their placement and organization.
This method is compatible with various file types, including documents, photos, videos, and more. It also offers the flexibility to select specific files or entire folders for transfer.
It’s important to note that the availability of this method depends on the software and operating system of your phone. However, most smartphones offer this functionality, making it a popular and widely used transfer method.
Now that you know how to transfer files using the drag and drop method, you can proceed to the final step to verify the successful transfer.
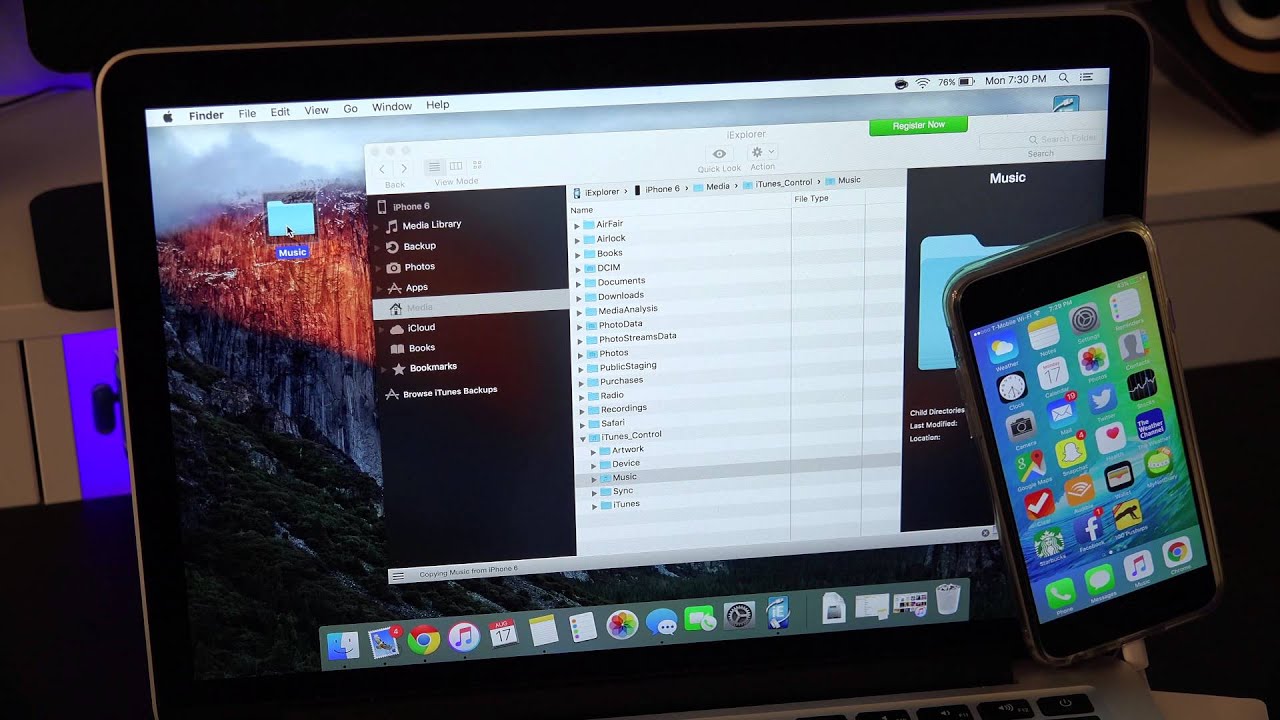
Method 2: Import through Software/App
Another convenient method to transfer files from your phone to your computer is by using specific software or apps designed for this purpose. These software or apps are often provided by the device manufacturer or are available as third-party solutions. Here’s how you can transfer files using this method:
- Make sure that you have the required software or app installed on both your phone and your computer. You can download these from the manufacturer’s website or from the designated app store.
- Connect your phone to your computer using a USB cable or establish a wireless connection as instructed by the software or app.
- Launch the software or app on your computer.
- Follow the prompts and instructions provided by the software or app to import or transfer the selected files from your phone.
- Select the destination folder on your computer where you want the transferred files to be saved.
- Wait for the transfer process to complete. The duration will depend on the file sizes and the transfer speed.
This method offers a convenient and user-friendly way to transfer files, as the software or app takes care of the transfer process for you. It ensures compatibility and seamless integration between your phone and computer, providing an optimized transfer experience.
Device manufacturers like Apple, Samsung, and Huawei often provide their own software solutions, such as iTunes or Samsung Smart Switch, to facilitate file transfer and synchronization between devices. These software often offer additional features like device backup, data management, and firmware updates.
Third-party apps like AirDroid and SnapDrop also provide a similar functionality, allowing you to wirelessly transfer files between your phone and computer without the need for a cable connection.
By using import software or apps, you can easily manage and transfer files, ensuring that they are appropriately organized and accessible on your computer.
Now that you know how to transfer files using import software or apps, you can proceed to the final step to verify the successful transfer.
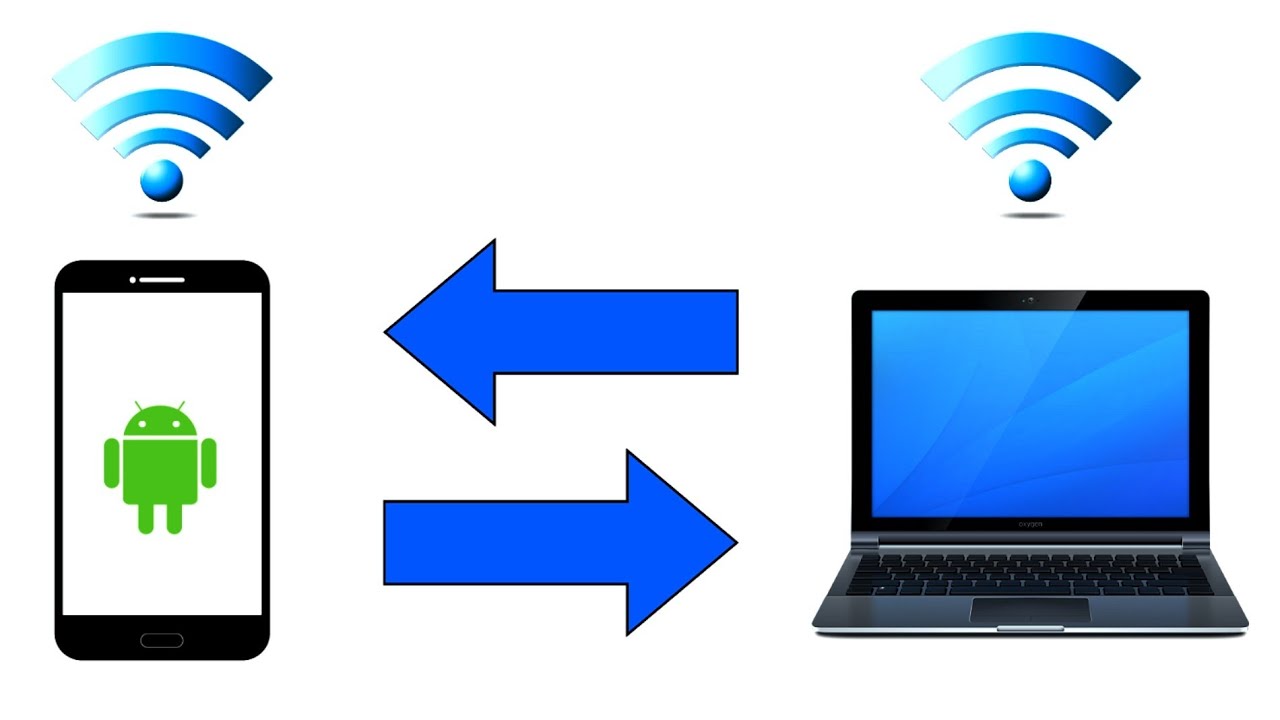
Method 3: File Sharing Apps
File sharing apps provide a convenient and efficient way to transfer files wirelessly between your phone and your computer. These apps utilize Wi-Fi or internet connectivity to establish a connection and facilitate the transfer process. Here’s how you can transfer files using file sharing apps:
- Ensure that both your phone and computer have the file sharing app installed. You can download these apps from the respective app stores.
- Open the file sharing app on your phone and select the files you want to transfer.
- Choose the “Send” or “Share” option within the app to initiate the transfer process.
- On your computer, open the file sharing app or access the web interface provided by the app.
- Follow the instructions provided by the app to receive the files on your computer.
- Select the destination folder where you want the transferred files to be saved.
- Wait for the transfer process to complete. The duration will depend on factors such as file sizes and the speed of your internet connection.
File sharing apps offer a seamless way to transfer files wirelessly, eliminating the need for cables or physical connections. They provide a user-friendly interface to browse and select files and ensure efficient transfer speeds.
Popular file sharing apps like SHAREit, Xender, and SendAnywhere are compatible with both Android and iOS devices, allowing for cross-platform file transfers. These apps often support various file types, including documents, photos, videos, and more.
Additionally, some file sharing apps offer features like group sharing, offline file transfer, and encryption for enhanced security.
It’s important to note that both your phone and computer need to be connected to the same Wi-Fi network or have internet access for file sharing apps to work.
Now that you are familiar with the file sharing app method, you have multiple options to choose from when transferring files between your phone and computer wirelessly.
Step 5: Verify Successful Transfer
After transferring files from your phone to your computer, it’s important to verify that the transfer was successful. This step ensures that your files are intact and accessible on your computer. Here’s how you can verify the successful transfer:
- Open the destination folder on your computer where you transferred the files.
- Check if all the transferred files are present in the folder. Ensure that the file names and formats are correct.
- Double-click on a few files to open them and confirm that they can be accessed and viewed without any issues.
- If the transferred files were media files like photos, videos, or music, play a few of them to ensure they are in proper working order.
- If you transferred documents, open them using the appropriate software or app and confirm that the contents are accurate and readable.
- If the files were compressed or archived, extract them using an appropriate program to ensure that the files are intact and usable.
- If you used specific software or apps for the transfer, check their interface or file management section to verify that the files are listed or recognized by the program.
By performing these verification steps, you can have peace of mind knowing that your files have been successfully transferred and are ready for use on your computer.
If you encounter any issues during the verification process, such as missing or corrupted files, you may need to repeat the transfer using a different method or troubleshoot any potential problems with the files or transfer process.
Once you have confirmed the successful transfer and accessibility of your files on your computer, you can safely disconnect your phone, close any relevant software or apps, and proceed to organize and utilize your transferred files as desired.
Conclusion
Transferring files from your phone to your computer is an essential task that allows you to free up storage space, access files on a larger screen, and ensure the safety of your valuable data. In this article, we explored different methods to accomplish this task efficiently and conveniently.
We started by connecting the phone to the computer using a USB cable or establishing a wireless connection. Then, we discussed three popular transfer methods: using a USB cable, utilizing cloud storage services, and employing email or messaging apps. Each method offers its own benefits and suits different file transfer needs.
We also delved into the step-by-step process of locating files on the phone and transferring them to the computer. Whether it was through drag and drop, import software/apps, or file sharing apps, each method provides a straightforward and effective way to transfer files based on your preferences and device compatibility.
Lastly, we highlighted the importance of verifying the successful transfer of files on your computer. By checking file availability, integrity, and accessibility, you can ensure that your files are safe and ready for use.
With the knowledge gained from this article, you are well-equipped to transfer files from your phone to your computer using various methods. Remember to choose the method that best suits your needs, consider file sizes and types, and follow the specific instructions provided by each transfer method.
So, whether you’re looking to transfer photos, videos, documents, or any other type of file, you can now confidently transfer your files from your phone to your computer with ease.