Introduction
If you’re familiar with PowerPoint, you know that it offers a wide range of fonts to choose from. However, sometimes these default fonts may not perfectly match the style or theme you have in mind for your presentation. That’s where downloading additional fonts comes in handy. By downloading fonts for PowerPoint, you can elevate your presentations and make them more visually appealing to captivate your audience.
Whether you want to add a touch of elegance, a dash of creativity, or a hint of personality to your slides, custom fonts can help you achieve the desired effect. In this article, we’ll guide you through the process of finding, downloading, and installing fonts for PowerPoint presentations on both Windows and macOS platforms.
Before we dive into the details, it’s important to note that while fonts play a crucial role in enhancing the visual appeal of your PowerPoint presentation, it’s equally important to use them wisely. Avoid using too many different fonts within a single presentation, as this can make it look cluttered and unprofessional. Stick to a consistent font scheme to maintain visual coherence throughout your slides.
Now that we have the basics covered, let’s explore why downloading fonts for PowerPoint can be beneficial and the steps you need to follow to get started.
Why Download Fonts for PowerPoint?
Using unique and eye-catching fonts in your PowerPoint presentations can significantly enhance the overall visual appeal and effectiveness of your slides. Here are a few reasons why you should consider downloading fonts:
- Personalization: Default fonts may not always align with your personal style or the specific theme of your presentation. By downloading custom fonts, you have a wider range of options to choose from, allowing you to personalize your presentations and make them stand out.
- Visual Impact: Fonts play a crucial role in setting the tone and mood of your presentation. Different fonts evoke different emotions and can communicate various messages. By using carefully selected fonts, you can create a visual impact that aligns with your presentation’s content and objective.
- Branding Consistency: If your presentation is for a company or brand, using the right fonts can reinforce brand consistency. By incorporating the company’s official fonts into your slides, you can ensure that your presentation aligns with the overall brand identity and reinforces the brand message.
- Enhanced Legibility: Choosing the right font can significantly improve the readability of your slides. Some fonts are designed specifically for readability on screens or projectors, ensuring that your audience can easily read and understand the text on your slides.
- Creativity and Uniqueness: Custom fonts provide you with the opportunity to showcase your creativity and differentiate your presentation from others. By using unique fonts, you can add a touch of originality and make your slides stand out from the standard, generic presentations.
Now that we understand the benefits of downloading fonts for PowerPoint, let’s explore how to find and choose the right fonts for your presentations.
Finding and Choosing Fonts
When it comes to finding and choosing fonts for your PowerPoint presentation, there are several options available to you. Here’s how you can go about it:
- Online Font Libraries: There are numerous online font libraries that offer a wide range of fonts for both personal and commercial use. Websites such as Google Fonts, Adobe Fonts, and DaFont provide an extensive collection of fonts that you can browse through. These libraries allow you to search for fonts based on categories, styles, or even specific keywords to find the perfect font for your presentation.
- Font Marketplaces: Font marketplaces like MyFonts and Fontshop offer premium fonts that can add a professional touch to your presentation. These marketplaces often provide a preview of the fonts, allowing you to test them out before making a purchase.
- Typography Blogs and Websites: Typography blogs and websites are also excellent sources for finding unique and trendy fonts. Websites like Typewolf and Behance showcase typography inspiration and provide links to the fonts used in various designs.
- Font Pairing Tools: If you’re looking for fonts that go well together, font pairing tools can be extremely helpful. Tools like Fontjoy and Canva’s Font Combinations allow you to explore different font combinations and find harmonious pairs that complement each other.
- Consider the Context: When choosing fonts for your PowerPoint presentation, consider the context and the message you want to convey. Different fonts work better for different themes and topics. For example, a playful font might be suitable for a presentation on children’s education, while a sleek and modern font might be more appropriate for a business or technology-related presentation.
Remember, while it’s essential to choose fonts that are visually appealing and align with your presentation’s theme, readability should be a top priority. Avoid using overly decorative or complex fonts that may be difficult for your audience to read, especially when projected on a large screen.
Once you have identified the fonts you want to use, the next step is to download and install them onto your computer. Let’s explore how to do that in the next section.
Downloading Fonts
Downloading fonts for your PowerPoint presentation is a straightforward process. Here’s how you can download fonts from various sources:
- Online Font Libraries: When you find a font you like on an online font library like Google Fonts or Adobe Fonts, simply click on the font’s name. This will take you to the font’s page, where you can find a “Download” button or a similar option. Clicking on it will initiate the download process, and the font file will be saved onto your computer.
- Font Marketplaces: On font marketplaces like MyFonts or Fontshop, you’ll usually find a “Buy” or “Add to Cart” button next to the font you want. Clicking on it will prompt you to complete the purchase, and once done, you can download the font file from your account or the provided download link.
- Typography Blogs and Websites: If you’ve come across a font on a typography blog or website, they usually provide a link to the font source. Clicking on the link will take you to the font’s page, where you can find the download option.
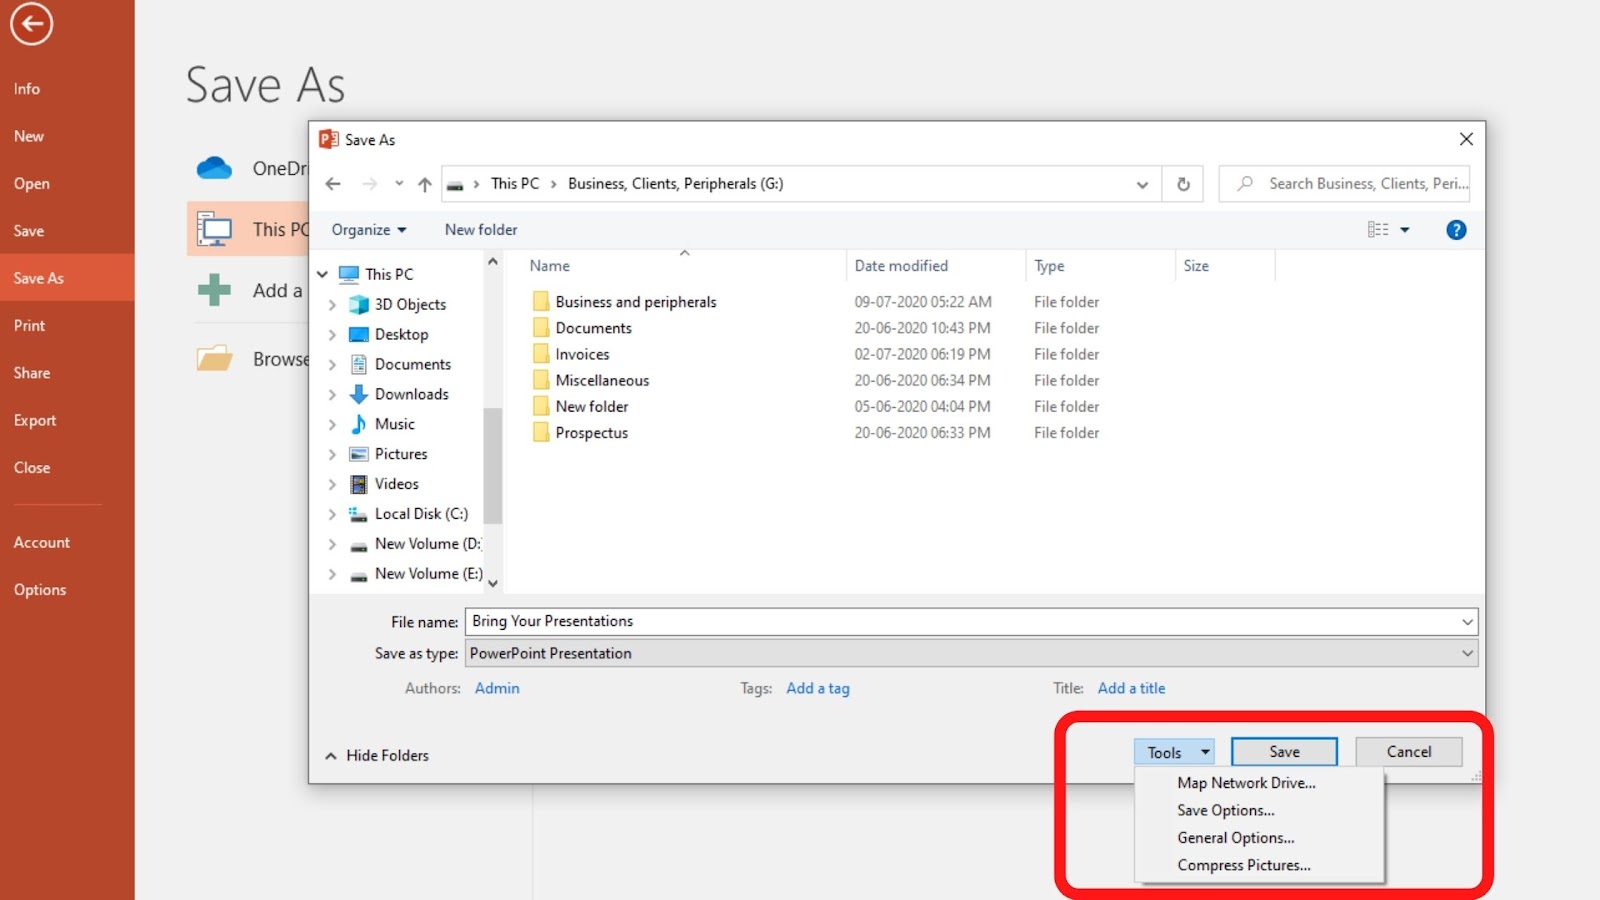
Regardless of the source, fonts are typically downloaded as compressed ZIP files. Once you have the ZIP file saved on your computer, extract its contents to reveal the font file(s) inside.
It’s important to note that fonts are copyrighted assets, and you should always respect the licensing terms specified by the font’s creator or distributor. Ensure that you are using the fonts within the terms of their respective licenses, whether they are free for personal use, available for commercial use, or require a purchase for certain uses.
Now that you have downloaded the font files, it’s time to install them on your computer. The installation process may vary between operating systems, so we will cover both Windows and macOS in the following sections.
Installing Fonts on Windows
Installing fonts on Windows is a straightforward process. Here’s a step-by-step guide:
- Locate the font files: After downloading the font files, typically in ZIP format, locate the extracted font files. These files usually have the extension “.ttf” (TrueType Font) or “.otf” (OpenType Font).
- Install the font: Right-click on the font file and select “Install” from the drop-down menu. This action will initiate the installation process, and Windows will install the font into the system’s font directory.
- Alternatively, manually install the font: If the font file is not in a ZIP format, you can manually install it by copying the font file(s) to the following folder: “C:\Windows\Fonts”. You can access this folder by opening the File Explorer and pasting the path into the address bar.
- Verify installation: Once the font is installed, it is then available for use in PowerPoint or any other applications on your Windows computer. To verify its installation, open PowerPoint and navigate to the font selection menu to see if the newly installed font appears in the list of available options.
Windows also provides a font preview feature that allows you to preview and manage installed fonts. Simply open the “Fonts” folder by typing “Fonts” into the Windows search bar, or go to the Control Panel and navigate to “Appearance and Personalization” > “Fonts”. From there, you can preview, install, or uninstall fonts as needed.
Now that you know how to install fonts on Windows, let’s move on to installing fonts on macOS.
Installing Fonts on macOS
Installing fonts on macOS is a relatively straightforward process. Here’s a step-by-step guide:
- Locate the font files: After downloading the font files, typically in ZIP format, locate the extracted font files. These files usually have the extension “.ttf” (TrueType Font) or “.otf” (OpenType Font).
- Double-click the font file: Double-clicking on the font file will open a preview of the font. Click the “Install Font” button to install the font onto your Mac.
- Alternatively, use Font Book: macOS comes with a pre-installed application called Font Book, which allows you to manage and organize your fonts. You can open Font Book by searching for it in Spotlight or locating it in the Applications folder. Once open, simply drag and drop the font files or choose “File” > “Add Fonts” to import the font files into Font Book. The fonts will be installed and available for use in applications.
- Verify installation: To verify that the font has been successfully installed, open PowerPoint or any other application that allows font selection. Navigate to the font dropdown menu and look for the newly installed font to see if it appears in the list of available options.
Font Book also allows you to preview, organize, and remove fonts as needed. You can access additional options by right-clicking on a font and selecting “Show Fonts” or “Get Info” to view more details about the font.
Installing fonts on macOS is straightforward, and with the Font Book application, managing your font collection becomes a breeze. Now that you know how to install fonts on macOS, let’s move on to applying fonts in PowerPoint.
Applying Fonts in PowerPoint
Now that you have downloaded and installed your desired fonts, it’s time to apply them in PowerPoint. Here are the steps to apply fonts to your PowerPoint presentation:
- Open PowerPoint: Launch PowerPoint and open the presentation where you want to apply the new fonts.
- Select text elements: Identify the text elements that you want to change the font for. This can include headings, subheadings, body text, or any other text content on your slides.
- Access the font settings: To access the font settings, select the text element and navigate to the “Home” tab on the PowerPoint ribbon. In the Font section, click on the font dropdown menu to view all the available fonts.
- Choose the new font: Scroll through the font list and select the newly installed font of your choice. As you select different fonts, the selected text element will update in real-time, allowing you to preview how the text will look with the new font.
- Apply consistent font styles: To maintain consistency throughout your presentation, apply the same font to all similar text elements. For example, use the same font for all headings and a different font for body text. This will create a cohesive visual style and enhance the overall professionalism of your presentation.
- Finalize the font selection: Once you have selected the desired font for each text element, review your slides to ensure that the fonts are visually appealing and legible.
Remember to save your PowerPoint presentation to preserve the font settings and ensure that the fonts appear correctly when you share or present the slides on other devices.
By applying custom fonts in PowerPoint, you can significantly enhance the design and aesthetics of your presentation, making it visually engaging and unique to your style or branding.
Now that you know how to apply fonts in PowerPoint, let’s wrap up our discussion.
Conclusion
Custom fonts can elevate your PowerPoint presentations by adding a touch of personalization, visual impact, and uniqueness. By downloading and installing fonts that align with your presentation’s theme, you can create a visually appealing and engaging experience for your audience.
In this article, we explored the benefits of downloading fonts for PowerPoint and discussed the process of finding and choosing fonts from various sources, such as online font libraries, font marketplaces, typography blogs, and font pairing tools. We also provided step-by-step instructions for downloading and installing fonts on both Windows and macOS systems.
Applying fonts in PowerPoint is a straightforward process, allowing you to enhance the design and readability of your slides. By selecting appropriate fonts and maintaining consistency throughout your presentation, you can create a cohesive visual style that amplifies your message.
Remember to consider the context of your presentation and choose fonts that align with your content and objective. While it’s essential to add visual flair, prioritizing readability ensures that your audience can easily consume the information on your slides.
So go ahead and explore the world of fonts to make your PowerPoint presentations truly captivating. Download, install, and apply fonts that reflect your style, enhance your message, and leave a lasting impression on your audience.