Introduction
When it comes to delivering presentations and sharing visual content, projectors play a crucial role in ensuring that your audience can see your slides clearly. Whether you are hosting a business meeting, conducting a training session, or giving a lecture, connecting your laptop to a projector can greatly enhance the impact of your presentation.
In this article, we will guide you through the process of connecting your laptop to a projector and displaying your PowerPoint slides effectively. We will cover the necessary steps to ensure a seamless setup, including adjusting the resolution, selecting the appropriate display mode, troubleshooting common issues, and more.
With the increasing popularity of remote work and virtual meetings, knowing how to display PowerPoint on a projector has become even more essential. Even if you are collaborating with colleagues from different locations, the ability to project your slides on a larger screen can make a significant difference in engagement and comprehension.
Whether you have a traditional projector or a modern projector with HDMI or USB-C connectivity, the techniques we will outline in this article can be applied to various projector models and laptop configurations. By following these guidelines, you can ensure that your PowerPoint presentation is flawlessly projected onto the big screen, allowing you to captivate your audience and deliver your message effectively.
So, if you have a presentation coming up and want to make a lasting impression, read on to discover our step-by-step guide on how to display PowerPoint on a projector. Let’s get started!
Connecting the Projector to the Laptop
Before you can start displaying your PowerPoint slides on a projector, you need to establish a connection between the projector and your laptop. Follow these steps to ensure a successful connection:
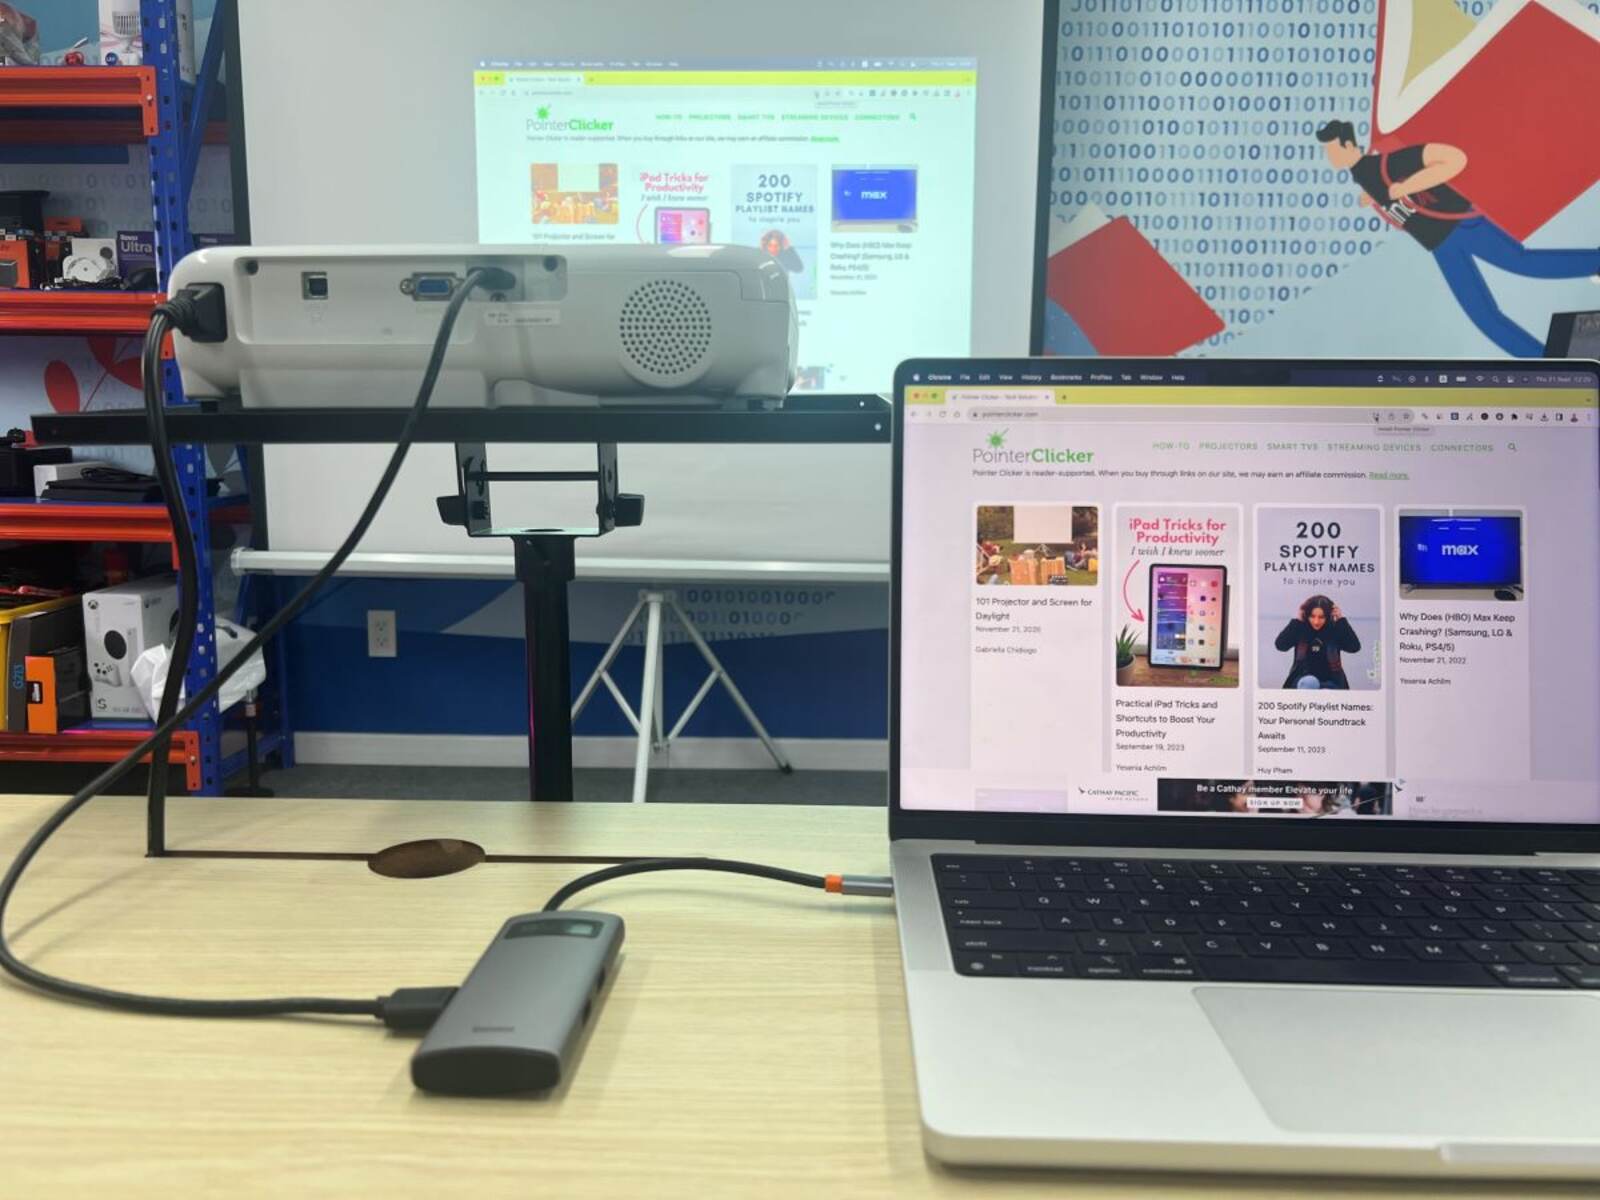
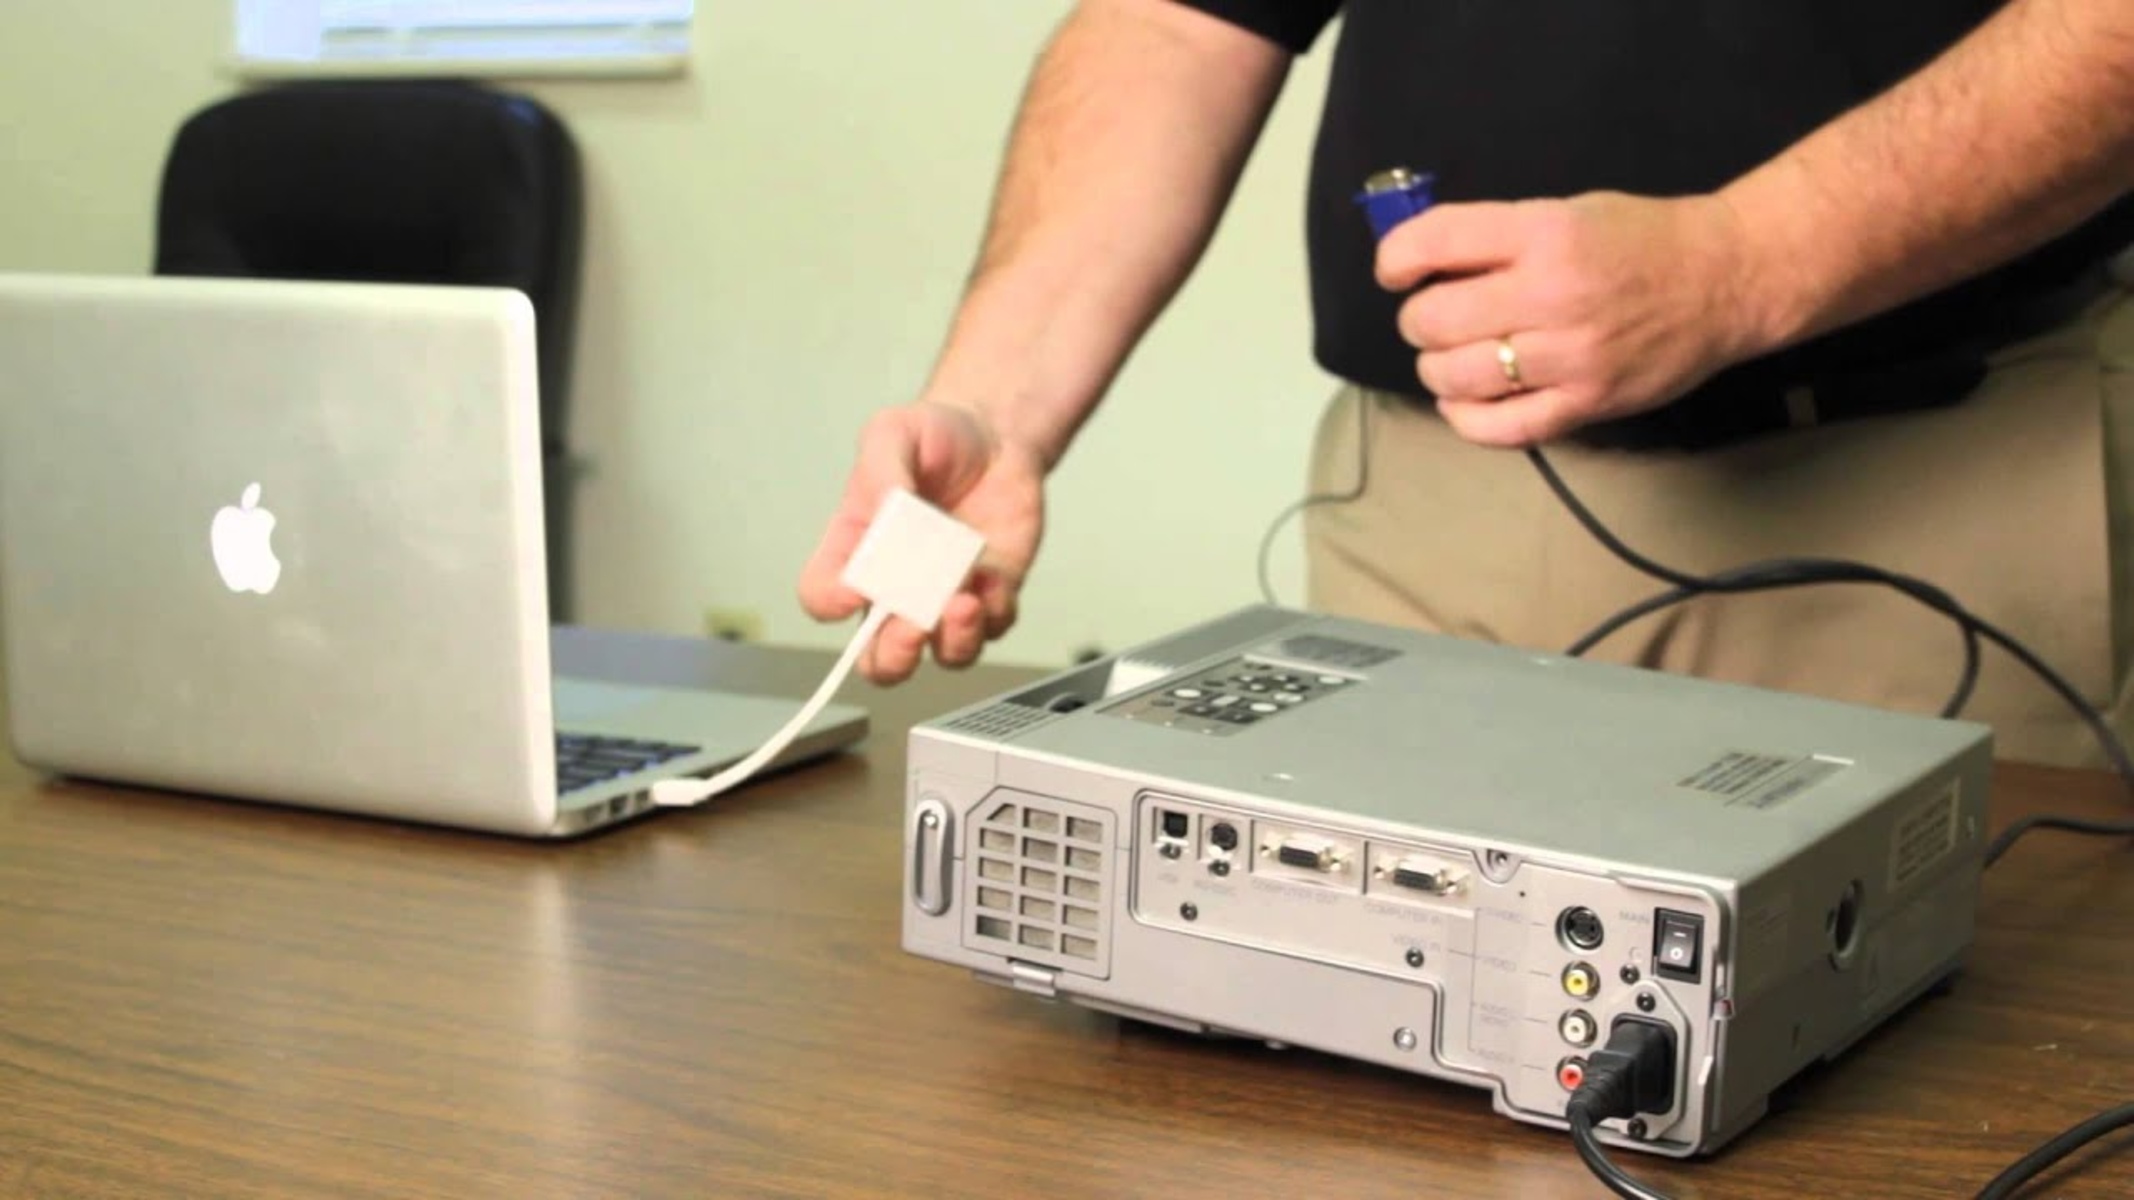
- Check the ports on your laptop and the projector: Most laptops and projectors have a variety of ports, including HDMI, VGA, and USB-C. Determine which ports are available on both devices.
- Select the appropriate cable: Based on the ports available, choose the corresponding cable to connect your laptop and projector. For example, if both devices have HDMI ports, use an HDMI cable for the connection.
- Power on the projector: Plug in the projector and turn it on. Allow it a few moments to warm up.
- Connect the cable: Take one end of the cable and insert it into the port on your laptop. Then, connect the other end to the corresponding port on the projector.
- Adjust the display settings: Once the connection is established, you may need to adjust the display settings on your laptop. On Windows, right-click on the desktop and select “Display settings.” On macOS, go to “System Preferences” and click on “Displays.” Ensure that the projector is recognized as the secondary display.
- Enable the duplicate or extend display mode: Depending on your preference, you can choose to duplicate your laptop screen on the projector or extend your desktop to have separate displays. Select the appropriate option under the display settings.
- Test the connection: Finally, press the appropriate function key or combination of keys on your laptop to enable the display output to the projector. This key varies depending on the laptop manufacturer but is often labeled with a projector icon. Alternatively, you can navigate to the display settings and manually enable the projector display.
Once you have followed these steps and successfully connected your laptop to the projector, you are now ready to proceed with setting up your PowerPoint slide show. In the next section, we will discuss how to optimize the slide show settings for the projector display.
Setting up the Slide Show
After connecting your laptop to the projector, it’s essential to optimize your PowerPoint slide show settings for the best viewing experience. Follow these steps to ensure that your slides are displayed correctly and engage your audience:
- Open your PowerPoint presentation: Launch PowerPoint and open the file containing your presentation.
- Check the slide layout: Review the slide layout to ensure that your content is organized and visually appealing. Make necessary adjustments to font sizes, colors, and slide backgrounds to enhance readability.
- Set the slide show options: Click on the “Slide Show” tab in the ribbon menu and select “Set Up Slide Show.” Here, choose whether you want to present the slide show on the primary monitor or the secondary monitor (which is the projector in this case).
- Select the appropriate slide show mode: Under the “Set Up Show” dialog box, decide whether you want to present your slides in “Presenter View” (where you can see speaker notes and upcoming slides), “Browsed by an individual” (the default full-screen mode), or “Browsed at a kiosk” (looping presentation).
- Enable slide transitions and animations: To add visual interest to your presentation, incorporate slide transitions and animations. Use them sparingly and purposefully to avoid overwhelming your audience. Go to the “Transitions” tab and select the desired animations and timings.
- Test the slide show: Before the actual presentation, preview the slide show on your laptop to ensure that everything appears as intended. Check for any issues with slide transitions, animations, or formatting that may need adjustments.
By following these steps, you can optimize your PowerPoint slide show for the projector display. Remember to keep your slides visually appealing, concise, and engaging to maintain your audience’s attention. In the next section, we will address how to adjust the resolution settings for the projector.
Adjusting the Resolution
One crucial aspect of displaying PowerPoint on a projector is ensuring that the resolution is optimized for the projector’s capabilities. Follow these steps to adjust the resolution settings on your laptop:
- Right-click on the desktop: On Windows, right-click anywhere on the desktop to access the context menu. On macOS, go to “System Preferences” and select “Displays.”
- Open display settings: In the context menu or the “Displays” section in System Preferences, click on “Display settings” or a similar option.
- Choose the appropriate resolution: In the display settings, you will see a list of available resolutions. Select a resolution that is compatible with your projector’s native resolution. It’s recommended to choose a resolution that matches or closely resembles the native resolution to ensure optimal image quality.
- Apply the changes: Once you have chosen the desired resolution, apply the changes to see them take effect. Your laptop’s screen and the projector display should now be adjusted accordingly.
During the resolution adjustment process, it’s essential to note that the resolution settings may vary depending on your operating system and graphics card. Ensure that you are selecting the appropriate settings for your specific setup.
By adjusting the resolution to match the projector’s capabilities, you can guarantee that your PowerPoint slides are displayed clearly and sharply. A mismatched resolution may result in distorted or blurry images, which can diminish the impact of your presentation.
In the next section, we will discuss the various display modes you can choose from to optimize the projection of your PowerPoint slides.
Choosing the Display Mode
When connecting your laptop to a projector, you have the option to choose from different display modes to ensure the best presentation experience. The display mode you select will determine how your PowerPoint slides are shown on the projector screen. Here are the commonly used display modes:
- Duplicate Display: In this mode, your laptop screen is mirrored onto the projector screen. Whatever is displayed on your laptop’s screen will be duplicated exactly on the projector. This mode is useful when you want to have a reference of your slides on your laptop while presenting.
- Extend Display: Choosing this mode allows you to have separate displays. Your laptop screen will show the presenter view or speaker notes, while the projector screen will display the full-screen slide show. This mode is great for presenters who want to have more control and access to additional information during the presentation.
- Presentation Mode: Some laptops offer a presentation mode, which automatically adjusts the settings for connecting to an external projector. This mode may optimize the screen resolution, audio output, and other settings for a smooth presentation experience. Check if your laptop has this mode available.
To select the display mode that suits your needs, follow these steps:
- Navigate to the display settings: Right-click on the desktop, select “Display settings” on Windows, or go to “System Preferences” and click on “Displays” on macOS.
- Choose the display mode: In the display settings, look for the “Multiple displays” or “Display mode” option. Select the mode that aligns with your preference.
- Apply the changes: Once you have selected the display mode, click on “Apply” or “OK” to save the settings.
By choosing the appropriate display mode, you can customize your presentation experience and make the most out of your PowerPoint slides. Remember, different modes work better for different presentation styles, so consider your specific needs when selecting the mode.
In the next section, we will guide you through the process of displaying PowerPoint on the projector, ensuring that your presentation runs smoothly.
Displaying PowerPoint on the Projector
Now that you have connected your laptop to the projector and adjusted the necessary settings, it’s time to display your PowerPoint slides on the big screen. Follow these steps to ensure a seamless and successful presentation:
- Open your PowerPoint presentation: Launch PowerPoint and open the specific file you want to display. Review your slides to familiarize yourself with the content and flow of the presentation.
- Enter slide show mode: To enter slide show mode, click on the “Slide Show” tab in the ribbon menu and select “From Beginning” or “From Current Slide.” Alternatively, press the “F5” key on your keyboard.
- Start the slide show: Once in slide show mode, your first slide will be displayed on both your laptop screen and the projector screen. Use the arrow keys on your keyboard or the mouse to navigate through the slides.
- Utilize slide show features: During your presentation, take advantage of the various slide show features available in PowerPoint. This includes animations, slide transitions, annotations, and laser pointers. Practice using these features beforehand and incorporate them strategically to enhance your presentation.
- Engage with your audience: As you display your PowerPoint slides on the projector, maintain eye contact with your audience and deliver your content confidently. Use your presenter view or speaker notes on your laptop screen to guide you through your presentation.
- Monitor the projection: Keep an eye on the projected slides to ensure they are displayed correctly on the screen. Occasionally glance at your laptop screen to stay in sync with the slide progression.
- Control the projection: You can pause or resume the presentation at any time by pressing the “Esc” key on your keyboard. This will show the slide thumbnail view, allowing you to make adjustments or navigate to a specific slide if needed.
- End the presentation: Once you have completed your presentation, press “Esc” to exit slide show mode. Take a moment to acknowledge any questions or comments from your audience before concluding the session.
By following these steps and utilizing the available features, you can confidently display your PowerPoint presentation on the projector. Remember to practice beforehand and ensure that your presentation flows smoothly to engage and captivate your audience effectively.
In the next section, we will address some common troubleshooting tips to help you overcome any technical issues that may arise during your presentation.
Troubleshooting Common Issues
While connecting and displaying PowerPoint on a projector, you may encounter some common technical issues. Here are a few troubleshooting tips to help you navigate through these challenges:
- No signal on the projector: If the projector is not receiving a signal from your laptop, check the cable connections and ensure that they are securely plugged in. Try disconnecting and reconnecting the cable, or use a different cable if available. You may also need to adjust the input source settings on the projector.
- No display on the projector screen: If the projector is receiving a signal, but you’re not seeing any display on the projector screen, check the display mode and resolution settings on your laptop. Ensure that the projector is set as the secondary display and that the resolution is compatible with the projector’s native resolution.
- Incompatible slide formats: If your slides contain unsupported media formats or fonts, they may not display properly on the projector. Make sure to use widely compatible file formats and fonts to avoid any compatibility issues.
- Audio not playing on the projector: If you have audio incorporated in your presentation, check the audio output settings on your laptop and the projector. Ensure that the audio is not muted, the volume is sufficiently high, and the correct audio output source is selected.
- Flickering or distorted display: If you notice flickering or distortion on the projected slides, it could be due to issues with the cable connection or the projector’s settings. Try adjusting the cable or changing the resolution settings on your laptop to resolve this issue.
- Power issues with the projector: If the projector is not turning on or experiencing power-related issues, check the power source and connection. Ensure that the power cable is securely plugged in and there is no damage to the cable or the power outlet.
If you encounter any other technical issues, refer to the user manual of your projector or consult with the technical support team for further assistance. It’s always a good idea to test the setup and familiarize yourself with the equipment before the actual presentation to minimize any last-minute surprises.
By being prepared and aware of these common issues and their respective solutions, you can troubleshoot any challenges that arise during your PowerPoint presentation on the projector.
Now that you have learned how to connect, set up, and troubleshoot your PowerPoint presentation on a projector, you are ready to deliver an impactful and visually engaging presentation. In the next section, we will conclude this guide with a summary of the key points covered.
Conclusion
Displaying PowerPoint on a projector can greatly enhance the impact of your presentations, allowing you to engage your audience and deliver your message effectively. By following the steps outlined in this guide, you can ensure a seamless and successful setup, from connecting your laptop to the projector to adjusting the resolution, choosing the display mode, and troubleshooting common issues.
Remember to select the appropriate cable for the connection, adjust the display settings, and choose the desired slide show mode for your presentation style. Utilize the available features in PowerPoint, such as slide transitions, animations, and presenter view, to enhance the visual appeal and delivery of your slides.
If you encounter any technical issues, such as a lack of signal or distorted display, refer to the troubleshooting tips provided to help you overcome these challenges. And always practice your presentation beforehand to familiarize yourself with the equipment and ensure a smooth presentation experience.
Now that you have the knowledge and understanding of how to display PowerPoint on a projector, you can confidently engage your audience, deliver visually appealing presentations, and make a lasting impression. So, go ahead, connect your laptop to a projector, and captivate your audience with your powerful PowerPoint presentations!