Introduction
Welcome to this guide on how to download a plugin for FL Studio! FL Studio is a popular digital audio workstation used by musicians, producers, and audio enthusiasts around the world. One of the advantages of using FL Studio is its extensive library of plugins, which allow users to expand the software’s capabilities and create unique sounds and effects.
Plugins are like additional tools that can be added to FL Studio to enhance its functionality. They can range from synthesizers and virtual instruments to audio effects and mastering tools. If you’re looking to download a plugin for FL Studio, this step-by-step guide will walk you through the process, ensuring a smooth and successful installation.
Whether you’re a beginner or an experienced user, this guide is designed to help you navigate the process of finding and downloading plugins for FL Studio. With the right plugin, you can unlock new creative possibilities and take your music production to the next level. So, let’s get started!
Step 1: Open the FL Studio App
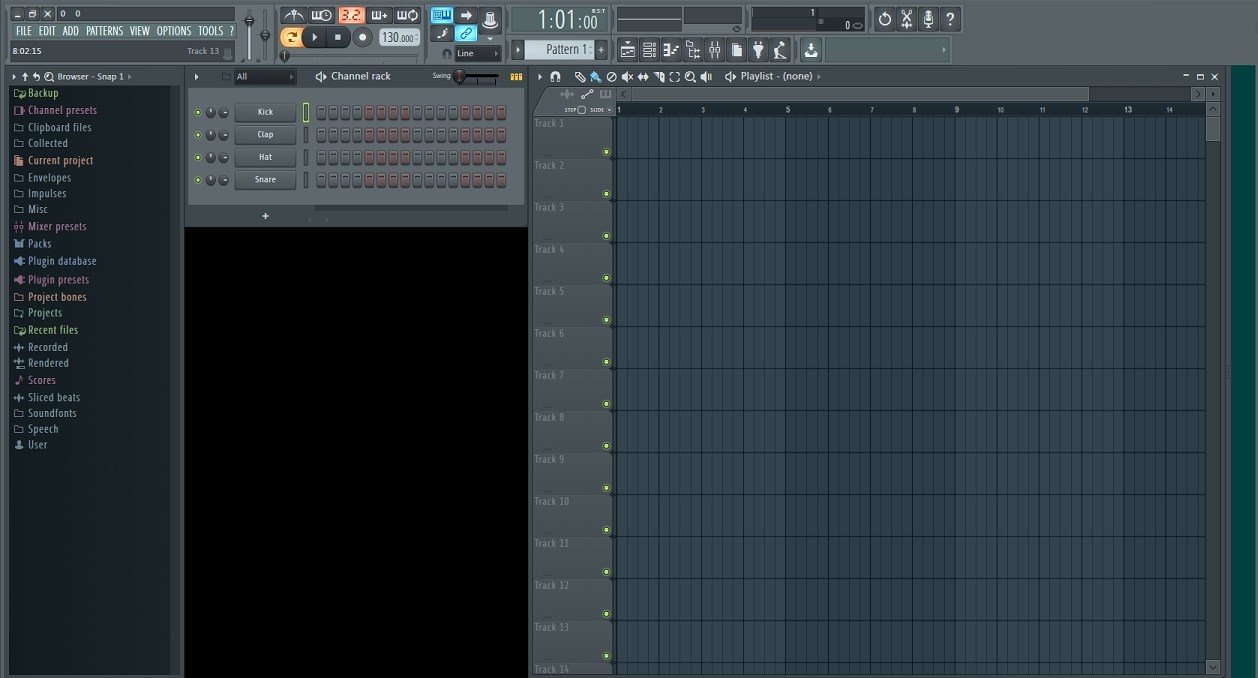
The first step in downloading a plugin for FL Studio is to open the FL Studio application on your computer. Locate the FL Studio icon either on your desktop or in your application folder and click on it to launch the program.
Once the FL Studio app is open, you will be greeted with a user-friendly interface that displays your project tracks, mixer, and various options. Take a moment to familiarize yourself with the layout if you’re new to FL Studio.
If you already have a project open in FL Studio, you can continue working on it while downloading the plugin. However, if you prefer a clean slate, you can create a new project by going to the “File” tab in the menu bar and selecting “New” or using the shortcut Ctrl+N (Windows) or Command+N (Mac).
Keep in mind that before proceeding with the plugin download, make sure you have a stable internet connection. Having a reliable internet connection ensures a smooth and uninterrupted download process.
Once you have FL Studio open and ready, it’s time to move on to the next step and begin your search for the plugin you want to download.
Step 2: Visit the Plugin’s Website
After opening FL Studio, the next step in downloading a plugin is to visit the official website of the plugin you want to install. Most plugins have their own dedicated websites where you can find information about the plugin, its features, compatibility, and, most importantly, download links.
To find the plugin’s website, you can simply search for the plugin name in your preferred search engine. For example, if you want to download a popular synthesizer plugin called “X-Synth”, search for “X-Synth plugin official website”. Look for results that link to the plugin’s official website.
Once you have found the website, click on the link to access it. On the plugin’s website, you will usually find a homepage that provides an overview of the plugin’s features and capabilities. Take a moment to explore the website and gather any necessary information about the plugin.
Plugin websites often offer additional resources such as user manuals, tutorials, and support forums, which can be helpful in using the plugin to its fullest potential. Take advantage of these resources if they are available to ensure a smooth installation and integration of the plugin into FL Studio.
It’s worth mentioning that some plugins may be available through third-party websites or marketplaces. In this case, make sure to visit the official page of the plugin or a trusted website to download the plugin safely and avoid any potential malware or unauthorized versions.
Now that you are on the plugin’s website and have gathered all the necessary information, it’s time to move on to the next step and locate the download page.
Step 3: Find the Download Page
Once you’re on the plugin’s website, the next step is to locate the download page. The download page is where you will find the necessary files to install the plugin into FL Studio.
To find the download page, navigate through the website’s menu or look for prominent options such as “Downloads” or “Get the Plugin”. Some plugin websites may have direct download links on the homepage itself.
Click on the link or button that leads you to the download page. On this page, you may find different options, such as a free trial version, a demo version, or the full version of the plugin. Choose the option that suits your requirements and click on the corresponding download button.
Plugin developers often provide different versions of the plugin depending on the operating system you’re using. Make sure to select the correct version: Windows, Mac, or Linux. If you’re unsure which version to choose, check your system’s specifications or consult the plugin’s documentation or support forums.
Some plugins may require you to create an account or log in before downloading. In such cases, follow the prompts to create an account or log in using your existing credentials. This step helps plugin developers track downloads and manage licenses.
After clicking on the download button and completing any necessary login or account creation steps, the download process will begin. Depending on your internet speed and the size of the plugin file, the download may take a few seconds to several minutes.
Once the download is complete, you’re one step closer to installing the plugin in FL Studio. But before that, let’s move on to the next step and learn how to select the correct version of the plugin for your setup.
Step 4: Choose the Correct Version
After finding the download page for the plugin, the next step is to choose the correct version of the plugin for your setup. Plugin developers often provide multiple versions of their plugins to ensure compatibility with different operating systems and digital audio workstations like FL Studio.
Before selecting a version, it’s important to determine which operating system you’re using. FL Studio is available for both Windows and Mac, so make sure to choose the version that matches your system. Usually, you’ll find separate download options for Windows and Mac, clearly labeled on the download page.
If you’re unsure about your operating system, you can check by going to the system settings on your computer. On Windows, you can go to “Settings” > “System” > “About” to find the information. On a Mac, you can click on the Apple logo in the top left corner of the screen, then select “About This Mac”.
Once you’ve determined your operating system, select the corresponding download option. It may be labeled as “Windows,” “Mac,” or “OSX” for Mac users. Ensure that you’re choosing the correct version to avoid any compatibility issues during the installation process.
Additionally, some plugins may have different versions or editions tailored for specific digital audio workstations. Make sure to download the version specifically designed for FL Studio to ensure proper integration and functionality.
If there are multiple versions available, you may also have the option to choose between a free trial or demo version and a full version of the plugin. Consider your requirements and, if necessary, check the plugin’s documentation or website to understand the limitations or differences between the various versions.
Once you have chosen the correct version of the plugin, it’s time to proceed to the next step and initiate the download process. Stay tuned for the next step, where we’ll discuss how to download the plugin file onto your computer.
Step 5: Download the Plugin
Now that you have chosen the correct version of the plugin, it’s time to initiate the download process. Downloading the plugin file onto your computer is an essential step towards installing it in FL Studio.
On the plugin’s download page, you will typically find a download button labeled with the version and file size of the plugin. Click on this button to start the download process.
Depending on your internet connection and the size of the plugin file, the download may take a few moments or several minutes to complete. It’s crucial to have a stable internet connection during this process to ensure a successful and uninterrupted download.
While waiting for the download to finish, it’s a good idea to keep track of where the file is saving on your computer. By default, the plugin file will usually download to your designated download folder, unless you manually specify a different location.
Once the download is complete, navigate to the location where the plugin file was saved. It is typically a zip file or an installer file, depending on the plugin and its packaging.
Before proceeding to the next step, it’s essential to ensure that the downloaded file is valid and intact. Check the file size and compare it to the size mentioned on the plugin’s website. If the sizes match, it’s a good indication that the file downloaded correctly.
Some plugins may also provide a checksum or MD5 value on their website, which you can use to verify the integrity of the downloaded file. It helps ensure that the file has not been tampered with and is safe for installation.
With the plugin file successfully downloaded and validated, you’re now ready to move on to the next step and locate the plugin file for installation in FL Studio. Stay tuned!
Step 6: Locate the Plugin File
After successfully downloading the plugin file, the next step is to locate it on your computer. Finding the plugin file is crucial in order to proceed with the installation in FL Studio.
By default, most downloaded files are saved in the designated download folder on your computer. If you haven’t changed the default download location, you can navigate to your Downloads folder or check your browser’s download history to find the plugin file.
If you remember specifying a different location during the download process, navigate to that location. It could be a different folder or a designated location for plugin installations on your computer.
The plugin file is usually in a compressed format, such as a ZIP file. If this is the case, you’ll need to extract the contents of the ZIP file to access the plugin file itself. Right-click on the ZIP file and select “Extract” or “Extract All” to extract the files to a specified folder.
Once the contents of the ZIP file are extracted, you should see the plugin file itself, usually with an extension specific to the plugin. Common extensions include .dll for Windows or .vst or .vst3 for both Windows and Mac.
It’s a good practice to double-check the file extension and make sure it matches the expected format for the plugin you downloaded. This ensures that you are working with the correct file and avoids any potential issues during installation.
It’s also worth noting that some plugin files may come bundled with additional files or folders, such as presets, documentation, or license information. It’s recommended to keep these files organized and stored alongside the plugin file for easy reference in the future.
With the plugin file located and ready, we’re now ready to dive into the next step—installing the plugin into FL Studio. Keep on reading!
Step 7: Install the Plugin
Now that you have located the plugin file on your computer, it’s time to install it into FL Studio. Installing the plugin will make it available for use within the software and allow you to access its features and functionalities.
The installation process may vary slightly depending on the plugin and its specific requirements. However, the general steps for installing a plugin in FL Studio remain relatively consistent.
Start by launching FL Studio on your computer if it’s not already open. Once FL Studio is open, navigate to the “Options” menu at the top of the screen and select “Manage plugins” from the drop-down menu.
A new window will appear, showing a list of plugins that are currently installed in FL Studio. To install a new plugin, click on the “Add path” button or similar option present in the plugin manager window.
Navigate to the location where you have saved the plugin file on your computer. Select the file or folder containing the plugin, and click “OK” or “Open” to add it to the plugin manager.
FL Studio will scan the plugin and verify its compatibility. If the plugin is compatible, it will appear in the list of available plugins in the plugin manager window.
You may have the option to categorize the plugin by creating a new folder or selecting an existing one. This can be useful for organizing your plugins based on type or developer, making them easier to locate in the future.
Once you have organized the plugin, click on the checkbox next to its name to enable it within FL Studio. This will make the plugin available for use in your projects.
Finally, click on the “Refresh” button in the plugin manager window to update FL Studio and ensure that the installed plugin is recognized and ready to use.
Congratulations! You have successfully installed the plugin into FL Studio. Now, you can start exploring its features and integrating it into your music production workflow.
Remember to consult the plugin’s documentation or website for any additional installation instructions specific to that particular plugin. This can provide valuable information on how to access and use the plugin’s unique features within FL Studio.
With the plugin installed, we’re almost done. The next step will guide you through the process of activating the plugin, so keep reading!
Step 8: Activate the Plugin
After successfully installing the plugin in FL Studio, the final step is to activate it. Activating the plugin ensures that it is properly authorized for use and allows you to access all of its features without any restrictions.
The process of activating a plugin may vary depending on the specific plugin and its licensing requirements. Some plugins may require you to enter a license key or serial number during the activation process, while others may use a different method like online registration or software-based activation.
If you have a license key or serial number for the plugin, locate it either in the documentation you received or in an email from the plugin developer. Copy the license key or serial number to your clipboard or write it down for future reference.
In FL Studio, navigate to the plugin manager window by going to the “Options” menu and selecting “Manage plugins”. Here, you will see the list of installed plugins, including the one you just installed.
Find the plugin in the list and click on its name to select it. Look for an activation button or option within the plugin manager window. It may be labeled as “Activate”, “Register”, or something similar.
If prompted, enter the license key or serial number for the plugin in the designated field. Follow the on-screen instructions provided by the plugin developer to complete the activation process.
Once the plugin is successfully activated, it will be fully functional within FL Studio, and you can start using it in your music production projects.
Make sure to keep a record of the license key or serial number and any activation-related information in a secure place. This will come in handy if you need to reinstall the plugin in the future or migrate it to a new computer.
It’s important to note that some plugins may have different activation processes or require additional steps such as online registration or account activation. Always refer to the plugin’s documentation or contact the developer for any specific activation instructions.
With the plugin successfully activated, you can now enjoy its features and capabilities to enhance your music production in FL Studio.
Congratulations! You’ve completed the process of downloading, installing, and activating a plugin in FL Studio. Now, you’re ready to unleash your creativity and make use of the new possibilities that the plugin brings to your projects.
Conclusion
Downloading and installing plugins for FL Studio can greatly expand your creative possibilities and enhance your music production workflow. Following the steps outlined in this guide, you now have the knowledge to successfully download, install, and activate plugins in FL Studio.
From opening FL Studio and visiting the plugin’s website to locating and downloading the plugin file, each step is essential in ensuring a smooth installation process. Choosing the correct version of the plugin and verifying the downloaded file’s integrity are crucial for a successful installation.
Once the plugin is installed, activating it enables you to access all of its features and unleash your creativity in your music projects. Remember to refer to the plugin’s documentation or contact the developer for any specific activation instructions.
Throughout the process, it’s important to maintain a stable internet connection, keep track of the plugin file’s location, and stay vigilant to ensure the safety and integrity of your downloads.
Now that you’re equipped with the knowledge and steps to download and install plugins in FL Studio, you can explore the vast world of plugins and add new sounds, effects, and instruments to your music production arsenal.
Remember, plugins are powerful tools that can elevate your music to new heights, so have fun exploring and experimenting with different plugins that suit your creative vision and musical style.
Happy producing!