Setting Up Your MIDI Keyboard
Setting up your MIDI keyboard in FL Studio 12 is an essential first step to unlock its full potential. Whether you're a seasoned musician or just starting out, integrating your MIDI keyboard with FL Studio 12 can significantly enhance your music production experience. Here's how to get started:
-
Connect Your MIDI Keyboard: Begin by connecting your MIDI keyboard to your computer using a USB cable. Once connected, ensure that your keyboard is powered on.
-
Install the Necessary Drivers: If your MIDI keyboard requires specific drivers to function with your computer, make sure to install them before proceeding. Most modern MIDI keyboards are "plug and play," meaning they will be automatically recognized by your computer without the need for additional drivers.
-
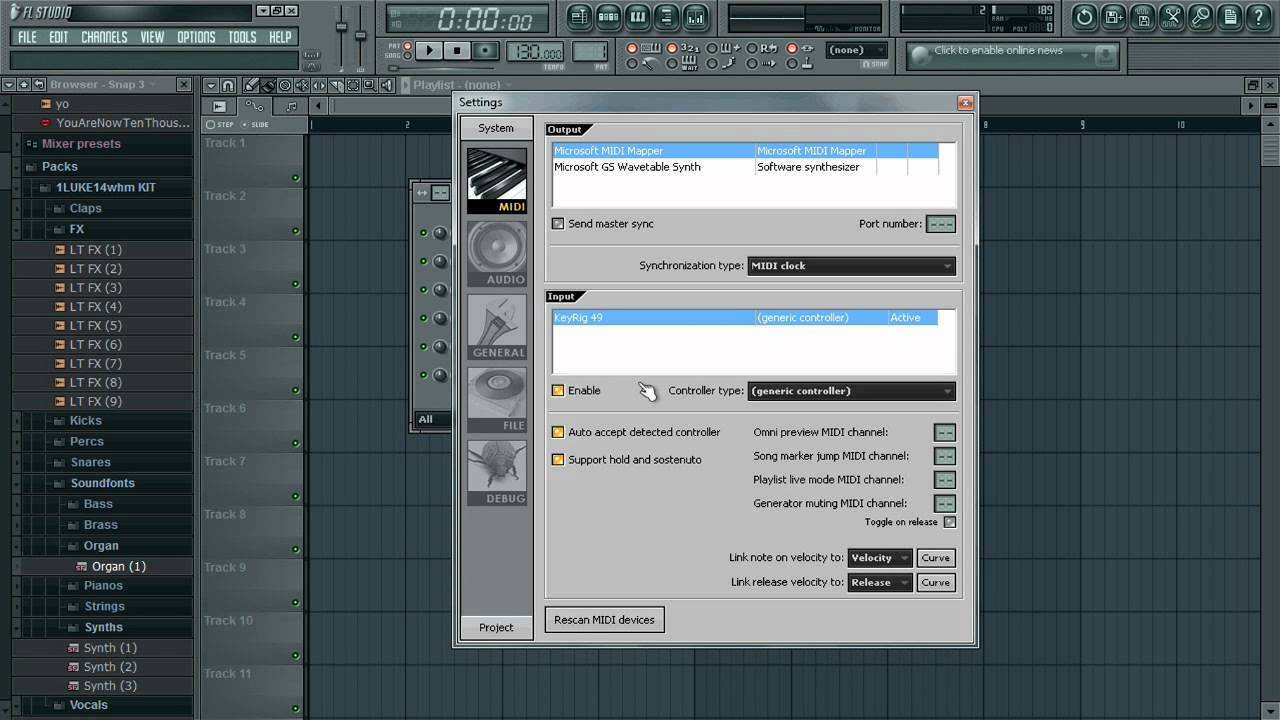
Open FL Studio 12: Launch FL Studio 12 on your computer. Once the software is open, navigate to the "Options" menu and select "MIDI Settings."
-
Enable MIDI Input: In the "MIDI Settings" window, ensure that your MIDI keyboard is enabled for input. FL Studio 12 should automatically detect your MIDI keyboard if it's properly connected to your computer.
-
Verify MIDI Connection: To confirm that your MIDI keyboard is successfully connected, press a few keys on the keyboard. You should see the corresponding input indicators light up within FL Studio 12, indicating that MIDI data is being received.
-
Set MIDI Channel: If your MIDI keyboard allows for channel selection, ensure that it is set to the appropriate channel for FL Studio 12. This is particularly important if you have multiple MIDI devices connected to your system.
-
Test the Keyboard: Test the functionality of your MIDI keyboard by playing a few notes. Ensure that the sound is being produced as expected and that there are no latency issues between pressing the keys and hearing the sound.
By following these steps, you can seamlessly set up your MIDI keyboard for use with FL Studio 12, laying the groundwork for a productive and creative music production process. With your MIDI keyboard integrated, you're ready to delve into the world of music creation within FL Studio 12.
Configuring FL Studio 12 for MIDI Input
Once your MIDI keyboard is physically connected to your computer, the next step is to configure FL Studio 12 to recognize and effectively utilize the MIDI input. This process involves setting up FL Studio to receive MIDI data from your keyboard and ensuring that the software translates these inputs accurately. Here’s how to configure FL Studio 12 for MIDI input:
-
Access the MIDI Settings: In FL Studio 12, navigate to the "Options" menu and select "MIDI Settings." This will open the MIDI Settings window, where you can manage all aspects of MIDI input and output.
-
Select Your MIDI Keyboard: In the MIDI Settings window, locate your MIDI keyboard from the list of available MIDI input devices. Ensure that it is enabled and selected as the primary input device for FL Studio 12.
-
Configure MIDI Ports: Verify that the appropriate MIDI input and output ports are assigned to your MIDI keyboard. This step is crucial for establishing a seamless connection between your keyboard and FL Studio 12.
-
Set MIDI Input Filters: Depending on your preferences, you may need to configure MIDI input filters to specify which MIDI messages FL Studio 12 should respond to. This can include note data, control change messages, pitch bend, and more.
-
Adjust MIDI Buffer Size: To optimize MIDI input responsiveness and minimize latency, consider adjusting the MIDI buffer size within the MIDI Settings window. Experiment with different buffer sizes to find the setting that offers the best performance for your setup.
-
Test MIDI Input: After configuring the MIDI settings, test the MIDI input by playing your keyboard. Verify that FL Studio 12 accurately captures the MIDI data and that there are no issues with note recognition, velocity sensitivity, or other key parameters.
By following these steps, you can effectively configure FL Studio 12 to receive MIDI input from your keyboard, ensuring a smooth and responsive interaction between your MIDI device and the software. With the MIDI settings properly configured, you’re ready to harness the full potential of your MIDI keyboard within FL Studio 12, empowering you to express your musical ideas with precision and creativity.
Assigning MIDI Controls to FL Studio Parameters
One of the most powerful features of using a MIDI keyboard in FL Studio 12 is the ability to assign MIDI controls to various parameters within the software. This functionality allows you to map specific knobs, sliders, and buttons on your MIDI keyboard to control different aspects of FL Studio, providing a hands-on and intuitive approach to music production. Here’s how to assign MIDI controls to FL Studio parameters:
-
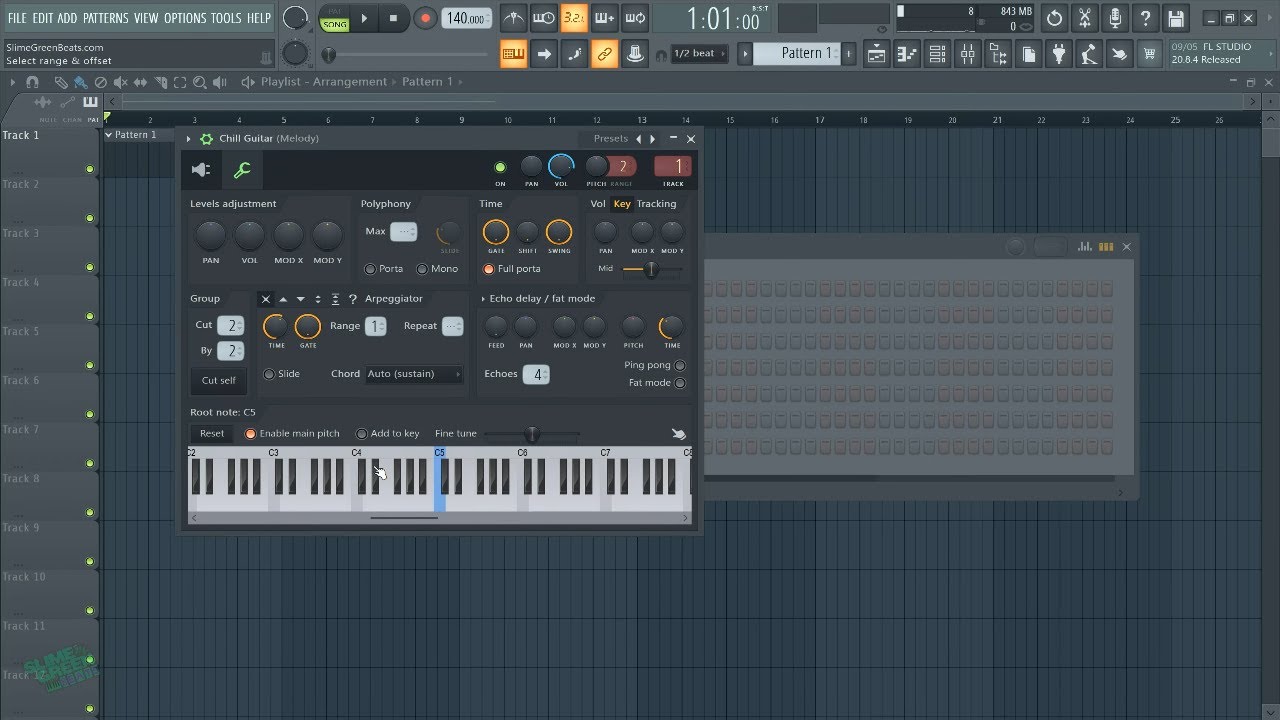
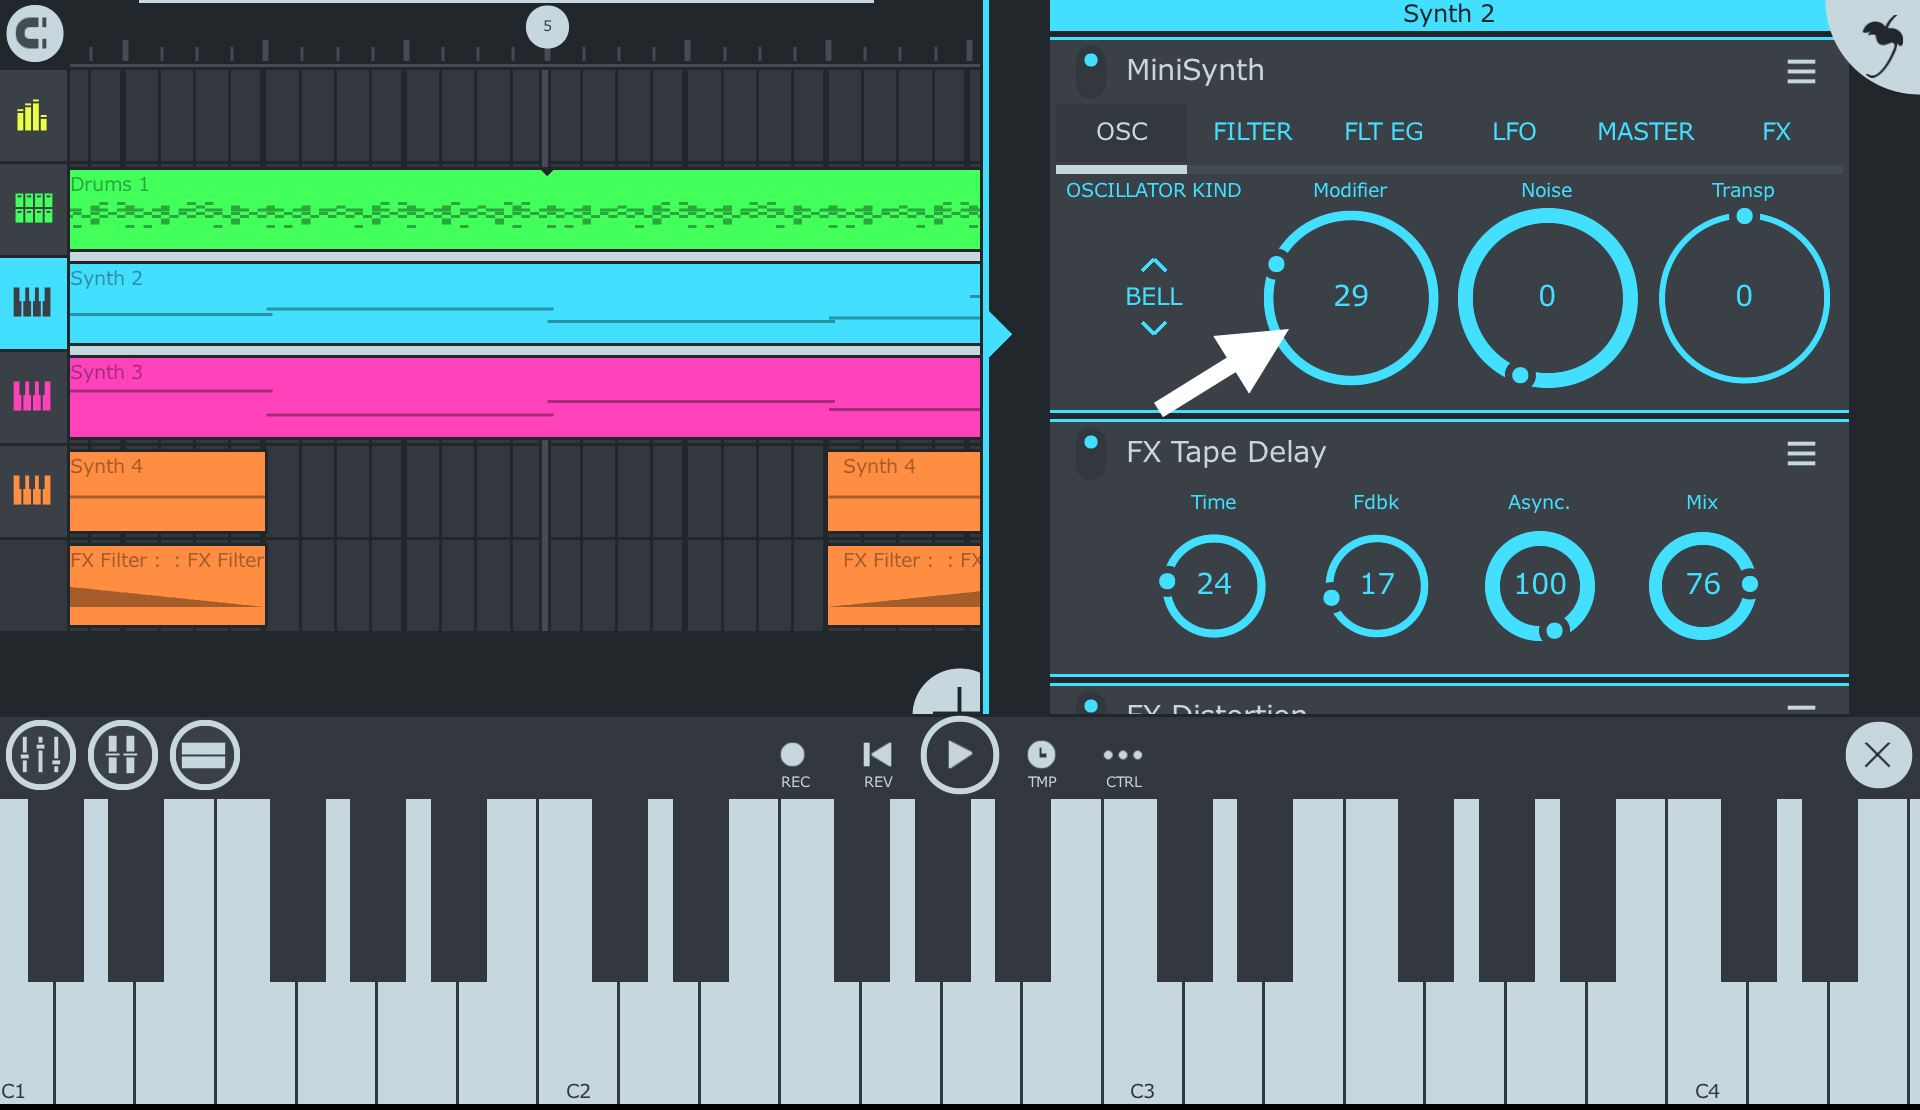
Access the Plugin Parameters: Open the plugin or instrument within FL Studio 12 that you wish to control using your MIDI keyboard. This could be a virtual instrument, mixer channel, or effect plugin.
-
Enable MIDI Learn Mode: Many parameters within FL Studio can be MIDI-mapped by enabling the MIDI Learn mode. This mode allows FL Studio to listen for incoming MIDI messages and assign them to the selected parameter.
-
Right-Click on the Parameter: Right-click on the parameter you want to control with your MIDI keyboard. This could be a knob, slider, button, or any adjustable parameter within the plugin or mixer channel.
-
Move the MIDI Control: Once in MIDI Learn mode, move the physical control on your MIDI keyboard that you want to assign to the parameter. For example, if you want to control the cutoff frequency of a filter, you would move the corresponding knob on your MIDI keyboard.
-
Verify the Assignment: After moving the MIDI control, FL Studio should automatically assign it to the selected parameter. You can verify this by testing the MIDI control and observing its impact on the parameter within FL Studio.
-
Refine the Mapping: If needed, you can further refine the MIDI mapping by adjusting the minimum and maximum values, scaling, and inversion settings to tailor the control response to your preference.
-
Save the Mapping: Once you’re satisfied with the MIDI mapping, ensure to save the project or preset to retain the assigned MIDI controls for future use.
By assigning MIDI controls to FL Studio parameters, you can personalize your music production workflow, streamline your creative process, and add a tactile dimension to your interaction with FL Studio 12. This hands-on approach empowers you to shape and manipulate sounds in real-time, fostering a deeper connection between your musical ideas and the software environment.
Recording MIDI Input in FL Studio 12
Recording MIDI input in FL Studio 12 allows you to capture the expressive nuances of your MIDI keyboard performance, enabling you to create and edit musical sequences with precision. Whether you’re laying down melodies, crafting intricate chord progressions, or programming rhythmic patterns, FL Studio’s MIDI recording capabilities provide a versatile platform for capturing your musical ideas. Here’s how to record MIDI input in FL Studio 12:
-
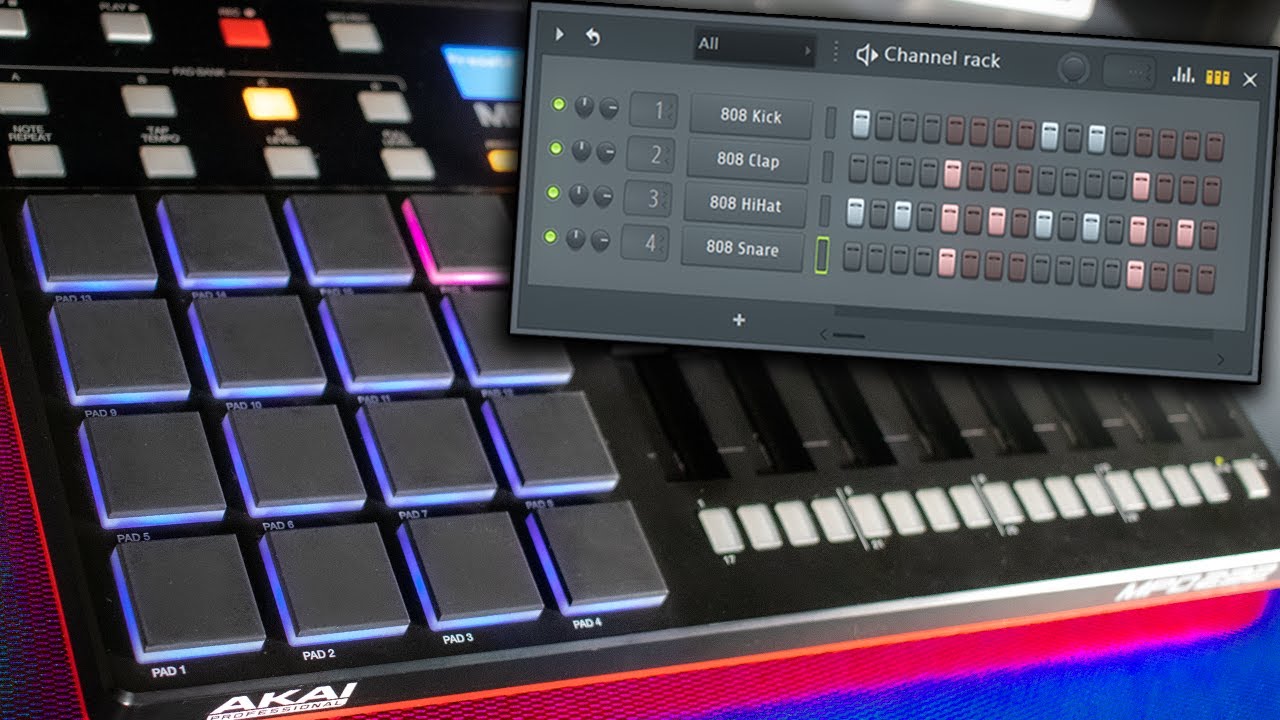
Select a MIDI Channel: Within FL Studio 12, choose the MIDI channel or instrument where you want to record your MIDI input. This could be a virtual instrument, sampler, or any MIDI-controllable device.
-
Arm the MIDI Track: Ensure that the MIDI track you wish to record on is armed for recording. This typically involves clicking the "Record" button on the MIDI track to enable MIDI input monitoring and recording.
-
Set the Recording Parameters: Configure the recording settings, such as the input source, MIDI channel, and recording quantization, to tailor the recording process to your specific requirements.
-
Enable Record Mode: Once the MIDI track is armed, initiate the recording process by clicking the "Record" button in FL Studio 12. This action prepares the software to capture incoming MIDI data from your keyboard.
-
Perform Your Musical Ideas: Play your MIDI keyboard to perform the musical passages, melodies, or rhythms that you intend to record. As you play, FL Studio 12 will capture the MIDI data in real-time, creating a MIDI sequence within the designated MIDI track.
-
Review and Edit the Recording: After recording, you can review and edit the MIDI sequence within FL Studio’s piano roll or MIDI editor. This allows you to refine the timing, note velocities, and other musical elements to achieve the desired musical expression.
-
Save and Store the Recording: Once you’re satisfied with the recorded MIDI input, ensure to save the project to preserve the MIDI sequence for future use. Additionally, consider exporting the MIDI data for use in other music production environments or hardware devices.
By leveraging FL Studio 12’s MIDI recording capabilities, you can capture the essence of your musical performances, refine them with precision, and seamlessly integrate them into your music production projects. Whether you’re composing, arranging, or experimenting with new musical ideas, the ability to record MIDI input empowers you to translate your creativity into tangible musical compositions within FL Studio 12.