Introduction
Are you a Procreate enthusiast looking to add some new fonts to your digital toolkit? Look no further! In this guide, we will walk you through the step-by-step process of downloading and installing fonts to Procreate. With a wide variety of fonts to choose from, you’ll be able to find the perfect style to enhance your digital artwork and make it truly unique. Whether you’re a graphic designer, illustrator, or hobbyist, adding custom fonts to Procreate can take your creations to the next level.
Procreate is a powerful digital art app available on the iPad, favored by both professionals and beginners alike. While the app does come with a range of pre-installed fonts, sometimes you may want to explore beyond the default options and incorporate your own font collection. Luckily, it’s a straightforward process to download and add fonts to Procreate, allowing you to unleash your creativity without limitations.
In this guide, we will cover the necessary steps to download fonts from the web and install them directly into Procreate. Remember, fonts are a crucial element in the world of design and can greatly impact the overall aesthetic of your work. So, let’s dive in and discover how to easily download and utilize fonts in Procreate.
Step 1: Choose a font website
To begin the process of downloading fonts to Procreate, the first step is to choose a font website that provides a wide selection of fonts for free or for purchase. There are several websites available that cater to designers and artists looking to expand their font library.
One popular font website is DaFont.com. DaFont offers an extensive collection of fonts across various categories such as script, handwritten, sans-serif, and more. Each font displayed on the website comes with a preview, allowing you to get a glimpse of how it will look in your artwork. Additionally, DaFont provides information about the font type, such as whether it is free for personal or commercial use.
Another reliable font website is FontSquirrel.com. Font Squirrel not only offers a large selection of high-quality fonts but also ensures that all the fonts available on their website are 100% free for commercial use. This makes it a great resource for designers who need fonts for client projects.
When choosing a font website, it’s important to consider factors such as the variety of font styles, the licensing terms, and the ease of downloading the font files. Make sure to explore different websites to find the perfect font sources that suit your design needs.
Once you have selected a font website that you prefer, you can proceed to the next step: finding the perfect font for your Procreate projects.
Step 2: Find a font you like
Now that you’ve chosen a font website, it’s time to find a font that suits your artistic vision. With a variety of font styles available, you can explore different categories and browse through numerous options until you find the perfect fit for your Procreate projects.
Start by searching for keywords that describe the type of font you’re looking for. Are you in need of a playful handwritten font for a whimsical illustration, or a bold and modern font for a graphic design project? By using specific keywords, you can narrow down your search and find fonts that align with your creative preferences.
Take your time to explore various font styles and consider the overall look and feel you want to achieve. Fonts have the power to convey emotions and enhance the message of your artwork, so it’s crucial to choose one that resonates with your artistic vision.
Additionally, make use of the font previews provided on the website. These previews give you a glimpse of how the font will look in different sizes and styles, allowing you to make an informed decision. Pay attention to the readability, legibility, and overall aesthetic appeal of the font in various contexts.
Remember, finding the perfect font might take some time and experimentation. Don’t be afraid to try different options and see how they complement your artwork. Once you’ve found a font that speaks to you, it’s time to move on to the next step: downloading the font file.
Step 3: Download the font file
After finding the perfect font for your Procreate projects, it’s time to download the font file onto your device. Font websites typically provide a straightforward download process, making it convenient for users to obtain the font files they desire.
To download the font file, locate the download button or link next to the font preview on the font website. Clicking on the download button will initiate the download process, and the font file will be saved to your device.
Depending on the font website and the font file format, you may encounter different file types such as .ttf (TrueType Font) or .otf (OpenType Font) files. Both file formats are widely supported in Procreate, so you can choose whichever option is available.
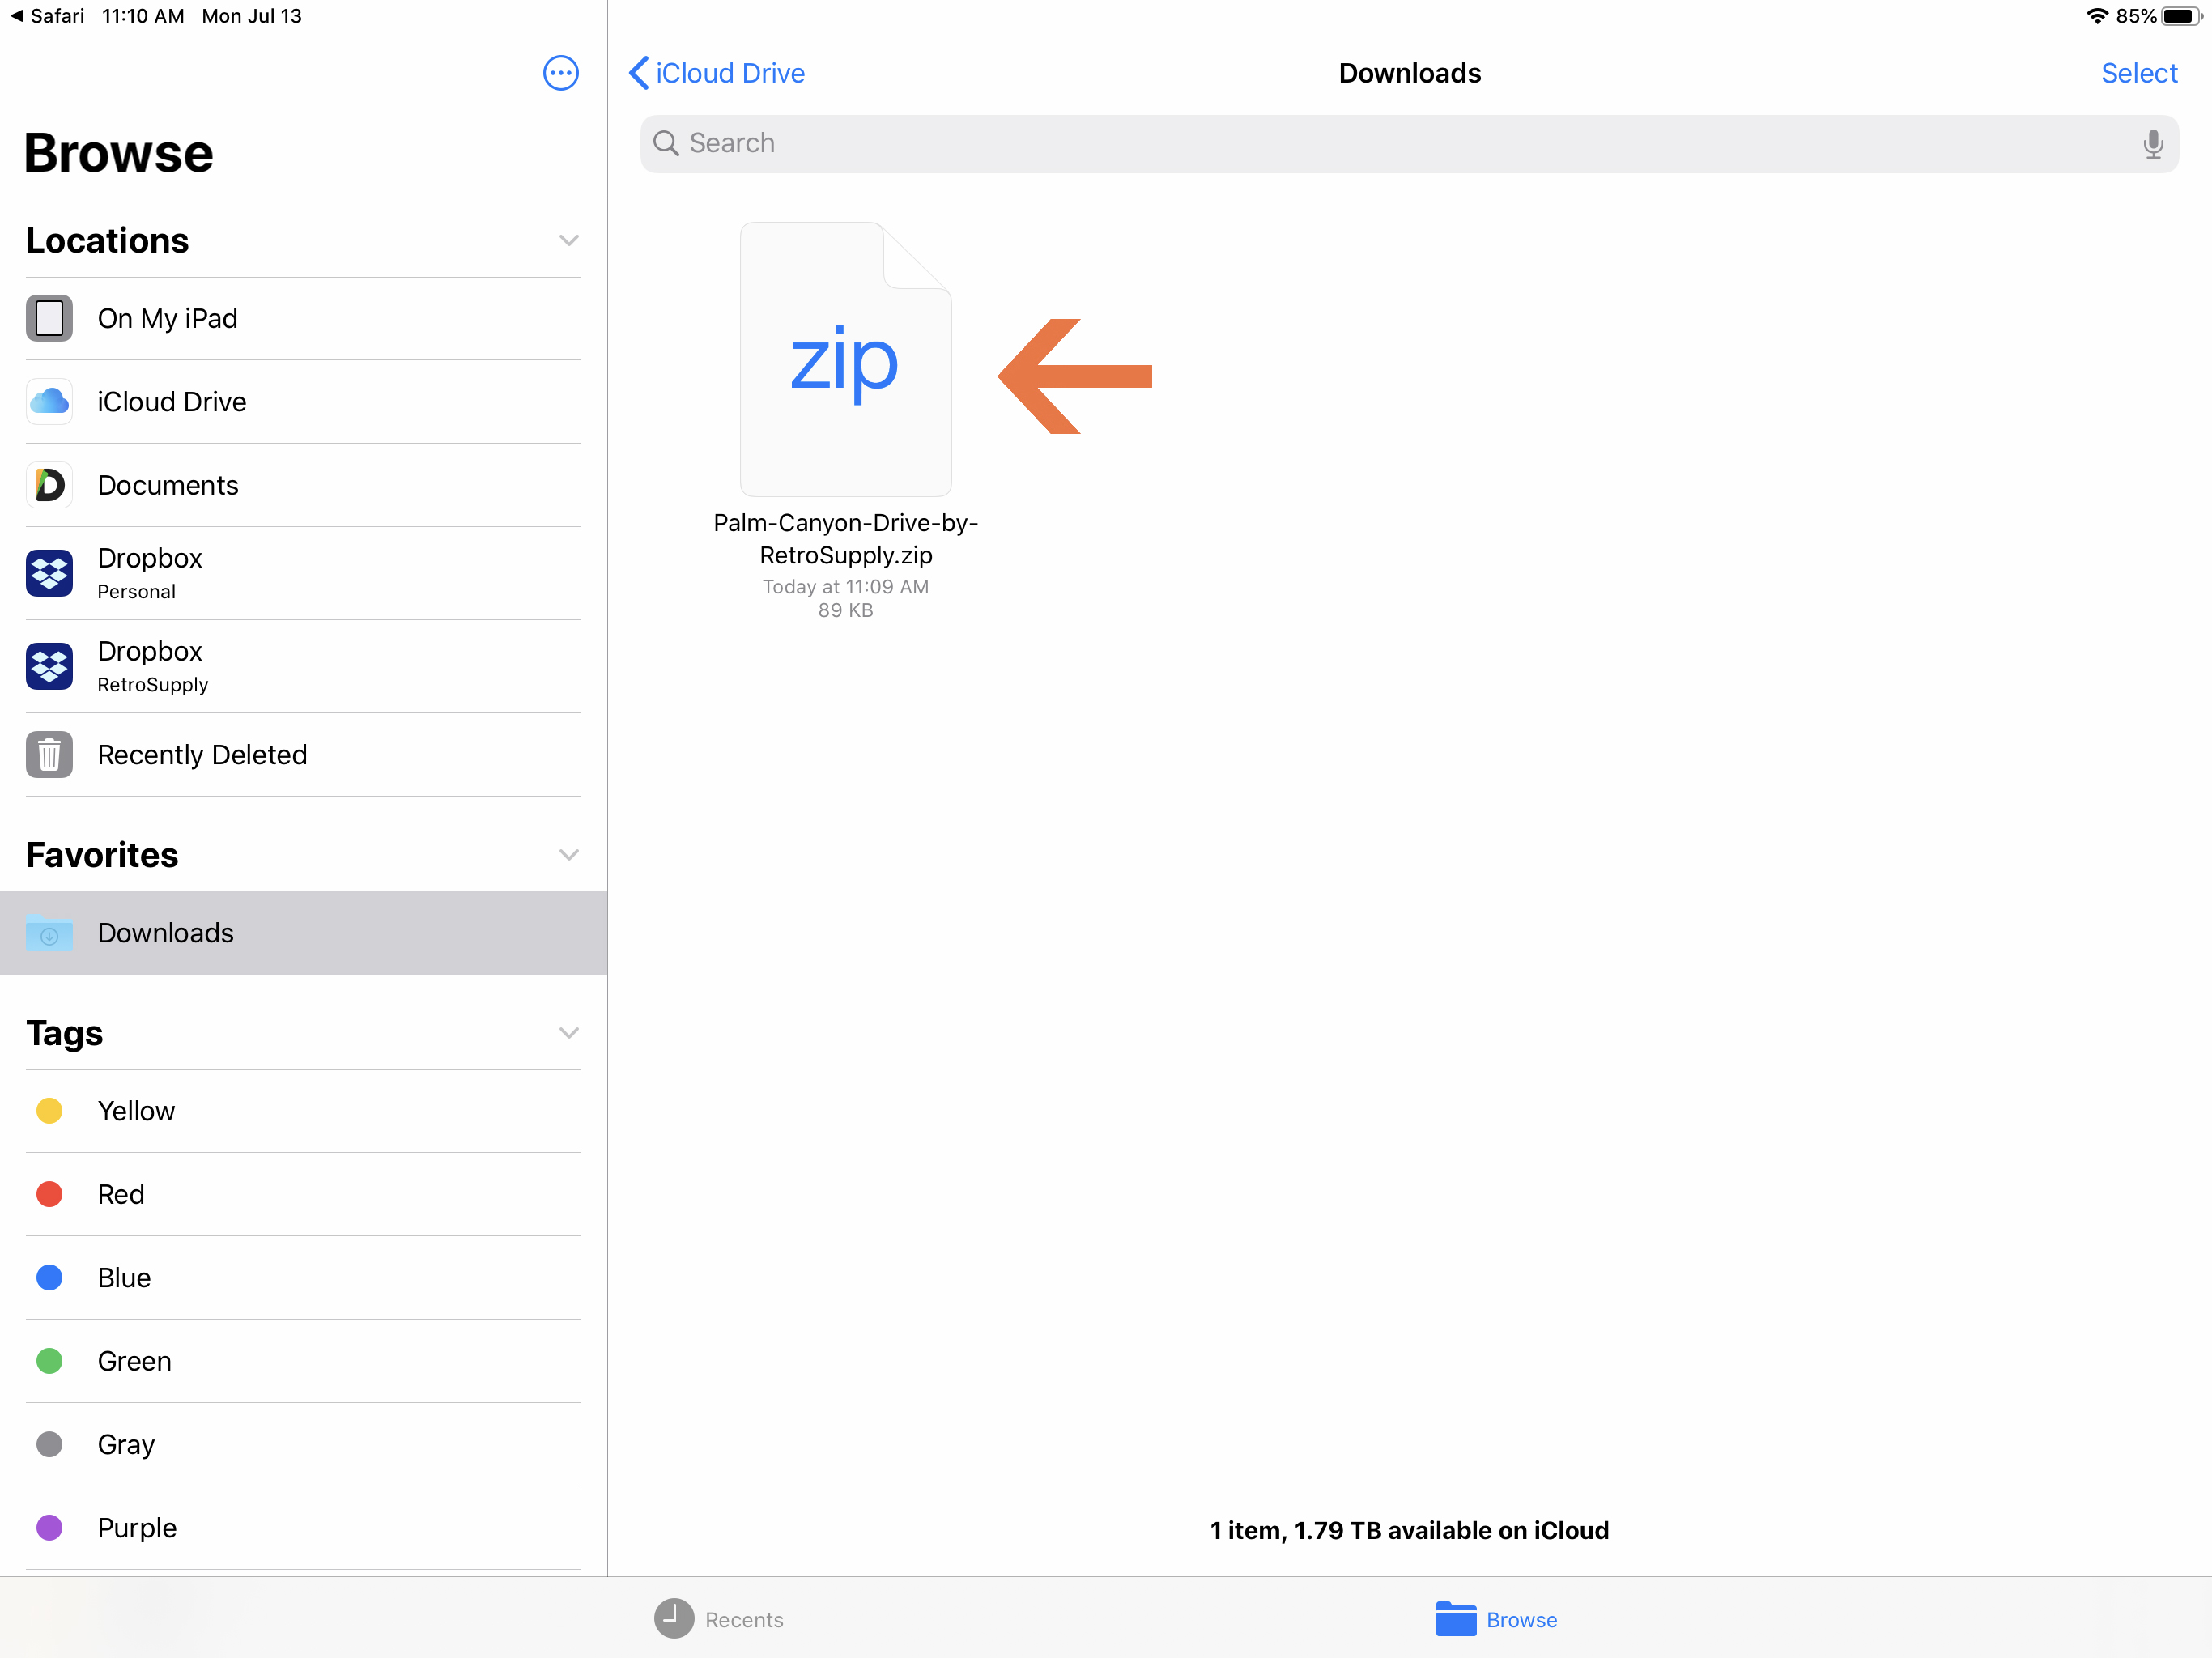
Once the download is complete, the font file will be saved to your device’s download folder or the designated location you have set for downloaded files. Make sure to remember where the font file is saved, as you will need to access it in the next steps of the process.
It’s worth noting that some font websites may require you to create an account or sign in before being able to download font files. This is a common practice to track font usage and ensure compliance with licensing agreements. If necessary, create an account or sign in to proceed with the download.
Congratulations! You have successfully downloaded the font file onto your device. The next steps will guide you through the process of importing the font file into Procreate, where you can begin using it in your digital artwork.
Step 4: Open the Files app on your iPad
To continue with the process of adding fonts to Procreate, you need to open the Files app on your iPad. The Files app is a built-in file management system that allows you to organize and access files stored on your device and in iCloud Drive.
Locate the Files app on your iPad’s home screen and tap on it to open it. The Files app icon resembles a blue folder and can typically be found in the Dock or on one of your home screens.
Once the Files app is open, you will have access to various file locations, including the iCloud Drive, On My iPad, and any other third-party cloud storage providers you may have linked to your device. These file locations are represented as folders that you can navigate and interact with.
Take a moment to familiarize yourself with the Files app interface. You can tap on different folders to open them and navigate through your files. The Files app allows you to create new folders, move files between folders, and manage your files efficiently.
In the next steps, you will use the Files app to import the font file and install it in Procreate. Make sure you have the font file downloaded and know its location within the Files app. If the font file is saved in a specific folder, locate that folder within the Files app before proceeding to the next step.
Opening and navigating the Files app on your iPad is a crucial step in the process of adding fonts to Procreate. Once you are familiar with the app, you are ready to move on to the next step: importing the font file to Procreate.
Step 5: Import the font to Procreate
With the font file ready and the Files app open, it’s time to import the font into Procreate and make it available for use in your digital artwork. Procreate makes it easy to import and install fonts directly from the Files app, allowing you to access them seamlessly within the app.
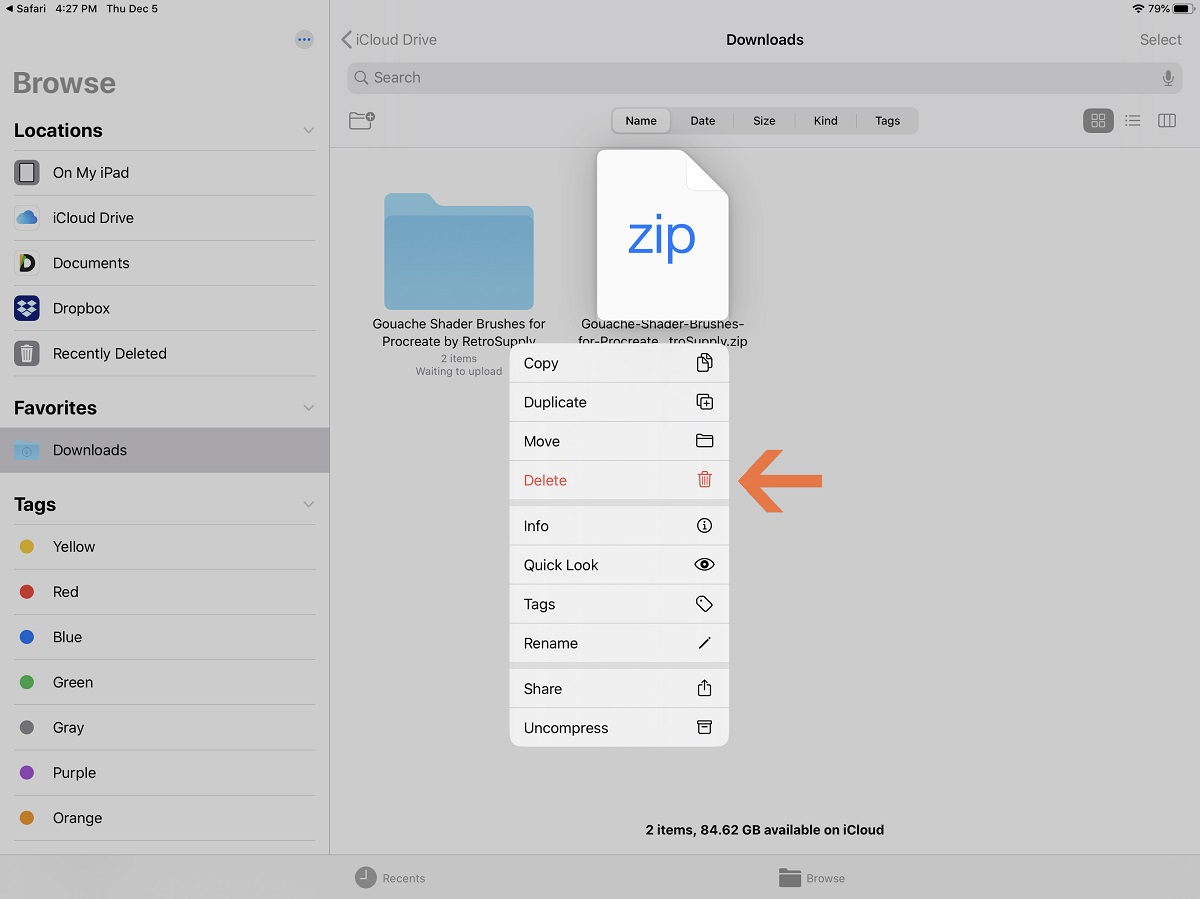
To import the font, navigate to the folder in the Files app where the font file is saved. Once you have located the font file, tap and hold on it until a menu appears. From the menu options, select “Share” or “Open In” to proceed.
A new menu will appear, displaying various app icons. Scroll through the options until you find the Procreate app icon and tap on it to initiate the import process. Procreate will then open, and the font file will be imported into the app.
After the import, Procreate may display a prompt confirming the successful installation of the font. The font file will be automatically installed within Procreate, making it readily available for your artwork.
It’s important to note that once a font is imported into Procreate, it will only be accessible within the app. The font will not be available in other apps or system-wide on your iPad. If you want to use the font in other apps, you will need to import it separately into those apps.
Congratulations! You have successfully imported the font into Procreate. The next step will guide you through the process of installing the font within Procreate, so you can select it and use it in your artwork.
Step 6: Install the font
Now that you have successfully imported the font into Procreate, the next step is to install the font within the app. Installing the font will make it accessible for use in your digital artwork, allowing you to create with your newly added font.
To install the font in Procreate, open the app and create a new canvas or open an existing one. Once you are on the canvas, tap the wrench icon on the top toolbar to open the Actions menu. From the Actions menu, select the “Add” option to view the additional settings.
In the Add menu, tap on the “Add Text” option. This will open the Text Studio, where you can customize and edit text layers in your artwork. At the top of the Text Studio, you will find the font name displayed. Tap on the font name to open the font selection menu.
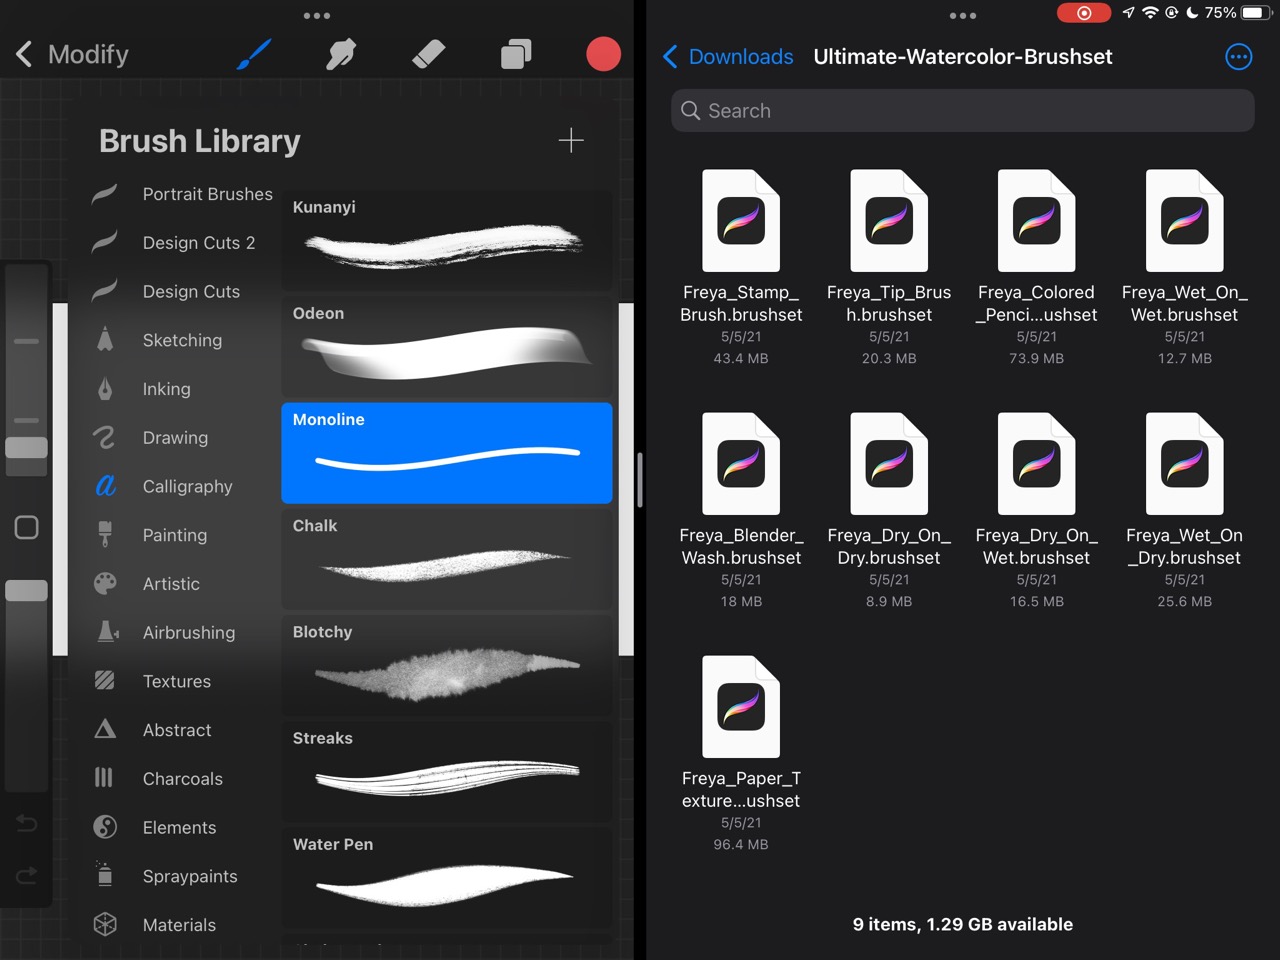
Within the font selection menu, you will see a list of all the installed fonts in Procreate, including the recently imported font. Scroll through the list until you find the desired font and tap on it to select it. The font name will now be displayed at the top of the Text Studio.
Once you have installed the font, you can start using it in your artwork by creating a new text layer or editing an existing one. Select the Text tool from the toolbar, tap on the canvas where you want to add the text, and start typing. The text will appear using the installed font, giving your artwork a unique and personalized touch.
Remember, the font you installed will remain available in Procreate for future projects. You can switch between different installed fonts at any time, giving you the flexibility to experiment and find the perfect typography for each artwork.
Congratulations! You have successfully installed the font in Procreate. With the font installed, you can now unleash your creativity and incorporate it into your digital illustrations and designs.
Step 7: Select and use the font in Procreate
Now that you have installed the font in Procreate, it’s time to select and use the font in your digital artwork. Procreate provides a user-friendly interface that allows you to easily access and incorporate the installed font in your designs.
To select the font in Procreate, open your canvas or create a new one. Tap on the Text tool from the toolbar, and a text entry box will appear on the canvas. In the Text Studio, you will see the font name displayed at the top. Tap on the font name to open the font selection menu.
Within the font selection menu, scroll through the list of installed fonts until you find the one you want to use. Tap on the font to select it, and the font name will be displayed at the top of the Text Studio.
With the font selected, you can now start using it in your artwork. Tap on the canvas where you want to add the text, and a text entry box will appear. Start typing your desired text, and it will appear on the canvas using the selected font.
Procreate offers various options for customizing text, such as adjusting the size, color, and opacity. You can access these options by tapping on the Text tool from the toolbar and then tapping on the text layer on the canvas. This will allow you to make further adjustments and enhancements to your text.
Don’t be afraid to experiment with different font styles and sizes to find the perfect typography for your artwork. Typography plays a significant role in visual communication, and using the right font can greatly enhance the overall impact of your design.
Remember, you can add multiple text layers with different fonts and arrange them creatively to create compositions and designs unique to your style. Procreate offers various layer management tools, allowing you to easily organize and manipulate each text layer.
Congratulations! You have successfully selected and used the font in Procreate. With the ability to add custom fonts to your digital artwork, you can now elevate your designs and create captivating illustrations that truly stand out.
Conclusion
Adding custom fonts to Procreate can significantly enhance your digital artwork and give it a unique touch. With the step-by-step guide provided, you now have the knowledge to download, import, install, and use fonts in Procreate to take your creative projects to the next level.
By choosing a font website, finding fonts that align with your artistic vision, and downloading the font files, you’ve taken the first crucial steps. Opening the Files app on your iPad and importing the font into Procreate allows you to easily access and utilize the font within the app.
Installing the font in Procreate ensures that it is readily available for use in your artwork, and selecting the font gives you the freedom to incorporate it into your designs effortlessly. With the ability to customize and manipulate text layers, you can create stunning compositions that resonate with your audience.
Remember, fonts are powerful tools in visual communication, and the right font can greatly impact the overall aesthetic and message of your artwork. Take the time to explore various font options, experiment with different styles, and find the perfect typography that complements your artistic vision.
Now that you have the skills to add custom fonts to Procreate, don’t be afraid to unleash your creativity and push the boundaries of your digital creations. Enjoy the process of discovering new fonts and incorporating them into your artwork, and watch as your designs flourish with personalized typography.
So go ahead, start expanding your font library and infuse your Procreate projects with the power of custom typography. Elevate your digital artwork, captivate your audience, and let your creativity soar to new heights with the endless possibilities of fonts in Procreate.