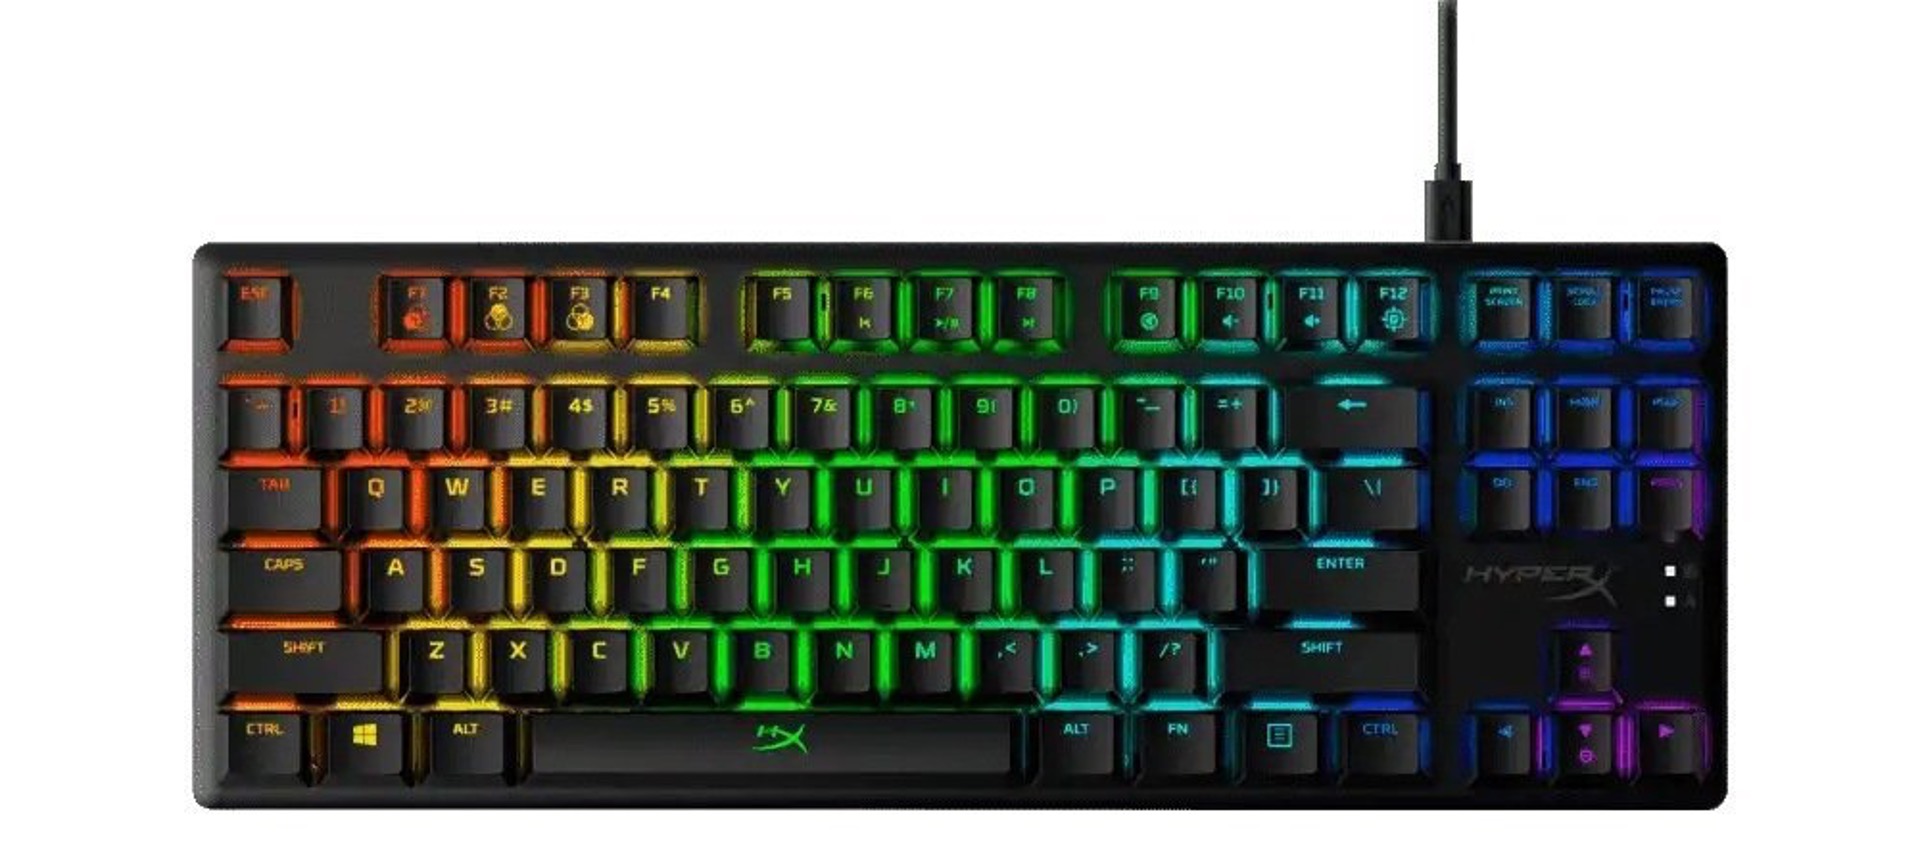
Introduction
Gaming keyboards are essential tools for gamers, offering customizable keys, enhanced responsiveness, and durability. However, over time, debris, dust, and grime can accumulate beneath the keycaps, affecting the keyboard's performance and aesthetics. To maintain optimal functionality and cleanliness, periodic keycap removal and cleaning are necessary. Whether you want to deep clean your gaming keyboard or replace the keycaps with custom ones, it's important to know the proper technique for removing the keys without causing damage.
In this guide, we will walk you through the step-by-step process of safely removing keys from a gaming keyboard. By following these instructions and using the right tools, you can effectively clean your keyboard and ensure that it continues to provide a seamless gaming experience. With a few simple tools and a little patience, you can maintain your gaming keyboard in top condition, free from debris and grime.
Regular maintenance not only prolongs the lifespan of your gaming keyboard but also enhances your gaming experience by ensuring that each keystroke is as responsive as the first. Additionally, by understanding how to remove and clean your keyboard's keys, you can personalize your gaming setup with custom keycaps, allowing you to express your unique style and preferences.
Now, let's dive into the step-by-step process of removing keys from your gaming keyboard and keeping it in pristine condition. With the right tools and a careful approach, you can effectively clean and maintain your gaming keyboard, ensuring that it remains a reliable and high-performing tool for your gaming endeavors.
Step 1: Gather the Necessary Tools
Before embarking on the process of removing keys from your gaming keyboard, it’s essential to gather the necessary tools to ensure a smooth and efficient experience. Here’s what you’ll need:
- Keycap Puller: This specialized tool is designed to safely and easily remove keycaps without causing damage to the keyboard.
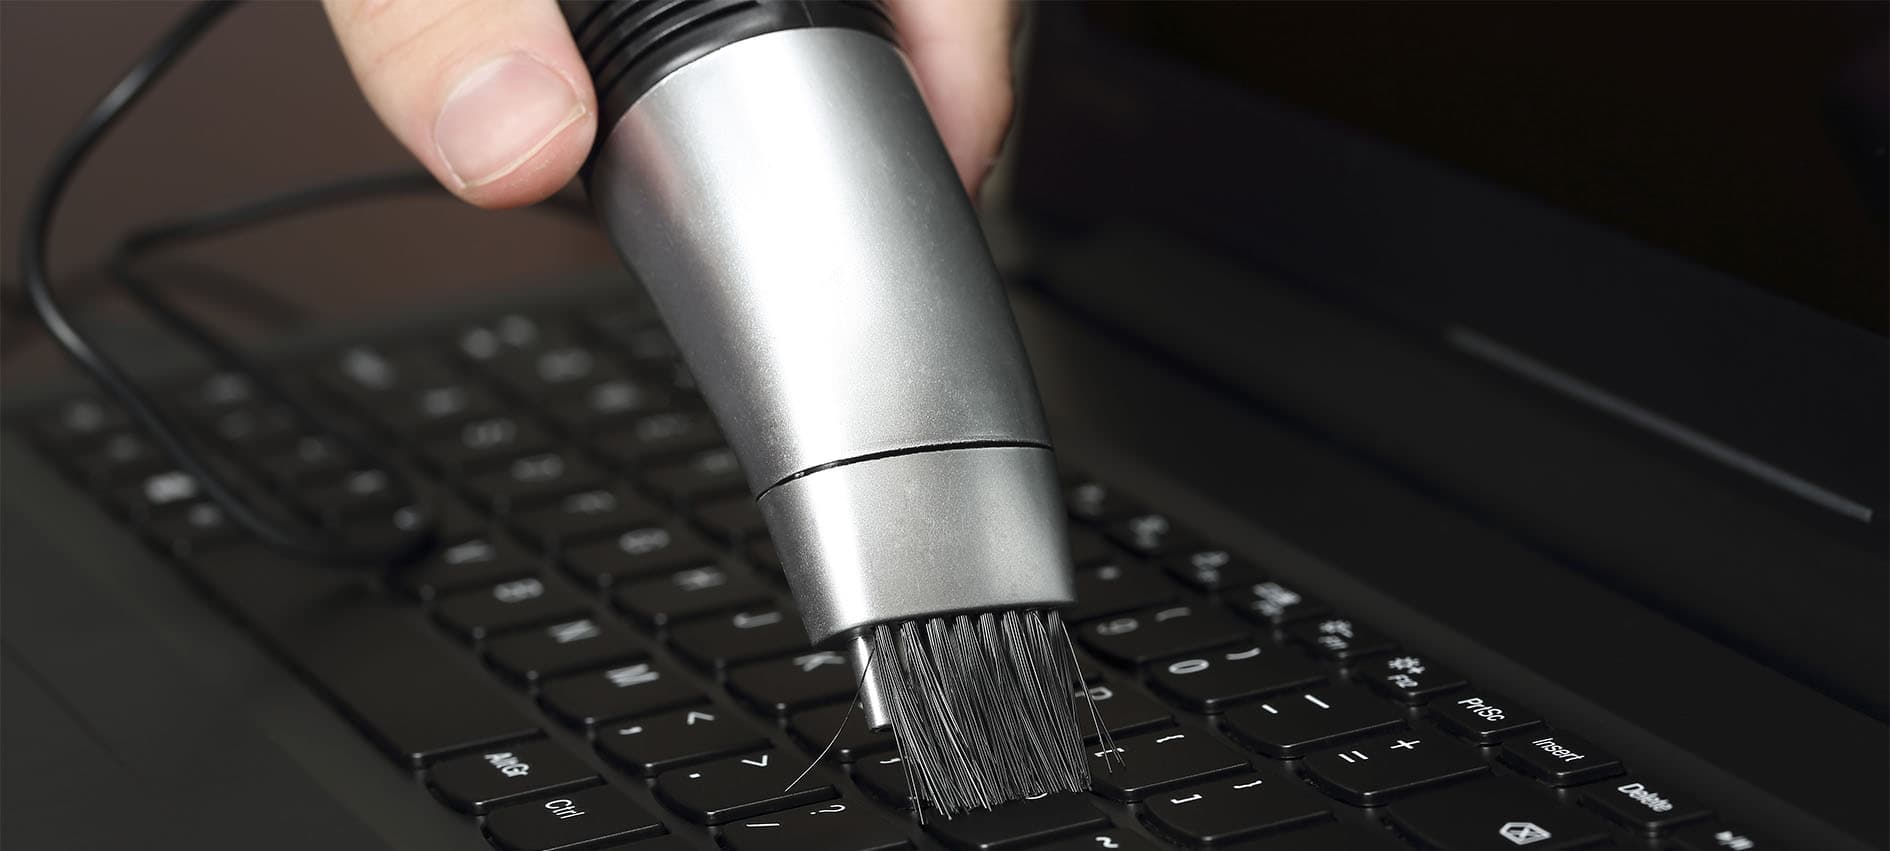
- Compressed Air Canister: Compressed air is effective for dislodging and removing dust and debris from beneath the keycaps.
- Cotton Swabs: These are useful for detailed cleaning in areas that are harder to reach.
- Microfiber Cloth: A soft, lint-free cloth is ideal for wiping down the keyboard and removing any remaining residue.
- Isopropyl Alcohol: A solution of isopropyl alcohol and water can be used to clean the keycaps and keyboard surfaces effectively.
- Plastic Bag or Container: This will serve as a container for the removed keycaps, preventing them from getting lost during the cleaning process.
By ensuring that you have these tools on hand, you can proceed with confidence, knowing that you are well-prepared to safely remove and clean the keys of your gaming keyboard. Having the right tools not only simplifies the process but also minimizes the risk of damaging the keyboard during maintenance.
With the necessary tools at your disposal, you are ready to move on to the next step: removing the keycaps from your gaming keyboard.
Step 2: Remove the Keycaps
Once you have gathered the essential tools, you can proceed to remove the keycaps from your gaming keyboard. Follow these steps carefully to ensure that the keycaps are removed safely and without causing damage to the keyboard.
- Prepare the Workspace: Find a clean, well-lit area to work on your keyboard. It’s important to have ample space to organize the keycaps and perform the cleaning process.
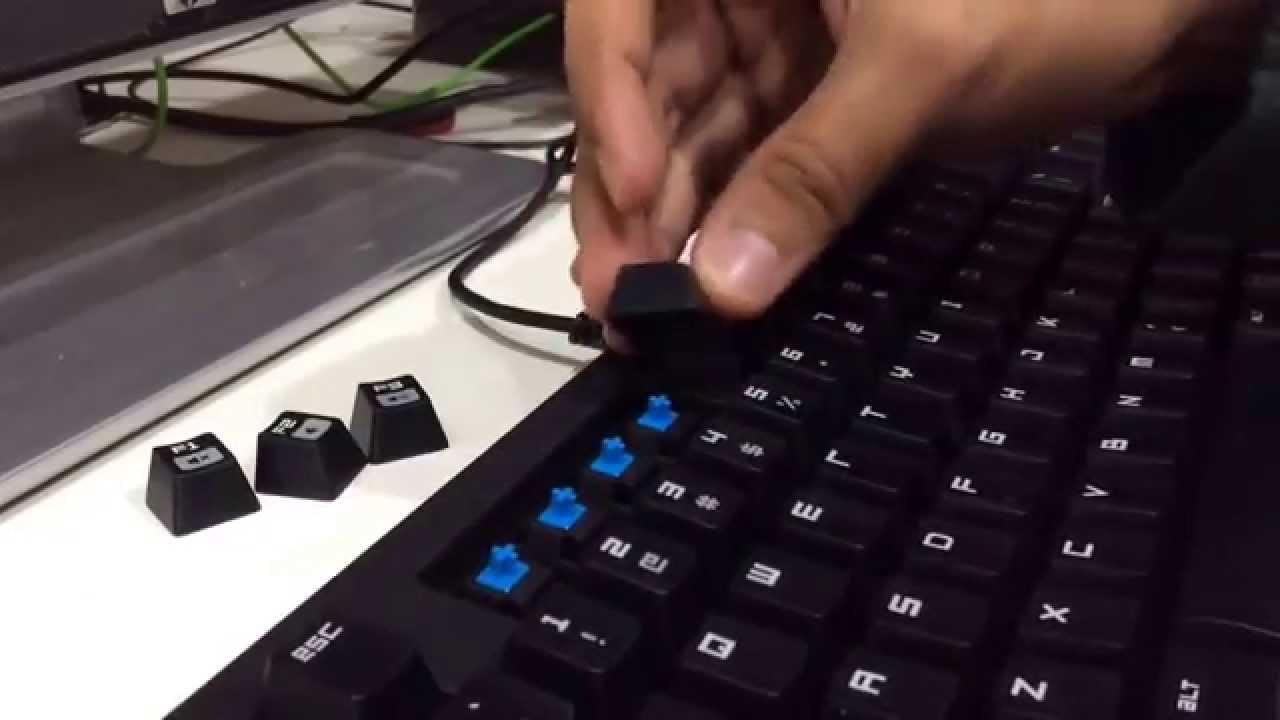
- Use the Keycap Puller: Take the keycap puller and carefully position it around the keycap you want to remove. Ensure that the keycap puller is properly seated on the keycap to prevent any damage to the key or the keyboard.
- Apply Even Pressure: Gently and evenly pull up on the keycap puller to detach the keycap from the switch. Avoid using excessive force, as this can lead to keycap or switch damage.
- Organize the Removed Keycaps: As you remove each keycap, place them in a plastic bag or container to keep them organized and prevent them from getting lost. Consider arranging them in a pattern that matches their original placement on the keyboard to simplify reassembly.
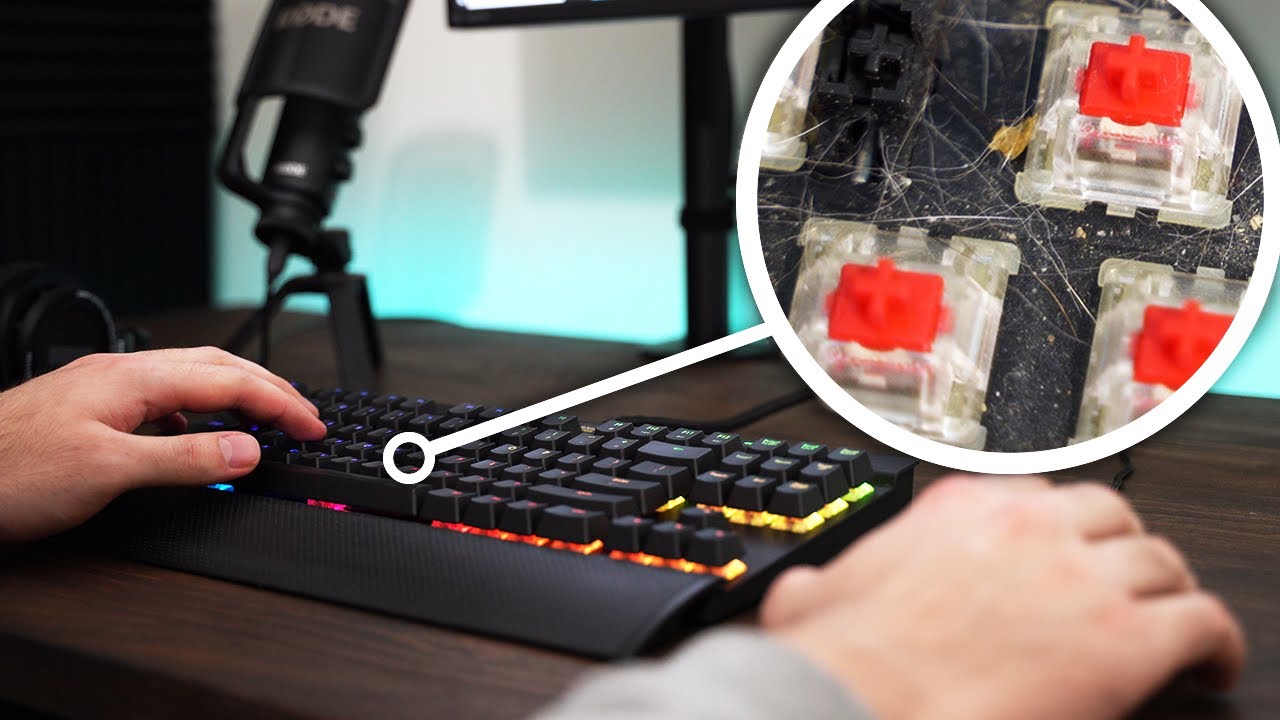
- Inspect for Debris: Once the keycaps are removed, inspect the exposed switches for any debris or dust. Use compressed air to gently blow away any particles that may be present.
By following these steps, you can safely remove the keycaps from your gaming keyboard, preparing it for thorough cleaning and maintenance. Taking a methodical approach and exercising caution during this process will help preserve the integrity of your keyboard while allowing for effective cleaning.
With the keycaps successfully removed, you are now ready to proceed to the next step: cleaning the keyboard to ensure optimal performance and longevity.
Step 3: Clean the Keyboard
With the keycaps safely removed, it’s time to clean your gaming keyboard to eliminate dust, debris, and any accumulated grime. Follow these steps to ensure a thorough cleaning process:
- Use Compressed Air: Direct the nozzle of the compressed air canister at the exposed switches to dislodge and remove any loose debris. Ensure that the air is applied gently to avoid damaging the switches.
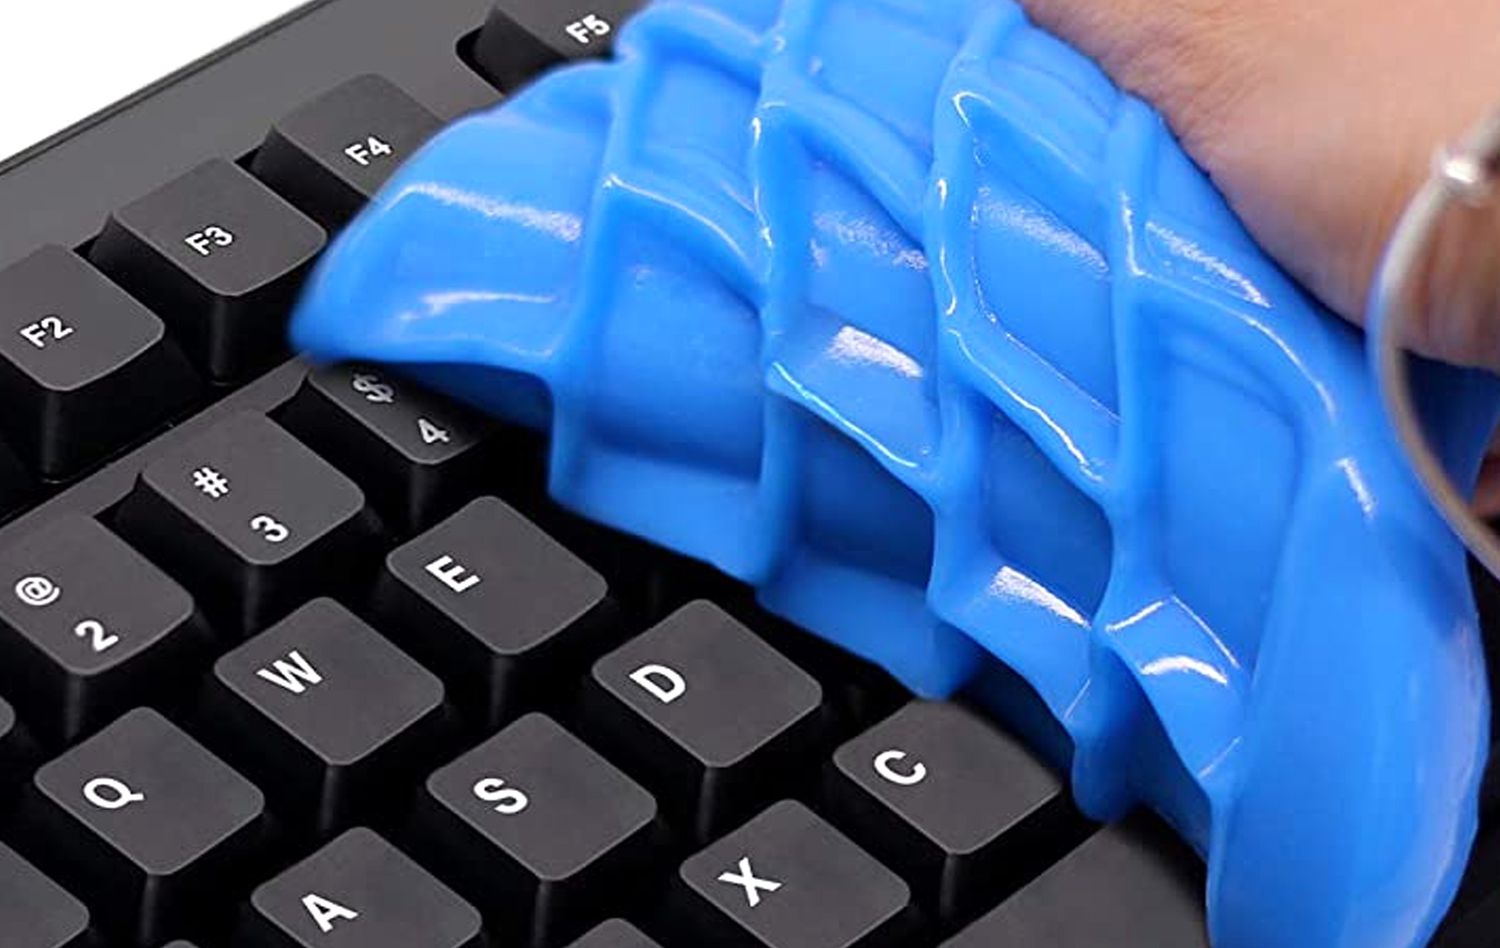
- Clean the Keycaps: Take the removed keycaps and gently clean them with a solution of isopropyl alcohol and water. Use a microfiber cloth or cotton swabs to remove any dirt or residue, ensuring that the keycaps are thoroughly clean before reinstallation.
- Clean the Keyboard Surface: Wipe down the exposed keyboard surface with a microfiber cloth lightly dampened with the isopropyl alcohol solution. Pay close attention to areas surrounding the switches and ensure that any visible grime or residue is effectively removed.
- Inspect for Lingering Debris: After cleaning, inspect the keyboard and switches for any remaining debris. Utilize compressed air and cotton swabs to address any stubborn particles that may still be present.
- Allow for Drying: Ensure that all components, including the keycaps and the keyboard surface, are completely dry before proceeding to reassemble the keyboard. This will prevent any moisture-related issues during reinstallation.
By meticulously cleaning your gaming keyboard, you can ensure that it not only looks pristine but also functions optimally, providing a seamless and responsive experience during your gaming sessions. The cleaning process is essential for maintaining the longevity and performance of your gaming keyboard, making it a worthwhile investment of your time and effort.
With the keyboard thoroughly cleaned and all components dry, you are now prepared to move on to the next step: reassembling the keyboard by reinstalling the keycaps.
Step 4: Reassemble the Keyboard
Now that the keycaps and the keyboard have been meticulously cleaned, it’s time to reassemble the keyboard. Follow these steps to ensure that the reassembly process is carried out effectively:
- Organize the Keycaps: Arrange the cleaned keycaps in the order they will be reinstalled on the keyboard. This can be done by following the layout of the keyboard or referring to any markings or labels on the keycaps.
- Position the Keycaps: Place each keycap over its respective switch, ensuring that it is aligned correctly. Apply gentle pressure to each keycap to secure it in place, taking care not to force or misalign the keycaps during reinstallation.
- Test the Keys: After reassembling the keyboard, test each key to ensure that it registers keystrokes accurately and feels responsive. This will verify that the keycaps have been reinstalled correctly and that the switches are functioning as intended.
- Final Inspection: Conduct a visual inspection of the keyboard to ensure that all keycaps are securely in place and that the keyboard surface is free from any residual marks or streaks. Make any necessary adjustments to the keycaps to achieve uniform alignment.
By methodically reassembling the keyboard and verifying the functionality of each key, you can be confident that your gaming keyboard is ready for seamless and reliable performance. The reassembly process marks the completion of the maintenance journey, ensuring that your gaming keyboard is clean, well-maintained, and prepared to enhance your gaming experience.
With the keyboard successfully reassembled and verified for functionality, you have completed the keycap removal and cleaning process, preserving the performance and aesthetics of your gaming keyboard. Regular maintenance and cleaning will contribute to the longevity of your keyboard, allowing you to enjoy its benefits for an extended period.
Conclusion
Mastering the art of removing and cleaning the keycaps of your gaming keyboard is a valuable skill that not only maintains the keyboard’s functionality but also allows for personalization and customization. By following the step-by-step process outlined in this guide and using the necessary tools, you can effectively maintain your gaming keyboard, ensuring that it remains a reliable and high-performing tool for your gaming endeavors.
Regular maintenance not only extends the lifespan of your gaming keyboard but also enhances your gaming experience by ensuring that each keystroke is as responsive as the first. Additionally, understanding how to remove and clean your keyboard’s keys enables you to personalize your gaming setup with custom keycaps, allowing you to express your unique style and preferences.
By taking a methodical approach and exercising caution throughout the keycap removal and cleaning process, you can preserve the integrity of your gaming keyboard while keeping it free from debris and grime. The meticulous cleaning and reassembly of the keyboard ensure that it not only looks pristine but also functions optimally, providing a seamless and responsive experience during your gaming sessions.
Now that you have completed the keycap removal and cleaning process, your gaming keyboard is ready to provide you with countless hours of immersive and enjoyable gaming. By incorporating regular maintenance into your gaming routine, you can ensure that your keyboard remains a reliable and high-performing asset, contributing to your gaming success and enjoyment.
With the knowledge and skills gained from this guide, you are well-equipped to maintain your gaming keyboard in top condition, free from debris and grime. Whether you choose to deep clean your keyboard, replace keycaps with custom ones, or simply ensure its optimal functionality, the ability to remove and clean the keycaps effectively is a valuable skill for any gaming enthusiast.