Introduction
Restringing an electric guitar is an essential skill that every guitarist should master. Whether you're a seasoned musician or just starting your musical journey, knowing how to properly restring your instrument is crucial for maintaining its playability and ensuring optimal sound quality. Over time, guitar strings accumulate dirt, sweat, and oils from your fingers, leading to a decrease in tone and playability. By regularly restringing your electric guitar, you can breathe new life into your instrument, allowing it to produce the vibrant tones it was designed for.
In this comprehensive guide, we'll walk you through the step-by-step process of restringing an electric guitar, covering everything from gathering the necessary tools and materials to stretching and tuning the new strings. Whether you're preparing for an upcoming performance or simply giving your guitar some much-needed maintenance, restringing your electric guitar is a rewarding and essential skill that will enhance your playing experience.
By following the detailed instructions provided in this guide, you'll not only learn the technical aspects of restringing your electric guitar but also gain a deeper understanding of your instrument's components and how they contribute to its overall sound and playability. So, grab your guitar, set aside some time, and let's dive into the art of restringing an electric guitar.
Step 1: Gather the Necessary Tools and Materials
Before diving into the restringing process, it’s essential to gather all the necessary tools and materials to ensure a smooth and efficient experience. Here’s a comprehensive list of what you’ll need:
- New Guitar Strings: Select the appropriate gauge and type of strings based on your playing style and musical preferences. Whether you prefer the bright sound of stainless steel or the warm tones of nickel, choosing the right strings is crucial for achieving your desired sound.
- Wire Cutters: A pair of wire cutters will be essential for trimming the excess string length once the new strings are installed.
- Tuner: A reliable tuner is necessary for accurately tuning the new strings to the desired pitches. Whether you opt for a clip-on tuner or a smartphone app, ensure that it’s readily accessible during the restringing process.
- Guitar Polish and Cloth: Cleaning the fretboard and guitar body is an integral part of the restringing process. Having guitar polish and a soft cloth on hand will allow you to maintain the instrument’s aesthetics and playability.
- String Winder: While not mandatory, a string winder can significantly expedite the string removal and installation process, making the task more efficient and less strenuous on your fingers.
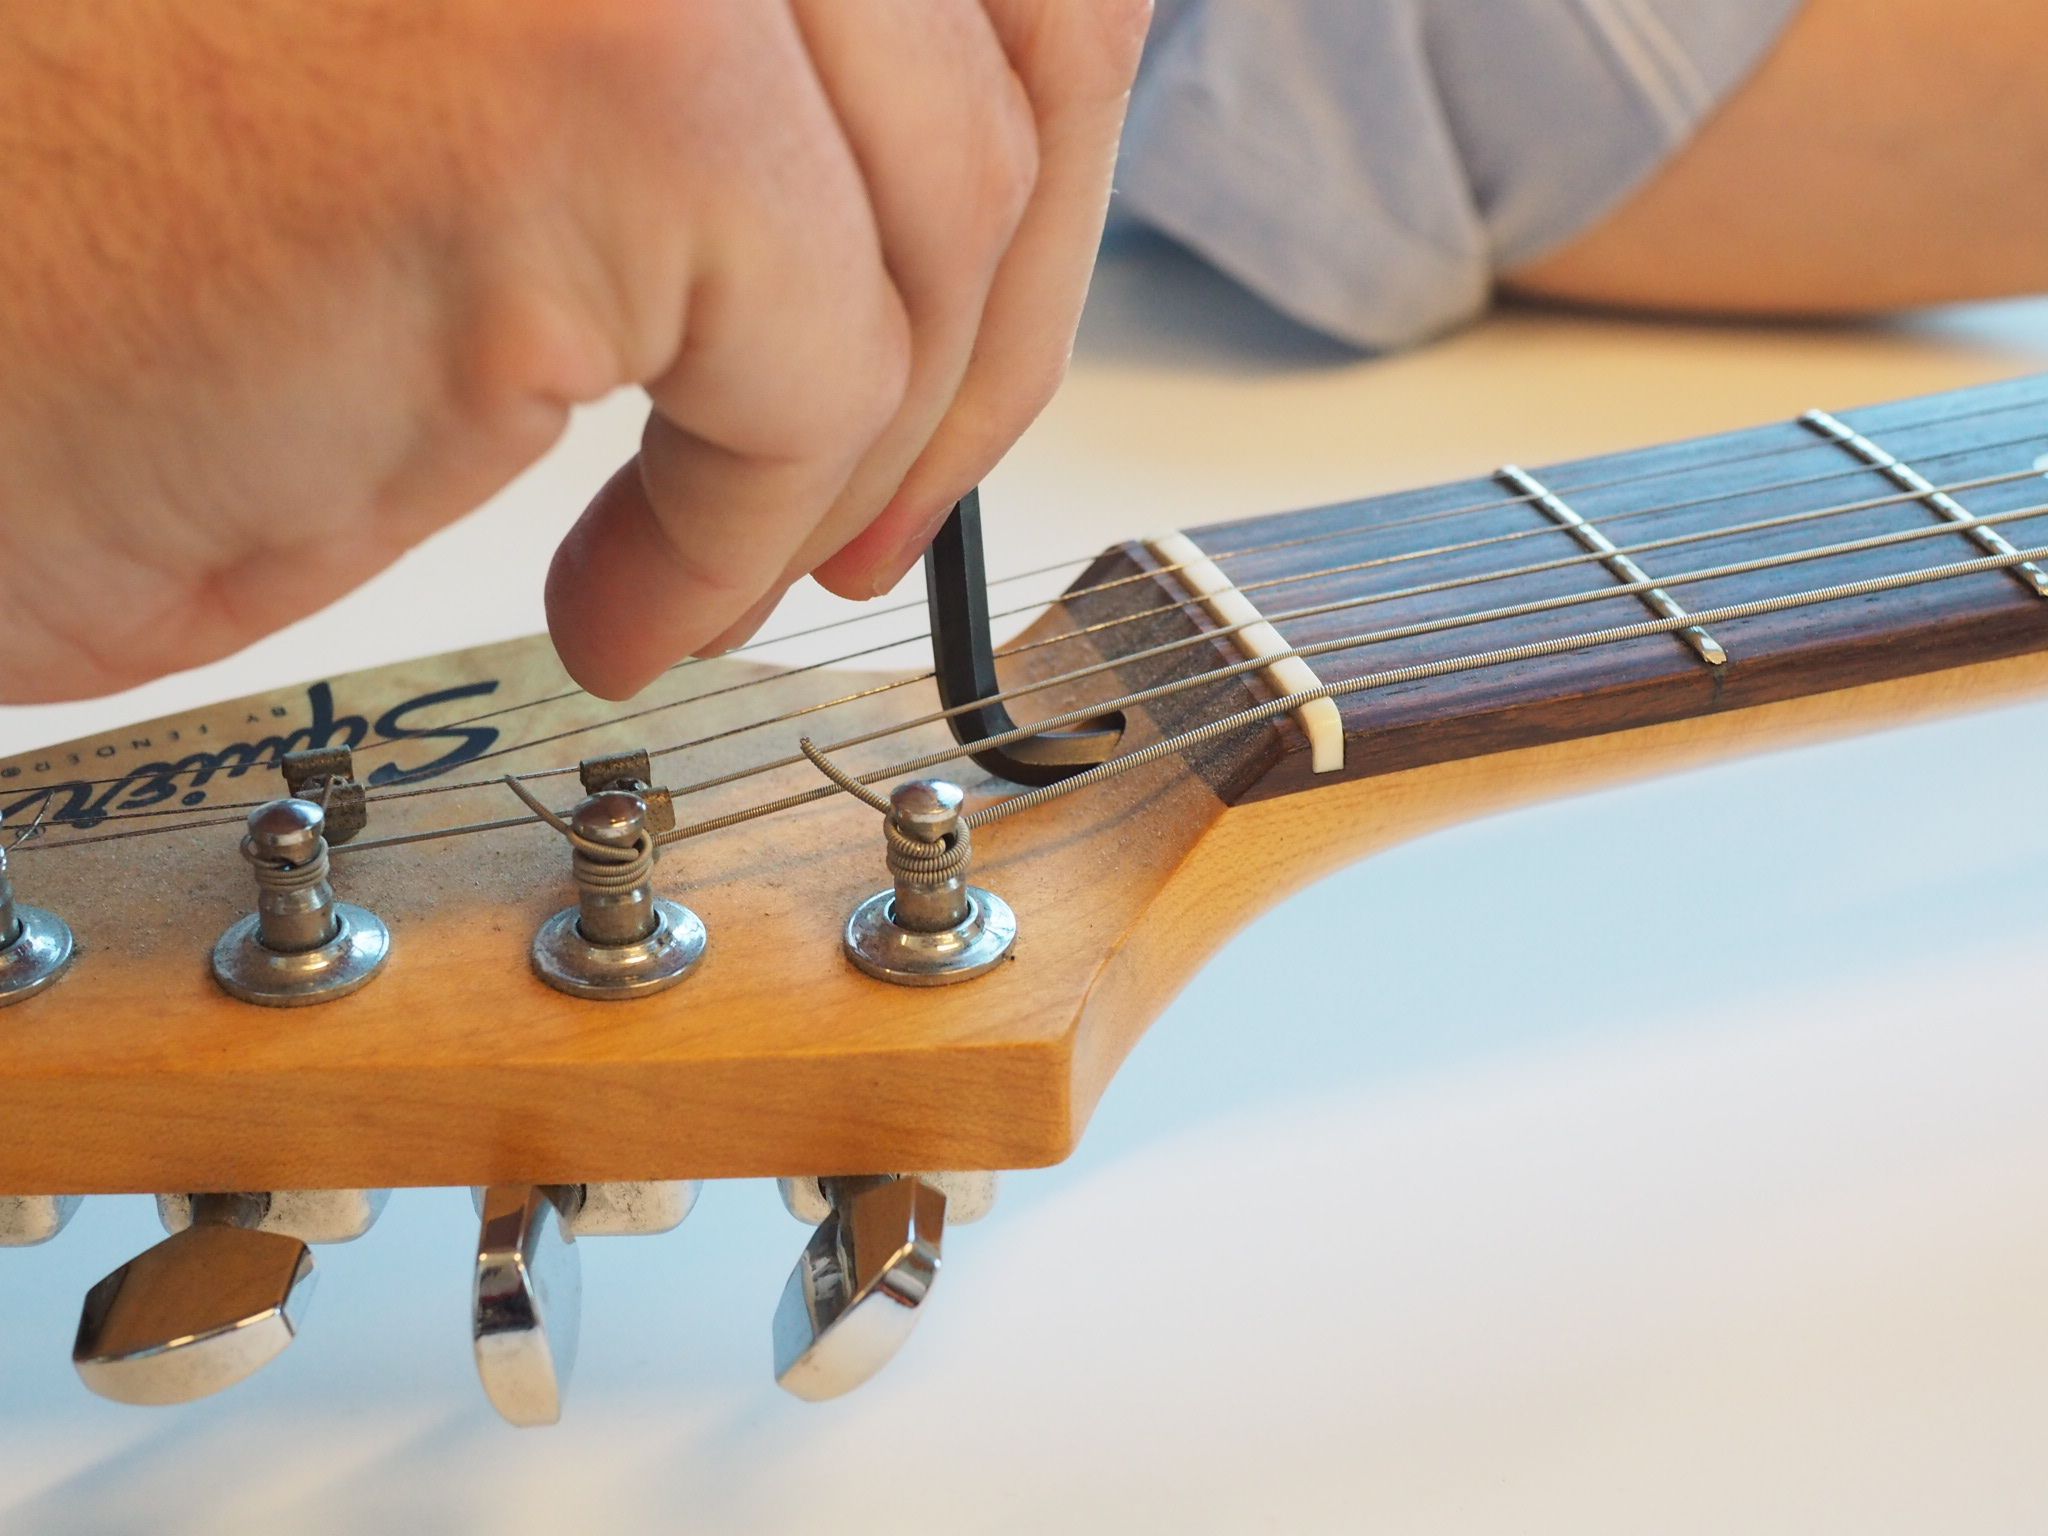
- Truss Rod Wrench: If adjustments to the truss rod are necessary, having the appropriate wrench on hand is vital for maintaining the guitar’s neck relief and playability.
- Work Area: Set up a well-lit and spacious work area where you can comfortably restring your guitar without the risk of misplacing tools or components.
By ensuring that you have all the required tools and materials within reach, you’ll be well-prepared to embark on the restringing journey with confidence and precision.
Step 2: Remove the Old Strings
With your tools and new strings at the ready, it’s time to bid farewell to the old, worn-out strings. Follow these steps to safely and effectively remove the existing strings from your electric guitar:
- Loosen the Tuning Pegs: Begin by turning the tuning pegs to slacken the tension of the old strings. This will make it easier to remove them from the guitar’s tuning posts.
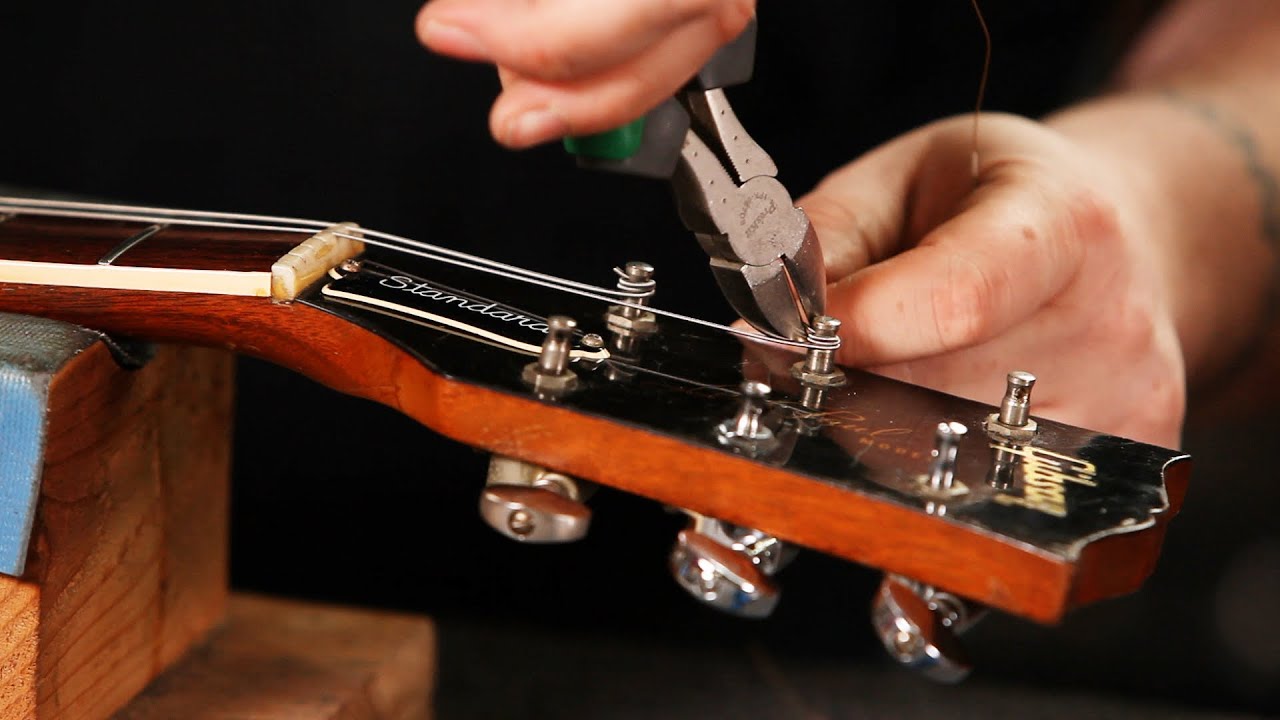
- Trim the Strings: Using wire cutters, carefully trim the strings near the tuning pegs to facilitate their removal. Be cautious during this step to avoid any potential injury from the sharp string ends.
- Unwind the Strings: Unwind the old strings from the tuning posts, making sure to keep them organized and set aside for proper disposal. As you unwind the strings, be mindful of any accumulated dirt or debris around the tuning posts and bridge, and take the opportunity to clean these areas.
- Remove the Bridge Pins (if applicable): If your electric guitar features a bridge with pins securing the strings, gently remove the bridge pins to free the strings from the guitar’s body. Exercise caution to prevent any damage to the bridge or the surrounding finish.
- Clean the Guitar Body and Fretboard: With the old strings removed, take a moment to clean the guitar’s body and fretboard using a soft cloth and guitar polish. This simple maintenance step will help preserve the instrument’s appearance and playability.
By methodically removing the old strings and taking the opportunity to clean the guitar’s components, you’re setting the stage for a seamless transition to the installation of fresh, vibrant strings that will breathe new life into your electric guitar.
Step 3: Clean the Fretboard and Guitar Body
After removing the old strings, it’s essential to devote attention to cleaning the fretboard and guitar body. This maintenance step not only enhances the instrument’s aesthetics but also contributes to its overall playability and longevity. Here’s how to effectively clean these crucial components of your electric guitar:
- Remove Stubborn Grime: Utilize a soft cloth or an appropriate fretboard cleaning tool to gently remove any accumulated dirt, sweat, or residue from the fretboard. Pay particular attention to areas around the frets and the fretboard edges, ensuring a thorough cleaning process.
- Hydrate the Fretboard (if applicable): If you have an unfinished or rosewood fretboard, consider applying a small amount of high-quality fretboard conditioner to nourish and protect the wood. This step helps prevent the fretboard from drying out and maintains its structural integrity.
- Clean the Guitar Body: Using a separate cloth and suitable guitar polish, carefully clean the guitar body to remove any smudges, fingerprints, or dust that may have accumulated. This simple yet impactful step restores the instrument’s luster and preserves its finish.
- Inspect and Address Any Issues: While cleaning, take the opportunity to inspect the fretboard and guitar body for any signs of wear, damage, or loose components. Addressing minor issues promptly can prevent them from escalating into more significant problems down the line.
By meticulously cleaning the fretboard and guitar body, you’re not only maintaining the visual appeal of your electric guitar but also contributing to its overall health and playability. This attention to detail ensures that your instrument remains in prime condition, ready to deliver exceptional tone and performance.
Step 4: Install the New Strings
With the old strings removed and the fretboard and guitar body cleaned, it’s time to breathe new life into your electric guitar by installing a fresh set of strings. Follow these steps to ensure a seamless and effective string installation process:
- Thread the Strings: Begin by threading the ball end of each string through the corresponding bridge or tailpiece, ensuring that they are securely seated in the designated anchor points. For guitars with a tremolo system, ensure that the strings are properly inserted into the tremolo block or bridge saddles.
- Secure the Strings at the Tuning Pegs: Pull the strings taut and insert them through the appropriate tuning pegs, leaving an adequate amount of slack to facilitate the winding process. As you secure the strings, ensure that they are aligned properly to minimize potential tuning and intonation issues.
- Wind the Strings: Utilize a string winder or your fingers to begin winding each string onto its respective tuning peg. Ensure that the winds are neat and consistent, with the strings wrapping downward from the top of the peg for optimal stability and tuning accuracy.
- Trim Excess String Length: Once the strings are securely wound and tuned to pitch, use wire cutters to trim the excess string length near the tuning pegs. Exercise caution to avoid leaving sharp ends that could pose a safety hazard.
By methodically installing the new strings and paying attention to proper winding and tension, you’re setting the stage for a rewarding playing experience with a rejuvenated instrument. The installation process is a pivotal step in the restringing journey, and executing it with precision and care will yield optimal results in terms of tone, playability, and tuning stability.
Step 5: Stretch and Tune the New Strings
After installing the fresh set of strings, it’s crucial to properly stretch and tune them to ensure stability and optimal performance. Here’s how to effectively stretch and tune your new electric guitar strings:
- Initial Stretching: With the strings secured and the excess length trimmed, gently apply pressure along the length of each string to stretch them and minimize initial tuning instability. This step helps preemptively address potential slack and ensures that the strings settle into their optimal tension more quickly.
- Tune to Pitch: Using a reliable tuner, begin tuning each string to its designated pitch, following the standard tuning for your guitar. Take your time to achieve precise tuning, ensuring that the strings are at the correct pitches before proceeding.
- Repeat Stretching and Tuning: After the initial stretching and tuning, repeat the process to further stretch the strings and fine-tune their pitches. This iterative approach helps mitigate the natural settling of the strings and enhances their stability.
- Check Intonation: Once the strings are tuned to pitch, verify the guitar’s intonation by playing fretted notes at various positions along the neck. Adjust the bridge saddles if necessary to optimize the instrument’s intonation, ensuring accurate pitch across the fretboard.
By meticulously stretching and tuning the new strings, you’re laying the foundation for a stable and responsive playing experience. This crucial step ensures that your electric guitar delivers consistent tone and tuning accuracy, empowering you to explore its sonic capabilities with confidence and precision.
Conclusion
Congratulations! You’ve successfully navigated the intricate process of restringing your electric guitar, revitalizing its sonic potential and playability. By following the comprehensive steps outlined in this guide, you’ve not only acquired a valuable skill but also gained a deeper understanding of your instrument’s maintenance and care.
Restringing an electric guitar is more than a routine maintenance task—it’s a ritual that connects you with your instrument on a profound level. As you meticulously removed the old strings, cleaned the fretboard and guitar body, and carefully installed and tuned the new strings, you fostered a deeper appreciation for the craftsmanship and artistry embodied in your guitar.
Furthermore, by maintaining a well-equipped work area and gathering the necessary tools and materials, you demonstrated a commitment to precision and excellence in caring for your instrument. This attention to detail not only enhances the restringing process but also reflects your dedication to achieving the best possible results.
As you embark on your musical journey with freshly strung and finely tuned strings, take a moment to savor the transformative power of this seemingly routine maintenance task. Your electric guitar now stands ready to accompany you on countless musical endeavors, resonating with the vibrant tones and dynamic expressiveness that only a well-maintained instrument can deliver.
Remember, the process of restringing your electric guitar is not merely a technical exercise; it’s a reaffirmation of your commitment to your craft and a celebration of the enduring bond between musician and instrument. Embrace the artistry and joy that emanate from your revitalized electric guitar, and let its renewed vitality inspire your musical pursuits.