Introduction
Restringing an electric guitar, such as a Les Paul, is an essential skill for any guitarist. Whether you're a seasoned musician or just starting your musical journey, knowing how to restring your instrument is a valuable skill that can enhance your playing experience. While the task may seem daunting at first, with the right tools and a bit of guidance, you'll find that it's a manageable and rewarding process.
In this guide, we'll walk through the step-by-step process of restringing an electric guitar, specifically focusing on the iconic Les Paul model. From gathering the necessary tools to making final adjustments, each stage plays a crucial role in ensuring that your guitar sounds its best and stays in optimal condition. By following these instructions, you'll not only learn how to restring your guitar but also gain a deeper understanding of your instrument's mechanics and maintenance needs.
As we delve into the restringing process, keep in mind that patience and attention to detail are key. Taking the time to properly restring your guitar will not only improve its sound quality but also prolong its lifespan. So, without further ado, let's embark on this journey to reinvigorate your Les Paul electric guitar and unleash its full sonic potential.
Gather the Necessary Tools
Before diving into the restringing process, it’s essential to gather the right tools to ensure a smooth and efficient experience. Here’s a list of items you’ll need:
- Electric Guitar Strings: Select a set of high-quality electric guitar strings that are suitable for your playing style and preferences. For a Les Paul, the gauge typically ranges from .010 to .046, but you can choose variations based on your tonal preferences.
- Wire Cutters: Precision wire cutters are essential for trimming the excess string length once they’re installed. Ensure that the cutters are sharp to achieve clean cuts without damaging the strings.
- Tuner: A reliable guitar tuner is crucial for accurately tuning the new strings to the desired pitches. Whether you prefer a digital tuner or a clip-on tuner, having this tool on hand is indispensable.
- Guitar Polish and Cloth: Keeping your guitar clean is an integral part of the restringing process. Have guitar polish and a soft cloth ready to remove any accumulated grime and maintain the instrument’s luster.
- String Winder: While not mandatory, a string winder can significantly expedite the restringing process by swiftly winding the new strings onto the tuning pegs. It’s a time-saving tool that can make the task more efficient.
- Truss Rod Wrench: Depending on your guitar’s setup, you may need a truss rod wrench to make minor adjustments to the neck relief after the new strings are installed. Check your guitar’s specifications to ensure you have the correct wrench size.
- Work Area: Set up a well-lit and spacious work area where you can comfortably restring your guitar without any obstructions. A stable surface and ample lighting will facilitate a hassle-free restringing process.
By having these tools at your disposal, you’ll be fully equipped to tackle the restringing process with confidence and precision. With everything in place, you’re ready to move on to the next step: removing the old strings from your Les Paul electric guitar.
Remove the Old Strings
With your tools gathered, it’s time to begin the restringing process by removing the old strings from your Les Paul electric guitar. Follow these steps to ensure a seamless removal:
- Loosen the Tuning Pegs: Starting with the low E string, use your tuner to detune the string until it’s loose enough to unwind from the tuning peg. Repeat this process for each string, working your way from the thickest to the thinnest string.
- Unwind and Remove the Strings: Once the strings are sufficiently loosened, unwind them from the tuning pegs and bridge. Be cautious when removing the strings, as they may have accumulated dirt and sharp kinks that could scratch the guitar’s finish.
- Discard the Old Strings: After removing all the old strings, dispose of them responsibly. Since used guitar strings can be sharp and pose a safety hazard, it’s important to handle and discard them carefully.
- Clean the Fretboard: With the old strings removed, take a moment to clean the fretboard using a soft, dry cloth. This will remove any accumulated grime and prepare the fretboard for the installation of the new strings.
By carefully following these steps, you’ll successfully remove the old strings from your Les Paul, setting the stage for the next phase of the restringing process. With the old strings out of the way, you’re ready to proceed to the crucial step of cleaning your guitar to ensure optimal performance and longevity.
Clean the Guitar
After removing the old strings, it’s essential to give your Les Paul electric guitar a thorough cleaning to maintain its appearance and playability. Follow these steps to ensure your instrument stays in top condition:
- Remove Dust and Residue: Use a soft, clean cloth to gently wipe down the entire guitar, including the body, neck, and headstock. This will remove any accumulated dust and residue, preventing them from interfering with the restringing process.
- Polish the Body: Apply a small amount of guitar polish to another clean cloth and gently polish the guitar’s body, taking care to avoid areas with unfinished wood or sensitive electronics. This will restore the instrument’s shine and protect its finish.
- Clean the Hardware: Use a cloth dampened with a mild guitar cleaner to wipe down the hardware, such as the bridge, tuners, and pickups. This will remove any grime or oxidation that may have accumulated over time.
- Condition the Fretboard: If your guitar has a rosewood or ebony fretboard, apply a small amount of fretboard conditioner to a clean cloth and rub it into the wood. This will moisturize the fretboard and prevent it from drying out.
- Inspect for Damage: While cleaning your guitar, take the opportunity to inspect it for any signs of damage, such as cracks, loose hardware, or fret issues. Addressing these issues promptly can prevent them from escalating into more significant problems.
By diligently cleaning and inspecting your guitar, you’ll not only maintain its visual appeal but also ensure that it performs optimally with the new strings. With your Les Paul looking and feeling refreshed, you’re now prepared to move on to the next stage: installing the new strings.
Install the New Strings
Now that your guitar is clean and prepped, it’s time to install the new strings on your Les Paul. Follow these steps to ensure a successful string installation:
- Attach the Ball End: Starting with the low E string, insert the ball end into the bridge’s corresponding slot. For guitars with a stop tailpiece, ensure the strings are properly seated in the tailpiece’s anchor studs.
- Thread the Strings: Guide the opposite end of the string up the neck and through the appropriate tuning peg. Leave enough slack to wind the string neatly around the peg without overlapping.
- Secure the Strings: Once the strings are threaded through the tuning pegs, begin winding them in the direction that tightens the string when tuning. Use a string winder for efficiency, ensuring the winds are neat and tight to maintain tuning stability.
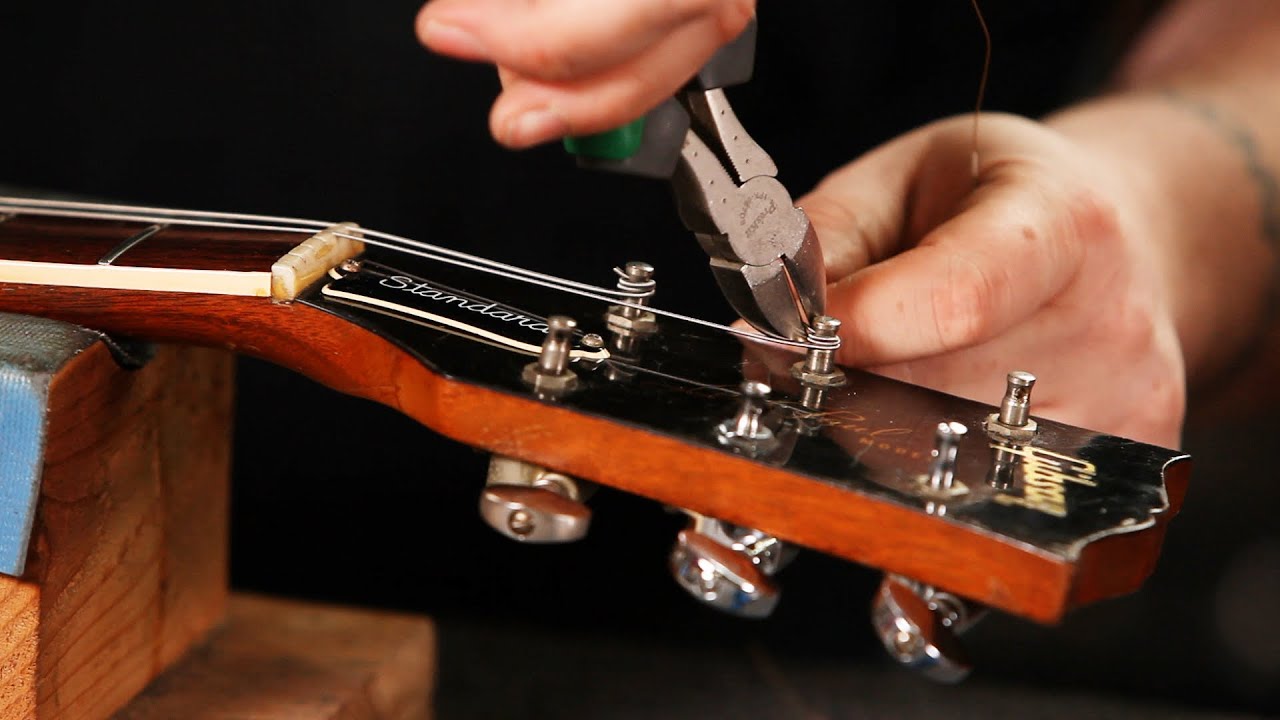
- Cut Excess String: After winding each string, use wire cutters to trim the excess length, leaving a small amount to maintain tension. Be cautious to avoid leaving sharp protrusions that could cause injury or damage the guitar.
- Stretch the Strings: With the strings installed, gently stretch and flex each one to minimize tuning instability. This process helps the strings settle and hold tune more effectively.
By methodically installing the new strings, you’ll set the stage for the final phase of the restringing process: tuning your guitar to achieve optimal pitch and tonal balance. With the new strings in place, your Les Paul will soon be ready to unleash its full sonic potential.
Tune the Guitar
After installing the new strings, tuning your Les Paul electric guitar is the next crucial step to ensure it produces the desired tones and maintains pitch stability. Follow these steps to accurately tune your instrument:
- Initial Tuning: Using your tuner, begin tuning the low E string to the correct pitch. Gradually work your way through each string, ensuring they’re tuned to their respective pitches.
- Check Intonation: Once the strings are tuned to pitch, check the intonation by playing each string at the 12th fret and comparing the pitch to the open string. If there’s a noticeable discrepancy, adjustments may be necessary.
- Fine-Tune the Strings: After checking the intonation, fine-tune each string to ensure precise pitch accuracy. This meticulous tuning process is essential for achieving optimal tonal balance across the fretboard.
- Confirm Stability: Play various chords and scales to confirm that the guitar holds its tuning stability. If any strings exhibit tuning issues, revisit the winding and stretching process to ensure they’re properly seated.
By meticulously tuning your Les Paul, you’ll ensure that it’s ready to deliver exceptional sound quality and responsiveness. With the guitar finely tuned, you’re now poised to make any final adjustments necessary to optimize its playability and tonal characteristics.
Final Adjustments
With the new strings installed and the guitar tuned to perfection, it’s time to make any final adjustments to optimize the playability and performance of your Les Paul electric guitar. Consider the following steps to ensure that your instrument is in top condition:
- Neck Relief: Check the neck relief by visually inspecting the curvature of the neck. If adjustments are needed, use a truss rod wrench to achieve the ideal amount of relief, ensuring comfortable playability and proper string action.
- Action Height: Verify the string action, or the distance between the strings and the frets, to ensure it meets your playing preferences. Make any necessary adjustments to achieve the desired action height across the fretboard.
- Pickup Height: Assess the pickup height to optimize the balance between string output and tonal clarity. Fine-tune the pickup height to achieve the ideal balance and responsiveness for your playing style.
- Intonation: Revisit the intonation and make any required adjustments to ensure that the guitar produces accurate pitches across the entire fretboard. This step is crucial for achieving precise tuning and tonal consistency.
- Test Playability: Play various scales, chords, and melodies to gauge the guitar’s overall playability and tonal characteristics. Make note of any areas that may require further attention or adjustments.
By meticulously addressing these final adjustments, you’ll fine-tune your Les Paul to meet your exacting standards, ensuring that it delivers exceptional playability, tonal balance, and responsiveness. With the restringing process complete and your guitar finely tuned and adjusted, you’re now ready to enjoy the renewed sonic prowess of your Les Paul electric guitar.