Introduction
Learning how to string an acoustic guitar is an essential skill for any guitarist. Whether you’re a beginner or an experienced player, knowing how to properly string your guitar is crucial for maintaining its tone and playability. While it may seem like a daunting task at first, with a bit of practice and patience, you’ll be able to change your guitar strings with ease.
Changing strings not only improves the overall sound quality of your instrument but also enhances the playing experience. Over time, guitar strings accumulate dirt, sweat, and grime, which can cause them to lose their brightness and become dull. Additionally, old strings are more prone to breaking and can negatively impact the tuning stability of your guitar.
In this step-by-step guide, we will walk you through the process of stringing your acoustic guitar. We’ll cover everything from removing the old strings to tuning the new ones. By following these instructions, you’ll be able to restring your guitar and have it sounding fresh and vibrant in no time.
Before we dive into the details, let’s briefly go over the tools and materials you’ll need for this task.
Tools and Materials Needed
To successfully restring your acoustic guitar, you’ll need a few tools and materials. Before you begin the process, gather the following items:
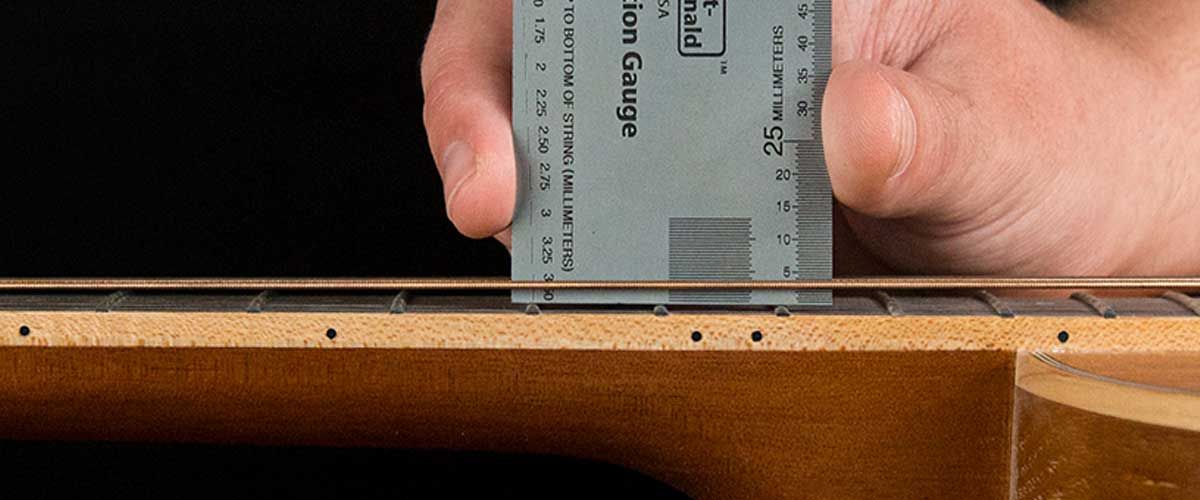
- Guitar strings: Choose a set of strings appropriate for your acoustic guitar. There are different gauges available, so consider your playing style and sound preference.
- Wire cutters/string cutters: These will be used to trim the excess string length.
- Tuner: A digital tuner or tuning app will help you ensure that your guitar is properly tuned.
- String winder: This handy tool makes winding the strings onto the tuning pegs quicker and easier.
- Guitar polish/lubricant: It’s a good idea to have some guitar polish or lubricant on hand to clean and condition your guitar’s fretboard.
- Lint-free cloth: This will be used for wiping down the guitar and removing any excess polish or lubricant.
- Guitar neck support: A guitar neck support or a pillow can help stabilize the neck while you work on restringing your guitar.
Make sure you have these tools and materials ready before you start. Having everything prepared will make the process smoother and more efficient. Now that we have all the necessary equipment, let’s move on to the next step – removing the old strings from your guitar.
Step 1: Remove Old Strings
Before you can restring your acoustic guitar, you’ll need to remove the old strings. Follow these steps to safely and effectively remove the strings:
- Loosen the strings: Start by turning the tuning pegs counterclockwise to loosen the tension on the strings. This will make it easier to remove them later.
- Remove bridge pins (if applicable): If your acoustic guitar has bridge pins, use a bridge pin puller or a pair of pliers to gently pull the bridge pins out of the bridge. Carefully remove each pin one by one.
- Unwind the strings from the tuning pegs: Begin at the headstock and unwind each string from its respective tuning peg. Take your time to prevent any sudden snapping or damage to your guitar.
- Remove the strings from the bridge: After releasing tension from the tuning pegs, pull the strings through the bridge. Again, be gentle to avoid any unnecessary strain on the guitar parts.
- Discard the old strings: Dispose of the old strings responsibly, making sure to keep them away from children and pets.
By following these steps, you’ve successfully removed the old strings from your acoustic guitar. Now, it’s time to move on to the next step – cleaning the guitar and preparing for the new strings.
Step 2: Clean the Guitar
After removing the old strings, it’s important to take some time to clean your guitar before installing the new ones. Cleaning your guitar not only improves its appearance but also helps maintain its condition and playability. Here’s how you can effectively clean your acoustic guitar:
- Prepare your cleaning tools: Get your guitar polish or lubricant, along with a lint-free cloth.
- Apply the polish/lubricant: Put a small amount of guitar polish or lubricant on the cloth. Gently rub it onto the entire surface of your guitar, including the body, neck, and fretboard. This will remove any dirt, fingerprints, or grime that may have accumulated over time.
- Wipe off excess polish/lubricant: After applying the polish or lubricant, use a dry section of the cloth to wipe off any excess residue. Ensure that the guitar is clean and free from any remaining product.
- Clean the fretboard: If your guitar has a wooden fretboard, you can further enhance its condition by using a specific fretboard conditioner. Apply a small amount to the cloth and gently rub it onto the fretboard, taking care not to get any on the strings.
- Buff the guitar: To give your guitar a final shine, use a clean, dry section of the cloth to buff the entire instrument. This will leave it looking fresh and ready for the new strings.
Cleaning your guitar not only improves its appearance but also helps prolong its lifespan. By removing dirt and debris, you can maintain the integrity of the wood and ensure optimal playability. With a clean guitar, you’re now ready to move on to the next step – choosing the right strings for your acoustic guitar.
Step 3: Choose the Right Strings
Selecting the appropriate strings for your acoustic guitar is crucial as it directly affects the sound and playability of your instrument. With various options available in the market, it’s important to consider a few factors when choosing the right strings:
- Gauge: The gauge of the strings refers to their thickness. Lighter gauge strings are easier to play and produce a brighter tone, while heavier gauge strings offer more volume and a fuller sound. Consider your playing style and preferences when deciding on the gauge.
- Material: Acoustic guitar strings are typically made from materials such as bronze, phosphor bronze, or nickel-plated steel. Each material produces a distinct tone, so choose the one that matches your desired sound.
- Coated vs. uncoated: Coated strings have a protective coating that helps prolong their lifespan and maintain their tone for a longer period. Although they are usually more expensive, they may be worth considering if you want strings that last longer.
Experimenting with different string brands and types can also help you find the perfect fit for your playing style and acoustic guitar. Consider seeking advice from fellow guitarists or consulting with a music store professional to further assist in your decision-making process.
Once you have selected the appropriate strings, you’re ready to move on to the next step – anchoring the strings onto the bridge of your acoustic guitar.
Step 4: Anchor the Strings
Anchoring the strings at the bridge of your acoustic guitar is crucial to ensure proper tension and stability. Follow these steps to securely anchor the new strings:
- Start with the thickest string: Begin with the thickest string (usually the lowest-pitched string) and locate the corresponding bridge pin hole.
- Insert the string: Insert the end of the string into the bridge pin hole. Make sure it goes in securely, but avoid forcing it too tightly.
- Secure the string: Gently push down on the bridge pin while pulling the string taut. This will lock the string in place. Repeat this process for each string, working your way from thickest to thinnest.
Keep in mind that some acoustic guitars may not require bridge pins, as the strings are tied directly to the bridge. In such cases, you will need to follow the manufacturer’s instructions or consult a professional for guidance on properly anchoring the strings.
Once you have anchored all of the strings, it’s time to move on to threading them through the tuning pegs – the next step in the restringing process.
Step 5: Thread the Strings Through the Tuning Pegs
Threading the strings through the tuning pegs is a crucial step in restringing your acoustic guitar. Properly threading the strings will ensure accurate tuning stability. Follow these steps to thread the strings through the tuning pegs:
- Start with the thickest string: Begin with the thickest string (usually the lowest-pitched string). Insert the end of the string through the corresponding tuning peg hole.
- Create a bend: Pull the string through the hole, leaving a small tail of about 2-3 inches. Create a bend in the string to prevent it from slipping out of the hole.
- Wrap the string: Hold the string firmly against the pegboard and begin winding it around the tuning peg in a clockwise direction. Make sure the string wraps underneath itself to provide proper tension.
- Continue winding: Keep winding the string until it reaches the desired tension. Be careful not to twist or overlap the string while winding, as this may cause tuning issues.
- Repeat for other strings: Repeat these steps for each string, working your way from thickest to thinnest. Ensure that each string is securely threaded and properly tensioned.
As you thread the strings, it’s essential to maintain even tension and avoid excessive slack or tightness. This will ensure that your guitar stays in tune and provides optimal playability.
Now that you’ve successfully threaded all the strings through the tuning pegs, you’re ready to move on to the next step – tuning the guitar to its proper pitch.
Step 6: Tune the Guitar
Now that you’ve threaded the new strings through the tuning pegs, it’s time to tune your acoustic guitar to the proper pitch. Tuning ensures that each string produces the correct note, allowing your guitar to sound harmonious and in tune with other instruments. Follow these steps to tune your guitar:
- Begin with the thickest string: Start by plucking the thickest string (usually the low E string) and listen to its pitch. If it sounds too low or too high, turn the corresponding tuning peg clockwise to increase the pitch or counterclockwise to decrease it.
- Continue to the next string: Move on to the next string (the A string) and repeat the process of plucking and adjusting the tension until it matches the correct pitch.
- Tune the remaining strings: Proceed to tune the rest of the strings (D, G, B, and high E) in the same manner, checking their pitch and making necessary adjustments using the tuning pegs.
- Use a tuner: For beginners or those who prefer precise tuning, consider using a digital tuner or a tuning app. These tools detect the pitch of your strings and guide you to the correct tuning. Follow the instructions provided by the tuner to ensure accurate tuning.
- Check your tuning: Once you’ve tuned all the strings, go through them again to double-check their pitch. Make any minor adjustments as needed.
Remember to be patient while tuning your guitar, as it may take a few attempts to achieve the desired pitch. Take your time to ensure that each string is correctly tuned for optimal sound quality.
With your guitar now in tune, it’s time to move on to the next step – stretching and settling the strings to promote stability and better performance.
Step 7: Stretch and Settle the Strings
After tuning your acoustic guitar, it’s important to stretch and settle the strings to ensure stability and maintain the tuning for longer periods. New strings often need some time to settle and adjust to the tension. Follow these steps to stretch and settle the strings:
- Gently stretch each string: Starting with the thickest string, use your fingers to gently pull and stretch each string away from the fretboard. Do this along the entire length of the string to release any excess tension.
- Re-tune the guitar: After stretching each string, re-tune the guitar using the same process as in Step 6. Strings may have slightly detuned during the stretching process, so adjusting their pitch is necessary.
- Repeat the stretching process: Continue stretching and re-tuning each string until the guitar holds its tuning consistently. The more you repeat this process, the better the strings will settle.
Stretching the strings helps to minimize the chances of them going out of tune while playing. It allows the strings to adjust and settle into their proper tension, resulting in better tuning stability and overall playability.
Once you’ve gone through the stretching and re-tuning process multiple times and feel satisfied with the tuning stability, you can proceed to the next step – trimming the excess length of the strings.
Step 8: Trim Excess String Length
After restringing and tuning your acoustic guitar, it’s time to trim the excess length of the strings. Trimming the excess helps prevent the strings from getting in the way or potentially causing injury. Follow these steps to trim the excess string length:
- Secure the guitar: Place the guitar on a stable surface or use a guitar neck support to keep it steady.
- Locate the excess string length: Identify the section of each string that extends beyond the tuning pegs.
- Use string cutters: With a pair of wire cutters or string cutters, carefully cut the excess string length. Be cautious not to cut too close to the tuning peg, as this could cause the string to slip out.
- Dispose of the trimmed strings: Safely discard the cut pieces of string, taking care to keep them out of reach of children and pets.
Trimming the excess string length not only improves the overall appearance of your guitar but also reduces the risk of accidentally hitting or scratching the guitar’s body. Ensure that you cut the strings cleanly and avoid leaving sharp edges that may cause discomfort while playing.
Congratulations! You have successfully restringed your acoustic guitar, tuned it, and trimmed the excess string length. Take a moment to admire your work and test the playability and sound of your freshly restrung guitar.
Remember, this process may require a bit of practice and patience, but with time, you’ll become more comfortable and proficient at restringing your guitar.
Now you can enjoy playing your acoustic guitar with a fresh set of strings, ensuring optimal tone, playability, and overall musical enjoyment.
Conclusion
Restringing an acoustic guitar may seem like a daunting task, but with the right tools, steps, and a little practice, it becomes a straightforward process. By following the steps outlined in this guide, you can successfully restring your acoustic guitar and enjoy the benefits of improved sound quality, playability, and tuning stability.
Remember, it’s important to choose the right strings for your guitar based on gauge, material, and personal preference. Anchoring the strings securely at the bridge and threading them properly through the tuning pegs are crucial for maintaining stable tension and sound integrity.
Once the strings are in place, tuning your guitar accurately ensures proper pitch and harmony. Stretching and settling the strings help to maintain tuning stability over time, while trimming the excess string length eliminates any potential hazards and enhances the aesthetics of your guitar.
Taking the time to properly restring your acoustic guitar leads to a more enjoyable playing experience, allowing you to explore your musical creativity and express yourself fully. With fresh strings, your guitar will sound vibrant, responsive, and ready for countless hours of musical expression.
So, don’t hesitate to restring your acoustic guitar when it’s time for a change. With the knowledge and steps provided in this guide, you have what it takes to become proficient at restringing and maintaining your instrument. Enjoy the process and happy playing!