Introduction
Restringing an acoustic guitar is an essential maintenance task that every guitar player should know how to do. Over time, guitar strings can become worn out, lose their tone, or even break. Restringing your guitar not only ensures that it sounds its best but also prolongs the life of your instrument.
When it comes to restringing an acoustic guitar, there are two common methods: using bridge pins and restringing without bridge pins. While using bridge pins is the traditional way, restringing without them offers some advantages, such as faster string changes and a more balanced tension across the guitar’s bridge.
In this article, we will focus on how to restring an acoustic guitar without bridge pins. Whether you’re a beginner or an experienced player, this step-by-step guide will walk you through the process, ensuring that you do it correctly and achieve optimal results.
Before we delve into the steps, let’s take a look at the tools you’ll need to restring an acoustic guitar without bridge pins:
- Guitar strings of your choice (make sure they are the correct gauge for your guitar)
- Wire cutters or string cutter
- Guitar tuner
- Guitar peg winder (optional but recommended for faster restringing)
- Guitar polish and cloth (optional for cleaning the guitar while the strings are off)
Having these tools ready will ensure a smooth restringing process and help you achieve the best possible results for your acoustic guitar. Now, let’s move on to the first step: removing the old strings.
Tools you’ll need
Before you begin restringing your acoustic guitar without bridge pins, it’s important to gather all the necessary tools. Having the right tools will make the process easier and ensure that you can complete the task efficiently. Here are the essential tools you’ll need:
- Guitar strings: Choose a set of acoustic guitar strings that are suitable for your playing style and sound preferences. Make sure they are the correct gauge for your guitar, as using the wrong gauge can affect the tone and playability of your instrument.
- Wire cutters or string cutter: These tools are essential for cutting the old strings and trimming the excess length of the new strings. Make sure your wire cutters or string cutter are sharp and capable of cleanly cutting through guitar strings.
- Guitar tuner: A reliable guitar tuner is essential for achieving accurate pitch and ensuring that your guitar is in tune after restringing. You can use a digital tuner, a tuner app on your smartphone, or a clip-on tuner that attaches to the headstock of your guitar.
- Guitar peg winder (optional): While not necessary, a guitar peg winder can significantly speed up the restringing process. It allows you to quickly wind the new strings around the tuning pegs, saving you time and effort. If you don’t have a peg winder, you can still manually wind the strings, although it may take a bit longer.
- Guitar polish and cloth (optional): This is not a necessary tool for restringing, but while the strings are off, it’s a great opportunity to clean your guitar. Guitar polish can help remove any smudges or dirt that may have accumulated on the body, while a soft cloth is ideal for gently buffing and polishing the instrument.
By having these tools ready, you’ll be well-prepared to restring your acoustic guitar without bridge pins. Now that you know what tools you need, let’s move on to the next section: removing the old strings.
Step 1: Removing the old strings
Before you can restring your acoustic guitar without bridge pins, you need to remove the old strings. Follow these steps to safely and efficiently remove the old strings:
- Loosen the strings: Begin by turning the tuning pegs counterclockwise to loosen the tension of each string. This will make it easier to remove the strings without causing any damage to your guitar.
- Unwind the strings at the headstock: Once the strings are sufficiently loose, unwind them from the tuning pegs. You can do this by holding the string with one hand near the tuning peg and using your other hand to unwind it in a counterclockwise direction. Continue this process for each string until they are all unwound.
- Remove the bridge pins (if applicable): If your acoustic guitar has bridge pins, gently push them out from the bridge using a bridge pin removal tool or a small, thin object such as a paperclip. Be careful not to apply too much pressure or damage the bridge. Set the bridge pins aside in a safe place.
- Remove the strings from the bridge: Once the bridge pins (if applicable) are removed, gently pull the strings out from the bridge. It’s important to do this slowly and carefully to avoid any damage to the bridge or the guitar body.
- Clean the guitar (optional): With the old strings removed, it’s a good opportunity to clean your guitar. You can use a guitar polish and a soft cloth to clean the body, fretboard, and any other areas that may have accumulated dirt or grime. This will help keep your guitar in top condition.
By following these steps, you have successfully removed the old strings from your acoustic guitar. Now you’re ready to move on to the next section: preparing the new strings.
Step 2: Preparing the new strings
Now that you have removed the old strings from your acoustic guitar, it’s time to prepare the new strings. Here’s what you need to do:
- Inspect the new strings: Before proceeding, examine the new set of strings to ensure they are free from any defects or damage. It’s essential to use high-quality strings to maintain the best sound and playability.
- Unwind the new strings: Take one of the new strings and unwind it from its packaging. Be careful not to kink or twist the string as you unravel it.
- Identify the correct string for each position: Most sets of acoustic guitar strings are labeled with numbers or letters to indicate which string corresponds to which position on the guitar neck. Make sure you match the correct string with the corresponding position, starting from the thinnest string (high E) to the thickest string (low E).
- Cut the strings to the desired length: Using wire cutters or a string cutter, measure and cut the first string to the appropriate length. Leave some excess length to ensure you have enough string to work with while securing it to the bridge.
- Repeat for the remaining strings: Repeat the previous step for each of the remaining strings, making sure to cut them to the appropriate lengths for their respective positions on the guitar neck.
- Optional: Stretch the strings (recommended): To minimize future tuning issues, it’s recommended to stretch the strings before installing them. Hold each string firmly at the twelfth fret and gently pull it upward and away from the guitar body, applying slight tension. Repeat this process for each string a few times to stretch them out.
By following these steps, you have now prepared the new strings for installation on your acoustic guitar. In the next section, we will cover how to feed the strings through the bridge.
Step 3: Feeding the strings through the bridge
Feeding the strings through the bridge is an important step in restringing an acoustic guitar without bridge pins. Follow these steps to properly thread the new strings through the bridge:
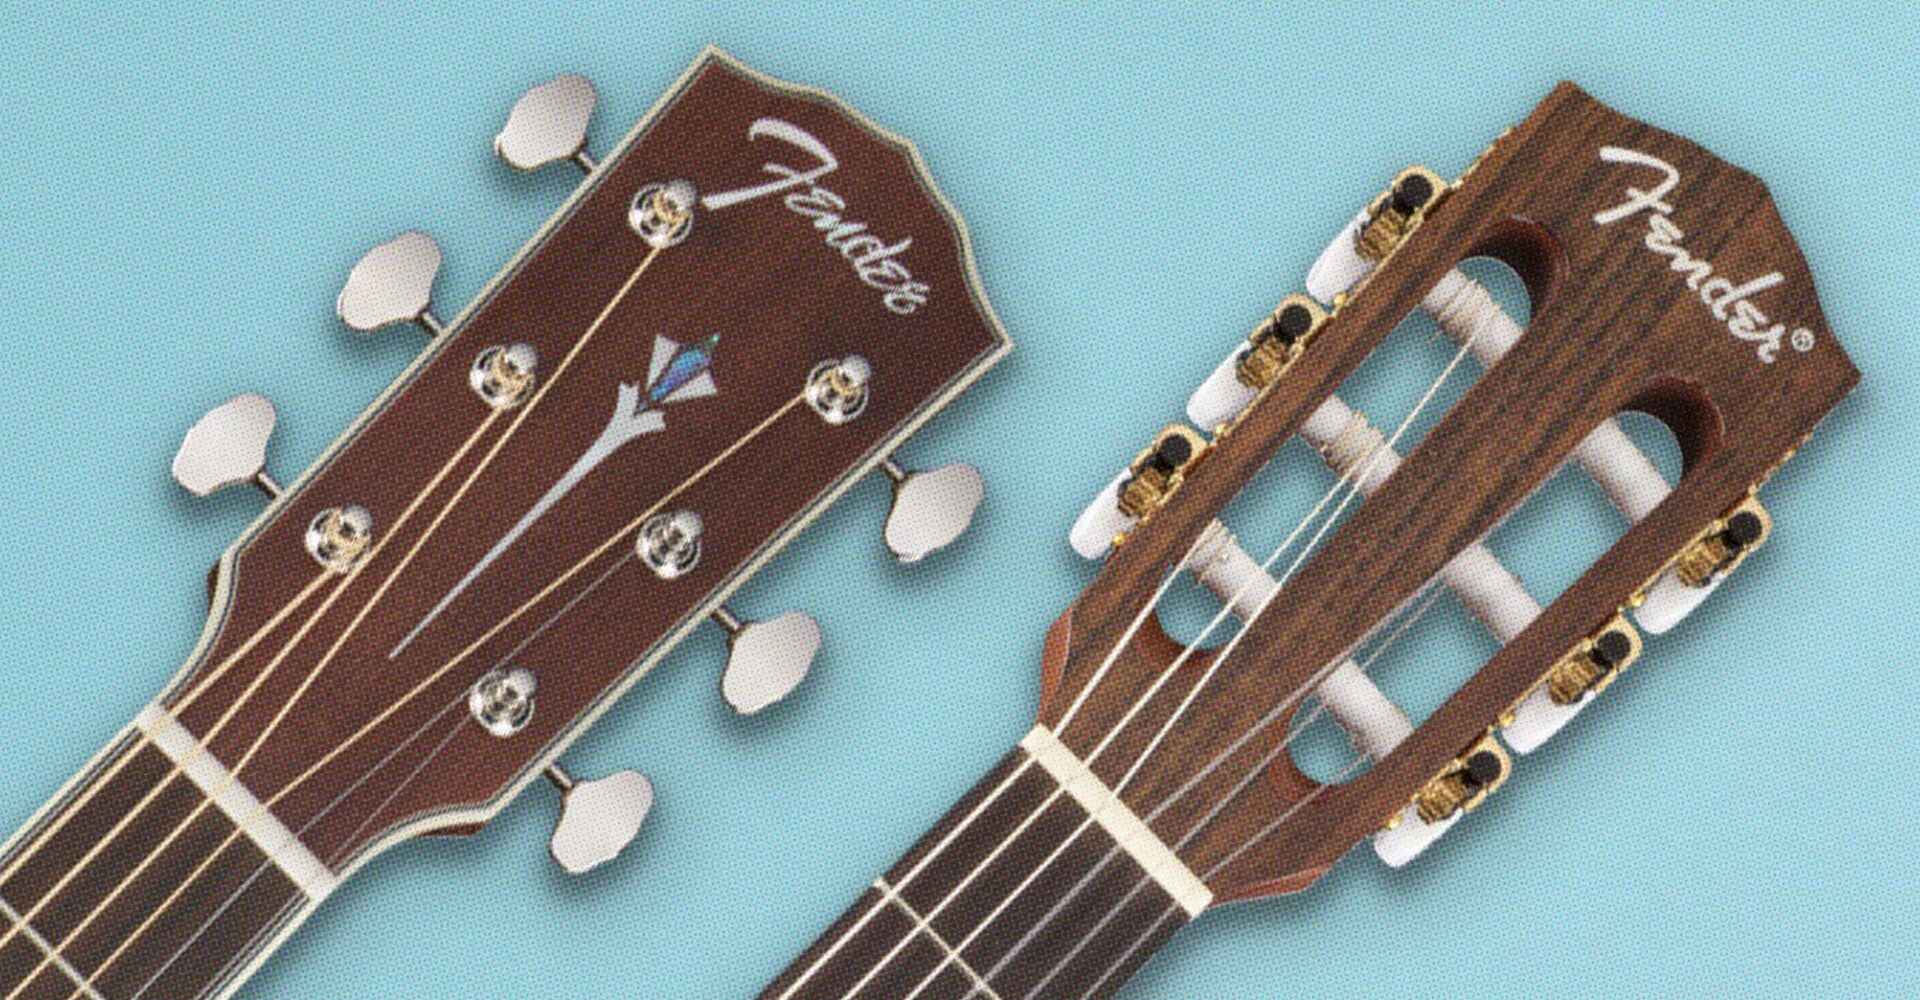
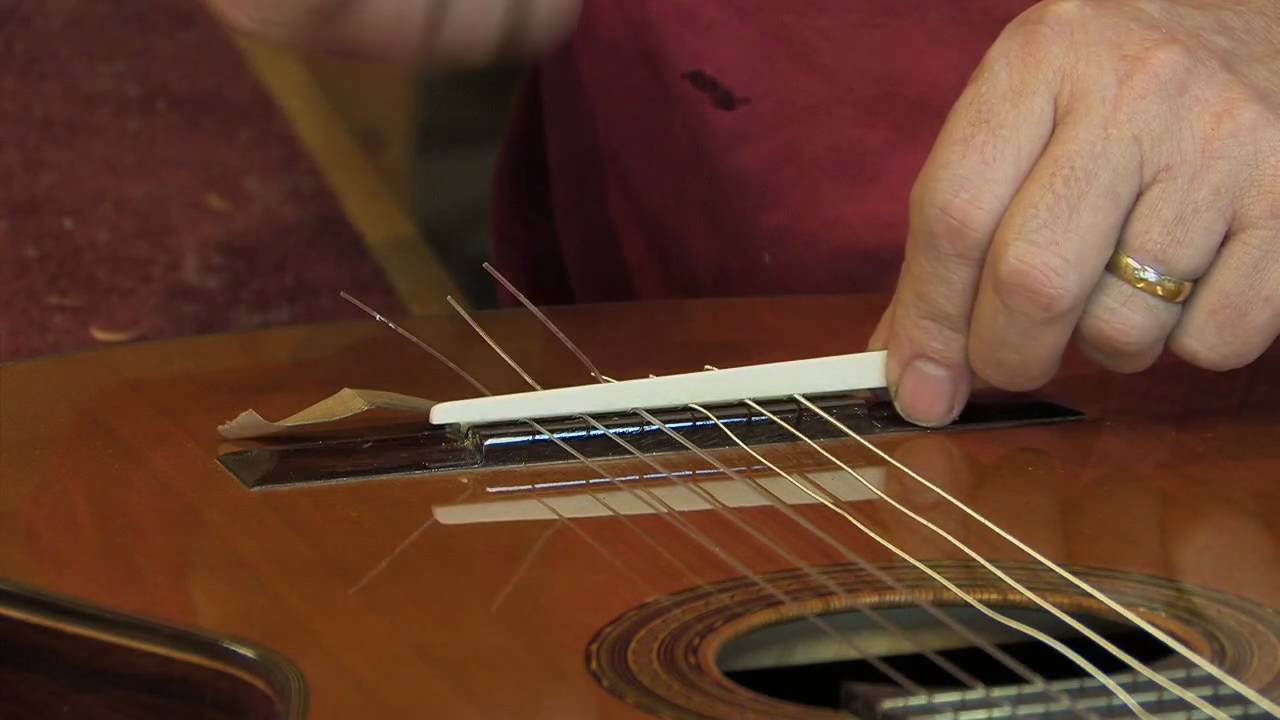
- Locate the bridge holes: On your acoustic guitar, you’ll notice small holes in the bridge where the strings are meant to pass through. These holes are typically located close to the saddle, which is the small piece that transfers the vibrations of the strings to the guitar body.
- Start with the thinnest string: Begin with the thinnest string (high E) and insert it into the corresponding hole on the bridge. Make sure the ball end of the string is facing down towards the guitar body.
- Guide the string through the hole: Once the string is inserted, gently push it through the hole until the ball end is securely seated against the bridge. You may need to use your fingertips or a thin object to guide the string through if it’s a tight fit.
- Repeat for the remaining strings: Proceed to feed the remaining strings through their respective bridge holes, starting with the second thinnest string (B) and working your way down to the thickest string (low E).
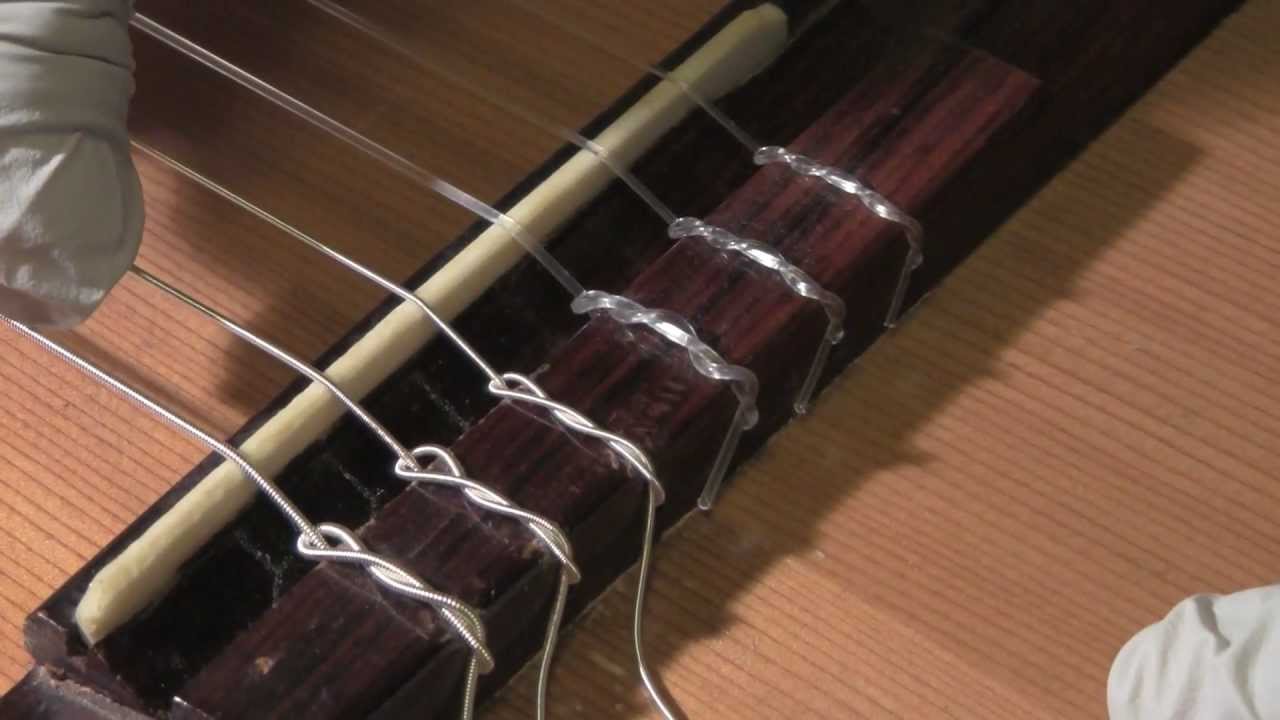
- Ensure proper alignment: As you thread each string through the bridge, pay attention to their alignment. Ensure that the strings are properly seated in the bridge holes and that they are positioned evenly across the guitar neck. This will help maintain optimal intonation and playability.
- Leave some slack: As you feed each string through the bridge, leave a bit of slack between the bridge and the string ball end. This will allow for easier string tension adjustment and prevent any unnecessary strain on the bridge.
By following these steps, you have successfully fed the new strings through the bridge of your acoustic guitar. In the next section, we will cover how to secure the strings to the guitar.
Step 4: Securing the strings
With the new strings threaded through the bridge of your acoustic guitar, it’s time to secure them in place. Follow these steps to properly secure the strings:
- Hold the string tension: Before securing the strings, hold the tension of each one. This will prevent them from slipping out of the bridge while you work on securing them.
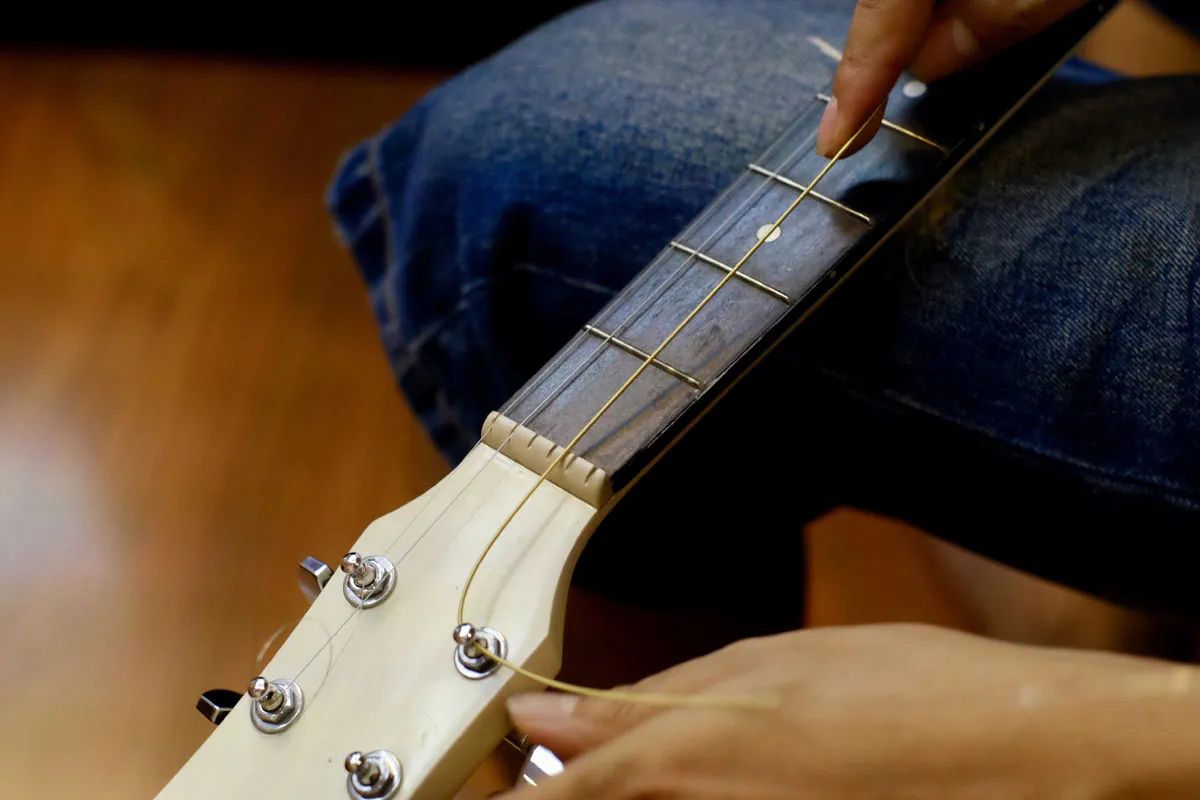
- Wrap the string around the tuning peg: Begin with the thinnest string (high E) and take the end of the string that is protruding from the bridge. Wrap it around the corresponding tuning peg in a clockwise direction. Make sure to leave some slack between the tuning peg and the bridge.
- Give it a few turns: As you wrap the string around the tuning peg, give it a few turns. This will help secure the string and ensure it stays in place while you tune it later. The number of turns may vary depending on personal preference and the type of tuning pegs your guitar has.
- Secure the string: Once you have given it a few turns, use your thumb and index finger to exert some pressure on the string, holding it in place against the tuning peg. This will prevent the string from slipping as you tighten and tune it.
- Repeat for the remaining strings: Proceed to wrap and secure the remaining strings in the same manner, starting with the second thinnest string (B) and continuing down to the thickest string (low E).
- Ensure proper windings: As you wrap the strings around the tuning pegs, make sure the windings are neat and evenly spaced. Avoid overlapping the windings or leaving them too loose, as this can affect tuning stability.
- Trim the excess string: After the strings are securely wrapped around the tuning pegs, use wire cutters or string cutters to trim the excess length. Leave a small amount of the string beyond the tuning peg to avoid any unwanted slippage.
By following these steps, you have successfully secured the new strings to your acoustic guitar. In the next section, we will cover how to tune your guitar for optimal sound.
Step 5: Tuning your guitar
After securing the new strings on your acoustic guitar, it’s important to tune them to ensure optimal sound and playability. Follow these steps to tune your guitar:
- Prepare your tuner: Turn on your guitar tuner and make sure it’s ready to detect the pitch of each string.
- Start with the thinnest string: Begin by plucking the thinnest string (high E) and observe the reading on your tuner. Adjust the tuning peg for that string to tighten or loosen the tension until the tuner displays the correct pitch for that string.
- Tune the remaining strings: Proceed to tune each string one by one, starting from the second thinnest string (B) and working your way down to the thickest string (low E). Use the tuner to guide you in adjusting the tension of each string until it reaches the desired pitch.
- Check the tuning accuracy: Once you have tuned all the strings, play a few chords or notes to check the overall tuning accuracy. Listen for any discrepancies or dissonance and make minor adjustments as needed to achieve perfect harmony between the strings.
- Repeat the tuning process: Since the new strings may stretch and settle over time, they may require some additional tuning. It’s normal for the strings to go slightly out of tune during the first few days of use. Keep your tuner handy and periodically check and retune your guitar as necessary.
By following these steps, you have successfully tuned your acoustic guitar after restringing it. Now you’re ready to enjoy playing your instrument with fresh, crisp strings.
Conclusion
Restringing an acoustic guitar without bridge pins is a valuable skill that every guitarist should possess. With a few simple steps, you can replace your old, worn-out strings and bring new life to your instrument. By following the steps outlined in this guide, you can restring your acoustic guitar confidently and effectively.
Starting with the removal of the old strings, you learned how to loosen and unwind them, remove bridge pins (if applicable), and clean your guitar. You then moved on to preparing the new strings, ensuring they are the correct gauge, and cutting them to the appropriate lengths. Feeding the strings through the bridge was the next step, carefully threading them through the holes and leaving some slack.
With the strings in place, you securely wrapped and secured them around the tuning pegs, being mindful of even windings and trimming the excess length. Finally, you tuned your guitar using a tuner and made any necessary adjustments to achieve the desired pitch and sound quality.
Remember, restringing your guitar is an ongoing process. As you play and the strings settle in, you may need to make minor tuning adjustments. Regularly check and retune your guitar to ensure optimal sound and playability.
By mastering the art of restringing your acoustic guitar without bridge pins, you have taken an important step towards maintaining your instrument’s performance and longevity. Enjoy the process of restringing, and let the fresh strings inspire your playing as you embark on musical journeys.