Introduction
Welcome to our guide on how to string a nylon string acoustic guitar. Whether you’re a beginner guitarist or a seasoned player, changing your guitar strings is an essential skill that every guitarist should learn. While it may seem daunting at first, with the right tools and a little bit of patience, you’ll be able to restring your guitar and have it sounding its best in no time.
Nylon strings are widely used on classical and flamenco guitars, offering a warm and traditional tone. They are also popular among fingerstyle guitarists due to their softer feel and easier playability. Restringing a nylon string acoustic guitar requires a slightly different approach compared to steel string guitars, but the basic principles are the same.
In this step-by-step guide, we’ll take you through the process of changing your nylon strings, from removing the old strings to tuning up the new ones. So gather your tools, grab your guitar, and let’s get started on giving your instrument a fresh set of strings!
Tools needed
Before you begin the process of restringing your nylon string acoustic guitar, it’s important to gather the necessary tools. Having the right equipment on hand will make the task easier and ensure that everything goes smoothly. Here are the tools you will need:
- New strings: Make sure you have a set of nylon strings specifically designed for acoustic guitars. There are various types of nylon strings available, such as clear nylon, rectified nylon, and fluorocarbon, so choose the one that suits your preference.
- String winder: This handy tool will make it much faster and easier to wind the strings onto the tuning pegs. It can be found at most music stores and online guitar accessory shops.
- Wire cutters: You’ll need a pair of wire cutters to trim the excess string once it’s properly attached to the guitar. Make sure they have a sharp cutting edge to ensure clean cuts.
- Guitar tuner: A reliable guitar tuner is essential for ensuring that your guitar’s strings are in tune. There are many options available, ranging from clip-on tuners to smartphone apps.
- Cleaning cloth: It’s a good idea to have a soft cloth on hand to wipe down the guitar and remove any dust or debris before and after restringing.
- Pencil: Although not essential, a pencil can be useful for marking the position of the strings on the bridge, helping you ensure that the strings are properly aligned.
Once you have gathered these tools, you’ll be ready to begin the restringing process. Having everything readily available will save you time and ensure that you have a smooth and successful string change.
Step 1: Removing old strings
The first step in restringing your nylon string acoustic guitar is to remove the old strings. Follow these steps to safely and efficiently remove the old strings:
- Loosen the tension: Begin by turning the tuning pegs counterclockwise to loosen the tension on each string. This will make it easier to remove the strings from the guitar.
- Unwind the strings: Once the tension is sufficiently loosened, unwind the strings from the tuning pegs. Start with the sixth (thickest) string and work your way towards the first (thinnest) string.
- Remove the strings from the bridge: After the strings are unwound from the tuning pegs, carefully lift the ends of the strings out from the bridge. Some guitars may have bridge pins holding the strings in place, so gently remove them if necessary.
- Dispose of the old strings: Once all the strings are removed, properly dispose of them. Nylon strings are not recyclable, so it’s best to throw them away in a trash bin.
Removing the old strings is an important step as it allows you to clean the guitar thoroughly and prepare for the installation of new strings. It’s essential to be gentle while removing the strings to avoid any damage to the guitar’s body or bridge. With the old strings removed, you’re now ready to move on to the next step: cleaning the guitar.
Step 2: Cleaning the guitar
After removing the old strings, it’s time to clean your nylon string acoustic guitar. Cleaning the guitar not only helps maintain its appearance but also removes any dirt or grime that may have built up over time. Follow these steps to ensure a clean and pristine instrument:
- Wipe down the body: Take a clean, dry cloth and gently wipe down the entire body of the guitar. This will remove dust and fingerprints, giving it a fresh look.
- Clean the fretboard: With a soft cloth, carefully remove any dirt or residue from the fretboard. You can moisten the cloth with a small amount of guitar cleaner or lemon oil if needed, but be sure to follow the manufacturer’s instructions.
- Polish the body: If desired, you can use a guitar polish specifically formulated for acoustic guitars to restore and protect the finish. Apply the polish in small circular motions, then buff it out with a clean cloth.
- Inspect the guitar: While cleaning, take the opportunity to inspect the guitar for any signs of damage or wear. Check for loose hardware, cracks, or any other issues that may require attention. If you notice any problems, consult a professional for repairs.
Cleaning your guitar not only keeps it looking its best but also helps prolong its lifespan. By removing dirt, dust, and sweat, you ensure that your guitar remains in optimal condition for playing. Once the guitar is clean and dry, you’re now ready to move on to the next step: preparing the new strings.
Step 3: Preparing the new strings
With the guitar cleaned and ready, it’s time to prepare the new nylon strings for installation. This step ensures that the strings are properly stretched, preventing any tuning issues and improving their overall tone. Follow these steps to prepare your new strings:
- Uncoil the strings: Start by uncoiling the new strings from their packaging. Take care to keep them organized and avoid kinks or tangles.
- Stretch the strings: To minimize the amount of stretching that occurs after installation, gently pull on each individual string from the center to the ends. This helps remove any excess slack and pre-stretch the strings.
- Align the strings: Lay the strings out in the order they will be installed on the guitar. The sixth string (thickest) should be on the bottom, followed by the fifth, fourth, third, second, and first strings.
- Cut the excess: Measure and cut the strings to the appropriate length. Leave enough allowance for winding around the tuning pegs, but not too much to prevent excessive bulk or potential tangling.
When preparing the new strings, it’s important to handle them with care and avoid overstretching or damaging them in the process. Taking the time to properly prepare your strings will ensure a smoother installation and help maintain their longevity.
Now that the new strings are prepared, it’s time to move on to the next step: inserting the ball end of the string.
Step 4: Inserting the ball end of the string
Once you have prepared the new nylon strings, the next step is to insert the ball end of the string into the bridge of your guitar. Follow these step-by-step instructions to properly insert the strings:
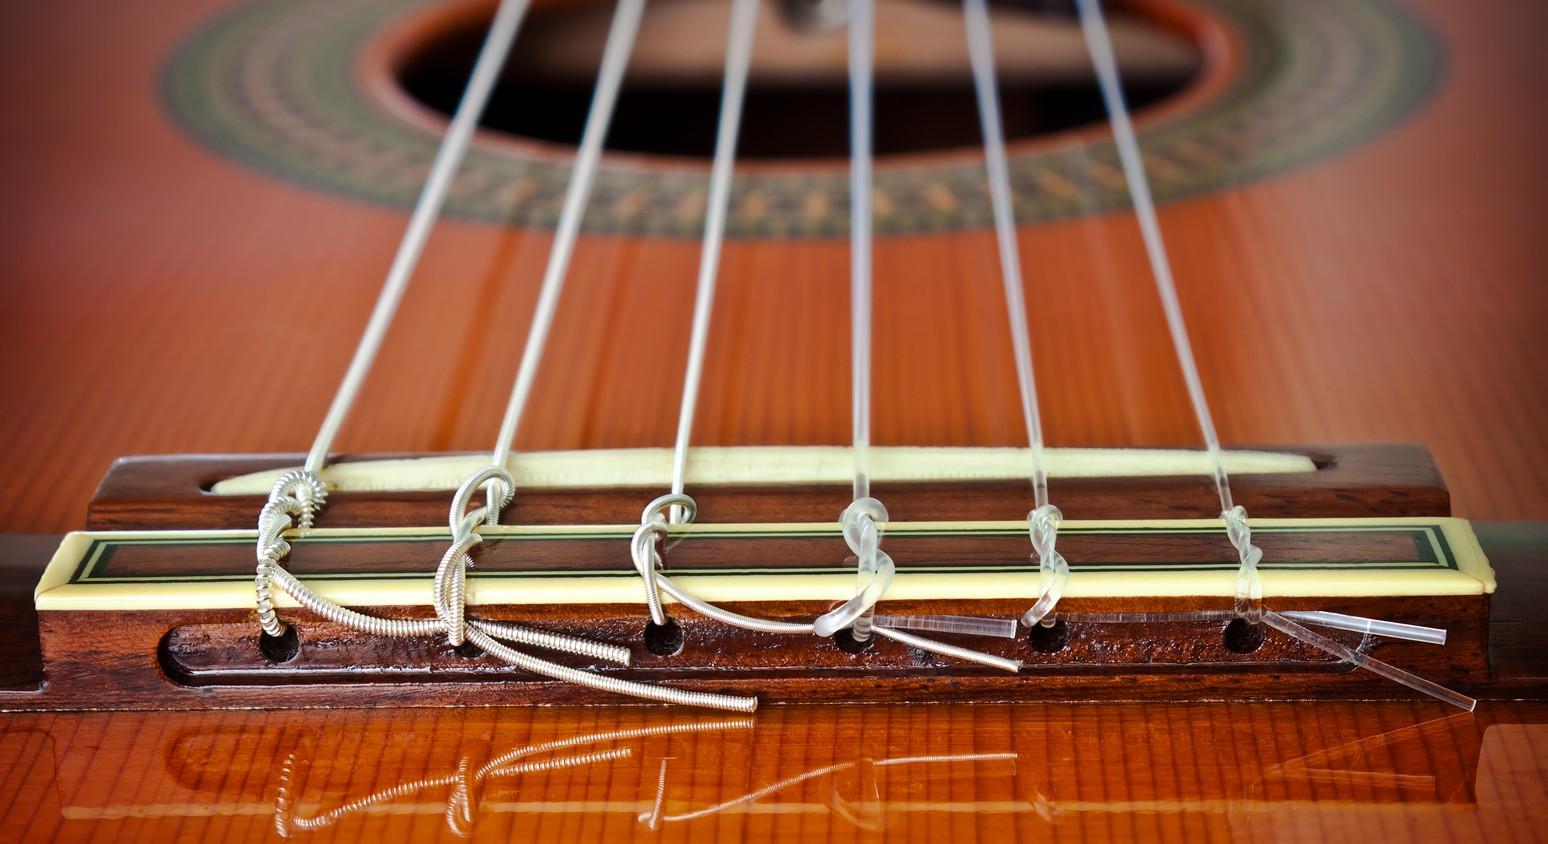
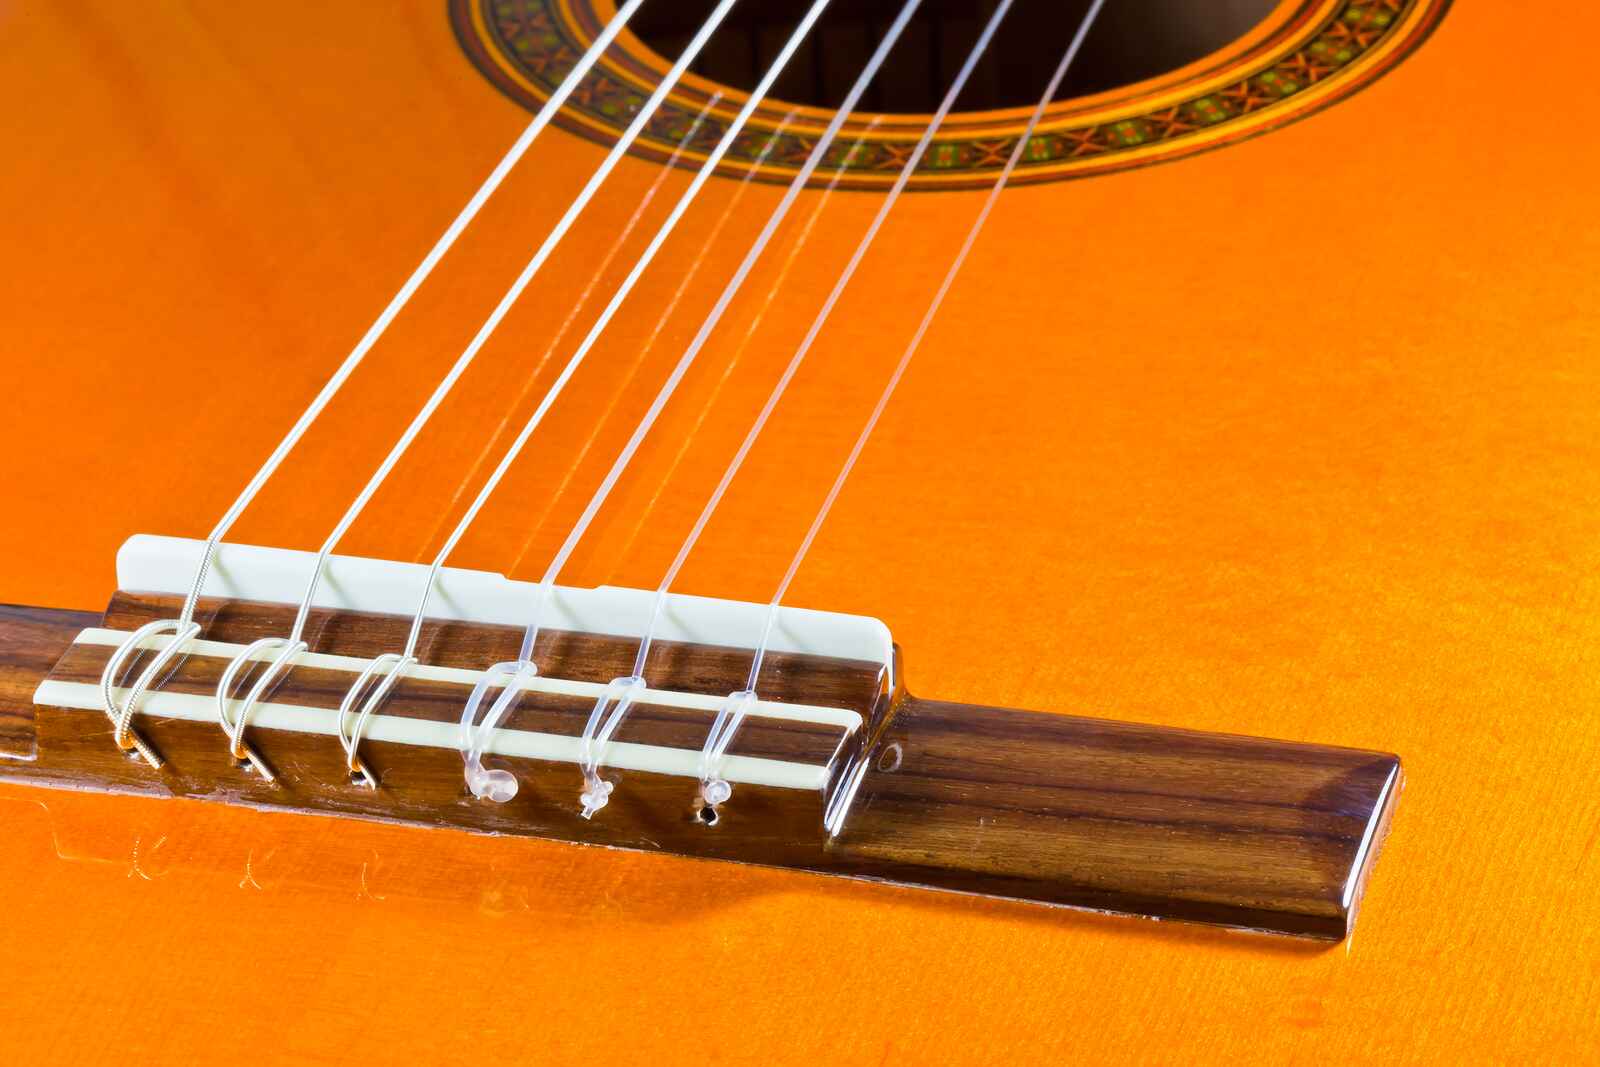
- Locate the bridge: Identify the bridge on your guitar. It is the section of the guitar body where the strings are anchored.
- Find the holes: Look for small holes or slots on the bridge where the ball ends of the strings will be inserted. The number of holes or slots will correspond to the number of strings on your guitar.
- Insert the ball end: Take the ball end of the first string (sixth string) and insert it into the corresponding hole on the bridge. Make sure the ball end is secured in place.
- Pull through: Gently pull the string through the hole until the ball end is snug against the bridge. The string should be taut but not overly tightened.
- Repeat for remaining strings: Repeat the process for the rest of the strings, making sure to insert each ball end into its respective hole on the bridge.
- Check alignment: As you insert each string, ensure that they are properly aligned and positioned on the bridge. This will help maintain the correct spacing and tension of the strings.
Properly inserting the ball end of the string is crucial for ensuring that the strings are securely held in place and produce the desired tone. Once you have successfully inserted all the strings, you can move on to the next step: securing the string on the bridge.
Step 5: Securing the string on the bridge
After inserting the ball end of the strings into the bridge of your nylon string acoustic guitar, the next step is to secure them in place. This is important to ensure that the strings remain properly anchored and provide optimal tuning stability. Follow these steps to securely fasten the strings on the bridge:
- Position the string: Take the first string (sixth string) and position it over the saddle of the bridge, which is the small elevated section where the strings rest.
- Align the string: Make sure the string is properly lined up with its corresponding saddle slot. This will help maintain the correct intonation and string spacing.
- Press down: Use your thumb or index finger to apply downward pressure on the string, securing it firmly against the saddle. This will prevent any slippage or movement during playing.
- Repeat for remaining strings: Repeat the process for the rest of the strings, ensuring that each one is properly aligned and pressed down on its corresponding saddle.
By securing the strings on the bridge, you ensure that they stay in place and provide consistent tension for accurate tuning and playing. Proper alignment and pressure on the saddle are crucial to maintain the stability and performance of your guitar’s strings.
Once you have securely fastened the strings on the bridge, you can proceed to the next step: winding the strings onto the tuning pegs.
Step 6: Winding the string onto the tuning peg
After securing the strings on the bridge, it’s time to wind them onto the tuning pegs. Proper winding ensures that the strings stay in tune and allows for easy adjustments when necessary. Follow these steps to correctly wind the strings onto the tuning pegs:
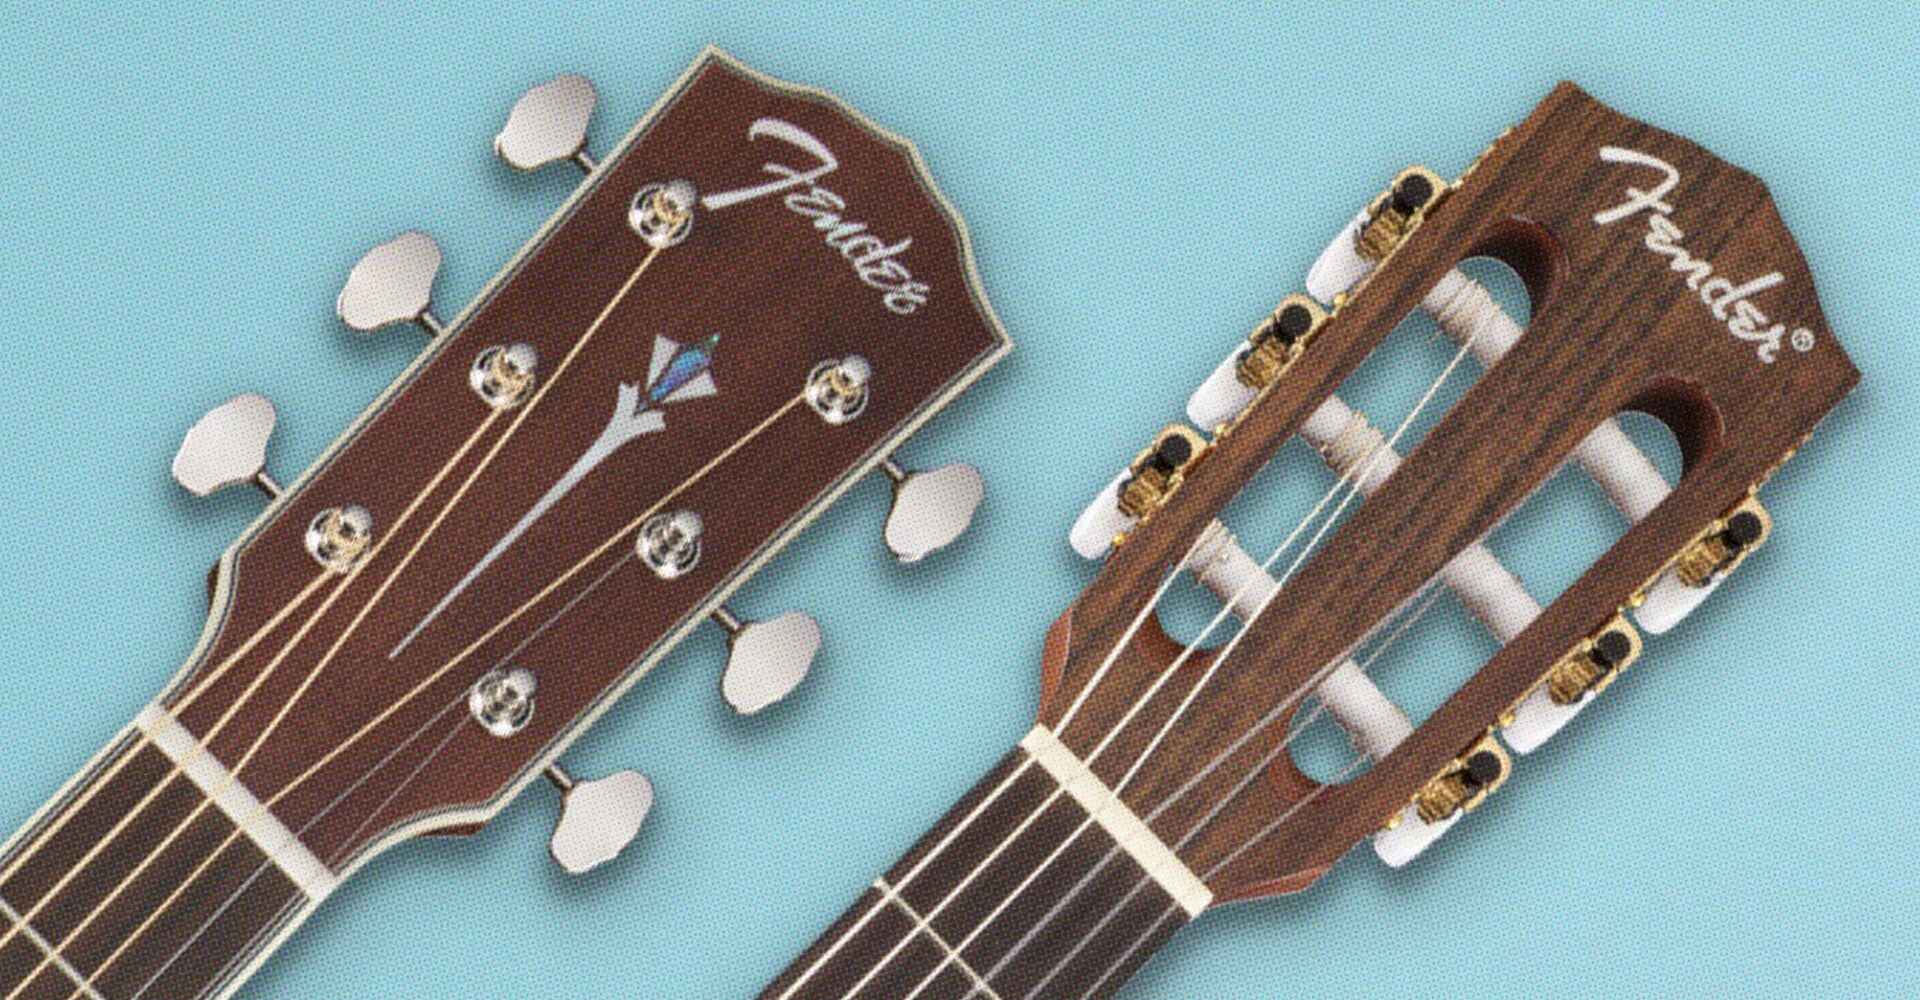
- Locate the tuning peg: Identify the tuning peg for the first string (sixth string). It is usually located on the headstock of the guitar.
- Insert the string: Take the free end of the string and insert it into the hole in the tuning peg. Leave a small amount of slack to work with.
- Turn the tuning peg: Begin turning the tuning peg clockwise to tighten the string. As you turn, use your other hand to guide the string towards the necessary peg slot for proper alignment.
- Wind the string: Continue turning the tuning peg until the string is securely wound against the peg, leaving a few inches of slack near the string hole. Be careful not to over-tighten or twist the string.
- Ensure proper winding: Make sure the string is wound neatly and evenly on the tuning peg, without any overlapping or excessive slack. This helps maintain the tension and stability of the string.
- Repeat for remaining strings: Repeat the process for the rest of the strings, making sure to insert them into their respective tuning pegs and wind them neatly.
Proper winding of the strings onto the tuning pegs is crucial for achieving accurate and stable tuning. Take your time to ensure that the strings are properly wound without any twists or tangles. Once you have completed this step, you can proceed to the next step: tuning the new strings.
Step 7: Tuning the new string
After winding the strings onto the tuning pegs, it’s time to tune your nylon string acoustic guitar. Proper tuning is crucial for achieving accurate pitch and ensuring that your guitar sounds its best. Follow these steps to tune the new strings:
- Get your tuner ready: Prepare your guitar tuner by turning it on and getting it ready to detect the pitch of the strings.
- Pluck the string: Take the first string (sixth string) and pluck it gently near the soundhole. This will produce a sound that the tuner can detect.
- Check the tuner display: Pay attention to the tuner display and adjust the string’s tuning peg as necessary. Turn the peg clockwise to raise the pitch or counterclockwise to lower the pitch.
- Continue tuning: Repeat the process for each string, plucking the string and adjusting the tuning peg until the tuner shows that the string is in tune.
- Check each string’s pitch: After tuning each string, play each one individually to ensure it is ringing out at the correct pitch. Use your ear to make any fine adjustments if needed.
- Double-check the overall tuning: Once all the strings are tuned individually, strum the guitar or play a few chords to listen for any discrepancies in the overall tuning. Make any necessary adjustments to ensure all strings are in harmony with each other.
Tuning your guitar is an ongoing process, especially when using new strings. It may take a few rounds of tuning and adjustments to achieve stable and accurate tuning. Regularly check and retune your guitar as the new strings settle and stretch over time.
With the strings properly tuned, you can move on to the next step: trimming the excess string.
Step 8: Trimming excess string
After tuning your nylon string acoustic guitar, it’s important to trim the excess string for a neat and professional appearance. Trimming the excess string also helps prevent any accidental contact or interference while playing. Follow these steps to properly trim the excess string:
- Identify the excess string: Locate the part of the string that extends beyond the tuning peg.
- Measure and mark: Use a pair of wire cutters to measure about an inch or so from the tuning peg. Mark the string with a pencil or simply remember the measurement.
- Remove the string: Carefully remove the string from the tuning peg and hold it steady.
- Trim the string: Position the wire cutters at the marked measurement and firmly cut the string. Be careful not to let the excess string fly or hit the guitar body.
- Smooth out the end: After trimming, use the wire cutters or a file to smooth out any sharp edges or burrs left by the cut.
- Repeat for remaining strings: Repeat the process for the rest of the strings, trimming the excess string to maintain a uniform and clean appearance.
Trimming the excess string not only enhances the cosmetic look of your guitar but also reduces the risk of any unnecessary tangling or unwanted noise caused by loose ends. Take care when trimming to avoid any damage to the guitar or injury to yourself.
Once the excess strings are trimmed, you can move on to the final step: repeating the process for the remaining strings.
Step 9: Repeat for remaining strings
Now that you have completed the previous steps, it’s time to repeat the process for the remaining strings of your nylon string acoustic guitar. Follow these steps to efficiently restring and tune the rest of the strings:
- Follow the previous steps: Begin by revisiting the steps outlined in the previous sections, starting from step 4 where you inserted the ball end of the string into the bridge.
- Secure the strings: Once you have inserted the ball ends into the bridge, proceed to secure the strings in place by following step 5, ensuring that they are properly positioned and pressed down on the saddle.
- Wind the strings: Move on to step 6 and wind each string onto the corresponding tuning peg, making sure to align and wind them neatly to maintain proper tension and stability.
- Tune the strings: After winding the strings, proceed to step 7 and tune each individual string using a guitar tuner, adjusting the tension as needed to achieve the correct pitch.
- Trim the excess string: Once all the strings are in tune, move on to step 8 and trim the excess string for a clean and professional look, taking care to smooth out any sharp edges.
- Repeat the process: Repeat these steps for each remaining string until all the strings on your nylon string acoustic guitar have been restrung and properly tuned.
By consistently following these steps for each string, you can ensure that your guitar is properly restrung and ready to produce beautiful tones. Take your time and pay attention to detail throughout the process to achieve the best results.
With all the strings properly restrung and tuned, your nylon string acoustic guitar is now ready to be played and enjoyed. Remember to regularly check the tuning and make adjustments as necessary to maintain optimal performance.
Conclusion
Congratulations! You have successfully learned how to string a nylon string acoustic guitar. By following the step-by-step process outlined in this guide, you have gained the knowledge and skills to restring your guitar and keep it playing its best. Here’s a quick recap of the steps:
- Removing the old strings
- Cleaning the guitar
- Preparing the new strings
- Inserting the ball end of the string
- Securing the string on the bridge
- Winding the string onto the tuning peg
- Tuning the new strings
- Trimming excess string
- Repeat for remaining strings
Remember that stringing your guitar is a process that requires patience and attention to detail. Take your time and make sure each step is done carefully to ensure the best results. Regularly checking and adjusting the tuning will help maintain the optimal sound quality of your guitar.
Now that you know how to restring a nylon string acoustic guitar, you can confidently change your strings whenever needed. Experiment with different string types and tensions to discover the tone that suits your playing style and preferences. Enjoy the process of restringing your guitar and the beautiful sounds it will produce!