Introduction
Are you an acoustic guitar enthusiast looking to bring new life to your beloved instrument? Refinishing an acoustic guitar can be a rewarding and satisfying project that allows you to give your instrument a fresh look while restoring its original beauty. Whether your guitar has suffered from wear and tear over the years or if you simply want to change its appearance, refinishing is a great option.
Refinishing an acoustic guitar involves stripping off the old finish, repairing any damage to the wood, and applying a new finish to protect and enhance its aesthetic appeal. It’s a hands-on process that requires patience, attention to detail, and the right materials. By following the steps outlined in this guide, you can achieve professional-looking results and make your guitar look and feel like new.
Before embarking on this project, it’s important to note that refinishing an acoustic guitar is a time-intensive process that requires some level of skill and experience. It’s recommended to have some basic knowledge of guitar maintenance and woodworking, as well as access to the necessary tools and materials. Additionally, keep in mind that refinishing your guitar may affect its sound, so it’s essential to proceed with caution and take your time to achieve the desired results.
In this step-by-step guide, we will walk you through the process of refinishing an acoustic guitar, from removing the strings and hardware to applying the new finish and reassembling the guitar. We will also provide tips and techniques to help you achieve professional-grade results. So, roll up your sleeves, gather your supplies, and let’s dive into the exciting world of refinishing an acoustic guitar!
Materials Needed
Before you begin the process of refinishing an acoustic guitar, gather the following materials to ensure you have everything you need:
- Screwdrivers: You will need a set of screwdrivers to remove the hardware from the guitar.
- Masking Tape: Use masking tape to protect areas of the guitar that you don’t want to paint or sand.
- Sandpaper: A variety of sandpaper grits, such as 120, 220, and 400, will be necessary for the sanding process.
- Grain Filler: A wood grain filler is used to fill in any imperfections in the wood grain before applying the new finish.
- Paint or Stain: Choose a paint or stain color of your preference to give your guitar a new look.
- Clear Coat: A clear coat of finish will protect the new paint or stain and give your guitar a glossy or matte finish.
- Paintbrushes: Different sizes of paintbrushes will be needed for applying paint, stain, and clear coats.
- Respirator Mask: Protect your lungs from harmful fumes and dust with a respirator mask.
- Safety Glasses: Wear safety glasses to protect your eyes during the refinishing process.
- Drop Cloth or Newspaper: Lay down a drop cloth or cover your work area with newspaper to catch any drips or spills.
- Lint-Free Cloths: Use lint-free cloths for cleaning the guitar and applying the finish.
- Truss Rod Wrench: A truss rod wrench is needed to adjust the tension of the truss rod inside the guitar neck.
- Guitar String Winder: A guitar string winder will make the restringing process much easier and faster.
- Guitar Strings: Choose the appropriate gauge and type of strings for your acoustic guitar.
Having these materials at hand will ensure that you have all the necessary tools and supplies to successfully refinish your acoustic guitar. Remember to work in a well-ventilated space and follow safety precautions to protect yourself and your instrument throughout the process.
Step 1: Removing the Strings
Before you can start refinishing your acoustic guitar, the first step is to remove the strings. This allows you to have full access to the guitar’s body and makes the refinishing process much easier. Follow these steps to remove the strings:
- Loosen the strings: Use a guitar tuner or turn the tuning pegs counterclockwise to loosen the tension of the strings. This will make it easier to remove them from the guitar.
- Cut the strings: Once the strings are loosened, use wire cutters or string cutters to cut the strings near the bridge of the guitar. Be careful not to damage the bridge or scratch the guitar’s body.
- Remove the bridge pins: Acoustic guitars usually have bridge pins that hold the strings in place. Use a bridge pin puller or a pair of pliers to carefully remove the bridge pins one at a time. Gently wiggle and pull up on each pin until it comes out of the bridge.
- Remove the strings: After removing the bridge pins, carefully pull the strings out of the bridge and the tuning pegs. Coil them up and set them aside for disposal or future use.
Once all the strings have been removed, you may notice that the guitar’s bridge saddle remains in place. It’s not necessary to remove the saddle unless you plan to make adjustments or repairs to it. However, if you prefer to remove it for the refinishing process, use a small screwdriver to carefully pry it up from the slot in the bridge. Keep in mind that removing the saddle may require additional adjustments and setup once the refinishing is complete.
With the strings removed, you now have a blank canvas to begin the refinishing process. Now it’s time to move on to the next step, which involves removing the hardware from the guitar.
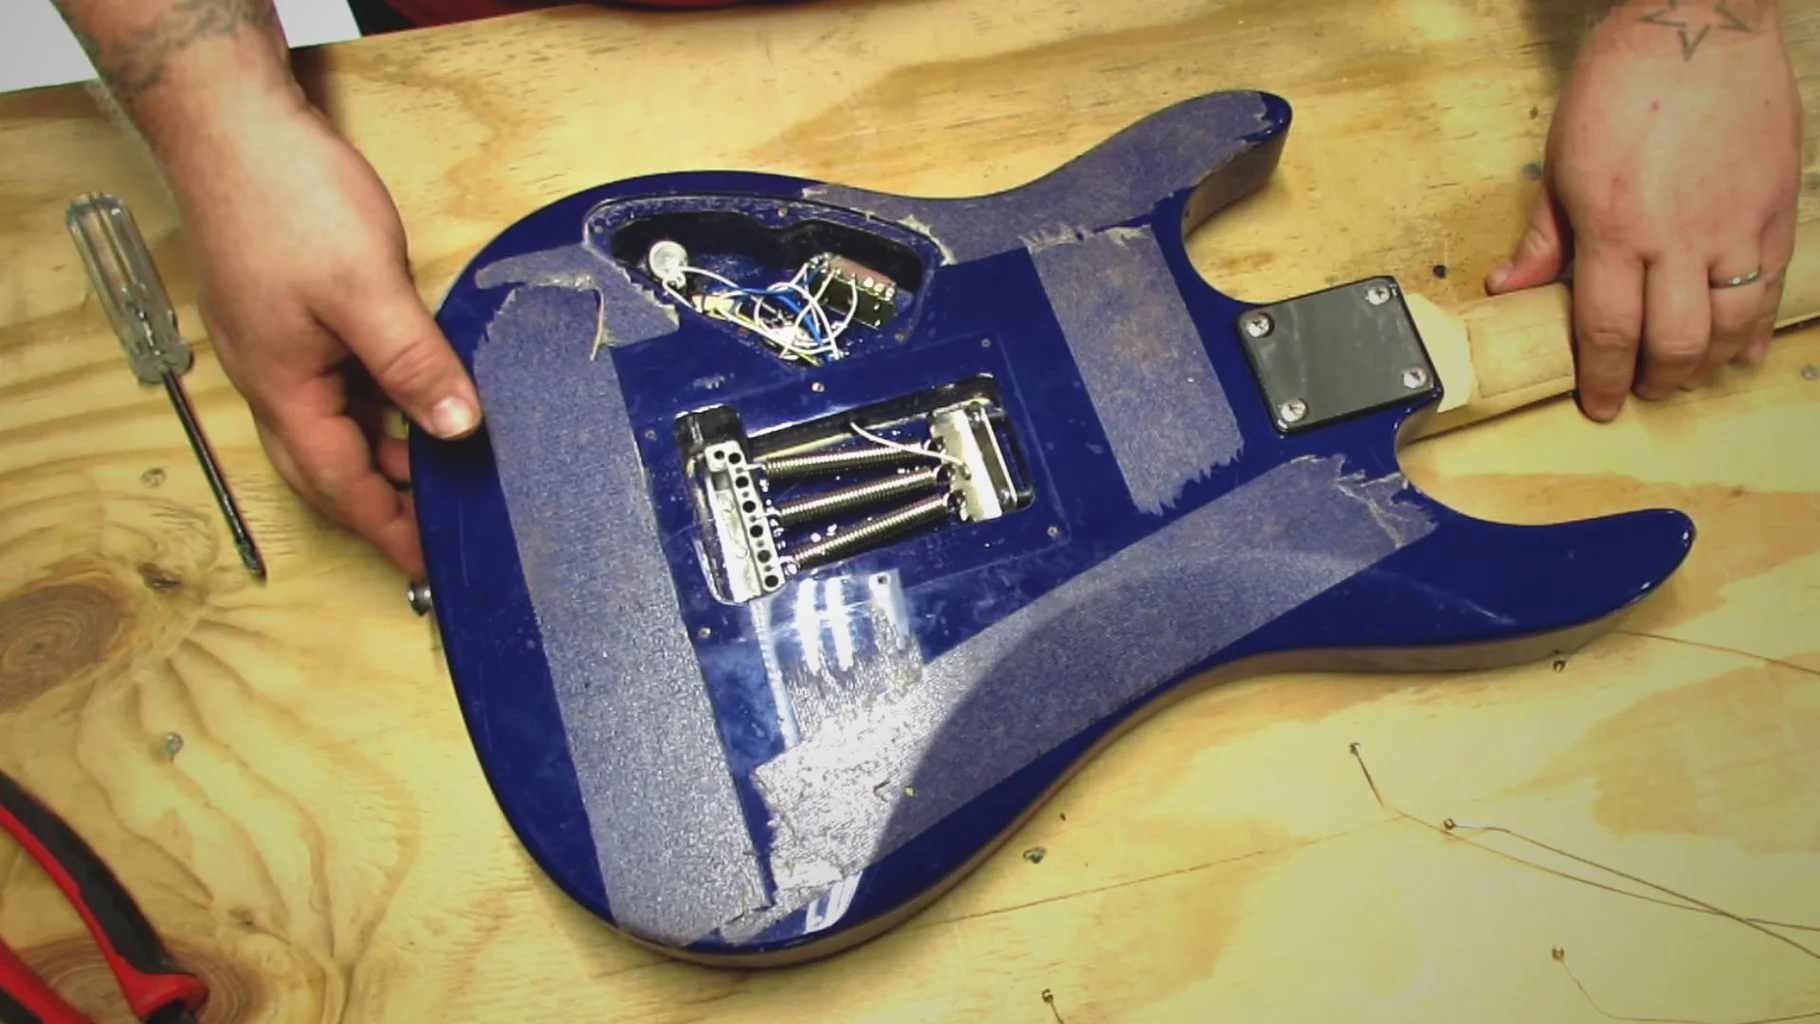
Step 2: Removing the Hardware
Once you have removed the strings from your acoustic guitar, it’s time to remove the hardware. This includes items such as the pickguard, strap buttons, tuning pegs, and any other detachable components. Removing the hardware allows for a more thorough refinishing process and ensures that no paint or finish accidentally gets applied to these parts. Follow these steps to remove the hardware:
- Remove the pickguard: The pickguard is usually held in place by adhesive or screws. Carefully peel off the pickguard if it’s adhesive, or use a screwdriver to remove the screws if it’s secured that way. Be gentle to avoid any damage to the guitar’s body.
- Take off the strap buttons: If your guitar has strap buttons, use a screwdriver to remove them from the body of the guitar. These buttons are typically located on the top and bottom of the guitar body.
- Unscrew the tuning pegs: Using an appropriate sized screwdriver, carefully remove the screws that hold the tuning pegs in place. You may need to hold the tuning pegs with your hand to prevent them from spinning as you unscrew.
- Remove any other detachable components: Some acoustic guitars may have additional detachable components, such as soundhole covers or electric pickups. Follow the manufacturer’s instructions or refer to a technical guide specific to your guitar model to safely remove these parts.
Place all the hardware components in a safe and organized location to ensure they don’t get lost or damaged during the refinishing process. It’s a good idea to label them or take pictures to help you remember how they were originally positioned on the guitar.
Now that you have successfully removed the hardware, you are ready to move on to the next step, which involves stripping the old finish from the guitar.
Step 3: Stripping the Old Finish
After removing the hardware from your acoustic guitar, the next step in the refinishing process is to strip off the old finish. Stripping the old finish allows you to start with a clean surface and ensures that the new finish will adhere properly to the guitar’s body. Follow these steps to strip the old finish:
- Choose a stripping method: There are a few different methods you can use to strip the old finish from your guitar. One common method is to use chemical paint strippers, which are applied to the guitar’s body and left to sit for a period of time. Another method is to use a heat gun to soften the finish and then scrape it off with a paint scraper. Research and choose the method that best suits your preferences and the type of finish on your guitar.
- Prepare the work area: Set up a well-ventilated workspace to protect yourself from the fumes of the stripping chemicals or the heat gun. Lay down a drop cloth or newspaper to catch any drips or scrapings.
- Apply the stripping agent: If you are using a chemical paint stripper, carefully apply it to the guitar’s body using a paintbrush or a rag. Follow the manufacturer’s instructions for the specific product you are using, including the recommended wait time.
- Remove the old finish: Once the stripping agent has had time to work, use a paint scraper or a putty knife to gently scrape off the old finish. Be careful not to dig into the wood or scratch the guitar’s body. Work in small sections and continue scraping until the majority of the old finish is removed.
- Clean the guitar: After scraping off the old finish, use a clean cloth or a small brush to remove any remaining residue. You can also use a fine-grade steel wool to gently buff the surface and remove any stubborn spots.
It’s important to note that stripping the old finish can be a messy and time-consuming process. Take your time and be patient, ensuring that you are following safety precautions and working in a well-ventilated area. Once you have successfully stripped the old finish, you are ready to move on to the next step, which involves inspecting and repairing any damage to the wood.
Step 4: Wood Repairs
After stripping the old finish from your acoustic guitar, it’s time to inspect the wood for any damage or imperfections. Addressing these issues before moving forward with the refinishing process will ensure that your guitar looks and performs at its best. Follow these steps to repair any wood damage:
- Inspect the wood: Carefully examine the guitar’s body for any cracks, dents, or scratches. Pay close attention to the areas around the soundhole, bridge, and headstock where damage is more likely to occur.
- Repair cracks: If you find any cracks in the wood, use a woodworking glue specifically designed for musical instruments to repair them. Apply a small amount of glue into the crack and use clamps or tape to hold the wood together until the glue dries completely.
- Fill dents and scratches: To fill in dents and scratches, use a wood filler or epoxy putty that matches the color of the guitar’s body. Apply the filler to the damaged area and use a putty knife or a scraper to smooth it out. Allow the filler to dry completely, and then sand it flush with the surrounding wood.
- Sand the repairs: Once the wood repairs are dry and smooth, use sandpaper or a sanding block to sand them until they are flush with the surrounding wood. Start with a coarser grit and gradually move to finer grits to achieve a seamless finish.
- Clean the guitar: After completing the wood repairs, use a clean cloth or a small brush to remove any dust or debris from the guitar’s body. Make sure the surface is clean and free from any loose particles before proceeding to the next step.
Repairing any wood damage is crucial to ensure the structural integrity of your guitar and maintain its overall appearance. Take your time and be meticulous in your repairs, as they will contribute to the final result of the refinishing process. Once you have finished repairing the wood, you are ready to move on to the next step, which involves sanding the guitar.
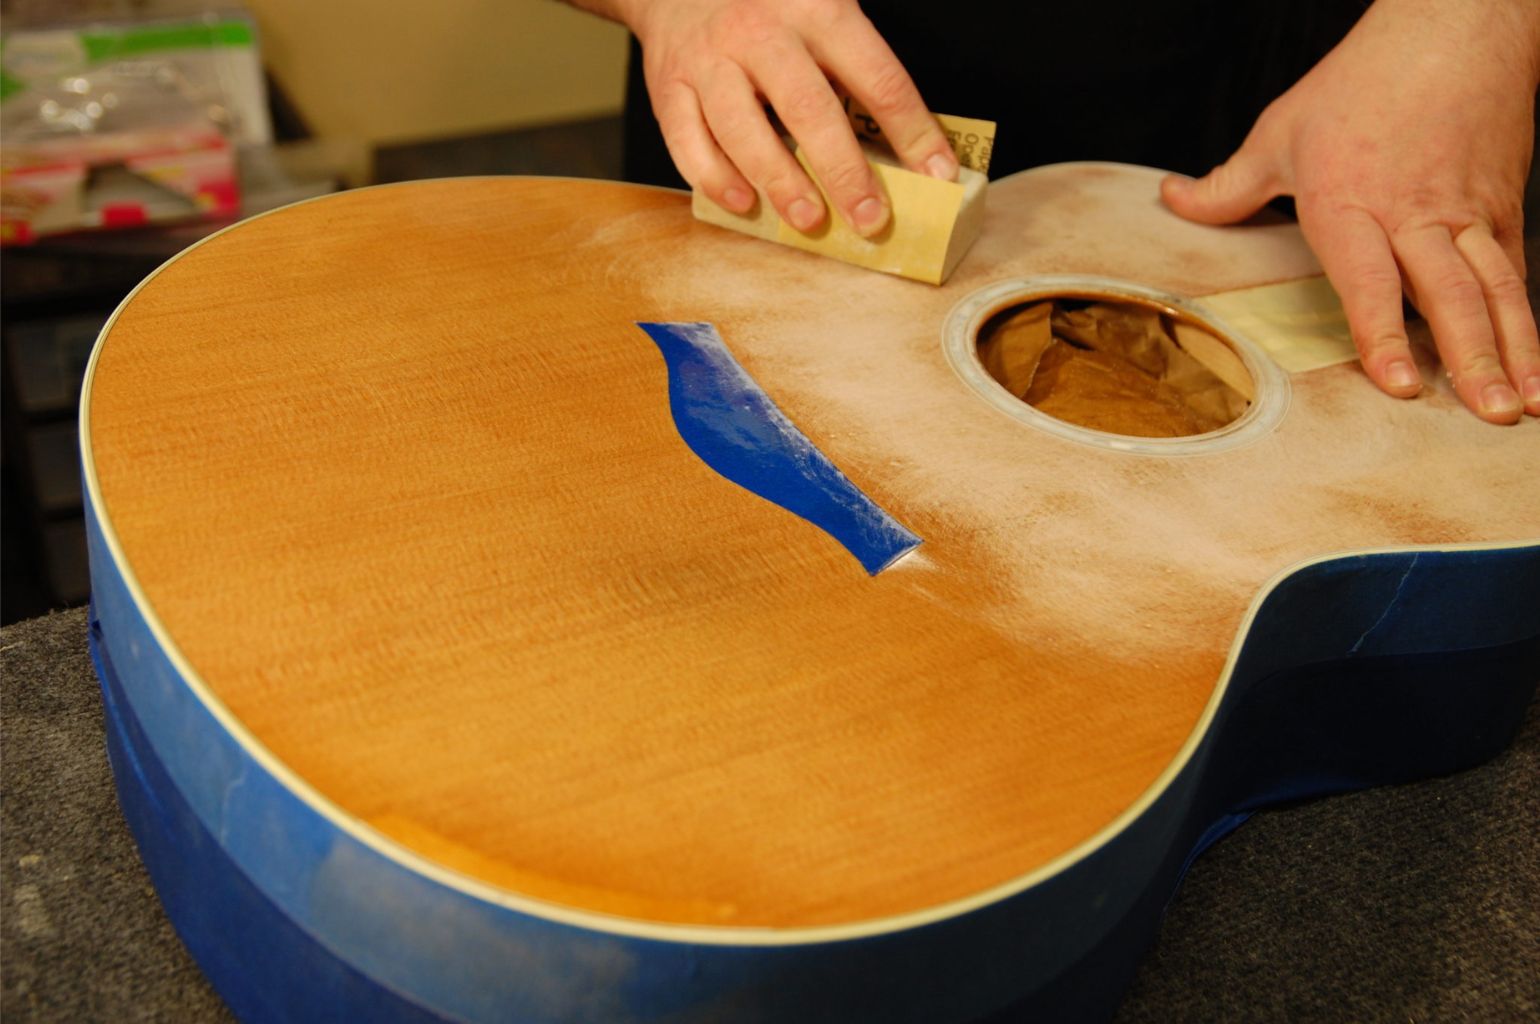
Step 5: Sanding the Guitar
After repairing any wood damage on your acoustic guitar, the next step in the refinishing process is to sand the guitar’s body. Sanding helps to smooth out the surface, remove any remaining traces of the old finish, and prepare the wood for the new finish. Follow these steps to sand your guitar:
- Select the right sandpaper: Choose a coarse-grit sandpaper, such as 120 or 150, to start with. As you progress through the sanding process, switch to finer-grit sandpapers, such as 220 and 400, for a smoother finish.
- Sand the guitar body: Begin by sanding the guitar’s body in a circular motion, applying even pressure with the sandpaper. Start with the top surface and work your way around the edges and sides. Be careful not to dig too deep or create uneven surfaces. Continue sanding until the old finish is completely removed and the wood is smooth to the touch.
- Sand the hard-to-reach areas: Use a small piece of sandpaper or a sanding sponge to sand the areas around the soundhole, bridge, and headstock, where it may be difficult to reach with a larger piece of sandpaper.
- Monitor your progress: Regularly check the surface of the guitar to ensure that you are achieving an even and consistent sanding result. Look for any rough spots or areas that still have remnants of the old finish. Continue sanding until the entire surface of the guitar is smooth and free from imperfections.
- Clean the guitar: After sanding, use a clean cloth or a brush to remove sanding residue and any dust from the guitar’s body. Ensure that the surface is clean and ready for the next step.
Sanding the guitar is an essential step in the refinishing process as it prepares the wood for the new finish and ensures a smooth and uniform surface. Take your time and be patient, as thorough sanding will contribute to the overall quality of the final result. Once you have finished sanding, you are ready to move on to the next step, which involves applying grain filler to the guitar.
Step 6: Applying Grain Filler
After sanding the guitar’s body, the next step in the refinishing process is to apply a grain filler. Grain filler helps to fill in the pores and grains of the wood, creating a smooth and uniform surface for the new finish. Follow these steps to apply the grain filler:
- Choose the right grain filler: Select a grain filler that matches the color of the wood or your desired finish. Grain fillers come in different shades, including clear, natural, or tinted options.
- Prepare the grain filler: Follow the manufacturer’s instructions to prepare the grain filler for application. This may involve stirring the filler or thinning it with a suitable solvent.
- Apply the grain filler: Using a clean cloth or a plastic scraper, apply the grain filler to the guitar’s body in the direction of the wood grain. Work in small sections at a time, spreading the filler evenly and making sure to fill all the pores and grains of the wood.
- Remove excess filler: After applying the grain filler, use a scraper or a putty knife to remove any excess filler from the surface. The goal is to leave a thin film of filler that fills the grains without leaving a thick layer.
- Allow the filler to dry: Follow the manufacturer’s instructions to determine the drying time of the grain filler. The drying time may vary depending on the type and brand of the filler. Ensure that the filler is completely dry before proceeding to the next step.
- Smooth the surface: Once the filler is dry, use sandpaper or a sanding block to gently sand the surface. This will help to level the filled grains and create a smooth surface ready for the new finish. Start with a coarser grit sandpaper and gradually progress to finer grits for a smoother finish.
- Clean the guitar: After sanding the filled surface, use a clean cloth or a brush to remove any sanding residue and ensure that the guitar’s body is clean and prepared for the next step.
Applying a grain filler is important to achieve a professional-looking finish, especially on open-grained woods. It helps to create a sleek and even surface that enhances the appearance of the wood. Take your time during this step to ensure thorough application and drying of the grain filler. Once you have finished applying the grain filler, you are ready to move on to the next step, which involves applying the new finish to the guitar.
Step 7: Applying the New Finish
After preparing the guitar’s body with grain filler, it’s time to apply the new finish. The type of finish you choose, whether it be paint, stain, or a clear coat, will determine the final look and protection of your acoustic guitar. Follow these steps to apply the new finish:
- Prepare the work area: Set up a clean and well-ventilated workspace, preferably with good lighting. Cover your work surface with a drop cloth or newspaper to protect it from any drips or spills.
- Apply the primer (if necessary): Depending on the type of new finish you are using, you may need to apply a primer before applying the final coat. Primers help to create a smooth and durable surface for the finish to adhere to. Follow the manufacturer’s instructions to apply the primer and allow it to dry completely.
- Apply the new finish: Using a paintbrush, foam brush, or spray gun, apply the new finish to the guitar in smooth and even strokes. Start from the top surface and work your way around the sides and edges. Allow each coat to dry according to the manufacturer’s instructions before applying additional coats. Multiple thin coats will generally yield better results than a single thick coat.
- Sand between coats: Depending on the type of finish you are using, you may need to lightly sand the guitar between coats to ensure a smooth and even finish. Use a fine-grit sandpaper or steel wool for this process. Clean off any sanding residue before applying the next coat.
- Build up the desired finish: Repeat the process of applying coats and sanding between them until you achieve the desired finish. Follow the manufacturer’s instructions for the recommended number of coats and drying times.
- Allow the final coat to cure: Once you have achieved the desired finish, allow the final coat to cure completely. This can take several days or longer, depending on the type of finish used. Avoid touching or handling the guitar during this curing process to prevent any damage to the finish.
Applying the new finish is an important step in the refinishing process as it not only enhances the aesthetic appeal of the guitar but also provides protection to the wood. Take your time and follow the manufacturer’s instructions for the particular finish you are using. Once the final coat has cured, you can proceed to the next step, which involves buffing and polishing the guitar to bring out its shine.
Step 8: Buffing and Polishing
After applying the new finish to your acoustic guitar, the next step in the refinishing process is to buff and polish the surface. This step enhances the shine and smoothness of the finish, giving your guitar a professional and lustrous appearance. Follow these steps to buff and polish your guitar:
- Clean the guitar: Use a clean cloth or a brush to remove any dust or debris from the guitar’s surface. Ensure that the surface is clean and free from any particles before proceeding.
- Choose the right polishing compound: Select a polishing compound suitable for the type of finish you applied. There are different types of compounds available, such as plastic polish, metal polish, or specifically formulated guitar polish. Read the instructions and choose the appropriate one.
- Apply the polishing compound: Apply a small amount of polishing compound to a clean, soft cloth. Work the compound into the cloth, ensuring an even distribution. Start with a small area and gradually work your way around the guitar, applying gentle pressure in circular motions.
- Buff the surface: Use the cloth with the polishing compound to buff the surface of the guitar. Apply consistent and even pressure while moving in circular motions. Continue buffing until the surface becomes smooth and begins to shine.
- Check for any imperfections: After buffing, inspect the guitar’s surface for any remaining imperfections, scratches, or dull areas. If necessary, repeat the buffing process on those specific areas to achieve a uniform shine.
- Remove excess compound: Once you are satisfied with the shine, use a clean, dry cloth to remove any excess polishing compound from the guitar’s surface. Ensure there are no streaks or smudges left behind.
- Final touch-up: Take a step back and inspect your guitar from different angles under good lighting. Any remaining imperfections can be addressed by buffing or applying a final coat of clear finish, if needed.
Buffing and polishing your guitar is the final step in the refinishing process. It adds the final touch by bringing out the natural beauty of the finish and giving your guitar a stunning, showroom-like appearance. Take your time during this step to achieve the desired shine and smoothness. Once you have completed the buffing and polishing process, you can proceed to the next step, which involves reassembling the hardware.
Step 9: Reassembling the Hardware
After buffing and polishing your acoustic guitar, it’s time to reassemble the hardware. Reinstalling the hardware components brings your guitar back to its functional state and completes the refinishing process. Follow these steps to reassemble the hardware:
- Clean the hardware: Take the time to clean and polish the hardware components that you removed earlier. This will ensure that they look their best and function properly.
- String the guitar: Begin by restringing the guitar with a fresh set of strings. Follow the manufacturer’s instructions to properly attach the strings to the bridge and tuning pegs. Use a string winder to make the process faster and more efficient.
- Reinstall the bridge pins: Place the bridge pins back into their respective holes on the bridge. Gently push them down until they sit flush with the bridge. Ensure that the strings are properly secured in the slots of the bridge pins.
- Attach the pickguard: If you removed the pickguard during the refinishing process, carefully reattach it to the guitar’s body. Use adhesive or screws, depending on the type of pickguard and the manufacturer’s instructions.
- Reattach the strap buttons: Use a screwdriver to firmly attach the strap buttons to the guitar’s body. Ensure that they are properly aligned and securely fastened.
- Install the tuning pegs: Place the tuning pegs back into their respective holes on the headstock. Insert the screws and tighten them appropriately, ensuring that the tuning pegs rotate smoothly and hold the strings in place.
- Double-check the hardware: Once everything is reassembled, give the guitar a thorough inspection. Check that all the hardware components are securely fastened and properly aligned. Test the tuning pegs and strap buttons to ensure they are functioning as expected.
Reassembling the hardware is an important step as it brings your acoustic guitar back to its playable state. Take your time during this step to ensure that everything is properly aligned and functioning. Once you have successfully reassembled the hardware, you can proceed to the final step, which involves restringing the guitar.
Step 10: Restringing the Guitar
In the final step of the refinishing process, it’s time to restring your acoustic guitar. Restringing not only completes the reassembly of your instrument but also allows you to experience the fresh sound and playability after the refinishing project. Follow these steps to restring your guitar:
- Choose the right strings: Select a set of acoustic guitar strings that suits your playing style and preference. Consider factors such as string gauge, material, and brand.
- Remove the old strings: Starting from the low E string, unwind and remove each string from the tuning pegs and the bridge. Dispose of the old strings responsibly.
- Prepare the new strings: Unpackage the new set of strings and straighten any kinks or bends. This will ensure that the strings are easier to work with and will stay in tune more effectively.
- Attach the strings to the bridge: Begin by inserting the ball end of the string into the appropriate bridge pin hole. Ensure that the string is securely seated in the bridge pin hole.
- Secure the strings to the tuning pegs: Pull the other end of the string through the appropriate nut slot and guide it to the correct tuning peg. Insert the string through the hole in the peg, leaving a few inches of excess string.
- Tighten the strings: Starting from the low E string, turn the tuning pegs clockwise to tighten each string. Be mindful of maintaining tension on the string with your other hand while winding to prevent slippage and ensure proper winding around the peg.
- Stretch and tune the strings: After attaching and tightening all the strings, gently pull and stretch each string away from the fretboard to help remove any initial slack. Then, tune each string using a tuner or by ear. Repeat the tuning process multiple times to stabilize the strings’ pitch.
- Cut excess string length: Once the strings are properly tuned and stabilized, use string cutters to trim off the excess string length near the tuning pegs. Be careful not to leave any sharp ends that could scratch the guitar or your fingers.
- Play and adjust as needed: With the guitar restrung, play each string, testing for proper tone, resonance, and intonation. Make any necessary adjustments to the tuning or bridge if required.
Restringing your acoustic guitar is the final step in the refinishing process, bringing your instrument back to its full potential. Take your time during this step to ensure proper string installation and tuning. Once you have successfully restrung your guitar, you can fully enjoy the fruits of your refinishing labor and admire the revitalized appearance and sound of your instrument.
Conclusion
Refinishing an acoustic guitar is a fulfilling and rewarding project that allows you to breathe new life into your instrument. By following the step-by-step guide outlined above, you can transform a worn-out or outdated guitar into one that is visually striking and sounds as good as new.
Throughout the refinishing process, it’s crucial to be patient, meticulous, and pay attention to detail. Take the time to properly remove the strings and hardware, strip the old finish, repair any wood damage, sand the guitar’s body, apply grain filler, and then proceed with applying the new finish. The final steps of buffing, polishing, reassembling the hardware, and restringing the guitar complete the process and prepare your instrument for an exceptional playing experience.
Remember, successful refinishing requires the right tools, materials, and a well-ventilated workspace. It’s also essential to follow safety precautions and manufacturer’s instructions when using chemicals, paints, or finishes. If you are unsure about any aspect of the refinishing process, do not hesitate to seek guidance from a professional or experienced luthier.
By taking the time and effort to refinish your acoustic guitar, you can create a unique instrument that reflects your personal style and showcases your passion for music. So, gather your materials, put on your creative hat, and embark on this gratifying journey of refinishing your acoustic guitar. The end result will be a stunning instrument that you can be proud to play and display for years to come.