Introduction
Welcome to the world of relicing acoustic guitars, where old meets new in a harmonious fusion of vintage aesthetics and modern craftsmanship. Relicing, also known as “aging” or “distressing,” is the art of artificially creating the worn and weathered look of a well-used instrument. This process involves intentionally adding scratches, dents, and other signs of wear to give the guitar an authentic and lived-in appearance.
Why would anyone want to purposefully distress a brand new acoustic guitar? The answer lies in the allure of nostalgia and the desire to capture the character and charm of vintage instruments. Reliced guitars carry a sense of history and evoke a connection to the past, even though they may have just rolled off the production line.
For guitar enthusiasts and players, there’s a certain appeal to owning an instrument that looks and feels like it has been on countless stages, played in smoky bars, and traveled the world. Reliced guitars can also be a cost-effective alternative to purchasing a genuine vintage guitar, which can come with a hefty price tag.
In this guide, we will explore the process of relicing an acoustic guitar and the steps involved in achieving an authentic aged look. From preparing the guitar for the transformation to carefully distressing the wood, we will delve into the techniques and considerations required to create a convincing reliced instrument. Whether you are a seasoned guitarist looking to give new life to an old companion or a hobbyist wanting to try your hand at relicing for the first time, this guide will provide you with the necessary knowledge to embark on your relicing journey.
So, grab your tools, roll up your sleeves, and let’s dive into the exciting world of relicing acoustic guitars.
What is Relicing and Why Do it?
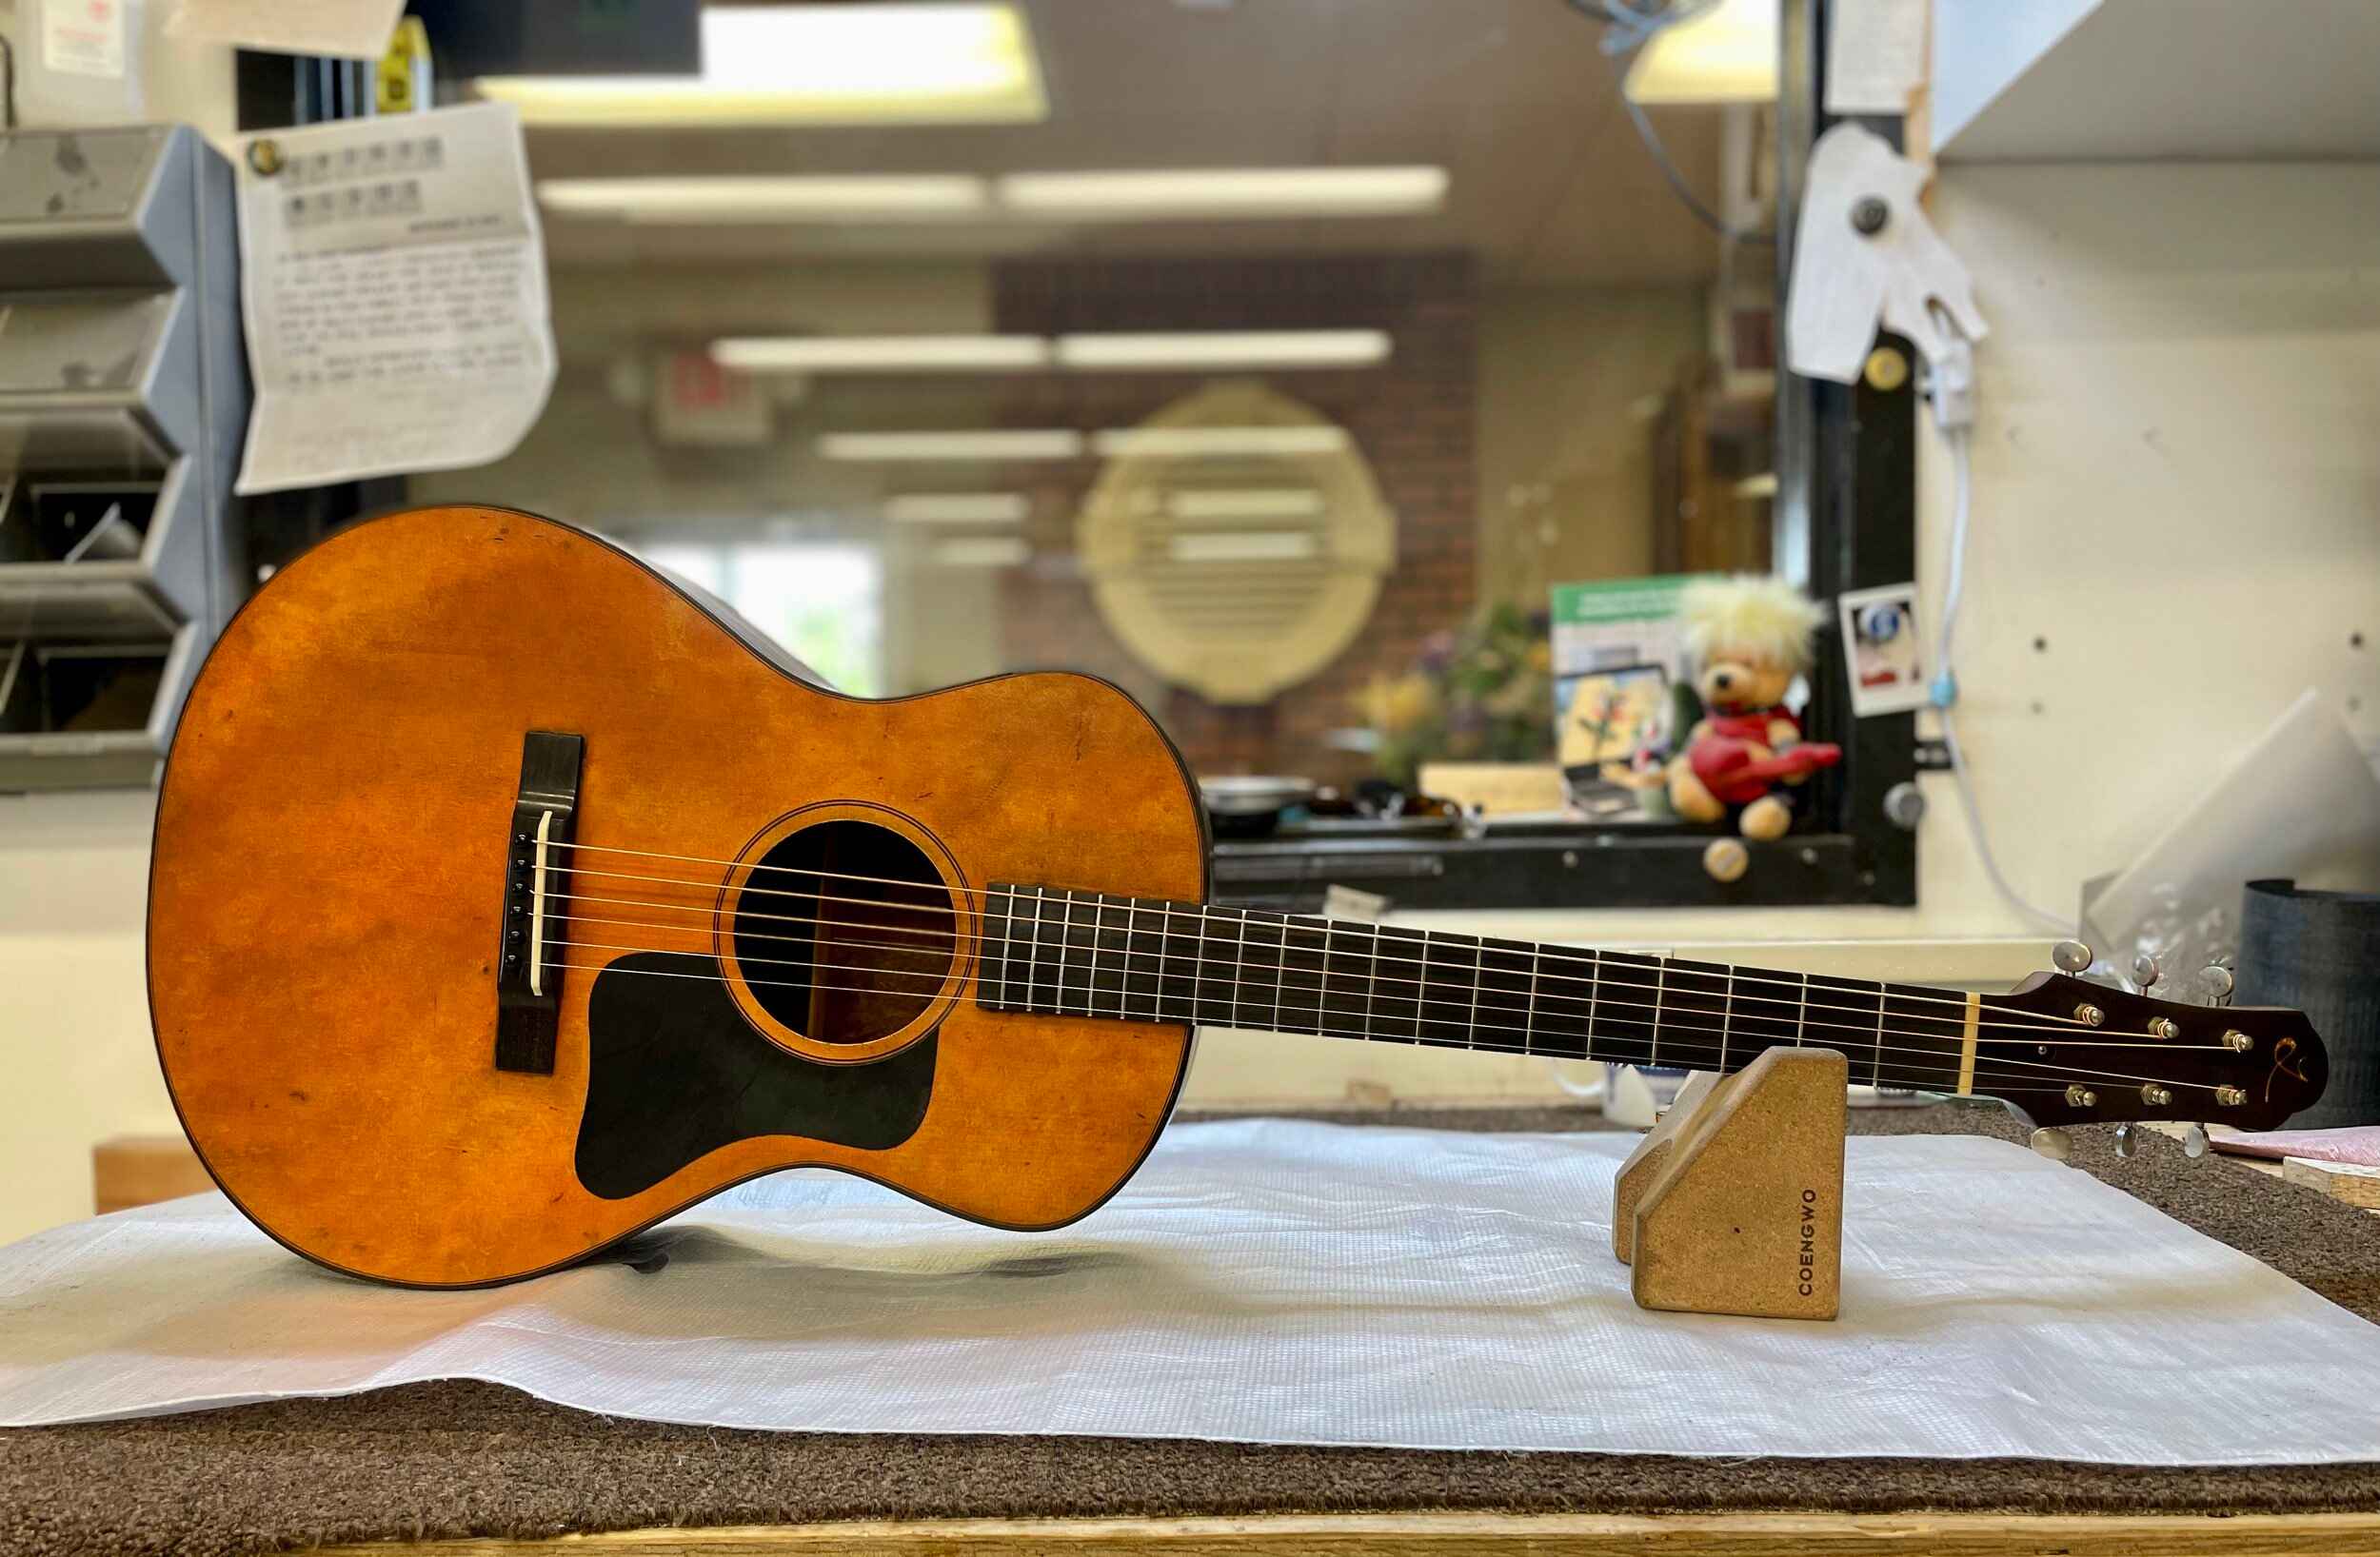
Relicing, often referred to as aging or distressing, is the process of intentionally creating the appearance of wear and tear on a guitar to give it a vintage and well-used aesthetic. This can include adding scratches, dents, finish wear, and other imperfections that mimic the natural patina developed over time on older instruments.
But why would someone want to intentionally weather their guitar? The answer lies in the appeal of vintage instruments, which are often associated with rich tones, exceptional craftsmanship, and the nostalgia of past eras. However, genuine vintage guitars can be expensive and hard to come by, making relicing an attractive alternative.
By relicing a guitar, musicians and collectors can enjoy the look and feel of a vintage instrument without the high price tag. Reliced guitars also have a unique story to tell, as the wear and tear on the instrument can suggest many hours of playing and a rich musical history. This aesthetic can add character and depth to a guitar, making it stand out on stage or in a collection.
Relicing also allows guitarists to customize their instruments to match their personal style and preferences. Some players prefer the worn-in feel of a reliced neck, which can offer a smoother playing experience. Additionally, relicing can provide a sense of individuality, as each reliced guitar has its own unique pattern of wear and distress.
For guitar builders and luthiers, relicing can be a way to showcase their skills and craftsmanship. It requires a deep understanding of the aging process and the ability to recreate the subtle nuances of a well-worn instrument. Relicing can also be a form of artistry, as builders have the opportunity to create a visually stunning guitar that tells a story through its appearance.
Ultimately, relicing is a way for musicians and guitar enthusiasts to bridge the gap between the vintage and the modern. It allows them to capture the essence of classic instruments while still enjoying the benefits and advancements of contemporary guitar design and technology.
Now that we understand what relicing is and why people choose to do it, let’s dive into the step-by-step process of preparing and distressing an acoustic guitar to achieve that coveted aged look.
Preparing the Guitar
Before diving into the relicing process, it’s essential to properly prepare the guitar to ensure a successful and polished end result. Here are the key steps to follow:
1. Gather the necessary tools and materials: Before beginning, make sure you have all the tools and materials you will need for the relicing process. This may include sandpaper, masking tape, a heat gun, various brushes, stains, and lacquer or finishing materials. It’s important to have everything on hand to avoid interruptions during the process.
2. Remove the strings: Start by removing all the strings from the guitar. This will provide easier access to different parts of the instrument and prevent them from getting in the way during the relicing process.
3. Disassemble any removable hardware: Next, disassemble any removable hardware, such as the bridge, pickguard, and tuning machines. This step requires caution and precision to avoid damaging these components.
4. Protect the areas you don’t want to relic: Use masking tape to cover any areas of the guitar that you want to keep intact and free from distressing. This may include the soundhole, binding, or other decorative elements that you want to preserve.
5. Clean and prepare the surface: Thoroughly clean the guitar’s surface to remove any dirt, oils, or residue. Use a soft cloth and a mild cleaner to gently wipe down the body, neck, and other parts of the instrument. This step ensures a clean and smooth base for the relicing process.
6. Evaluate the guitar’s existing finish: Take a moment to assess the guitar’s current finish. This will help you determine the best approach for distressing and aging the guitar. If the guitar has a thick polyurethane finish, for example, additional steps may be required to achieve an authentic reliced look.
By following these steps, you will have a clean and well-prepared canvas for the relicing process. With the guitar properly prepared, you can now move on to the exciting and creative steps of distressing and aging the instrument to give it that coveted vintage charm.
Disassembling and Removing Hardware
Disassembling the hardware of the guitar is an essential step in the relicing process as it allows for easier access to various parts of the instrument. Here are the key steps to follow when disassembling and removing hardware:
1. Remove the strings: Begin by removing all the strings from the guitar. This step not only makes it easier to access the hardware but also prevents any damage to the strings during the disassembly process.
2. Loosen and remove the tuning machines: Use a suitable tool, such as a wrench or screwdriver, to loosen and remove the tuning machines. Make sure to keep the screws or other components in a safe place, as you will need them later when reassembling the guitar.
3. Remove the pickguard, if applicable: If your guitar has a pickguard, carefully detach it from the body. Typically, pickguards are held in place with screws or adhesive. Take your time and use the appropriate tools to ensure a smooth removal without damaging the guitar’s finish.
4. Take off the bridge: Depending on the type of guitar, the bridge may be attached with glue or screws. If it is glued, gently apply heat using a heat gun to soften the glue. Use caution not to overheat the guitar, as excessive heat can damage the finish or weaken the adhesive on other parts of the instrument.
5. Remove the remaining hardware: Look for any additional hardware on the guitar, such as strap buttons, control knobs, or backplates. Carefully remove them using the appropriate tools or unscrew them if necessary. Keep each component organized and labeled to facilitate reassembly later on.
6. Document the disassembly process: It is highly recommended to take photos or make notes of the disassembly process. This documentation will assist you when it comes time to reassemble the guitar, ensuring that each component is placed back in its original position.
By properly disassembling and removing hardware from the guitar, you create a clear path for distressing and aging the various parts. Remember to handle each component with care and keep them safely stored until it’s time to reassemble the guitar in the later stages of the relicing process.
Creating Scratches and Dents
One of the key aspects of relicing an acoustic guitar is recreating the appearance of scratches and dents that naturally occur over time. These imperfections contribute to the vintage charm and character of the instrument. Here are the steps to create realistic-looking scratches and dents:
1. Evaluate the guitar’s natural wear patterns: Examine vintage guitars or reference images to understand the typical wear patterns and locations of scratches and dents. This will help you create a more authentic and realistic reliced look.
2. Start with shallow scratches: Using a small screwdriver or other suitable tool, carefully create shallow scratches on the guitar’s body, neck, and headstock. Mimic the natural movement and wear by making the scratches in different directions and lengths. Be mindful of the guitar’s wood and finish, ensuring that you do not damage it excessively.
3. Add deeper scratches: For a more distressed appearance, create deeper scratches by applying more pressure with the screwdriver or other tools. Vary the depth and angle of the scratches to replicate the organic nature of wear and tear.
4. Use a hammer to create dents: With a hammer covered in a soft cloth, carefully tap the guitar’s body and other parts to create dents. Start with light taps and gradually increase the force to achieve the desired level of distressing. Again, refer to reference images to understand the common areas for dents on vintage guitars.
5. Repeat the process: Step back and assess the scratches and dents you have created. If necessary, continue adding more distressing until you achieve the desired aesthetic. Remember to maintain a balance between realism and the overall visual appeal.
6. Blend the distressing: Use sandpaper or a sanding sponge to gently smooth out any harsh edges or inconsistencies in the scratches and dents. This step helps blend the distressed areas with the rest of the guitar’s finish for a more cohesive and natural appearance.
Creating scratches and dents requires careful attention to detail and a artistic approach. Take your time, study the wear patterns of vintage guitars, and aim for a realistic and balanced distressing. Each scratch and dent tells a story, and by carefully crafting them, you can enhance the vintage look of your reliced acoustic guitar.
Aging the Wood
One of the key elements in relicing an acoustic guitar is aging the wood to give it that authentic vintage look. This process involves simulating the natural effects of time and wear on the guitar’s body, neck, and other wooden components. Here are the steps to effectively age the wood of your reliced guitar:
1. Sanding and distressing the wood: Start by sanding the guitar’s wooden surfaces to remove any existing finish or sealant. This creates a raw and exposed wood surface that can be distressed and aged more effectively. Use sandpaper with varying grits to create different levels of smoothness and wear on the wood.
2. Add dings and divots: Use a hammer or other suitable tool to carefully create small dings and divots in the wood. Strategically place these marks in areas that typically receive wear over time, such as the body edges, back, and neck. Randomize their placement to achieve a more natural and organic look.
3. Use stain or dye: Apply a wood stain or dye that replicates the color and patina of aged wood. Choose a stain that matches the desired vintage look, whether it’s a warm amber tone or a deeper, weathered brown. Apply the stain with a brush or cloth, following the wood grain for an even and natural appearance.
4. Consider wood aging techniques: Experiment with additional wood aging techniques, such as using tea or coffee stains, vinegar and steel wool solutions, or even exposing the wood to the elements (if done carefully). These methods can further enhance the aged appearance of the wood, giving it a weathered and worn-in look.
5. Darken the edges: Pay special attention to the edges of the guitar’s body and neck, as these areas naturally accumulate more wear and dirt. Use a darker stain or dye to darken and define these edges, mimicking years of hand placement and contact with the player’s body.
6. Seal and protect the wood: Once you are satisfied with the aged look of the wood, apply a clear sealer or lacquer to protect the finish. This will also add a subtle sheen and depth to the wood, enhancing the overall visual appeal of the reliced guitar.
Aging the wood of your reliced acoustic guitar requires patience, experimentation, and careful attention to detail. By distressing, staining, and sealing the wood properly, you can achieve a convincing vintage appearance that adds character and depth to your instrument.
Finishing Techniques
Once you have distressed and aged the wood of your reliced acoustic guitar, the next step is to apply finishing techniques to complete the authentic vintage look. Here are some key techniques to consider:
1. Faux finish checking: Finish checking refers to the small cracks that often appear in the finish of vintage guitars. To mimic this effect, carefully apply thin lines or cracks using a fine brush and dark paint or ink. These simulated cracks add depth and authenticity to the reliced appearance.
2. Apply a tinted clear coat: Enhance the vintage vibe by applying a tinted clear coat over the wood surface. This can be achieved using a combination of clear lacquer and a touch of dye or stain. Choose a tint that complements the color and aging of the wood to achieve the desired look.
3. Distress the finish: To further mimic the wear and tear of an aged instrument, distress the finish by gently sanding or scraping certain areas. Focus on the edges, corners, and other high-contact areas where natural wear occurs. This technique helps create a more organic and lived-in appearance.
4. Add simulated patina: Give your reliced guitar a touch of patina by applying a subtle layer of brown or amber shading to certain areas. This can be achieved using transparent glazes or toners, applied sparingly with a soft brush. Patina adds depth and richness to the finish, further enhancing the vintage aesthetic.
5. Age hardware and metal parts: To complete the overall vintage look, consider aging the metal hardware and parts of your guitar. This can be done using chemical patinas, oxidation techniques, or simply by using sandpaper or abrasive materials to wear away the finish. Aged hardware adds to the authenticity of the reliced appearance.
6. Revisit and refine: Once you have applied the finishing techniques, step back and evaluate the overall look of your reliced acoustic guitar. Assess the balance of distressing, coloring, and aging to ensure a cohesive and believable vintage appearance. Make any necessary adjustments to refine the final result.
By carefully applying these finishing techniques, you can bring your reliced acoustic guitar to life with a convincingly aged and vintage look. Remember to take your time and experiment, as each guitar will have its own unique wear patterns and characteristics. With the finishing touches complete, your reliced acoustic guitar is now ready to be reassembled and played, showcasing its timeless charm and character.
Reassembling and Reinstalling Hardware
With the reliced appearance of your acoustic guitar complete, it’s time to reassemble and reinstall the hardware. This step is crucial to ensure proper functionality and playability of the instrument. Here are the steps to follow when reassembling your reliced guitar:
1. Refer to your documentation: Review the photos or notes you took during the disassembly process to guide you in reassembling the guitar. Ensure that you have all the necessary components and hardware ready.
2. Start with the hardware: Begin by reinstalling the hardware components, such as the tuning machines, strap buttons, and control knobs. Use the appropriate tools to securely attach them to the guitar, taking care not to over tighten or damage the finish.
3. Reattach the pickguard: If your guitar has a pickguard, carefully align it with the body and secure it in place using the screws or adhesive. Ensure that it is firmly attached and sits flush against the body.
4. Reinstall the bridge: If you removed the bridge during the relicing process, it’s time to reattach it. Apply a small amount of wood glue to the bottom of the bridge and carefully position it on the guitar’s body. Use clamps or masking tape to hold it in place while the glue dries.
5. Restring the guitar: Install a fresh set of strings onto the guitar. Follow the proper stringing technique for your specific type of bridge and tuning machines. Take care to properly stretch and tune the strings to ensure stability and proper intonation.
6. Double-check functionality: With the hardware installed and the guitar restrung, test the functionality of the instrument. Check the tuning stability, adjustable components, and overall playability of the guitar. Make any necessary adjustments or tweaks to ensure optimal performance.
7. Clean and polish: Once everything is assembled and in working order, give the guitar a final cleaning and polishing. Use a guitar cleaner or polish to remove any fingerprints or residue, and gently buff the finish to bring out its shine.
By carefully reassembling and reinstalling the hardware, you can ensure that your reliced acoustic guitar is not only visually appealing but also fully functional. Take your time during this process, paying attention to detail, and enjoy the satisfaction of seeing your reliced guitar come together in its final form.
Final Touches and Aging the Finish
As you near the completion of relicing your acoustic guitar, it’s time to add the final touches and focus on aging the finish. These last steps will help enhance the overall vintage look and ensure that your reliced guitar looks authentically aged. Here’s what you need to do:
1. Fine-tune distressing: Take a critical look at your reliced guitar and make any necessary adjustments to the distressing. Use sandpaper or fine-grit abrasive materials to finesse scratches, dents, or any other distressing elements. Aim for a balanced and natural appearance.
2. Add wear on the neck: Pay close attention to the neck of the guitar, as it naturally accumulates wear from the player’s hands. Create subtle wear patterns, such as glossiness and smoothness, using sandpaper or a polishing cloth. Mimic the areas where the player’s hands typically come into contact with the neck.
3. Age the finish: Apply a finishing technique to age the finish of the guitar. This can be done with a combination of tinted clear coats, toners, or glazes to create an aged and slightly yellowed or ambered appearance. Apply these products lightly and gradually until you achieve the desired effect.
4. Focus on hardware aging: Take extra care to age the hardware components of the guitar, such as tuners, control knobs, and bridge pins. Use chemical patinas, oxidation techniques, or abrasive materials to create a worn and tarnished look. It’s the subtle details that add to the overall vintage aesthetic.
5. Simulate dirt and grime: To achieve a truly authentic aged look, simulate dirt and grime that accumulates over time. Use a small brush or a cotton swab dipped in diluted brown or black paint to add subtle grime around seams, hardware, and other areas prone to dirt buildup.
6. Final inspection and adjustments: Step back and carefully inspect your reliced guitar for any areas that might need further distressing, aging, or touch-ups. Make any necessary adjustments to ensure that the overall appearance is cohesive and convincing.
7. Apply a protective layer: Once you are satisfied with the aging of the finish, apply a final protective layer such as a clear lacquer or sealant to preserve the reliced look and protect the guitar from further wear and tear.
Through these final touches and aging techniques, your reliced acoustic guitar will exude the charm and character of a vintage instrument. These small details make a significant difference in achieving an authentic reliced appearance. Now, stand back and admire the fruits of your labor—a beautifully aged and vintage-inspired guitar that reflects a rich musical history.
Conclusion
Congratulations! You have successfully navigated the process of relicing an acoustic guitar, transforming a new instrument into a vintage masterpiece. Through careful planning, attention to detail, and artistic techniques, you have achieved a reliced look that captures the timeless charm of bygone eras.
Relicing an acoustic guitar is a unique and personal journey, allowing you to customize and create an instrument with character, history, and a story to tell. The process of distressing, aging the wood, and applying finishing techniques may require patience and experimentation, but the result is a reliced guitar that stands out with its vintage aesthetics.
Remember, the art of relicing extends beyond simply creating scratches and dents. It’s about intricately recreating the wear, tear, and natural patina that develop over time on vintage instruments. By studying reference materials, paying attention to detail, and infusing your own creative touch, you have breathed life into your reliced guitar.
Whether you plan to showcase your reliced guitar on stage, add it to your collection, or simply enjoy playing it, your effort and dedication have made it a truly unique instrument. As you strum its strings, you can feel the connection to the past and the love and craftsmanship that went into its creation.
So, let your reliced guitar be a source of inspiration and a reflection of your own artistic expression. Embrace the beauty of imperfections, as they add depth and character to your musical companion. And as your reliced guitar continues to age with you, it will carry a story, a journey, and a legacy that will be cherished for years to come.


