Introduction
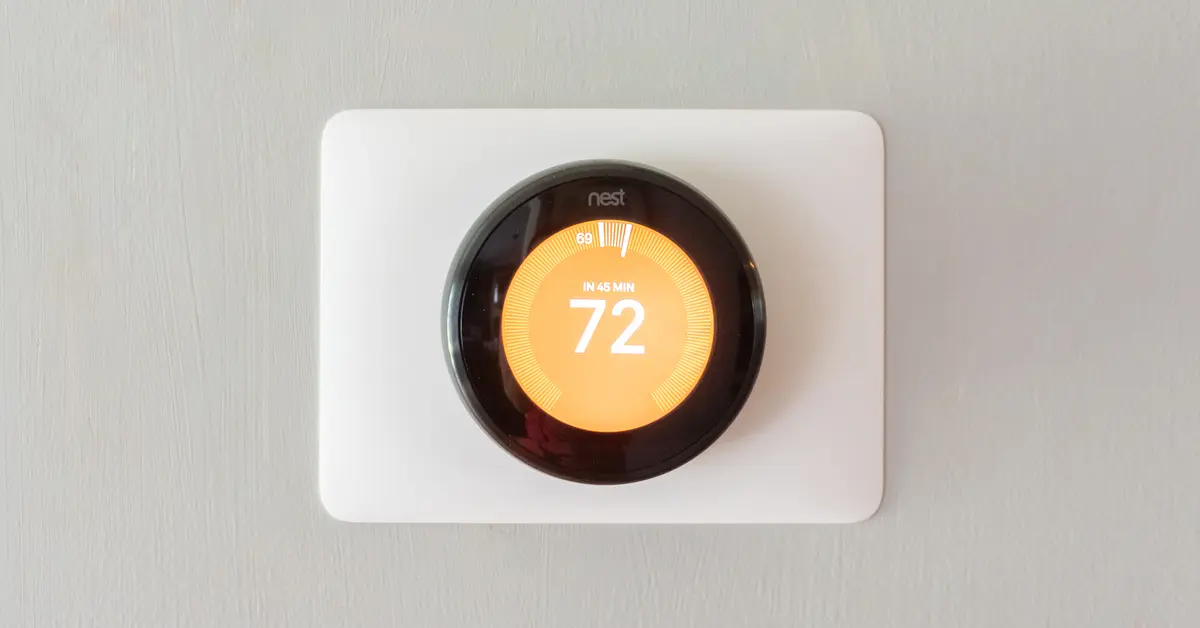
Welcome to the step-by-step guide on how to change your Nest smart thermostat to air conditioning mode. Nest smart thermostats are becoming increasingly popular due to their energy-saving features, sleek design, and intuitive user interface. By following this guide, you will be able to upgrade your thermostat to control your air conditioning system, allowing you to effortlessly maintain a comfortable indoor climate during those scorching summer months.
Switching your Nest thermostat to air conditioning mode is a simple process that can be completed in a few easy-to-follow steps. Before we delve into the details, it is essential to ensure that your HVAC (heating, ventilation, and air conditioning) system is compatible with the Nest thermostat. Checking compatibility is crucial to ensure seamless integration and optimal performance.
Once you have verified compatibility, gather the necessary tools, including a screwdriver and wire labels, to assist you during the installation process. Before proceeding, it is crucial to shut off the power to your HVAC system to avoid any potential electrical hazards.
Next, remove your old thermostat carefully, ensuring that you label and document the wires as you disconnect them. Properly connecting the wires to your Nest thermostat is essential for it to function correctly. As the wires vary across different HVAC systems, it is crucial to follow the Nest installation guide or consult a professional if you encounter any confusion.
After connecting the wires, it’s time to install your Nest thermostat on the wall. The Nest thermostat comes with a sleek wall plate that provides a professional and secure mounting solution. Follow the installation guide to ensure the thermostat is securely attached.
Once the physical installation is complete, power on your HVAC system and begin the setup process. The Nest thermostat will guide you through a series of prompts to connect it to your Wi-Fi network and customize settings such as temperature preferences and schedule options. Ensure that you configure the thermostat to air conditioning mode during this setup process.
With your Nest thermostat set up, it’s time to test its functionality by turning on your air conditioning system. Monitor the temperature and ensure that the system is cooling your space effectively. If you encounter any issues, this guide includes troubleshooting tips for common problems you may encounter during the process.
By following this guide, you can transform your Nest smart thermostat into a powerful controller for your air conditioning system. Enjoy the convenience and energy-saving benefits that come with having complete control over your indoor environment.
Checking Compatibility
Before embarking on the process of changing your Nest smart thermostat to air conditioning mode, it is crucial to check the compatibility of your HVAC system with the Nest thermostat. Compatibility ensures that the thermostat can properly communicate with your heating, ventilation, and air conditioning equipment, allowing for seamless integration and optimal performance.
To check compatibility, start by identifying the type of HVAC system you have. Nest thermostats are compatible with a wide range of systems, including single-stage, multi-stage, and heat pump systems. It is essential to understand your system’s specifications to determine if it aligns with the Nest thermostat’s requirements.
You can typically find information about your HVAC system in the user manual, specifications sheet, or by contacting the manufacturer. Look for details such as the type of system, the number of stages or zones, and the available wires.
Once you have identified the type of system you have, visit the Nest website or consult the compatibility checker tool provided by Nest. These resources allow you to enter your HVAC system’s details to determine if it is compatible with the Nest thermostat.
If your system is deemed compatible, you can proceed with the installation process. However, if your system is not listed as compatible or if you are unsure about the compatibility result, it is highly recommended to consult a professional HVAC technician. They can assess your system and provide guidance on the best course of action.
Keep in mind that compatibility is not only limited to the HVAC system itself but also to the specific model of the Nest thermostat you own. Different generations or models of Nest thermostats may have varying compatibility requirements. Ensure that you check compatibility based on the specific Nest thermostat you have or plan to purchase.
Checking compatibility is an essential step to ensure a successful installation and avoid any compatibility issues down the line. By taking the time to verify compatibility, you can proceed with confidence, knowing that your Nest thermostat will seamlessly integrate with your HVAC system, providing you with optimal control over your home’s air conditioning functionality.
Gathering Necessary Tools
Before you begin the process of changing your Nest smart thermostat to air conditioning mode, it is important to gather the necessary tools. Having the right tools on hand will make the installation process smoother and more efficient. Here is a list of tools you will need:
- A small screwdriver – A Phillips-head or flathead screwdriver will typically be sufficient for removing your old thermostat and installing the Nest thermostat. Choose a screwdriver that fits the screws used in your thermostat.
- Wire labels – It is essential to label the wires before disconnecting them from your old thermostat. This will help you easily identify and connect the wires to the correct terminals on the Nest thermostat later. You can use pre-made wire labels or create your own by writing the corresponding letters on small pieces of tape.
- A level – Installing the Nest thermostat on the wall requires ensuring it is straight and level. A small bubble level can be helpful in achieving an accurate installation.
- A smartphone or computer – You will need a smartphone or a computer to download the Nest app and complete the setup process. Make sure your device is compatible with the Nest app.
- A Wi-Fi network – The Nest thermostat connects to your home’s Wi-Fi network to enable remote access and control. Ensure that you have a stable Wi-Fi connection during the setup process.
Having these tools readily available before starting the installation process will save you time and frustration. It is always better to be prepared and have everything you need within reach.
In addition to the tools mentioned above, make sure you have read and familiarized yourself with the Nest installation guide, which provides detailed instructions specific to your model of the Nest thermostat. The installation guide will guide you through the steps required to install and configure your Nest thermostat properly.
It is also important to note that different HVAC systems may require additional tools or equipment during the installation process. If you are unsure about any specific requirements, it is recommended to consult the Nest installation guide or seek professional assistance.
Gathering the necessary tools upfront will ensure a smooth and efficient installation process, allowing you to change your Nest smart thermostat to air conditioning mode with confidence.
Shutting Off Power
Before you begin the process of removing your old thermostat and installing the Nest smart thermostat, it is crucial to shut off the power to your HVAC (heating, ventilation, and air conditioning) system. This step is necessary to ensure your safety and avoid any electrical accidents during the installation.
Here is a step-by-step guide to help you shut off the power:
- Locate the circuit breaker or fuse box – The circuit breaker or fuse box is typically located in an accessible area, such as the basement, utility room, or garage. If you are unsure of its location, refer to your home’s electrical system diagram or consult a professional.
- Identify the breaker or fuse for your HVAC system – Look for the breaker or fuse that corresponds to your HVAC system. It may be labeled as “heating” or “air conditioning.” If you are uncertain, consult the circuit breaker/fuse box guide or consult an electrician.
- Switch off the breaker or remove the fuse – Once you have identified the correct breaker or fuse, switch it to the “off” position or remove the fuse. This action will cut off the power supply to your HVAC system, ensuring it is safe to proceed with the installation.
- Verify that the power is off – To ensure that the power to your HVAC system is truly off, try turning on the thermostat or running the heating or cooling function. If nothing happens, it is an indication that the power has been successfully shut off.
It is important to exercise caution when working with electrical systems. If you are not comfortable or confident in shutting off the power yourself, it is highly recommended to consult a licensed electrician.
Remember, safety should always be the top priority. By safely shutting off the power to your HVAC system, you can proceed with confidence and peace of mind, knowing that you are taking the necessary precautions to protect yourself and your home.
Removing Old Thermostat
Before you can install your new Nest smart thermostat, you need to remove the old thermostat from your wall. This step requires careful handling to avoid damaging the walls or wires. Here’s a step-by-step guide to help you remove your old thermostat:
- Turn off the power – Before proceeding with any work, ensure that the power to your HVAC system is turned off. Follow the steps outlined in the “Shutting Off Power” section to safely shut off the power supply.
- Remove the thermostat cover – Gently detach the cover of your old thermostat by carefully pulling it away from the wall. Some covers may have small screws that need to be loosened before removal.
- Take a photo of the wiring – Before disconnecting the wires, take a clear photo or make note of the wire connections. This will serve as a reference point when connecting the wires to your new Nest thermostat.
- Loosen the terminal screws – Using a small screwdriver, carefully loosen the terminal screws that secure the wires to the thermostat. Keep in mind that different thermostats may have varying screw types, such as Phillips-head or flathead screws.
- Disconnect the wires – Once the screws are loose, gently pull the wires from their respective terminals. If the wires are tightly wound around the terminals, use a small amount of force to free them, taking care not to damage the wires.
- Remove the thermostat from the wall – After disconnecting the wires, you can remove the old thermostat from the wall. Hold the base firmly and gently pull it away, releasing it from the mounting plate.
- Ensure wires do not fall into the wall – As you remove the old thermostat, pay attention to the wires and ensure they do not fall back into the wall. It is helpful to use tape or wire labels to secure the wires and prevent them from slipping.
Once you have successfully removed the old thermostat from the wall, you are ready to proceed with the installation of your new Nest smart thermostat. Take a moment to clean any dust or debris from the wall surface to ensure a clean and secure installation.
It is important to handle the old thermostat with care and avoid yanking or pulling the wires forcefully, as this could cause damage or disconnection of the wires. If you encounter any difficulties during the removal process or are unsure about the wiring connections, consult the Nest installation guide or seek professional assistance.
By following these steps, you will safely and effectively remove the old thermostat and prepare your wall for the installation of your new Nest smart thermostat.
Connecting Wires to Nest Thermostat
With the old thermostat removed, it’s time to connect the wires from your HVAC system to the Nest thermostat. Properly connecting the wires is crucial to ensure the Nest thermostat functions correctly and maintains a seamless connection with your heating and cooling system. Follow these step-by-step instructions to connect the wires to your Nest thermostat:
- Identify the labeled wires – Refer to the photo or notes you took during the removal of the old thermostat to identify the labeled wires. Each wire corresponds to a specific terminal on the Nest thermostat.
- Strip the wire tips – Using wire strippers or a sharp knife, carefully strip about 1/4 inch of insulation from the ends of the wires. This will expose the conductive metal beneath the insulation, allowing for proper connection to the Nest thermostat terminals.
- Connect the wires to the Nest terminals – Match each wire to its corresponding terminal on the Nest thermostat. The terminals on the Nest thermostat are typically labeled with letters such as R, W, Y, G, and C. Depending on your HVAC system, you may have additional terminals or different labels, so it’s important to refer to the Nest installation guide or consult a professional if you are unsure.
- Insert the wires into the terminals – Insert the stripped wire ends into the appropriate terminals on the Nest thermostat. Ensure that each wire is securely inserted and the terminal screws are tightened to hold the wires in place. Avoid leaving any exposed copper wire outside the terminal to prevent any short circuits.
- Attach the Nest thermostat to the wall plate – If your Nest thermostat comes with a wall plate, align the thermostat with the wall plate and gently press it into place until it clicks. Ensure that the thermostat is level and securely attached to the wall plate.
It is important to note that different HVAC systems may have different wire colors and terminal labels. Therefore, it is crucial to refer to the labels on your old thermostat or consult the Nest installation guide for proper wire identification and connection.
If you encounter any difficulties during the wire connection process or are unsure about the wiring configuration of your HVAC system, it is recommended to consult a professional HVAC technician for assistance. They can help you ensure that the wires are connected correctly and that your Nest thermostat will function optimally.
By following these steps, you will successfully connect the necessary wires from your HVAC system to your Nest thermostat, setting the stage for the next phase of installation.
Installing Nest Thermostat
Now that the wires are securely connected to the Nest thermostat, it’s time to install the thermostat itself on the wall. The installation process may vary slightly depending on the model of your Nest thermostat, but the general steps remain the same. Follow these instructions to successfully install your Nest thermostat:
- Select the appropriate location – Choose a suitable location on the wall for your Nest thermostat. Ideally, it should be centrally located and at a height that is easily accessible for temperature adjustments. Avoid installing the thermostat in direct sunlight or near drafts that may affect temperature readings.
- Prepare the wall – Clean the wall surface where the thermostat will be installed to ensure a secure attachment. Remove any debris or dust and ensure the surface is smooth and dry.
- Mount the wall plate – If your Nest thermostat comes with a wall plate, align the wall plate with the holes on the wall and use the provided screws to securely attach it. Use a level to ensure the wall plate is straight and level.
- Attach the Nest thermostat to the wall plate – Hold the Nest thermostat and align it with the connectors on the wall plate. Gently press the thermostat into place until it snaps securely onto the wall plate.
- Check for proper alignment – Ensure that the Nest thermostat is level and aligned with the wall plate. Adjust as necessary to achieve optimal positioning.
- Test the attachment – Gently tug on the Nest thermostat to ensure it is firmly attached to the wall plate. It should not wobble or come loose.
If your Nest thermostat does not come with a wall plate, follow the specific instructions provided in your Nest installation guide to mount the thermostat directly to the wall. The steps may involve drilling holes and using anchors and screws for secure installation.
During the installation process, make sure to follow any additional instructions provided with your specific model of the Nest thermostat. Different models may have slight variations in the installation process, so it’s essential to refer to the instructions provided.
Once the Nest thermostat is securely installed on the wall, you are ready to proceed with the power-on and setup process, which will be covered in the next section of this guide.
By following these steps, you will have successfully installed your Nest thermostat, bringing you one step closer to enjoying the enhanced control and energy-saving benefits it offers.
Powering on and Setting up Nest Thermostat
With your Nest thermostat installed, it’s time to power it on and set it up for use with your HVAC system. Follow these step-by-step instructions to power on and set up your Nest thermostat:
- Restore power to your HVAC system – Return to your circuit breaker or fuse box and switch the breaker or insert the fuse that supplies power to your HVAC system, turning it back on. This action will supply power to your Nest thermostat.
- Wait for the Nest thermostat to power on – Give your Nest thermostat a few moments to power on and initialize. You will see the Nest logo appear on the screen, indicating that it is ready for setup.
- Download and open the Nest app – On your smartphone or computer, download the Nest app from the App Store or Google Play Store. Open the app to begin the setup process.
- Create a Nest account – If you do not already have a Nest account, you will need to create one. Follow the prompts in the app to create an account using your email address and a secure password.
- Follow the on-screen instructions – The Nest app will guide you through the setup process with step-by-step instructions. Follow the prompts to connect your Nest thermostat to your Wi-Fi network, customize settings such as temperature preferences, and select your HVAC system type.
- Configure Nest thermostat with your HVAC system – During the setup process, you will be prompted to select your HVAC system type and answer a few questions about your specific setup. Follow the instructions carefully to ensure proper configuration.
- Verify connections and settings – Once the setup process is complete, the Nest app will verify the connections between your Nest thermostat and your HVAC system. It will also display the selected settings and options. Review the information to ensure accuracy.
- Test the Nest thermostat function – To ensure everything is working properly, test the function of your Nest thermostat. Adjust the temperature settings and check if the HVAC system responds accordingly. Monitor the performance to ensure the temperature changes reflect your adjustments.
During the setup process, make sure to input any specific details or preferences as requested by the app. This may include your location, preferred temperature units, and any additional features you want to enable on your Nest thermostat.
Keep in mind that the setup process may vary slightly depending on the specific model of your Nest thermostat. If you encounter any difficulties or have questions, consult the Nest app guidance or refer to the installation guide that came with your Nest thermostat.
By following these instructions, you will successfully power on and set up your Nest thermostat, allowing you to control and optimize your HVAC system for comfort and energy efficiency.
Configuring Nest Thermostat with HVAC System
Once your Nest thermostat is powered on and set up, the next step is to configure it properly with your HVAC (heating, ventilation, and air conditioning) system. This ensures that your thermostat works seamlessly with your specific setup, allowing you to maximize its functionality and energy-saving features. Follow these steps to configure your Nest thermostat with your HVAC system:
- Select your HVAC system type – During the initial setup process, you will be prompted to select the type of HVAC system you have. This can include options such as gas, electric, oil, heat pump, or radiant heat. Choose the option that is most applicable to your system.
- Answer specific setup questions – The Nest app will ask you a series of questions to fine-tune the configuration of your Nest thermostat. These questions may include details about the location of your thermostat, the type of fuel used, and any additional features or accessories connected to your HVAC system.
- Configure temperature preferences – Customize your temperature preferences according to your comfort needs. Set a desired temperature range for different times of the day, allowing your Nest thermostat to automatically adjust the temperature based on your schedule.
- Enable eco-friendly features – Take advantage of the energy-saving features offered by your Nest thermostat. Consider enabling features like Eco Mode, which adjusts the temperature when you’re away to save energy but ensures comfort when you return.
- Connect to remote access and smart home systems (optional) – If desired, connect your Nest thermostat to your home’s Wi-Fi network for remote access and control. Additionally, you can integrate your Nest thermostat with smart home systems like Google Home or Amazon Alexa for voice control and enhanced automation.
- Review and confirm settings – Once you have completed the configuration steps, review the settings displayed on the Nest app. Ensure that the temperature preferences, schedule, and additional features are accurately reflected.
It is important to note that the configuration process can vary depending on the specific model of your Nest thermostat and the features available to you. Additionally, if you have unique settings or complexities in your HVAC setup, it may be beneficial to consult the Nest installation guide or seek professional assistance for optimal configuration.
By properly configuring your Nest thermostat with your HVAC system, you can take full advantage of its features, ensuring optimal comfort, energy efficiency, and control over your indoor climate.
Testing Air Conditioning Functionality
After configuring your Nest thermostat with your HVAC system, it’s essential to test the air conditioning functionality to ensure everything is working correctly. This step allows you to verify that your Nest thermostat is effectively controlling your air conditioning system and that your desired temperature adjustments are being reflected. Follow these steps to test the air conditioning functionality:
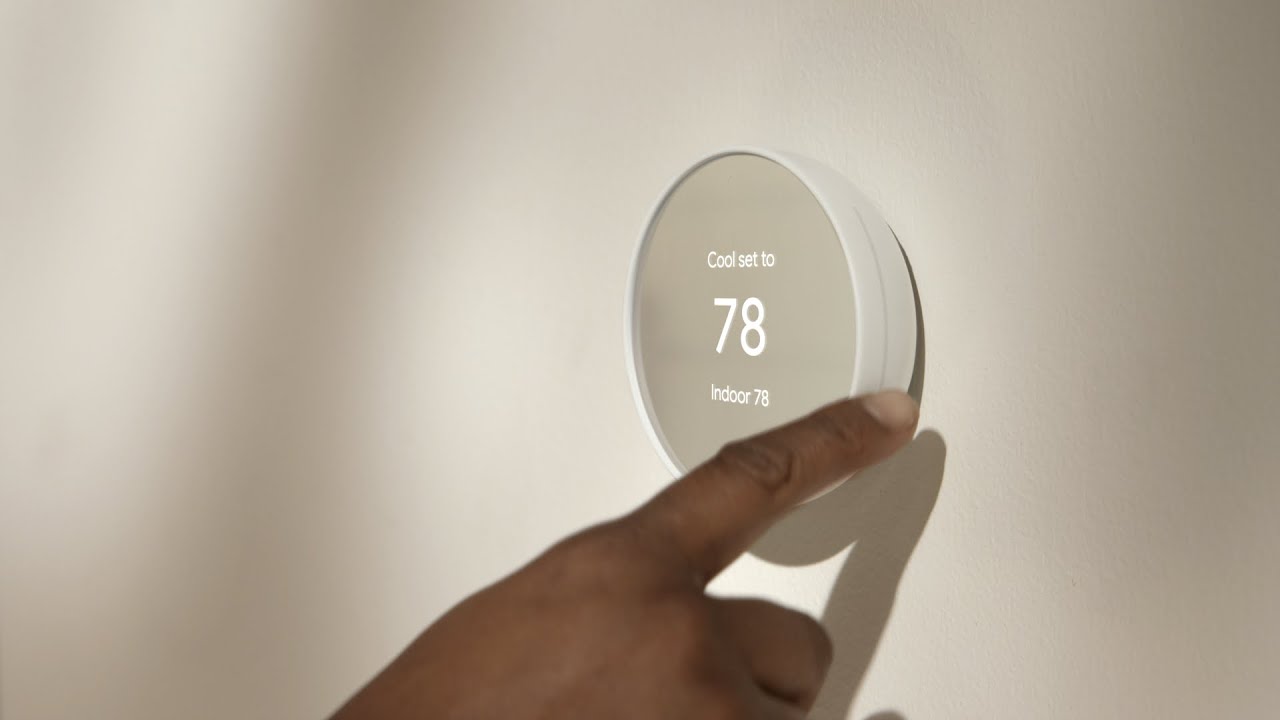
- Ensure the Nest thermostat is in cooling mode – Double-check that your Nest thermostat is set to air conditioning mode. Adjust the temperature settings if needed to activate the cooling function.
- Wait for the air conditioning system to kick in – Give your air conditioning system a few moments to start up and begin cooling your space. Depending on the system, it may take a short while for the cold air to begin flowing throughout your home.
- Monitor the temperature – Keep an eye on the temperature displayed on your Nest thermostat as well as the actual temperature in the room. Ensure that the temperature drops and that the air conditioning system maintains the desired level of coolness.
- Check for proper airflow – Pay attention to the airflow from your air conditioning vents. Ensure that the airflow is strong and evenly distributed throughout the space. If you notice any weak or uneven airflow, you may need to troubleshoot or adjust the HVAC system.
- Adjust temperature settings – Experiment with adjusting the temperature settings on your Nest thermostat to ensure that the air conditioning system responds accordingly. Observe how long it takes for the system to reach the new temperature setting and if it maintains that temperature consistently.
- Monitor energy usage – If your Nest thermostat provides energy usage data, keep an eye on it to see if your air conditioning system is operating efficiently. This information can help you identify any potential issues or assess the overall energy efficiency of your cooling system.
During the testing process, it’s important to note any unusual behaviors or issues that may arise. If you encounter any problems, refer to the troubleshooting section of the Nest installation guide or reach out to Nest support for assistance.
By thoroughly testing the air conditioning functionality of your Nest thermostat, you can ensure that your cooling system operates smoothly and efficiently, providing you with a comfortable indoor environment during hot summer days.
Troubleshooting Common Issues
Even with proper installation and configuration, you may encounter common issues when using your Nest thermostat. Troubleshooting these issues can help identify and resolve any problems that may arise. Here are some common issues you may encounter and their potential solutions:
- Incorrect temperature readings – If you notice that the temperature displayed on your Nest thermostat does not match the actual temperature in the room, it may indicate a calibration issue. Try performing a manual recalibration by adjusting the temperature settings a few degrees higher or lower and then back to the desired temperature.
- Inconsistent or inadequate cooling – If your air conditioning system is not providing consistent or sufficient cooling, several factors could be at play. Check that the air filters are clean and not blocking airflow. Verify that the vents and registers are fully open and not obstructed. If the issue persists, consult a professional to assess the overall performance of your HVAC system.
- No power or unresponsive Nest thermostat – If your Nest thermostat does not turn on or becomes unresponsive, check that the power supply is stable and securely connected. Ensure that the wires are properly inserted into the corresponding terminals. If the issue continues, try resetting the Nest thermostat by pressing and holding the device’s display for about 10 seconds.
- Wi-Fi connectivity problems – If your Nest thermostat is having trouble connecting to your Wi-Fi network, first check that your network is functioning properly. Ensure that the Wi-Fi signal is strong and that the correct network credentials are entered into the Nest app. You may need to move your Wi-Fi router closer to the thermostat or consider installing a Wi-Fi extender for better coverage.
- Smart home integration issues – If you are experiencing difficulties integrating your Nest thermostat with other smart home systems, ensure that all devices and apps are up to date. Verify that the necessary permissions and authorizations are granted for seamless communication between devices. Consult the specific integration guides and support resources provided by the respective manufacturers.
If you encounter any other issues with your Nest thermostat that are not addressed above, consult the troubleshooting section of the Nest installation guide or visit the official Nest support website for additional assistance. They provide comprehensive guidance on resolving a wide range of issues that may arise.
Remember, if you are unsure about any troubleshooting steps or encounter difficulties that you are not comfortable addressing yourself, it is always recommended to seek professional assistance from an HVAC technician or contact Nest customer support for further guidance.
By troubleshooting common issues and resolving any problems that arise, you can ensure that your Nest thermostat operates smoothly, providing you with optimal control and comfort throughout your home.
Conclusion
Congratulations! By following this step-by-step guide, you have successfully learned how to change your Nest smart thermostat to air conditioning mode. This process allows you to take full advantage of the features and benefits offered by your Nest thermostat, ensuring optimal comfort and energy efficiency during the warmer months.
We started by checking the compatibility of your HVAC system with the Nest thermostat to ensure proper integration. Then, we gathered the necessary tools, shut off the power, and carefully removed the old thermostat. After connecting the wires to the Nest thermostat, we proceeded to install it securely on the wall using a wall plate or directly mounting it.
Next, we powered on the Nest thermostat and set it up through the Nest app. We configured the thermostat with your specific HVAC system, customized temperature preferences, and explored additional energy-saving features. With the setup complete, we tested the air conditioning functionality, ensuring that your Nest thermostat effectively controlled the cooling system.
To ensure a seamless experience, we also provided troubleshooting tips for common issues you may encounter, allowing you to address any problems and optimize the performance of your Nest thermostat.
Remember, if you encounter any difficulties or are unsure about any aspect of the installation or setup process, it is always recommended to consult the Nest installation guide or seek professional assistance. They can provide expert guidance tailored to your specific situation.
Now, with your Nest smart thermostat configured to air conditioning mode, you can enjoy the convenience, comfort, and energy-saving benefits it brings. Take advantage of the intuitive controls, remote access, and smart home integration possibilities to enhance your home’s climate control experience.
Thank you for following this guide, and we hope you have a pleasant and satisfying experience using your Nest thermostat!