Introduction
Repairing a hole in an acoustic guitar may seem like a daunting task, but with the right tools and a little patience, it’s a project that can be successfully completed. Whether your guitar has suffered from an accidental bump or has developed a hole over time due to wear and tear, knowing how to effectively plug the hole is essential in keeping your instrument in top shape.
A hole in the body of an acoustic guitar can negatively impact its sound quality and structural integrity. It can cause buzzes and rattles, and if left unaddressed, may lead to further damage or even render the guitar unplayable. By following a few simple steps, you can restore your beloved guitar to its former glory and ensure years of continued enjoyment.
In this guide, we will walk you through the process of plugging a hole in an acoustic guitar. We will cover the tools and materials needed, as well as step-by-step instructions to effectively repair the damage. From assessing the extent of the hole to reattaching the bridge and tuning the guitar, each step is crucial in achieving a successful repair.
Before we begin, it’s important to note that this repair process is suitable for smaller holes and cracks. If your guitar has extensive damage or a large hole, it is recommended to seek professional repair assistance. Additionally, it’s always a good idea to take your time, work in a well-ventilated area, and have patience throughout the process to ensure the best possible results.
Tools and Materials Needed
Before embarking on the journey to repair a hole in your acoustic guitar, it’s essential to gather the necessary tools and materials. Having everything you need at hand will make the process smoother and more efficient. Here’s a list of the tools and materials you’ll need for this repair project:
- A suitable wood filler or epoxy
- A small putty knife or spatula
- Sandpaper (various grits, ranging from coarse to fine)
- A clean cloth or rag
- Paint or stain (if needed to match the guitar’s finish)
- A small paintbrush or sponge brush
- Masking tape
- A small container for mixing the wood filler or epoxy
- Rubber gloves
- Protective eyewear
- A well-ventilated work area
When selecting a wood filler or epoxy, ensure that it is suitable for guitar repair and capable of adhering to the guitar’s body. It’s also important to choose a filler or epoxy that matches the color and tone of your guitar’s wood finish. This will help to seamlessly blend the repair into the surrounding area.
Sandpaper with varying grits is essential for smoothing and shaping the filled area. Coarse-grit sandpaper will be useful for removing excess filler or epoxy, while finer-grit sandpaper will enable you to achieve a smooth and polished finish. Always start with the coarser grits and gradually work your way up to the finer grits for the best results.
Lastly, if the hole you are repairing requires touch-up paint or stain, be sure to have the appropriate color and type of paint or stain on hand to match your guitar’s finish. Talk to a professional at your local guitar store or consult the manufacturer’s guidelines to ensure you choose the right type of paint or stain for your guitar.
Step 1: Assess the Damage
The first step in repairing a hole in an acoustic guitar is to thoroughly assess the extent of the damage. Carefully examine the hole or crack to determine its size, shape, and any underlying structural damage. This evaluation will help you to plan and execute the appropriate repair method.
Begin by examining the hole from both the outside and inside of the guitar’s body. Take note of any splintering, loose wood fibers, or signs of stress around the damaged area. This information will help you to understand the severity of the damage and whether additional steps, such as reinforcing the area or using specialized techniques, are necessary.
Consider the size of the hole or crack as well. Smaller holes or cracks are generally easier to repair and may only require a simple fill-and-sand method. On the other hand, larger or more extensive damage may need additional attention, such as using patches or braces to reinforce the repaired area.
Depending on the location of the hole, you’ll also need to consider the impact on the guitar’s sound quality. Holes on the top or sides of the guitar may affect its resonance and tone. In contrast, holes on the back or sides may have less impact on the sound quality but should still be repaired to maintain the guitar’s structural integrity.
During this assessment, it’s crucial to be realistic about your own skills and limitations. If the damage appears to be beyond your ability to repair, it’s advisable to seek professional assistance. Repairing an acoustic guitar requires precision and expertise to ensure satisfactory results.
By thoroughly assessing the damage before beginning the repair process, you’ll be better equipped to choose the appropriate repair method and ensure a successful outcome. Remember to take your time and carefully consider the next steps in the process before moving forward.
Step 2: Prepare the Work Area
Once you have assessed the damage and determined the repair method, it’s time to prepare your work area. Creating a clean and organized space will allow you to work efficiently and minimize the risk of any additional damage to your guitar.
Start by finding a well-lit and well-ventilated area to conduct the repair. Adequate lighting will ensure you can see the details of the repair process clearly, while good ventilation will help to dissipate any fumes from the materials you’ll be using.
Next, place a clean cloth or protective covering on your work surface to prevent scratches or other damage to the guitar’s body. Make sure the cloth is large enough to comfortably accommodate the guitar and any additional tools or materials you’ll need during the repair.
It’s also a good idea to have a small container or tray for holding and mixing the wood filler or epoxy. This will prevent any spills or messes from damaging your work area or other tools.
Before you begin, it’s important to note that using rubber gloves and protective eyewear is essential when working with certain materials such as wood fillers or epoxies. This will safeguard your skin and eyes from any potential irritants or chemicals.
Lastly, gather all the tools and materials you will need for the repair and have them within easy reach. This will help you maintain a smooth workflow and prevent unnecessary interruptions or delays.
By setting up a clean and organized work area, you’ll create a conducive environment for a successful acoustic guitar repair. Taking the time to prepare in advance will streamline the repair process and ensure you have everything you need at your fingertips.
Step 3: Remove the Bridge Pins
To proceed with repairing the hole in your acoustic guitar, you’ll need to remove the bridge pins. Bridge pins are small cylindrical pegs that hold the strings in place at the bridge of the guitar. Removing them will allow you to access the area around the hole more easily.
Start by loosening the tension on the strings by turning the tuning pegs counterclockwise. This will relieve the pressure on the bridge pins and make them easier to remove. Once the strings are sufficiently loosened, you can use a bridge pin puller or a pair of pliers to gently pull the bridge pins out of their holes.
When removing the bridge pins, it’s crucial to handle them with care to prevent any damage. Grip the pin firmly but gently and pull it straight out, being cautious not to bend or break it. Set aside the bridge pins in a safe place to avoid misplacing them or causing any accidental damage.
After removing the bridge pins, take a moment to assess their condition. If any of the bridge pins appear worn, damaged, or cracked, consider replacing them with new ones to ensure that your guitar functions optimally once the repair is complete.
Removing the bridge pins will provide you with clear access to the area around the hole, making it easier to proceed with the repair. Remember to be gentle when removing the pins and handle them with care to prevent any accidental damage. With the bridge pins safely removed, you’re ready to move on to the next step of the repair process.
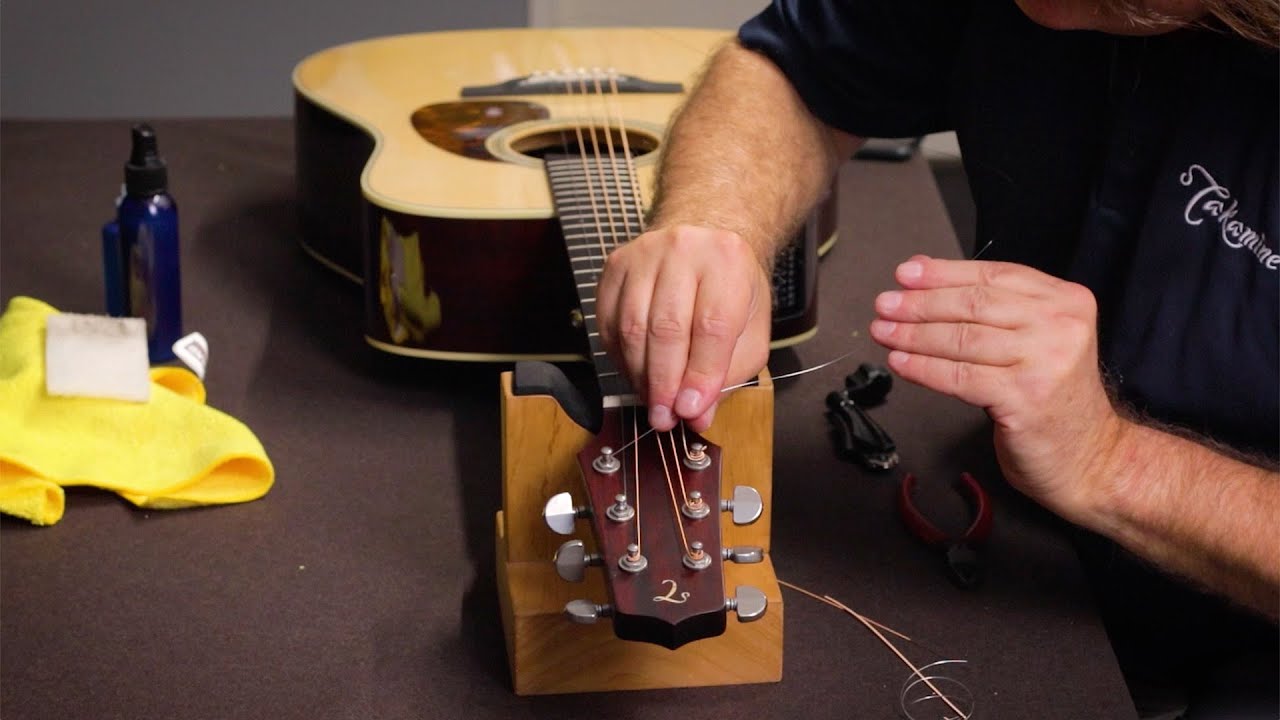
Step 4: Remove and Clean the Strings
With the bridge pins removed, the next step in repairing the hole in your acoustic guitar is to remove and clean the strings. This will allow for a thorough repair and prevent any damage to the strings during the process.
Start by loosening the tension on the strings further by turning the tuning pegs counterclockwise until the strings are loose and floppy. Once they are sufficiently loosened, you can carefully unwind and remove each string from the tuning pegs and the bridge.
As you remove each string, take note of its position to ensure that you can restring the guitar correctly once the repair is complete. You can use masking tape or small labels to mark the strings with their corresponding positions to avoid any confusion later on.
After removing the strings, it’s essential to clean them thoroughly to eliminate any dirt, debris, or oils that may have accumulated on the surface. You can use a soft cloth or a mild cleaning solution specifically designed for guitar strings to wipe each string clean. This will help to prolong the life of the strings and improve their overall playability.
While cleaning the strings, take the opportunity to inspect them for any signs of wear or damage. If any of the strings are severely worn or have visible issues, it is recommended to replace them with new ones for optimal sound quality and playability.
Once you have cleaned and inspected the strings, coil them up neatly and set them aside in a safe place. This will prevent them from tangling or getting damaged while you continue with the repair process.
By removing and cleaning the strings, you ensure a clean working area and prevent any accidental damage to them during the repair. Take your time to clean and inspect each string carefully, and keep them safely stored until you’re ready to reinstall them in the final steps of the repair.
Step 5: Remove the Bridge
After removing and cleaning the strings, the next step in repairing the hole in your acoustic guitar is to remove the bridge. Removing the bridge will provide better access to the hole and allow for a more effective repair.
The bridge is typically held in place by tension from the strings and adhesive or glue. To remove it, you’ll need to carefully separate the bridge from the guitar body without causing any damage.
Start by gently inserting a thin putty knife or spatula under the edge of the bridge, working your way around its perimeter. Apply slight, even pressure to loosen the adhesive or glue and gradually lift the bridge off the top of the guitar body.
While lifting the bridge, be cautious not to apply excessive force or use sharp tools that may damage the guitar’s surface. Take your time and work patiently to ensure a clean and safe removal.
Once the bridge is lifted, you may need to use heat from a hairdryer or heat gun to soften any adhesive that is still holding it in place. This can aid in the removal process and minimize the risk of damage to the guitar body.
After removing the bridge, take a moment to inspect the area underneath for any debris, adhesive residue, or other unwanted material. Use a clean cloth or a gentle solvent to carefully clean the guitar’s body where the bridge was attached. This will provide a clean surface for the next steps in the repair process.
Set the bridge aside in a safe place, and be sure to take note of its position and orientation. This will ensure that you can reattach it correctly later on during the repair.
By removing the bridge, you create an open space to effectively repair the hole in your acoustic guitar. Take care to lift the bridge gently, avoid using excessive force, and clean the area underneath to prepare for the next steps in the repair process.
Step 6: Fill the Hole
Now that you have removed the bridge, it’s time to fill the hole in your acoustic guitar. Filling the hole will restore the structural integrity of the guitar and prepare it for the next steps in the repair process. Let’s dive into the steps to successfully fill the hole.
1. Prepare the wood filler or epoxy: Start by reading the instructions on the wood filler or epoxy you have chosen for the repair. Mix the filler or epoxy in a small container according to the manufacturer’s guidelines. Ensure that you achieve a smooth and homogeneous mixture.
2. Apply the filler or epoxy: Using a small putty knife or spatula, apply the filler or epoxy to the hole in the guitar. Fill the hole completely, ensuring that the filler or epoxy is level with the surface of the guitar’s body. Smooth out any excess filler or epoxy, taking care to create a seamless transition between the filled area and the surrounding wood.
3. Allow for curing or drying: Follow the instructions provided by the manufacturer to allow the filler or epoxy to cure or dry properly. This process may take a few hours or longer, depending on the specific product used. Make sure to keep the guitar in a well-ventilated area during this time.
4. Check for shrinkage or sinking: Once the filler or epoxy has cured or dried, inspect the filled area for any signs of shrinkage or sinking. If necessary, apply a second coat of filler or epoxy to level out the surface and ensure a sturdy and even repair.
5. Sand the filled area: Once the filler or epoxy has fully cured, use fine-grit sandpaper to carefully sand the filled area. Start with a coarser grit and gradually transition to a finer grit to achieve a smooth and even finish. Sand in gentle circular or back-and-forth motions, taking care not to sand too aggressively and damage the surrounding wood.
By following these steps, you can effectively fill the hole in your acoustic guitar, restoring its structural integrity and preparing it for the next stages of the repair process. Take your time, follow the manufacturer’s instructions for the filler or epoxy, and strive for a seamless and well-blended repair.
Step 7: Sand and Shape the Filled Area
After filling the hole in your acoustic guitar, the next step is to sand and shape the filled area. This step is crucial in achieving a smooth and seamless repair that blends seamlessly with the rest of the guitar’s surface. Let’s explore the process of sanding and shaping the filled area in more detail.
1. Start with coarse sandpaper: Begin by using coarse-grit sandpaper to sand the filled area. Carefully sand in small circular motions, applying even pressure across the surface. This will help to level any unevenness and blend the filled area with the surrounding wood. Be sure to keep the sandpaper flat against the guitar’s body to avoid creating dips or indentations.
2. Transition to finer grit sandpaper: Once the filled area is leveled, switch to finer grit sandpaper. Gradually work your way up to a finer grit to achieve a smoother finish. This will help to remove any remaining roughness and refine the shape of the filled area.
3. Shape the filled area: As you sand, pay attention to the shape of the filled area. Use the sandpaper to carefully shape the filled area to match the contours of the guitar’s body. This will ensure a seamless repair that is visually appealing and blends well with the rest of the guitar’s surface.
4. Check for smoothness: Periodically pause and run your fingers over the filled area to check for smoothness. If you feel any rough spots or unevenness, continue sanding and shaping until the surface feels consistently smooth to the touch.
5. Clean the guitar’s body: After sanding and shaping the filled area, use a clean cloth or brush to remove any sanding dust and debris from the guitar’s body. This will prepare the surface for the next step in the repair process.
By following these steps, you can effectively sand and shape the filled area of your acoustic guitar. Take your time, be meticulous in your sanding technique, and strive for a smooth and well-shaped repair. Remember to work gradually with finer grit sandpaper to achieve the best results.
Step 8: Paint or Stain the Filled Area
After sanding and shaping the filled area of your acoustic guitar, the next step is to paint or stain the filled area to match the rest of the guitar’s surface. This step will help to seamlessly blend the repair and create a cohesive and aesthetically pleasing appearance. Let’s dive into the process of painting or staining the filled area.
1. Select the appropriate paint or stain: Choose a paint or stain that matches the color and finish of your guitar’s body. It’s important to select a product specifically designed for use on guitars to ensure a professional-looking and durable finish.
2. Prepare the filled area: Before applying paint or stain, ensure that the filled area is clean and free from any dust or debris. Use a clean cloth or brush to remove any residual sanding dust from the surface.
3. Apply the paint or stain: If you are using paint, use a small brush or sponge brush to carefully apply a thin and even coat to the filled area. If you are using a stain, apply the stain with a cloth or brush and allow it to soak into the wood, following the manufacturer’s instructions for drying time.
4. Blend the edges: To create a seamless transition between the filled area and the surrounding wood, feather the paint or stain along the edges of the repair. This will help to blend the colors and ensure a natural and cohesive appearance.
5. Allow for drying or curing: Follow the manufacturer’s instructions for drying or curing time. This will ensure that the paint or stain sets properly and maximizes its durability.
6. Assess the color and finish: Once the paint or stain has dried or cured, examine the repaired area in different lighting conditions to ensure a good color match and finish. If needed, apply additional coats of paint or stain to achieve the desired appearance.
By following these steps, you can effectively paint or stain the filled area of your acoustic guitar, creating a seamless repair that blends well with the rest of the guitar’s surface. Take your time, choose suitable products, and ensure proper drying or curing for the best results.
Step 9: Reattach the Bridge
With the hole repaired and the filled area painted or stained, it’s time to reattach the bridge to your acoustic guitar. Properly securing the bridge is crucial for maintaining the guitar’s playability and structural integrity. Let’s explore the process of reattaching the bridge.
1. Align the bridge: Start by carefully placing the bridge back onto the guitar’s body, aligning it with the original position. Take your time to ensure that the bridge is positioned correctly and that the string holes are aligned with the corresponding bridge pins.
2. Apply adhesive: Apply a small amount of suitable adhesive or wood glue to the bottom of the bridge. Be sure to use an adhesive that is specifically designed for use with guitars to ensure a secure bond. Apply the adhesive evenly, covering the entire surface that will come into contact with the guitar’s body.
3. Press down and clamp: Once the adhesive is applied, firmly press down on the bridge to secure it in place on the guitar’s body. You may also use clamps or rubber bands to hold the bridge in position while the adhesive dries. Follow the manufacturer’s instructions for the adhesive’s drying time and recommended clamping duration.
4. Ensure proper alignment: As the adhesive dries, double-check the alignment of the bridge to ensure that it hasn’t shifted. Use a ruler or other straight edge to verify that the bridge is parallel to the guitar’s body and properly seated.
5. Remove excess adhesive: After the adhesive has dried, carefully remove any excess glue or adhesive that may have squeezed out around the edges of the bridge. Use a clean cloth or a gentle solvent to remove any residue, taking care not to damage the guitar’s finish.
6. Allow for curing time: Even though the adhesive may be dry to the touch, it’s important to allow for proper curing time as recommended by the manufacturer. This will ensure that the bond between the bridge and the guitar’s body is strong and durable.
By following these steps, you can successfully reattach the bridge to your acoustic guitar. Take your time during the process to achieve proper alignment, secure the bridge firmly, and remove any excess adhesive. With the bridge securely in place, you’re ready to move on to the final steps of the repair process.
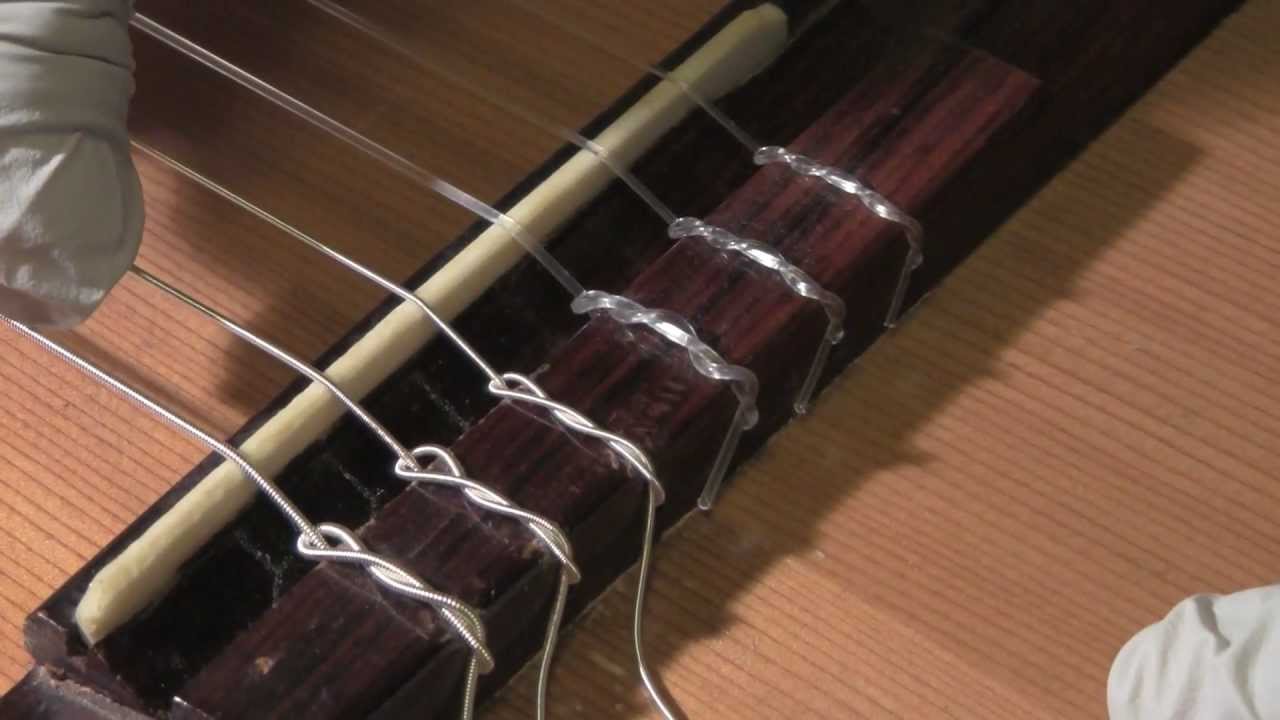
Step 10: Reinstall the Strings
With the bridge securely attached, the next step in repairing your acoustic guitar is to reinstall the strings. Restringing the guitar will bring it back to playable condition and allow you to fully enjoy the results of your repair. Let’s go through the process of restringing your acoustic guitar.
1. Choose the right strings: Select the appropriate gauge and type of strings for your acoustic guitar. Consider factors such as your playing style, desired tone, and the recommendations of the guitar manufacturer. Ensure that you have the correct number of strings needed for your guitar’s configuration.
2. Start with the first string: Begin by threading the first string through the appropriate tuning peg on the headstock. Leave some slack in the string to allow for proper winding later on. Be mindful of the correct order and position of each string, ensuring that it corresponds correctly with the markings or labels you placed earlier during the removal process.
3. Thread the string through the bridge and the bridge pin: Carefully guide the end of the string through the appropriate hole in the bridge and then through the corresponding hole in the bridge pin. Make sure the string is securely fitted in place and that it rests against the bridge plate.
4. Wind the string onto the tuning peg: With the string correctly threaded, begin winding it around the appropriate tuning peg. Use your fingers to hold the string in place, applying gentle tension as you turn the tuning peg clockwise. Make sure the string winds evenly and avoids any overlapping or tangling.
5. Tune each string: Once the first string is secured, continue with the rest of the strings in the same manner, working your way from the thinnest to the thickest string. As you install each string, tune it to the desired pitch using a guitar tuner. Adjust the tension and tuning pegs as necessary to achieve the correct pitch.
6. Stretch and settle the strings: After all the strings are installed and tuned, gently stretch and settle them by applying some pressure along the length of each string or strumming the strings lightly. This process helps to stabilize the tuning and improve the string’s overall performance.
By following these steps, you can successfully restring your acoustic guitar and bring it back to playing condition after the repair. Take your time, ensure correct threading and winding of each string, and tune them to the desired pitch. With the strings properly installed, you’re ready to move on to the final step in the repair process.
Step 11: Test and Tune the Guitar
After completing the repair process and restringing your acoustic guitar, the final step is to test and tune the instrument. This step ensures that your guitar is in optimal playing condition and ready to be enjoyed. Let’s explore the process of testing and tuning your guitar.
1. Check for buzzing or rattling: Gently strum each string and listen for any buzzing or rattling sounds. If you encounter any issues, inspect the area around the repaired hole and bridge to identify the source of the problem. It may require additional adjustment or professional assistance to resolve any buzzing or rattling issues.
2. Play each string and evaluate the sound quality: Play each string individually and listen to the tone and sustain. Assess whether the repaired area has any noticeable impact on the sound quality. If there are any concerns, consult with a professional or an experienced guitar player for further evaluation and adjustment.
3. Evaluate the playability: Test the playability of your guitar by playing chords, scales, or songs that you are familiar with. Pay attention to the action, or the height of the strings from the fretboard. Ensure that the guitar is comfortable to play and that there are no obstacles or unevenness that may hinder your playing experience.
4. Fine-tune the guitar: Even though you already tuned the guitar when restringing, it’s normal for new strings to stretch and settle, causing minor tuning fluctuations. Use a guitar tuner to fine-tune each string and ensure they are in proper pitch. Tune each string slowly and carefully, making small adjustments until they are tuned accurately.
5. Test and adjust the intonation: Check the intonation of your guitar by playing harmonics at the 12th fret and comparing them to the corresponding fretted notes. Use a tuner to ensure that the harmonics and fretted notes are in tune. If there are any noticeable intonation issues, consult a professional for proper adjustment.
By following these steps, you can thoroughly test and tune your acoustic guitar after the repair. Pay attention to any buzzing or rattling sounds, evaluate the sound quality, assess the playability, and fine-tune the instrument to ensure optimal performance. If you encounter any significant issues or concerns, it is recommended to seek professional assistance for further evaluation and adjustment.
Conclusion
Repairing a hole in an acoustic guitar may seem like a daunting task, but with the right tools, materials, and step-by-step guidance, it is achievable for anyone willing to put in the time and effort. By following the outlined steps, you can successfully plug a hole in your acoustic guitar, restoring its structural integrity and preserving its sound quality.
From assessing the damage to reattaching the bridge and tuning the guitar, each step plays a crucial role in achieving a successful repair. It is essential to take your time, work patiently, and pay attention to detail throughout the entire process.
Remember to create a clean and organized work area, gather the necessary tools and materials, and assess the extent of the damage before beginning the repair. Removing the bridge, filling the hole, sanding and shaping the filled area, and applying paint or stain all contribute to a seamless repair that blends with the overall appearance of the guitar.
Reattaching the bridge, reinstalling the strings, and properly testing and tuning the guitar are the final steps that ensure the guitar is in optimal playing condition. These steps help to finalize the repairs and ensure that your guitar sounds and feels great when you start playing again.
However, it is important to note that repairing a guitar can be a complex and delicate process. If you feel unsure or lack the necessary skills, it is always recommended to seek professional assistance to avoid causing further damage.
By taking the time and effort to repair a hole in your acoustic guitar, you not only restore its functionality but also prolong its lifespan, allowing you to continue making beautiful music for years to come. Happy playing!