Introduction
Welcome to the world of guitar customization! If you’re looking to add a personal touch to your acoustic guitar, painting it is a fantastic way to do so. Not only does it allow you to express your creativity, but it also gives your instrument a unique look that reflects your style and personality.
Painting an acoustic guitar may seem like a daunting task, but with the right materials and a little bit of patience, it can be a rewarding and enjoyable experience. Whether you’re an experienced artist or a beginner, this step-by-step guide will walk you through the process of painting an acoustic guitar.
Before we dive into the details, it’s important to note that painting an acoustic guitar will alter its sound to some extent. The finish on the guitar affects the resonance and tone, so keep in mind that your painted guitar may sound slightly different than it did before. However, many guitarists find the aesthetic transformation to be well worth it.
In this guide, we’ll cover everything from preparing the guitar for painting to adding intricate designs and details. By the end, you’ll have a stunning and personalized instrument that’s sure to turn heads and inspire your playing.
Remember, each guitar is unique, so it’s important to approach the painting process with care and attention to detail. Take your time, be patient, and let your creativity flow. Now, let’s gather the materials needed to get started on transforming your acoustic guitar.
Materials Needed
Before you begin painting your acoustic guitar, you’ll need to gather some essential materials. Here’s a list of what you’ll need:
- Acoustic guitar
- Screwdrivers or hex keys (depending on the type of screws on your guitar)
- Paint stripper or sandpaper
- Primer
- Acrylic or enamel paint
- Paintbrushes of various sizes
- Masking tape
- Old newspapers or drop cloths
- Clear coat for sealing the paint
- Sandpaper (assorted grits)
- Lint-free cloth
- Rubbing alcohol
- Plastic gloves
- Respirator or face mask
It’s important to choose quality materials to ensure a professional-looking finish. When selecting paint, go for non-toxic, acrylic or enamel-based options that are suitable for use on musical instruments. These types of paint provide durability and vibrant colors that will last.
Additionally, make sure you have the necessary tools for disassembling your acoustic guitar, such as screwdrivers or hex keys. You’ll need these to remove the strings, pickguard, and any other detachable parts before painting.
Finally, don’t forget to protect your work area. Lay down old newspapers or use drop cloths to prevent any paint or primer from staining your floor or workbench.
Now that you have all the necessary materials, let’s move on to the first step: preparing your acoustic guitar for painting.
Step 1: Prepare the Guitar
Before you start painting your acoustic guitar, it’s crucial to properly prepare the surface. This step ensures that the paint adheres well and provides a smooth and even finish. Here’s how to prepare your guitar:
- Remove the strings: Begin by loosening and removing the strings from your guitar. This will make it easier to work on the body and avoid any accidental damage.
- Disassemble detachable parts: Use a screwdriver or hex key to remove any detachable parts, such as the pickguard or bridge. Take note of their placement and store them safely, as you’ll need to reassemble them later.
- Clean the guitar: Use a lint-free cloth dampened with rubbing alcohol to wipe down the guitar’s surface. This will remove any oils, debris, or residue and ensure a clean painting surface.
- Mask off any areas: To protect parts of the guitar that you don’t want to paint, use masking tape to cover the fretboard, soundhole, and any other areas you wish to keep untouched.
By following these preparatory steps, you’ll create a clean and suitable canvas for your guitar painting project. Once you’ve completed these steps, you’re ready to move on to the next phase: removing the existing finish from your acoustic guitar.
Step 2: Remove the Existing Finish
Before applying a new paint job to your acoustic guitar, it’s important to remove the existing finish. This step allows the new paint to adhere properly and ensures a smooth and even surface. Here’s how to remove the existing finish:
- Choose a paint stripper or sandpaper: Depending on the type of finish on your guitar, you can either use a chemical paint stripper or sandpaper. If you’re using a paint stripper, follow the instructions on the product carefully. If you prefer sanding, start with medium grit sandpaper and gradually move to finer grits for a smooth surface.
- Apply the paint stripper: If you’re using a paint stripper, apply it onto the guitar’s body, following the product instructions. Make sure to wear gloves and protective eyewear, as paint strippers can be harsh chemicals that may irritate the skin and eyes.
- Scrape off the old finish: Once the paint stripper has softened the existing finish, use a plastic scraper or a putty knife to gently scrape it off. Be careful not to damage the wood underneath. Repeat the process until most of the old finish is removed.
- Sand the guitar: If you’re using sandpaper, begin by sanding the guitar body in the direction of the wood grain. Start with medium grit sandpaper and gradually move to finer grits for a smooth and even surface. This step helps to remove any residual finish and prepare the guitar for the new paint.
Remember to take your time and work patiently during this step. Carefully remove all traces of the old finish to ensure the best results for your new paint job. Once you’re satisfied with the removal process, you’re ready to move on to the next step: sanding the guitar to create an optimal surface for paint adhesion.
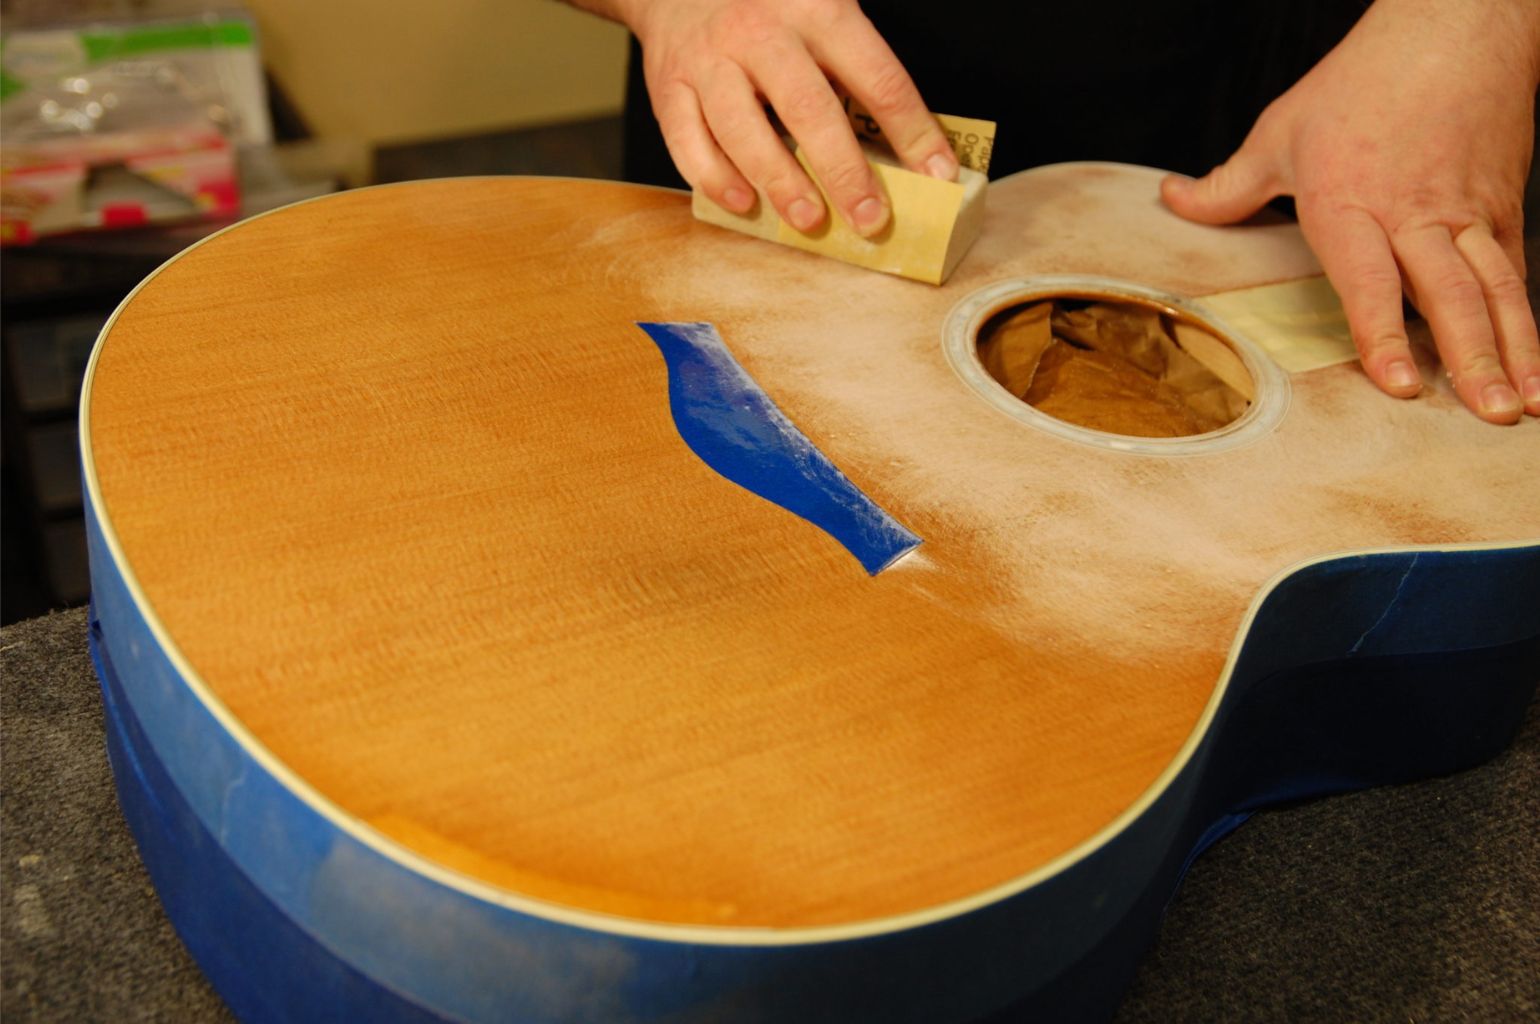
Step 3: Sand the Guitar
After removing the existing finish from your acoustic guitar, it’s time to sand the surface to create a smooth and optimal base for painting. This step helps to remove any imperfections, scratches, or uneven surfaces, allowing the new paint to adhere properly. Here’s how to sand your guitar:
- Select the right sandpaper: Start with a coarse grit sandpaper (around 120 or 150) to smooth any rough areas and remove any remaining traces of the old finish. Gradually move to finer grits, such as 220 and 320, to create a smoother surface.
- Sand in the direction of the wood grain: Using light pressure, sand the guitar body in long and smooth strokes, following the direction of the wood grain. This helps to prevent any visible scratches and maintains the natural appearance of the wood.
- Focus on problem areas: Pay extra attention to any problem areas, such as dents or scratches. Use finer grit sandpaper and sand carefully to smooth out these imperfections and create an even surface.
- Clean the guitar: Once you’ve finished sanding, use a clean cloth or brush to remove any dust or debris from the guitar’s surface. This ensures that no particles will interfere with the paint application.
Sanding the guitar is a critical step in achieving a professional-looking paint job. It not only creates a smooth surface but also helps the paint to adhere properly, ensuring a durable and long-lasting finish. Take your time and be thorough in sanding the entire guitar body.
Now that you have sanded the guitar, you’re ready to move on to the next step: applying a primer to prepare the surface for painting.
Step 4: Apply Primer
Now that you have sanded the surface of your acoustic guitar, it’s time to apply a primer. Primer acts as a base layer that helps the paint adhere better and provides a smoother finish. Here’s how to apply primer to your guitar:
- Choose the appropriate primer: Select a primer specifically designed for use on musical instruments. Look for a high-quality, non-toxic primer that is compatible with the type of paint you plan to use.
- Prepare your work area: Make sure your work area is clean, well-ventilated, and free from any dust or debris. Lay down old newspapers or use a drop cloth to protect your surroundings from primer overspray.
- Start with a thin coat: Apply a thin, even coat of primer to the guitar body using a paintbrush. Make sure to cover the entire surface, including hard-to-reach areas. Avoid applying too much primer at once, as it may lead to drips or an uneven finish.
- Allow the primer to dry: Follow the manufacturer’s instructions for drying time. Typically, it takes around 1-2 hours for the primer to dry completely. Make sure the primer is fully dry before moving on to the next step.
- Sand the primer: Once the primer is dry, lightly sand the guitar with fine-grit sandpaper. This will help to smooth out any imperfections and create a smooth surface for the paint. Wipe away any dust or debris with a clean cloth.
Priming your guitar is essential for achieving a professional-looking and long-lasting paint job. It not only improves paint adhesion but also helps to prevent the wood from absorbing too much paint. By following these steps, you’re now ready to move on to the exciting part: choosing the design for your painted acoustic guitar.
Step 5: Choose Your Design
Choosing the design for your painted acoustic guitar is an exciting and creative process. This step allows you to infuse your personal style and artistic flair into your instrument. Here are a few tips to help you choose the perfect design:
- Consider your preferences: Think about your personal taste, musical style, and any specific themes or motifs that resonate with you. Do you prefer bold and vibrant colors or a more subtle and sophisticated look? Explore different design ideas and gather inspiration from various sources, such as artwork, patterns, or even nature.
- Research guitar designs: Look into different guitar designs and styles to get a sense of what you like. Consider traditional patterns, abstract art, or even custom designs that reflect your individuality. Remember that the design you choose should complement the shape, size, and overall aesthetic of your guitar.
- Create a sketch or digital mockup: Before diving into painting, sketch out your design idea on paper or use graphic design software to create a digital mockup. This step will help you visualize the final result and make any necessary adjustments or refinements to your design.
- Seek expert advice: If you’re unsure about your design or need guidance, consult with an experienced painter or artist who specializes in guitar customization. They can provide insights and suggestions based on their expertise and help you refine your design concept.
- Personalize your design: Consider adding personal touches to your design, such as initials, symbols, or meaningful lyrics. This will make your painted guitar even more unique and special to you.
Remember, there are no strict rules when it comes to choosing a design for your painted acoustic guitar. It’s all about expressing yourself and creating something that resonates with you. Take your time to explore different ideas and choose a design that truly reflects your artistic vision.
Once you’ve settled on a design, you’re ready to move on to the next step: painting the base coat.
Step 6: Paint the Base Coat
With your design chosen and sketched out, it’s time to bring it to life by painting the base coat of your acoustic guitar. The base coat serves as the foundation for your design and provides the main color or background for your artwork. Follow these steps to paint the base coat:
- Prepare your paints: Using high-quality acrylic or enamel paints, mix and dilute them as necessary to achieve your desired colors. It’s essential to work with paints that are specifically formulated for use on musical instruments and provide a durable and long-lasting finish.
- Apply the base coat: Start by applying the base coat paint to the entire guitar body using a soft-bristle paintbrush or an airbrush. Apply thin and even coats, working in one direction to ensure smooth coverage. Allow each coat to dry thoroughly before applying the next. Depending on the color and effect desired, multiple coats may be required.
- Achieve a solid and even finish: Pay attention to any areas that may need additional coats of paint to achieve a solid and even finish. Take your time and ensure that the base coat is applied evenly without any visible brush strokes or inconsistencies.
- Allow the paint to cure: Once you have achieved your desired base color and finish, allow the paint to cure according to the manufacturer’s instructions. This process ensures that the paint fully hardens before moving on to the next steps of the painting process.
During this step, it’s important to keep in mind the design and colors you have selected. The base coat serves as the background for your artwork, so choose a color that complements your overall design and brings out the desired aesthetic.
With the base coat applied and cured, you’re now ready to move on to the next step: adding details and intricate designs to your painted acoustic guitar.
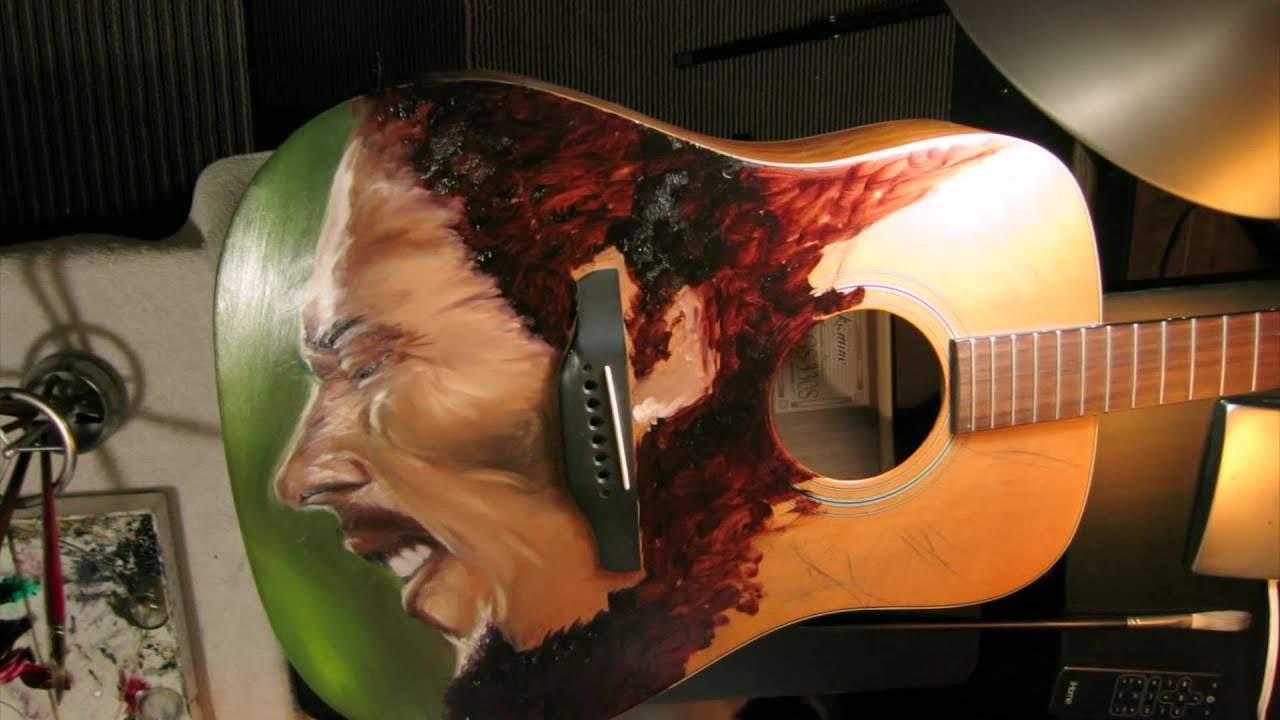
Step 7: Add Details and Designs
Now that you have your base coat in place, it’s time to add the details and designs that will bring your painted acoustic guitar to life. This step allows you to showcase your creativity and style by incorporating intricate patterns, images, and artistic elements. Follow these steps to add details to your guitar:
- Plan your design: Refer to your sketch or digital mockup to guide you in applying your design to the guitar. Take your time in considering the placement and composition of the details to ensure a visually pleasing result.
- Use fine brushes or fine-tip markers: Depending on the intricacy of your design, choose suitable tools such as fine brushes or fine-tip markers to add the details. Ensure that your brushes are clean and in good condition to achieve precise lines and shapes.
- Layer your paint: Apply multiple layers of paint to achieve depth and richness in your design. Allow each layer to dry thoroughly before applying the next. This technique will help you create shading, highlights, and a more dynamic visual effect.
- Work in sections: Break down your design into manageable sections and work on one section at a time. This approach will help you maintain focus and ensure that you’re giving proper attention to each individual detail.
- Add finishing touches: Once you’ve completed the main elements of your design, take a step back and assess the overall composition. Add any final touches, highlights, or small details to enhance the visual impact and cohesiveness of the artwork.
Remember to be patient and take your time during this step. Adding details and designs to your painted acoustic guitar requires precision and attention to detail. Enjoy the process and allow your creativity to shine through.
Once you’re satisfied with the details and designs, allow the paint to fully dry before proceeding to the next step: sealing the paint to protect your artwork.
Step 8: Seal the Paint
Now that you have added the final details and designs to your painted acoustic guitar, it’s crucial to seal the paint to protect your artwork and ensure its longevity. Sealing the paint provides a protective barrier against moisture, scratches, and fading. Follow these steps to seal the paint on your guitar:
- Choose the right sealant: Select a clear coat specifically formulated for musical instruments. Look for a clear coat that offers durability, UV protection, and a glossy or matte finish, depending on your preference.
- Prepare your work area: Ensure that your work area is clean and free from any dust or debris. Lay down newspapers or use a drop cloth to protect your surroundings from any potential overspray.
- Apply thin and even coats: Use a soft-bristle brush or an airbrush to apply thin and even coats of the clear sealant. Start from one end of the guitar body and work your way to the other, applying light, sweeping strokes. Avoid applying too much sealant at once, as it may result in drips or an uneven finish.
- Allow each coat to dry: Follow the manufacturer’s instructions for drying time between each coat. Typically, it takes several hours for the sealant to dry completely. Take caution not to touch or handle the guitar until the sealant has fully cured.
- Apply multiple coats: Determine the number of coats needed by considering the desired level of protection. Applying multiple thin coats will provide better coverage and ensure a more robust seal.
- Buff and polish: Once the final coat has cured, use a soft cloth to buff and polish the guitar’s surface gently. This step will help achieve a smooth and glossy finish, enhancing the overall appearance of your painted acoustic guitar.
Sealing the paint on your guitar not only protects your artwork but also enhances the longevity and durability of the finish. It’s a crucial step to maintain the vibrancy and beauty of your design for years to come.
After sealing the paint, allow the clear coat to cure completely before moving on to the final step: reassembling your acoustic guitar and enjoying its rejuvenated appearance.
Step 9: Reassemble the Guitar
After completing the painting and sealing process of your acoustic guitar, it’s time to reassemble all the necessary components and bring your instrument back together. Reassembling your guitar ensures that it functions properly and can be enjoyed for playing. Follow these steps to successfully reassemble your painted acoustic guitar:
- Retrieve the detached parts: Gather all the parts that you had detached during the painting process, such as the pickguard, bridge, and other components. Ensure that they are in good condition and free from any residual paint or debris.
- Securely attach the components: Use the appropriate tools, such as screwdrivers or hex keys, to securely attach the detached components back to the guitar. Follow the manufacturer’s instructions or refer to your guitar’s manual for proper assembly.
- String your guitar: Begin by selecting and stringing your guitar with the desired set of strings. Make sure to properly align and attach the strings to the bridge and tuning pegs, following the appropriate stringing technique for your specific guitar model.
- Tune and test: Once the strings are in place, carefully tune them to the desired pitch. Take your time to properly adjust each string’s tension and listen for accurate and balanced tuning. Play a few notes or chords to ensure that the guitar sounds and plays as expected.
- Inspect for any adjustments: After reassembling the guitar, inspect each component and make any necessary adjustments. Check the action, intonation, and overall playability of the instrument. If needed, consult a professional guitar technician for fine-tuning and adjustments.
By following these steps, you will successfully reassemble your acoustic guitar after the painting process. Take your time during this step to ensure that everything is properly aligned and functioning as it should. Once you’re satisfied with the reassembled guitar, it’s time to enjoy the fruits of your hard work and showcase your unique and personalized instrument.
Conclusion
Congratulations! You have successfully completed the process of painting an acoustic guitar. Through careful preparation, sanding, priming, painting, sealing, and reassembly, you have transformed your instrument into a stunning work of art that reflects your creativity and individuality.
Remember, painting an acoustic guitar is a creative and personal endeavor. It allows you to express yourself, add a personal touch to your instrument, and create a unique visual representation of your musical identity.
Throughout this guide, you have learned the importance of proper preparation, including removing the existing finish, sanding the surface, and applying a primer. You have explored the exciting steps of choosing a design, painting the base coat, adding intricate details, and sealing the paint to protect your artwork. Finally, you have reassembled your guitar, ensuring that it functions properly and sounds great.
While painting an acoustic guitar requires time, patience, and attention to detail, the results are well worth it. Your painted guitar now stands as a testament to your artistic skills and personal style. It’s a unique piece that is bound to catch the eyes and ears of those around you.
As you continue your journey with your painted acoustic guitar, remember to take proper care of it. Avoid exposing it to extreme temperatures, humidity, or direct sunlight, as these can affect the paint and overall condition of the instrument. Regularly clean and protect your guitar to maintain its beauty and longevity.
Now that you have successfully painted your acoustic guitar, take pride in your craftsmanship and creativity. Let your instrument be a conversation starter, a source of inspiration, and a symbol of your passion for music and art. Happy playing!