Introduction
Welcome to the world of immersive audio with JBL Soundbar! Whether you’re a movie enthusiast or a music fanatic, a JBL Soundbar can transform your audio experience to a whole new level. With its sleek design and powerful sound output, JBL Soundbar brings theater-like sound quality right into your living room.
In this guide, we will walk you through the steps to set up your JBL Soundbar and get you ready to enjoy an incredible audio experience. From unboxing the soundbar to configuring sound settings, we will cover everything you need to know to get started.
Before we dive into the setup process, let’s take a moment to understand the benefits of using a JBL Soundbar. Unlike traditional TV speakers, soundbars are designed to enhance the audio quality and deliver a more immersive experience. JBL Soundbars are known for their exceptional sound clarity, precise audio detailing, and deep bass reproduction.
Whether you’re watching your favorite movie, playing video games, or enjoying your playlist, JBL Soundbars ensure that every sound is reproduced with utmost precision, bringing your content to life.
Now, let’s begin our journey of setting up your JBL Soundbar. Get ready to elevate your audio experience and immerse yourself in the world of captivating sound!
Unboxing the JBL Soundbar
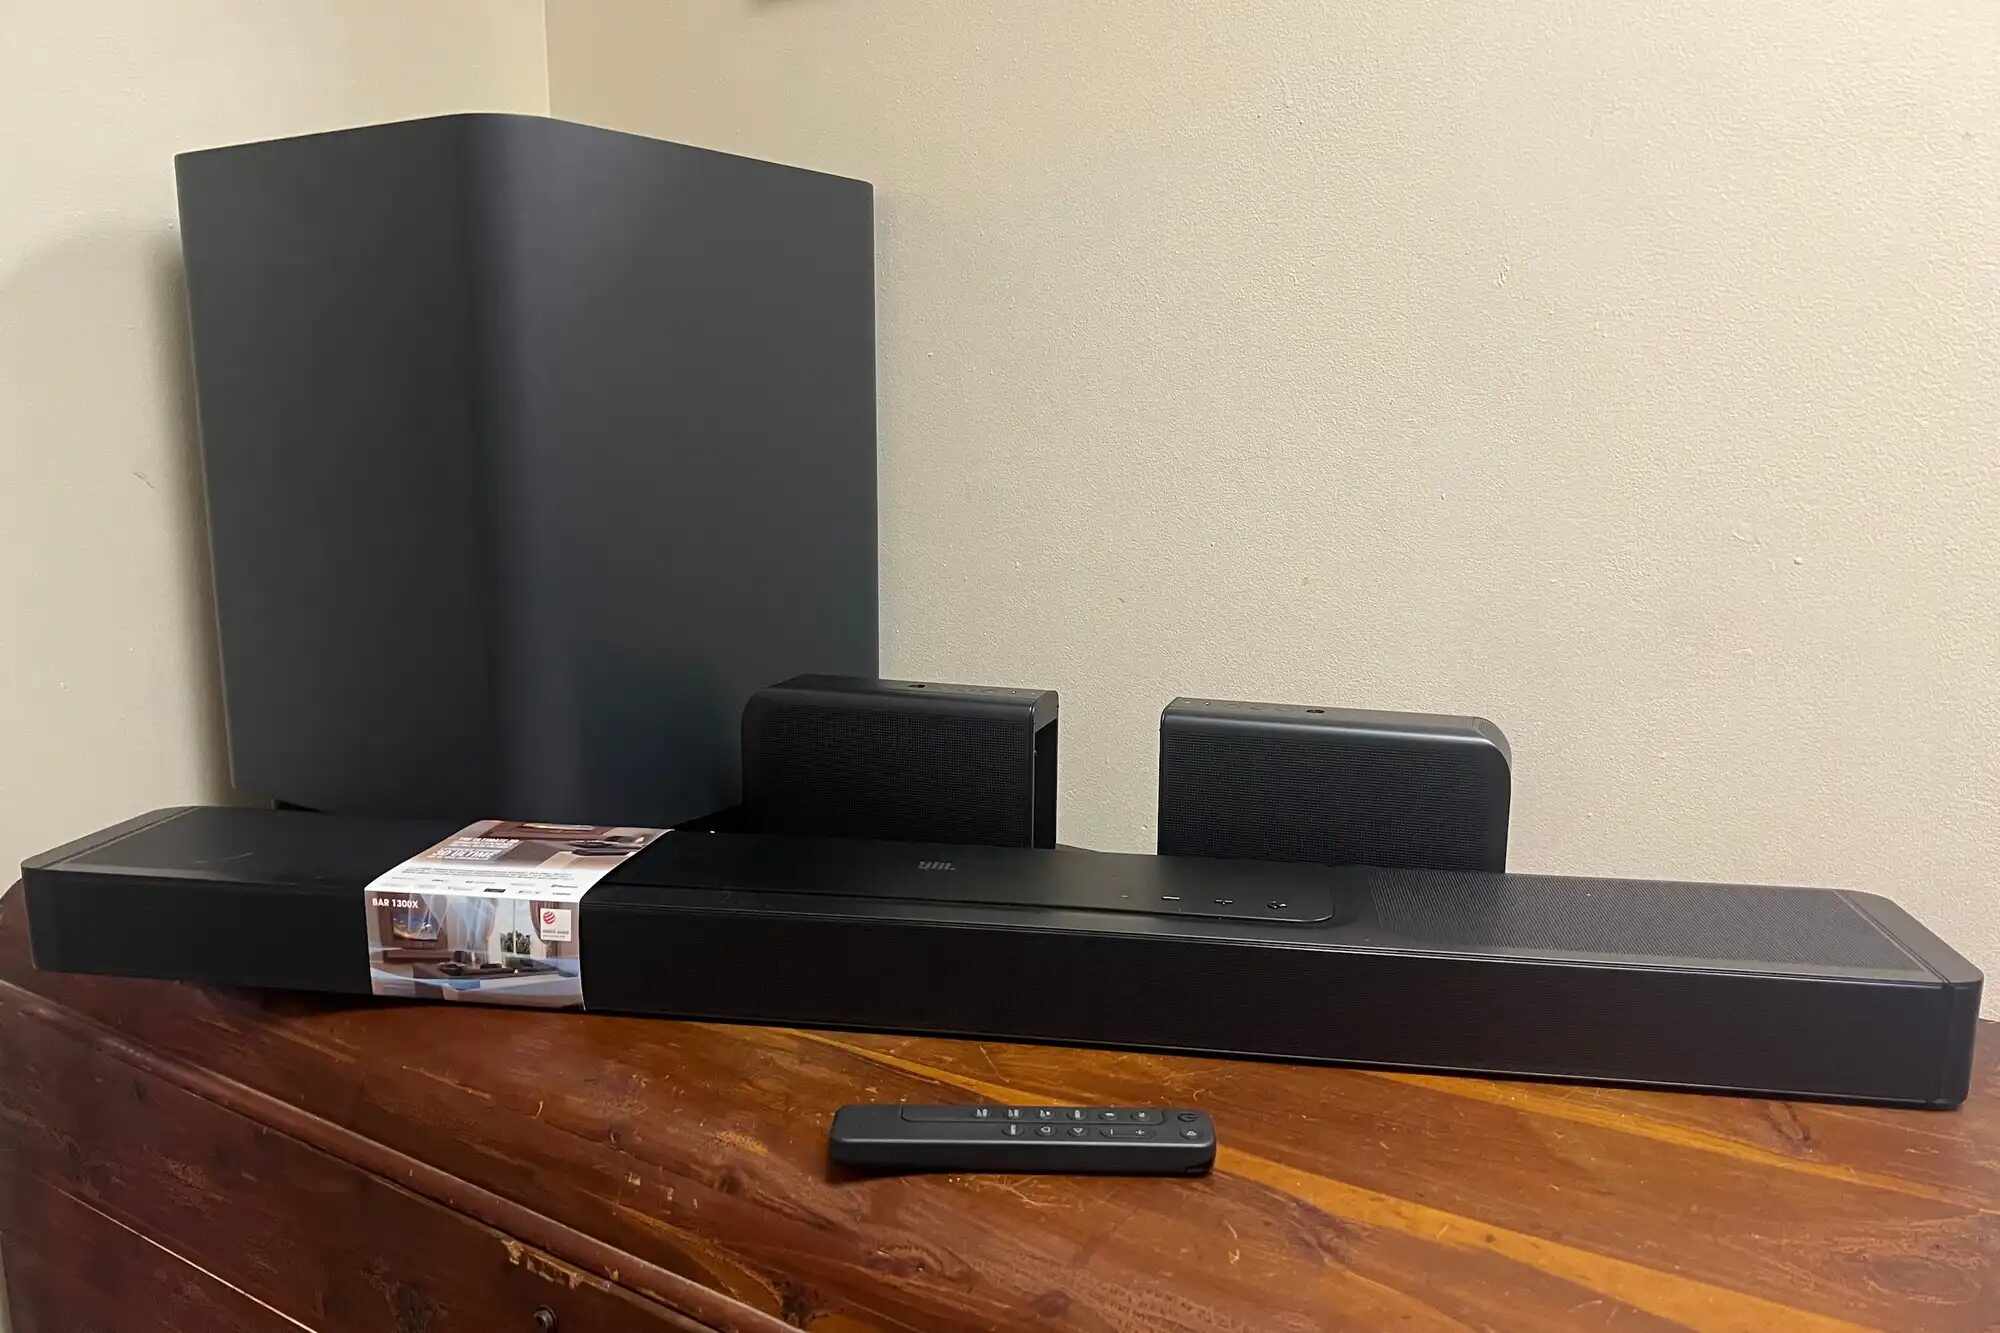
The first step in setting up your JBL Soundbar is to unbox it. Start by locating the box and carefully lifting it to a flat surface. Take a moment to admire the sleek design and compact size of your new soundbar.
Open the box and remove the contents. Inside, you will find the JBL Soundbar along with a power cable, HDMI cable, remote control, batteries, and any additional accessories that may be included.
Before proceeding, ensure that all the components are present and in good condition. It’s always a good idea to read the user manual or quick start guide that comes with the soundbar to familiarize yourself with the various components and their functions.
Once you have confirmed that everything is in order, carefully remove the soundbar from its protective packaging. Take note of any plastic films or covers that may be attached to the soundbar and remove them, ensuring a clean and clear appearance.
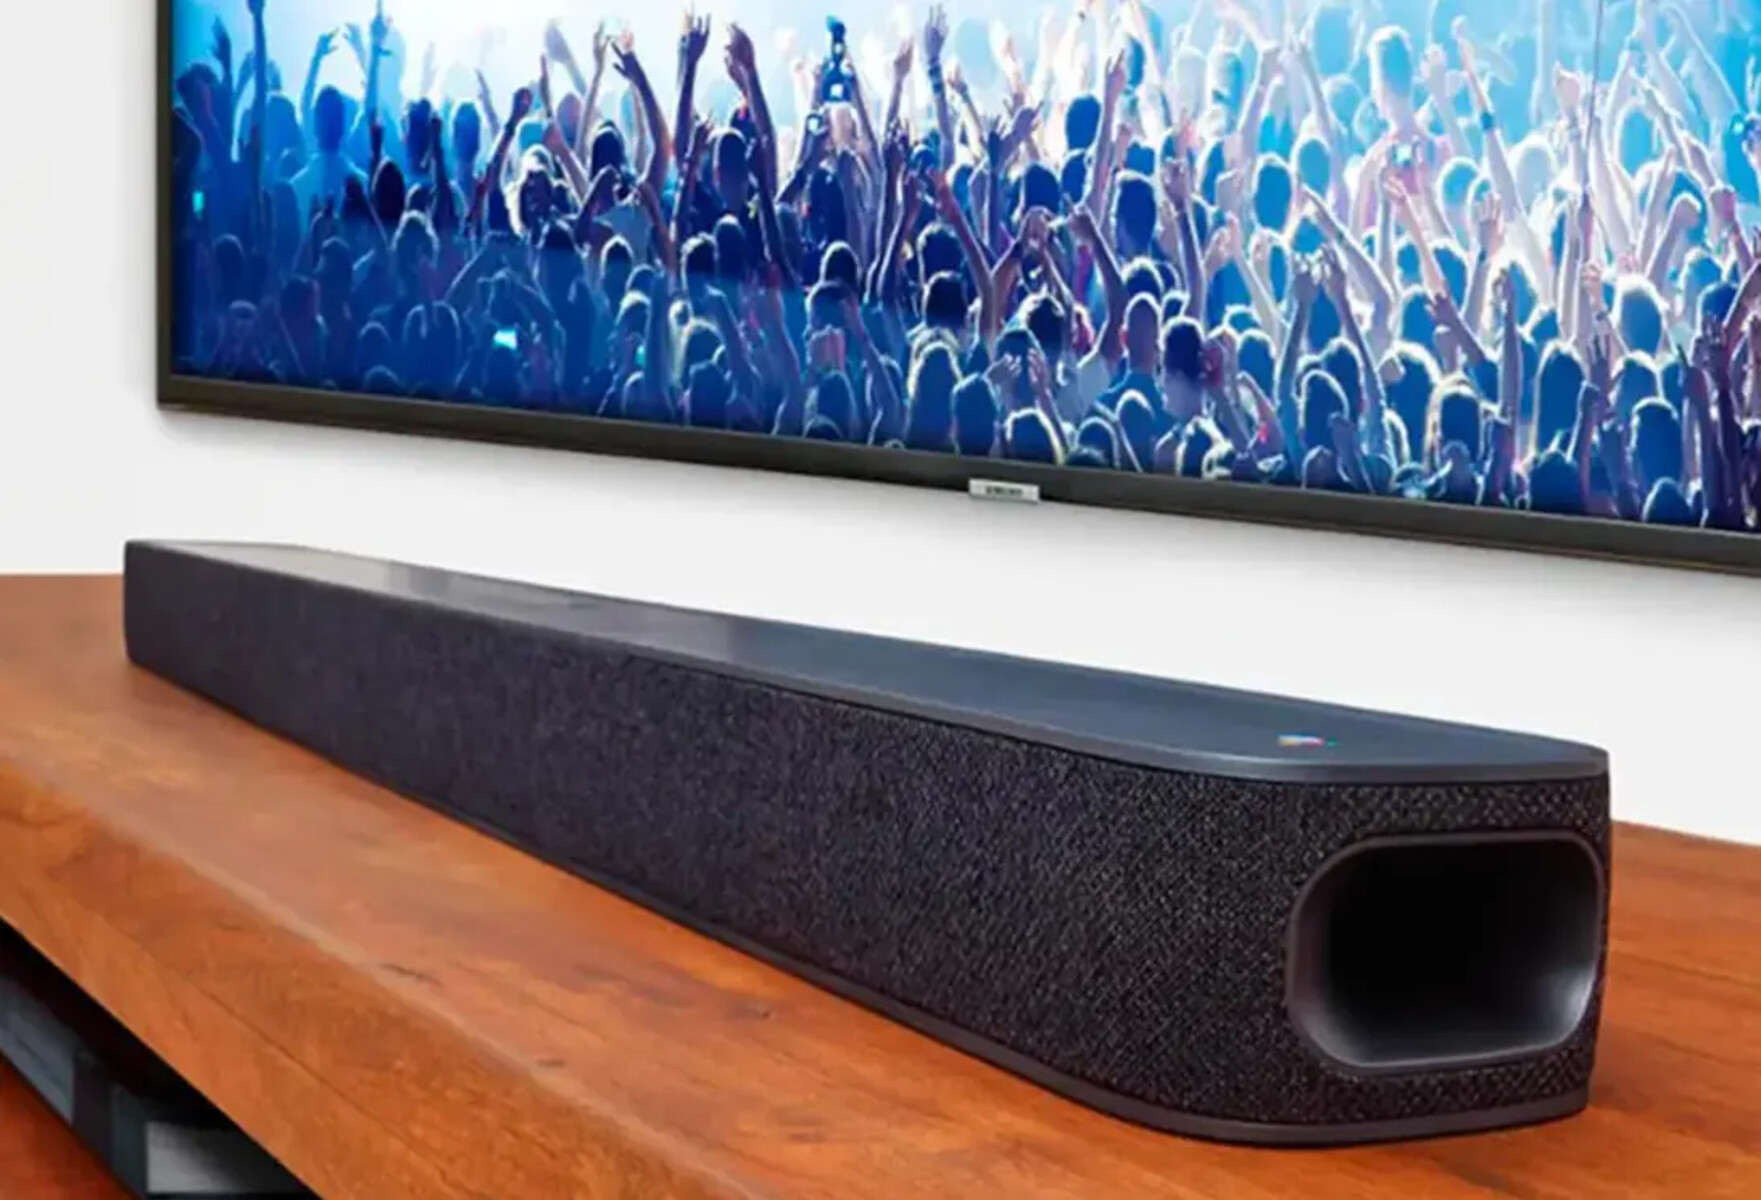
Now, find a suitable location for your soundbar. It is typically placed in front of or below the TV for optimal sound projection. Make sure to choose a spot that is free from obstructions and allows the sound to travel unimpeded.
It is essential to consider the connectivity options and the proximity to power outlets when deciding on the placement of your soundbar. A clear line of sight to the TV helps in establishing a seamless connection and ensures an immersive audio experience.
With the soundbar unboxed and the ideal location chosen, you are now ready to move on to the next step – connecting the soundbar to power.
Connecting the Soundbar to Power
Now that you have unboxed your JBL Soundbar, it’s time to connect it to power. This step is crucial as it enables the soundbar to function and deliver its outstanding audio performance.
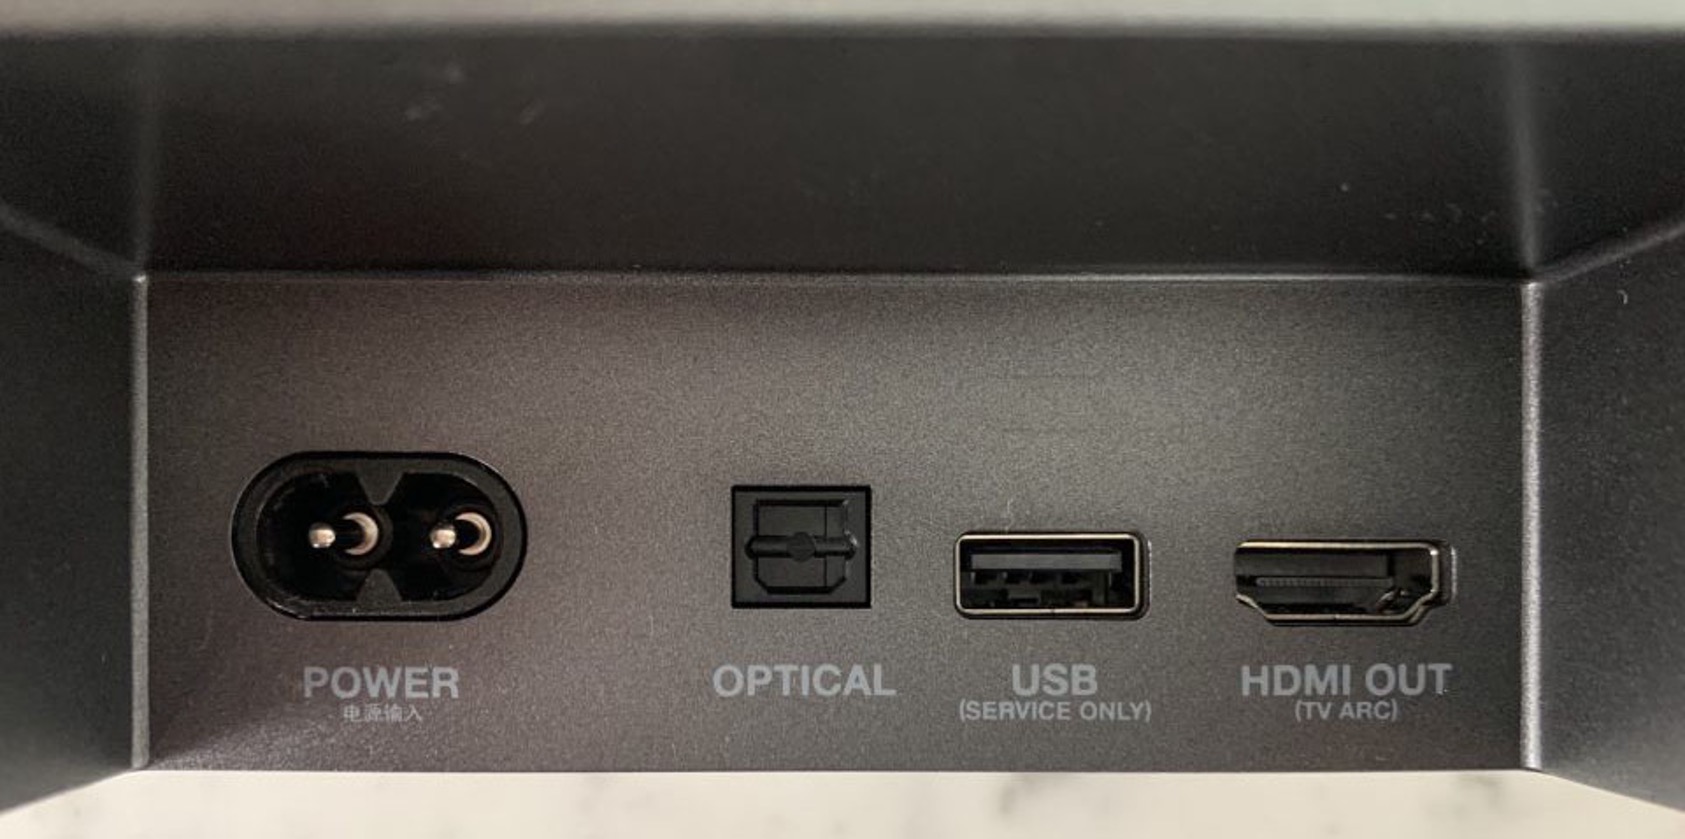
Locate the power cable that came with your soundbar. One end of the cable will have a standard plug that goes into a power outlet, while the other end will have a connector that fits into the back of the soundbar.
Take the power cable and insert the connector firmly into the corresponding port on the back of the soundbar. Ensure that the connection is secure, and the cable is not loose.
Now, plug the other end of the power cable into a nearby power outlet. Make sure the outlet is easily accessible and not blocked by any obstacles that may interfere with the power supply.
Once the power cable is securely connected both to the soundbar and the power outlet, you can proceed to turn on the soundbar. Look for the power button on the soundbar or the remote control and press it to power on the device.
As the soundbar powers on, you may notice indicator lights or a display panel illuminating to indicate that it is receiving power. These lights or displays may vary depending on the model of your JBL Soundbar.
At this point, it is important to refer to the user manual or on-screen instructions, if applicable, to ensure that the soundbar is set to the correct input source for optimal performance. You may need to switch the input source to the appropriate HDMI port or optical input, depending on the connection method you plan to use with your TV.
With the soundbar successfully connected to power, you have completed the second step of the setup process. Now it’s time to move on to connecting the soundbar to your TV.
Connecting the Soundbar to the TV
Now that you have powered up your JBL Soundbar, the next step is to connect it to your television. This connection will allow the soundbar to receive audio signals from your TV and deliver immersive sound.
Start by identifying the available audio output options on your TV. Most TVs offer multiple audio output options, such as HDMI ARC (Audio Return Channel), optical, or analog (RCA) outputs. Choose the option that is most suitable for your setup.
If your TV supports HDMI ARC, this is generally the recommended option as it allows for a seamless and high-quality audio connection. Locate the HDMI ARC port on your TV and the corresponding HDMI ARC port on your soundbar.
Take an HDMI cable and insert one end into the HDMI ARC port on your TV. Ensure that the cable is securely connected. Then, connect the other end of the HDMI cable to the HDMI ARC port on your soundbar.
If your TV does not have an HDMI ARC port, you can use the optical output. Locate the optical output port on your TV and the corresponding optical input port on your soundbar.
Take an optical cable and insert one end into the optical output port on your TV. Make sure the connection is secure. Then, connect the other end of the optical cable to the optical input port on your soundbar.
If your TV only has analog (RCA) outputs, you can still connect it to your soundbar. Locate the analog output ports on your TV, usually labeled as “Audio Out” or “Line Out.” Take an RCA cable and connect the red and white plugs to the corresponding colored ports on your TV. Then, connect the other end of the RCA cable to the analog input ports on your soundbar.
Once the audio connection between your TV and soundbar is established, turn on your TV and soundbar. Use the TV remote or the soundbar’s remote to navigate to the input source associated with the connection you made (e.g., HDMI ARC, optical, or analog).
If everything is connected properly, you should now hear audio coming from your JBL Soundbar. Adjust the volume as needed and listen to the difference in sound quality compared to your TV’s built-in speakers.
Congratulations! You have successfully connected your JBL Soundbar to your TV. Now, let’s move on to the next step and explore how to connect external devices to the soundbar.
Connecting External Devices to the Soundbar
In addition to enhancing your TV sound, your JBL Soundbar can also serve as a hub for connecting external devices such as Blu-ray players, gaming consoles, or streaming devices. This allows you to enjoy the superior audio quality of your soundbar with all your entertainment sources.
Before connecting any external device, make sure that the device is turned off and that both the soundbar and TV are powered on.
Start by identifying the available audio input options on your soundbar. Common options include HDMI, optical, and auxiliary inputs.
If your device supports HDMI, connect the HDMI output from your device to an available HDMI input on your soundbar. Make sure to use high-speed HDMI cables to ensure the best audio and video quality.
If your device only has optical or analog (RCA) outputs, you can still connect it to your soundbar. Use an appropriate optical cable or RCA cables to connect the audio output of your device to the corresponding input on your soundbar.
Once you have made the necessary connections, switch the input source on your soundbar to the appropriate input associated with the connected device. This can usually be done using the soundbar’s remote control or buttons on the soundbar itself.
Now, power on the external device and navigate to the corresponding input source on your TV. You should now be able to enjoy the audio from the connected device through your JBL Soundbar.
Repeat these steps for each external device you want to connect to your soundbar, ensuring that you use the appropriate cables and select the correct input source on your soundbar for each device.
The ability to connect external devices to your JBL Soundbar not only expands its versatility but also allows you to streamline your entertainment setup. With everything connected to your soundbar, you can enjoy a seamless audio experience without the need for multiple audio systems or complicated setups.
Now that you have successfully connected your external devices to your soundbar, it’s time to move on to the next step in the setup process – configuring sound settings.
Configuring Sound Settings
After connecting your JBL Soundbar to your TV and external devices, it’s important to configure the sound settings to optimize the audio performance and tailor it to your preferences. Here are a few key settings to consider:
- Sound Modes: Many JBL Soundbars come with preset sound modes that are designed to enhance specific types of content. These modes can include options like Movie, Music, Sports, or Game. Experiment with different modes to find the one that best suits your audio preferences for different types of content.
- Equalizer Settings: Some soundbars allow you to customize the equalizer settings to fine-tune the audio output. This allows you to adjust the bass, treble, and other audio frequencies to achieve the desired sound quality.
- Virtual Surround Sound: If your soundbar supports virtual surround sound technology, enable it to create a more immersive audio experience. This technology simulates a surround sound effect, even without physical rear speakers, to provide a greater sense of depth and spaciousness in the soundstage.
- Dialogue Enhancement: If you find that dialogue in movies or TV shows is not clear enough, look for a dialogue enhancement setting. Enabling this feature can make speech more distinct and easier to understand, improving the overall viewing experience.
- Volume Leveling: If you notice significant volume differences between different sources, enable the volume leveling feature. This setting helps to maintain a consistent volume level across various content, preventing sudden loudness or quietness fluctuations.
Accessing and adjusting these settings can vary depending on the model of your JBL Soundbar. Most soundbars come with a remote control or dedicated buttons on the soundbar itself for easy access to these features.
Refer to the user manual or online documentation specific to your soundbar model for detailed instructions on how to navigate and customize the sound settings. Taking the time to fine-tune these settings can greatly enhance the audio quality and ensure an optimal listening experience.
Once you have configured the sound settings according to your preferences, sit back, and enjoy the immersive audio experience that your JBL Soundbar delivers. Whether you’re watching movies, gaming, or listening to music, the optimized sound settings will make every moment more enjoyable.
Now that you have customized your sound settings, let’s move on to exploring how to control your JBL Soundbar.
Controlling the Soundbar
Controlling your JBL Soundbar is easy and convenient, thanks to the included remote control or available control options. Here’s how you can navigate and adjust the settings of your soundbar:
- Remote Control: Most JBL Soundbars come with a dedicated remote control that allows you to control various functions. The remote control typically includes buttons for power, volume adjustment, input selection, sound mode selection, and other audio settings. Familiarize yourself with the buttons and their functions to easily navigate and make adjustments.
- HDMI CEC: If your TV supports HDMI CEC (Consumer Electronics Control) and your soundbar is connected using HDMI, you may be able to control the soundbar using your TV remote. HDMI CEC allows for seamless communication between HDMI-connected devices, enabling you to control the soundbar’s power, volume, and other functions through your TV remote.
- Mobile App Control: Some JBL Soundbars come with a companion mobile app that allows you to control the soundbar from your smartphone or tablet. Check if your soundbar model supports this feature and download the corresponding app. With the app installed, you can adjust various settings, access additional features, and even stream music wirelessly to your soundbar.
- On-Screen Display: Certain soundbars may provide an on-screen display that appears on your TV screen. This display allows you to navigate and adjust the sound settings using your TV remote or the soundbar’s own remote control.
With the available control options, you can easily adjust the volume, switch between audio sources, select sound modes, and fine-tune other settings to enhance your listening experience.
It’s important to note that the specific control options and functionalities can vary depending on the model of your JBL Soundbar. Refer to the user manual or online resources provided by JBL for detailed instructions on how to control your specific soundbar model.
Experiment with the different control options to find the most convenient and intuitive method for you. Whether you prefer to use the remote control, your TV remote, a mobile app, or on-screen display, having easy access to soundbar controls ensures that you can make adjustments effortlessly without interrupting your audio enjoyment.
Now that you are familiar with controlling your JBL Soundbar, let’s move on to the optional step of mounting the soundbar.
Mounting the Soundbar (Optional)
If you want to further enhance the aesthetic appeal and save valuable space in your entertainment area, you have the option to mount your JBL Soundbar on a wall or TV stand. Here’s a guide on how to mount your soundbar:
- Wall Mounting: Start by selecting a suitable location on the wall for mounting your soundbar. Make sure the surface is sturdy and can support the weight of the soundbar. Use a stud finder to locate the wall studs for secure mounting. After marking the desired position, use a drill to mount the soundbar bracket or wall mount according to the instructions provided with the mounting kit. Once the bracket is securely mounted, carefully hang the soundbar on the bracket and ensure it is level. Make any necessary adjustments to the position, and tighten the screws to secure the soundbar in place.
- TV Stand Mounting: If you prefer to mount the soundbar on your TV stand, check if your TV stand has a suitable mounting option. Many TV stands come with a dedicated space or bracket designed for soundbar placement. Verify the compatibility and dimensions of your soundbar with the TV stand’s mounting option. Follow the instructions provided with the TV stand to securely attach the soundbar in the designated location. Ensure that the soundbar is placed in a position that allows the audio to project freely and is visually appealing.
When mounting your soundbar, it’s important to consider the proximity to the TV, connectivity options, and access to power outlets. Ensure that the cables are neatly managed and do not obstruct the soundbar’s placement.
Before mounting, double-check the user manual or online resources for specific instructions on how to mount your particular JBL Soundbar model. It’s important to follow the manufacturer’s guidelines for a secure and proper installation.
Please note that not all JBL Soundbars are designed for wall mounting or TV stand mounting. Some models may only be intended for placement in front of or below the TV. Refer to the product documentation to determine if your soundbar is suitable for mounting and to learn about any additional accessories required for the process.
Mounting your JBL Soundbar is optional but can significantly enhance the overall aesthetic of your entertainment setup. By choosing the right mounting option, you can achieve a clean, clutter-free look while still enjoying the immersive audio experience provided by your soundbar.
With the soundbar properly mounted, you’re now ready to sit back and enjoy the incredible audio quality it delivers.
Conclusion
Congratulations on successfully setting up your JBL Soundbar! By following the steps outlined in this guide, you have unboxed your soundbar, connected it to power and your TV, configured the sound settings, connected additional devices, controlled the soundbar, and even considered the option of mounting it for enhanced aesthetics.
Your JBL Soundbar now brings a whole new level of audio immersion to your entertainment experience. Whether you’re watching movies, playing games, or listening to music, the powerful sound quality and precise audio detailing of your soundbar will enhance every moment.
Remember to regularly check for firmware updates and explore any additional features or functionalities offered by your specific JBL Soundbar model. Taking advantage of these updates and features can further improve the sound quality and expand the capabilities of your soundbar.
If you encounter any difficulties during the setup process or while using your soundbar, refer to the user manual or visit the JBL support website for troubleshooting tips and resources.
Now, sit back, relax, and enjoy the immersive sound experience that your JBL Soundbar provides. Feel the powerful bass rumble, the crisp treble, and the rich audio details as they transform your entertainment into a captivating journey.
Thank you for choosing JBL. We hope you have a fantastic audio experience with your new soundbar!