Introduction
Welcome to the world of computer hardware troubleshooting! One frustrating experience that many computer users encounter is when their computer suddenly shuts down without warning. Imagine working on an important document or in the middle of an intense gaming session, only to have your computer power off abruptly, leaving you bewildered and annoyed.
In many cases, this unexpected shutdown can be attributed to a faulty power supply unit (PSU). The PSU is a critical component that provides the necessary electrical power to all the other parts of a computer. When a PSU malfunctions, it can lead to various issues, including random shutdowns.
In this article, we will delve into the world of PSUs and explore the potential causes behind a computer turning off unexpectedly. We will discuss the inner workings of a PSU, common problems caused by a faulty unit, signs to look out for, and how to test and replace a faulty PSU. By the end, you will have a better understanding of the role of the PSU in your computer and how to tackle the issue if it is the culprit behind your computer turning off.
Whether you are a casual computer user or a tech enthusiast, join us on this informative journey to discover the impact of a faulty PSU and gain valuable insights into troubleshooting computer shutdowns.
What is a PSU?
In order to understand how a faulty power supply unit (PSU) can cause a computer to turn off, we first need to understand what a PSU is and its role in a computer system.
A PSU, also known as a power supply or power pack, is an essential component of a computer that converts the alternating current (AC) from the electrical outlet into direct current (DC) that is required by the various components of the computer. The PSU supplies power to the motherboard, processor, memory, graphics card, storage devices, and other peripherals.
The PSU performs two main functions: providing the necessary power and regulating the voltage and current to prevent damage to the computer components. It ensures a stable power supply to all the connected devices, allowing them to function optimally.
PSUs come in various wattages, which determine the amount of power they can deliver. When choosing a PSU, it is important to select one that can handle the power requirements of the computer system. Using a PSU with insufficient wattage can lead to stability issues, while using one with excessive wattage can be a waste of energy.
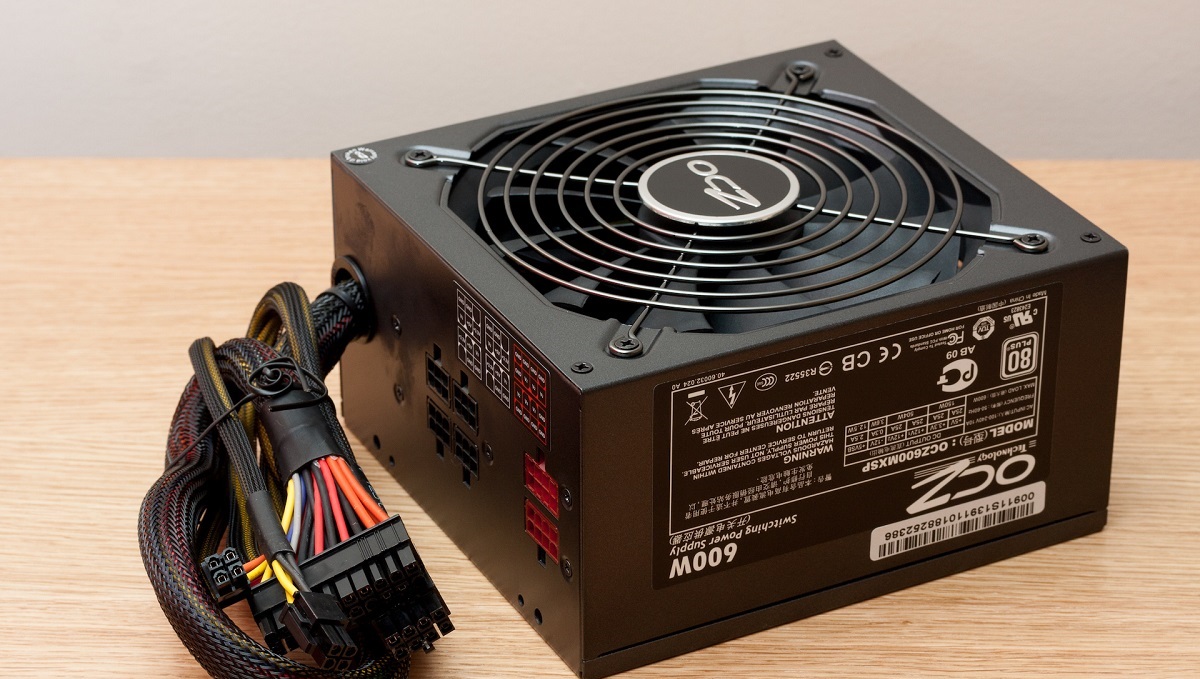
Modern PSUs also come with several connectors to supply power to different components. The most common connector is the 24-pin ATX connector, which provides power to the motherboard. Other connectors include the 4-pin or 8-pin CPU connector, PCIe connectors for graphics cards, SATA connectors for storage devices, and peripheral connectors for other devices such as fans and drives.
Overall, a PSU is the lifeline of a computer, providing the necessary power for all the components to function properly. Without a functional and reliable PSU, a computer cannot operate correctly, leading to potential issues like sudden shutdowns. Understanding the role and functionality of the PSU is crucial when troubleshooting computer problems.
How does a PSU work?
Now that we have a basic understanding of what a power supply unit (PSU) is, let’s dive into how it works to deliver the necessary power to a computer system.
At its core, a PSU converts the alternating current (AC) from the electrical outlet into the direct current (DC) required by the computer’s components. It follows a multi-step process to accomplish this task efficiently.
The first step in the process is rectification, where the AC voltage is converted into a pulsating DC voltage. This is accomplished using a device called a rectifier, which consists of diodes that allow the current to flow in only one direction. The rectified voltage is then smoothed out using capacitors to reduce the ripple and provide a steady DC voltage.
Once the AC voltage is rectified and smoothed, the next step is voltage regulation. The PSU utilizes circuitry and components like voltage regulators and transformers to ensure that the output voltage remains stable and within the required limits. This is important to prevent damage to the delicate electronic components in the computer system.
Another crucial aspect of a PSU’s operation is power distribution. The PSU is designed to supply power to different components of the computer, such as the motherboard, processor, memory, and peripherals. This is achieved through various connectors and cables that deliver the appropriate voltage and current to each component.
In addition to delivering power, a PSU also incorporates several safety features to protect the computer system. These features include overvoltage protection (OVP), undervoltage protection (UVP), overcurrent protection (OCP), short-circuit protection (SCP), and over-temperature protection (OTP). These safeguards ensure that the PSU shuts down or regulates power in case of abnormal voltage or current levels, preventing damage to the components.
Overall, a PSU is a complex piece of hardware that works diligently to provide a stable and regulated power supply to a computer system. By converting AC voltage to DC, regulating voltage levels, and distributing power to different components, the PSU ensures that the computer functions smoothly and reliably.
Can a faulty PSU cause a computer to turn off?
A faulty power supply unit (PSU) can indeed cause a computer to turn off unexpectedly. As the primary source of power for the entire system, the PSU plays a crucial role in the stable operation of a computer.
One common issue that can occur with a faulty PSU is random shutdowns. When a PSU malfunctions, it may not be able to deliver a consistent and stable power supply to the computer components. This can lead to sudden power loss, causing the computer to shut off abruptly.
A faulty PSU can also result in insufficient power output. If the PSU is unable to provide enough power to the components, the computer may not have enough energy to run properly, causing it to shut down. This can happen when the PSU is overloaded, unable to handle the power requirements of the system, or when there is a physical defect in the PSU itself.
Additionally, a faulty PSU can also cause power surges. A power surge is an increase in electrical voltage that goes beyond the normal range. This sudden surge of power can overwhelm the delicate components of a computer, leading to immediate shutdown or even permanent damage.
Inadequate power supply is another issue that a faulty PSU can cause. If the computer demands more power than the PSU can provide, it can result in instability and possible shutdowns. This can occur when components like graphic cards or processors require a higher wattage than the PSU can deliver, leading to insufficient power supply and subsequent shutdowns.
It’s essential to note that while a faulty PSU can be a common cause of computer shutdowns, other issues can also lead to similar symptoms. Issues like overheating, faulty RAM, or software problems can also cause a computer to turn off unexpectedly. Therefore, it’s important to properly diagnose the issue to determine whether a faulty PSU is the actual culprit.
In the next sections, we will explore common problems caused by a faulty PSU, signs to look out for, and methods to test and replace a faulty PSU. By understanding how a faulty PSU can impact a computer and recognizing the signs of a failing unit, you will be well-equipped to troubleshoot and resolve any issues that arise.
Common problems caused by a faulty PSU
A faulty power supply unit (PSU) can give rise to various issues in a computer system. Let’s explore some of the common problems that can be caused by a faulty PSU:
1. Overheating: A malfunctioning PSU can generate excessive heat, leading to increased temperatures within the computer case. This can negatively impact the performance of other components and potentially cause the computer to shut down to prevent overheating.
2. Power surges: A faulty PSU can cause power surges, where the voltage supplied to the computer exceeds the normal range. Power surges can lead to immediate shutdowns and can even cause irreversible damage to the computer’s hardware.
3. Inadequate power supply: If the PSU cannot supply enough power to the computer components, issues like stability problems and random shutdowns may occur. This can happen when the PSU is underpowered or unable to handle the power requirements of the system.
4. Blue Screen of Death (BSOD): A PSU that is failing due to instability or voltage fluctuations can cause the dreaded Blue Screen of Death. If the PSU cannot provide a consistent power supply to the computer, it can result in system crashes and the display of a blue screen error message.
5. Unusual noises: A faulty PSU may produce unusual noises, such as buzzing, whining, or clicking sounds. These noises can indicate issues with the internal components of the PSU, which may lead to power interruptions and potential shutdowns.
6. Burning smell or smoke: If you detect a burning smell or see smoke emanating from the PSU, it is a definite sign of a serious problem. This can indicate overheating or even electrical shorts, which can pose a significant risk to both the PSU and the rest of the computer system. Immediate action should be taken to address this issue.
These are just a few examples of the common problems that can occur as a result of a faulty PSU. It’s important to address these issues as soon as possible to prevent further damage to the computer and potential loss of data. In the next sections, we will discuss the signs of a faulty PSU and methods to test and replace it to ensure the smooth and reliable operation of your computer system.
Overheating
One of the common problems caused by a faulty power supply unit (PSU) is overheating. When a PSU malfunctions, it can generate excessive heat, which can have detrimental effects on the overall performance and stability of the computer system.
Overheating can occur due to various reasons when it comes to the PSU. Some of the possible causes include overloaded PSU, dust buildup, fan failure, or inadequate cooling inside the computer case.
When the PSU is overloaded, it is trying to draw more power than it can handle. This excessive power draw can result in the generation of excess heat. Overloading can happen if the wattage rating of the PSU is insufficient for the power demands of the computer system, especially if the system has power-hungry components such as high-end graphics cards or multiple hard drives.
Dust buildup is another culprit for PSU overheating. Over time, dust accumulates within the computer case and can clog the PSU’s internal components, such as the fan and heat sinks. This hampers proper ventilation and heat dissipation, causing the PSU to heat up.
A faulty fan inside the PSU can also contribute to overheating. The fan plays a crucial role in cooling down the components and expelling hot air from the PSU. If the fan stops working or operates at a reduced speed, heat buildup can occur, leading to overheating.
Inadequate cooling inside the computer case can exacerbate the problem. If the case lacks proper airflow or if the positioning of components obstructs the airflow, it can prevent the dissipation of heat generated by the PSU. This can create a vicious cycle of heat buildup and lead to overheating.
Overheating can have severe consequences on the stability and performance of the entire computer system. It can cause the PSU to shut down or even fail completely, leading to system crashes and data loss. Additionally, high temperatures can negatively affect other components inside the computer, such as the CPU, graphics card, and memory, potentially causing them to operate at reduced efficiency or trigger protective mechanisms like thermal throttling.
To mitigate the issue of PSU overheating, it is essential to ensure proper ventilation and temperature management within the computer case. Regularly cleaning the PSU and the computer case by removing dust buildup can help maintain better airflow. Checking the functionality of the PSU fan and replacing it if necessary can also help prevent overheating. Additionally, monitoring the temperature of the PSU and the overall system using software tools can provide early warnings of potential overheating issues.
By addressing PSU overheating promptly and taking necessary preventive measures, you can ensure the longevity and optimal performance of your computer system.
Power surges
Power surges are another common problem that can be caused by a faulty power supply unit (PSU). A power surge refers to a sudden spike in electrical voltage that exceeds the normal operating range. These surges can lead to immediate shutdowns and pose a risk to the computer’s hardware.
There are various causes of power surges, and a faulty PSU can be one of them. When the PSU is malfunctioning, it may not regulate the voltage properly, resulting in voltage fluctuations that can lead to power surges. This can happen due to internal faults, such as damaged components or degraded circuitry, within the PSU.
In some cases, the power surges may be caused by external factors, such as lightning strikes or power grid issues. However, a faulty PSU can exacerbate the effects of these external surges on the computer system. A PSU that is already unstable or unable to handle power fluctuations may amplify the impact of external surges, potentially causing severe damage to the computer’s components.
Power surges pose significant risks to a computer system. They can lead to immediate shutdowns, data loss, and even permanent damage to hardware components. When the voltage exceeds the normal range, it can overwhelm delicate electronic components, such as the motherboard, processor, memory, and storage devices.
To protect your computer system from power surges caused by a faulty PSU, it is crucial to use surge protectors or uninterruptible power supplies (UPS). Surge protectors are devices that are designed to divert excess voltage and protect connected devices from power surges. They serve as a first line of defense against voltage spikes and can help safeguard your computer system from the detrimental effects of surges.
Uninterruptible power supplies (UPS) go a step further by providing backup power during outages and regulating the voltage supplied to the system. UPSs typically include surge protection capabilities as well, making them an effective solution for protecting against power surges caused by both internal and external factors.
By investing in surge protectors or UPSs, you can add an extra layer of protection against power surges caused by a faulty PSU. These devices can help safeguard your computer system, prolong its lifespan, and prevent potential damage and data loss due to voltage spikes.
Inadequate power supply
Another common problem that can be caused by a faulty power supply unit (PSU) is inadequate power supply to the computer system. When the PSU fails to provide sufficient power to the components, various issues can arise, including stability problems and unexpected shutdowns.
Inadequate power supply can occur due to a few different reasons. One possibility is that the wattage rating of the PSU is insufficient for the power requirements of the computer system. If the PSU does not have enough power output, it can struggle to meet the demands of power-hungry components, such as high-end graphics cards or multiple hard drives. As a result, the system may experience instability or sudden shutdowns.
Another cause of inadequate power supply can be related to the overall health and functionality of the PSU. Over time, PSUs can degrade and their power output capabilities can diminish. This can result in a situation where the PSU is no longer able to supply the necessary power to the system, leading to inadequate power supply and subsequent shutdowns.
In some cases, inadequate power supply can also be caused by physical defects within the PSU itself. Faulty internal components or damaged circuitry can hamper the PSU’s ability to deliver proper power output to the computer system. This can manifest as instability, random crashes, or abrupt shutdowns.
When a computer experiences inadequate power supply, it may struggle to perform tasks that require significant power consumption. This can lead to freezing, lagging, or even system reboots. In severe cases, the lack of power supply can cause the system to shut down completely to protect the sensitive components from potential damage.
To address inadequate power supply, it is crucial to ensure that the PSU is properly matched to the power requirements of the computer system. Checking the wattage rating of the PSU and comparing it to the power needs of the components can help identify if the PSU is underpowered. Upgrading to a higher wattage PSU may be necessary to ensure a stable and sufficient power supply.
Additionally, regularly checking the health of the PSU and monitoring its performance can help identify any degradation or faults before they cause significant issues. Using software tools to monitor the voltage outputs of the PSU can provide insights into any irregularities in power supply.
By addressing inadequate power supply caused by a faulty PSU, you can ensure that your computer system receives the necessary power it needs to operate optimally, reducing the risk of instability, unexpected shutdowns, and potential damage to the components.
Signs of a faulty PSU
Identifying the signs of a faulty power supply unit (PSU) is essential for diagnosing and troubleshooting computer issues. A failing or faulty PSU can cause a range of problems, and being aware of these signs can help you take appropriate action and prevent potential damage to your computer system.
1. Random shutdowns: One of the most common signs of a faulty PSU is random and unexpected shutdowns. If your computer powers off suddenly without any warning or error messages, it could indicate an issue with the PSU. The PSU may not be able to provide a consistent and stable power supply, resulting in the system shutting down abruptly.
2. Blue screen of death (BSOD): Another sign of a failing PSU is frequent occurrences of the Blue Screen of Death. If your computer consistently displays a blue screen error message accompanied by a system crash, it may be caused by unstable power supply or voltage fluctuations from the PSU.
3. Unusual noises: A faulty PSU can produce unusual noises such as buzzing, whining, or clicking sounds. These noises can indicate problems with the internal components of the PSU, including fan issues or capacitor failure. If you notice any unfamiliar or persistent noises coming from your PSU, it may be a sign of a problem.
4. Burning smell or smoke: A burning smell or the presence of smoke is a clear indication of a serious problem with the PSU. It can be caused by overheating or electrical shorts within the PSU. If you detect any burning odor or see smoke coming from your PSU, immediately turn off your computer and seek professional assistance.
5. Voltage inconsistencies: Monitoring the voltage outputs of your PSU can provide insights into its health. If there are significant fluctuations in the voltage levels, it could be a sign of a failing PSU. Software tools or hardware devices can help monitor and display real-time voltage readings for analysis.
6. System instability: A faulty PSU can cause overall system instability. You may experience frequent crashes, freezing, slow performance, or unresponsive applications. These issues can be a result of the PSU’s inability to provide a consistent and reliable power supply to the computer components.
It’s important to note that these signs can also be caused by other hardware or software issues. Therefore, it’s crucial to perform a thorough diagnosis before concluding that the PSU is the root cause. Consulting with knowledgeable professionals or using reliable diagnostic tools can provide more accurate assessments of the PSU’s condition.
Recognizing the signs of a faulty PSU can help you take prompt action and prevent potential damage to your computer system. If you suspect issues with your PSU based on these signs, it’s recommended to seek professional assistance to properly diagnose and resolve the problem.
Random shutdowns
Random and unexpected shutdowns are a frustrating experience for any computer user. They disrupt your workflow, potentially leading to data loss and other complications. One common cause of these random shutdowns is a faulty power supply unit (PSU).
When a PSU is malfunctioning, it may not be able to provide a consistent and stable power supply to your computer system. As a result, the system can shut down abruptly without any warning or error messages. These random shutdowns are often a clear indication of an issue with the PSU.
There are several reasons why a faulty PSU can cause random shutdowns. One possibility is that the PSU is unable to deliver sufficient power to the components of your computer. If the PSU is underpowered or struggling to meet the power requirements of your system, it may lead to sudden shutdowns as the components are unable to function properly without adequate power.
In some cases, a faulty PSU may also cause voltage fluctuations, resulting in the computer system receiving inconsistent power supply. These fluctuations can trigger protective mechanisms within the computer, causing it to shut down to prevent damage to the hardware.
Additionally, overheating can also play a role in random shutdowns caused by a faulty PSU. When the PSU is malfunctioning, it can generate excess heat. This heat can eventually affect the overall temperature balance inside the computer case, leading to overheating of other components. To avoid damage, the computer may shut down to protect itself from further heat-related issues.
It’s important to note that while random shutdowns can be a strong indication of a faulty PSU, other factors can also contribute to this problem. Issues like overheating due to inadequate ventilation, faulty RAM, or software conflicts can also cause your computer to shut down unexpectedly.
If you’re experiencing random shutdowns, it’s crucial to perform a thorough diagnosis to identify the underlying cause. This involves checking the temperatures of various components, testing the functionality of other hardware, and analyzing software conflicts. If you suspect that the PSU is the root cause, consulting with a professional or replacing the PSU may be necessary.
By addressing the issue of random shutdowns caused by a faulty PSU, you can restore stability and reliability to your computer system. It’s important to ensure that the new PSU is of the correct wattage and compatible with your system’s power requirements to avoid future issues.
Blue screen of death (BSOD)
The dreaded Blue Screen of Death (BSOD) is a sight that no computer user wants to encounter. This screen appears when the Windows operating system encounters a critical error that it cannot recover from, forcing the system to shut down. One of the common causes of recurring BSODs is a faulty power supply unit (PSU).
A failing PSU can lead to voltage instability or fluctuations, which can trigger a BSOD. If the PSU is unable to deliver a consistent and stable power supply to the computer’s components, it can result in sudden crashes and display the blue screen error message.
The instability in voltage supplied by a faulty PSU can cause serious issues within the computer system. The irregular power supply can lead to data corruption, failure to load operating system files, or conflicts with device drivers or system services. These issues can trigger the Windows operating system to panic, resulting in a BSOD as a protective measure to prevent further damage.
BSODs caused by a faulty PSU can occur randomly while using the computer or during specific activities that demand more power from the system, such as gaming, video editing, or running resource-intensive applications. The increased power requirements during these activities can exacerbate instability issues in the PSU, leading to more frequent BSOD occurrences.
It’s worth noting that a BSOD does not always indicate a faulty PSU, as software or hardware issues unrelated to the power supply can also trigger these errors. However, if you regularly experience BSODs without any apparent pattern or other clear reasons, it is advisable to investigate the possibility of a failing PSU.
To diagnose if the PSU is the culprit behind the BSODs, it is important to perform thorough testing. This can involve checking for any unusual noises, monitoring the voltage outputs using software tools or hardware devices, and stress-testing the system to observe its behavior under heavy load. Consulting with a professional or a computer technician can provide further guidance in identifying the root cause of the BSODs.
If a faulty PSU is indeed responsible for the recurrent BSODs, replacing the PSU with a reliable and appropriately rated unit can help resolve the issue. Ensuring that the new PSU meets the power requirements of the system and provides stable voltage output is crucial to prevent further BSOD occurrences.
By addressing the issue of BSODs caused by a faulty PSU, you can restore stability and eliminate the frustration of system crashes. It’s important to be diligent in diagnosing the cause of the recurring BSODs and taking appropriate action to ensure a reliable and efficient computer system.
Unusual noises
If you notice unusual noises emanating from your computer, particularly from the power supply unit (PSU), it could be a sign of a problem. Unusual noises from the PSU can indicate internal issues that require attention and potential resolution.
There are several types of noises that a faulty PSU can produce:
1. Buzzing or humming: A buzzing or humming sound is a common indication of a failing PSU. It can stem from various causes, such as faulty fans, loose components, or excessive vibrations. These noises may become more noticeable when the PSU is under load or when the computer is performing resource-intensive tasks.
2. Whining or high-pitched noise: A high-pitched whining noise is often associated with coil whine, which occurs when certain components within the PSU vibrate at audible frequencies. Coil whine can be caused by various factors, including poor manufacturing, specific loads, or power supply inefficiencies. While it may not necessarily indicate a functional issue, it can be unpleasant and may warrant investigation.
3. Clicking or ticking: Clicking or ticking sounds can suggest a problem with the PSU’s internal components, such as the fan or capacitors. It may indicate that the fan is malfunctioning or obstructed, preventing proper cooling. Clicking can also signal capacitor failure, where the electrical charge buildup causes audible clicking as the capacitors discharge and charge back up again.
Unusual noises from the PSU should not be ignored, as they can be indicative of underlying issues. While some noises may not directly affect the functionality of the PSU or the computer, they can still indicate potential problems that may worsen over time.
If you encounter unusual noises from the PSU, it’s crucial to take action. Here are some steps you can take:
1. Clean the PSU: Dust accumulation within the PSU can lead to vibrations and fan-related noises. Power off the computer, disconnect the power cord, and carefully clean the PSU using compressed air or anti-static brushes to remove any dust or debris. This can help restore proper airflow and potentially resolve certain noise issues.
2. Check and replace the fan: If the noise persists, it may be due to a faulty or malfunctioning fan. Power off the computer, disconnect the power cord, and open the computer case. Inspect the fan in the PSU for any obstructions, damage, or signs of failure. If necessary, replace the fan with a compatible and reliable replacement to restore proper cooling and reduce noise levels.
3. Seek professional assistance: If the unusual noise continues or if you are unsure about handling the PSU yourself, it is advised to consult a professional or a computer technician. They can diagnose the issue, perform more extensive testing, and provide solutions for the noisy PSU.
Addressing unusual noises from a faulty PSU is important to ensure the stability and optimal performance of your computer system. By taking proactive measures to diagnose and resolve these issues, you can maintain a quieter and more efficient computing experience.
Burning smell or smoke
One of the most alarming signs of a serious problem with the power supply unit (PSU) is the presence of a burning smell or the sight of smoke emanating from the PSU. This odor or smoke is an immediate indication of a potentially dangerous situation that requires immediate attention.
A burning smell or smoke coming from the PSU can be caused by several factors, including:
1. Overheating: Excessive heat buildup within the PSU can result in burning smells or smoke. This can occur due to an inadequate cooling system or obstructed airflow. Components inside the PSU, such as capacitors or wires, may become overheated and emit the distinct smell of burning electronics.
2. Electrical short: An electrical short circuit within the PSU can cause a burning smell. When electrical components or wires come into contact with each other or with the metal chassis of the PSU, it can create a damaging surge of electricity. This can lead to overheating, melting, and the production of smoke or burning odors.
3. Component failure: The failure of internal components, such as capacitors or transformers, can generate heat and result in the release of unpleasant smelling fumes. This failure can be due to age, manufacturing defects, or excessive stress on the PSU.
If you detect a burning smell or see smoke coming from the PSU, it is crucial to take immediate action to prevent potential harm or damage:
1. Power off and unplug: Safely shut down your computer and unplug it from the power source. This will help prevent any further damage or potential electrical hazards.
2. Seek professional assistance: Do not attempt to fix or investigate the issue yourself, as it involves potential electrical hazards. Instead, contact a professional technician or bring your computer to a certified repair center. They can inspect the PSU, diagnose the problem, and provide appropriate solutions.
3. Avoid use until resolved: Refrain from using your computer or the PSU until the issue has been properly addressed. Continued use could exacerbate the problem and potentially lead to more severe consequences, such as fire or permanent damage to other components.
It is important not to ignore the presence of a burning smell or smoke from the PSU. Taking immediate action to address the issue can prevent further damage, ensure your safety, and protect your computer system from potential hazards. Remember that safety is paramount, so prioritize seeking professional help when dealing with such dangerous situations.
How to test your PSU
Testing your power supply unit (PSU) is an essential step in diagnosing potential issues and determining the health of your computer system. By verifying the functionality of your PSU, you can identify whether it is the cause of any problems you may be experiencing. Here are a couple of methods you can use to test your PSU:
1. Using a multimeter:
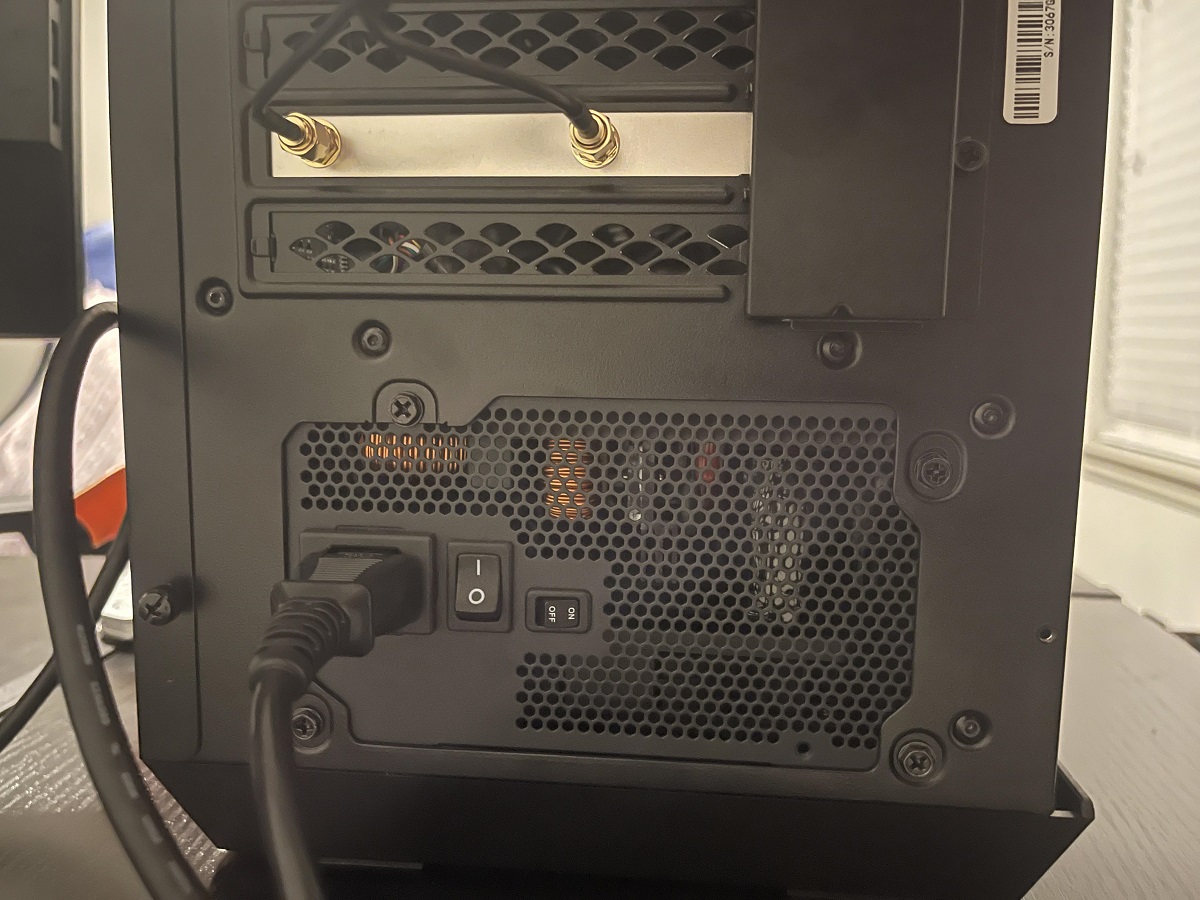
– Power off your computer and unplug it from the power source.
– Open the computer case to access the PSU.
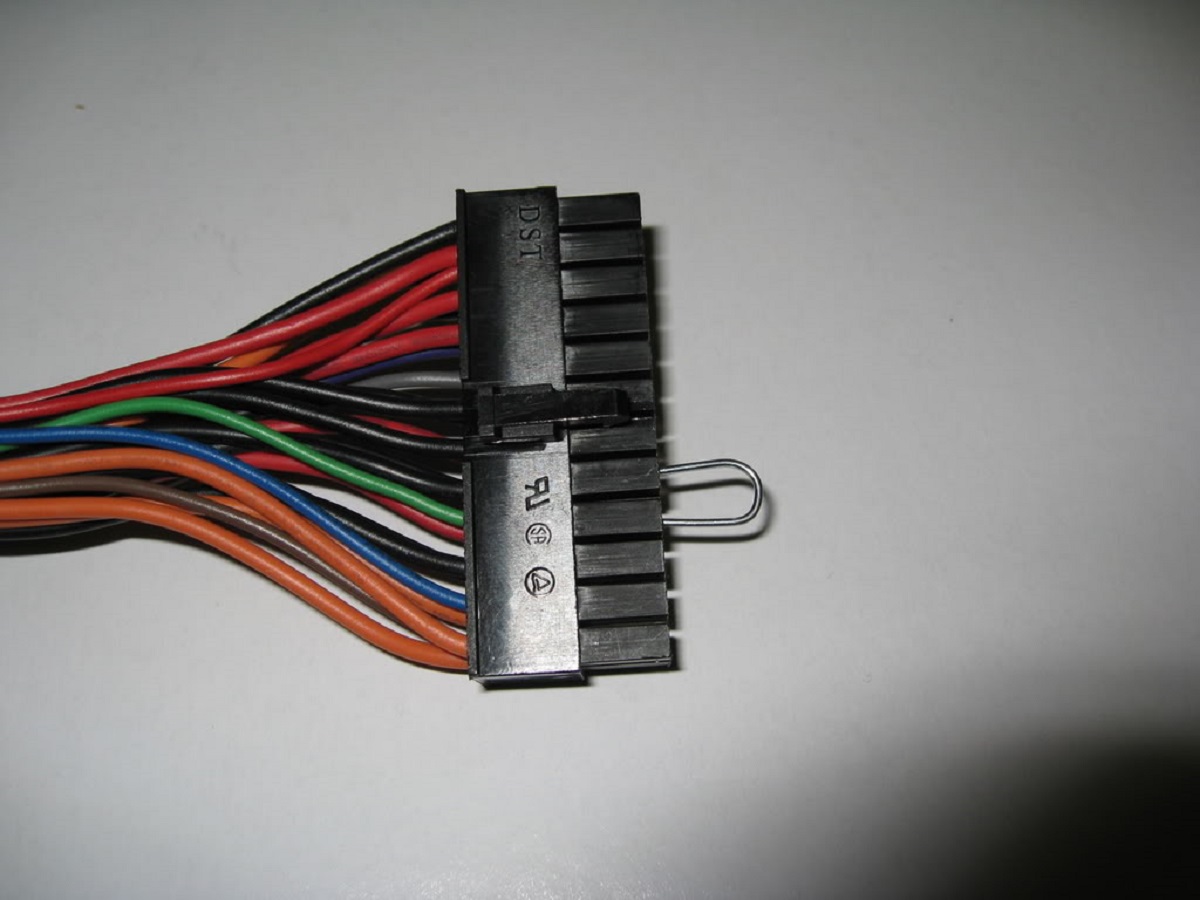
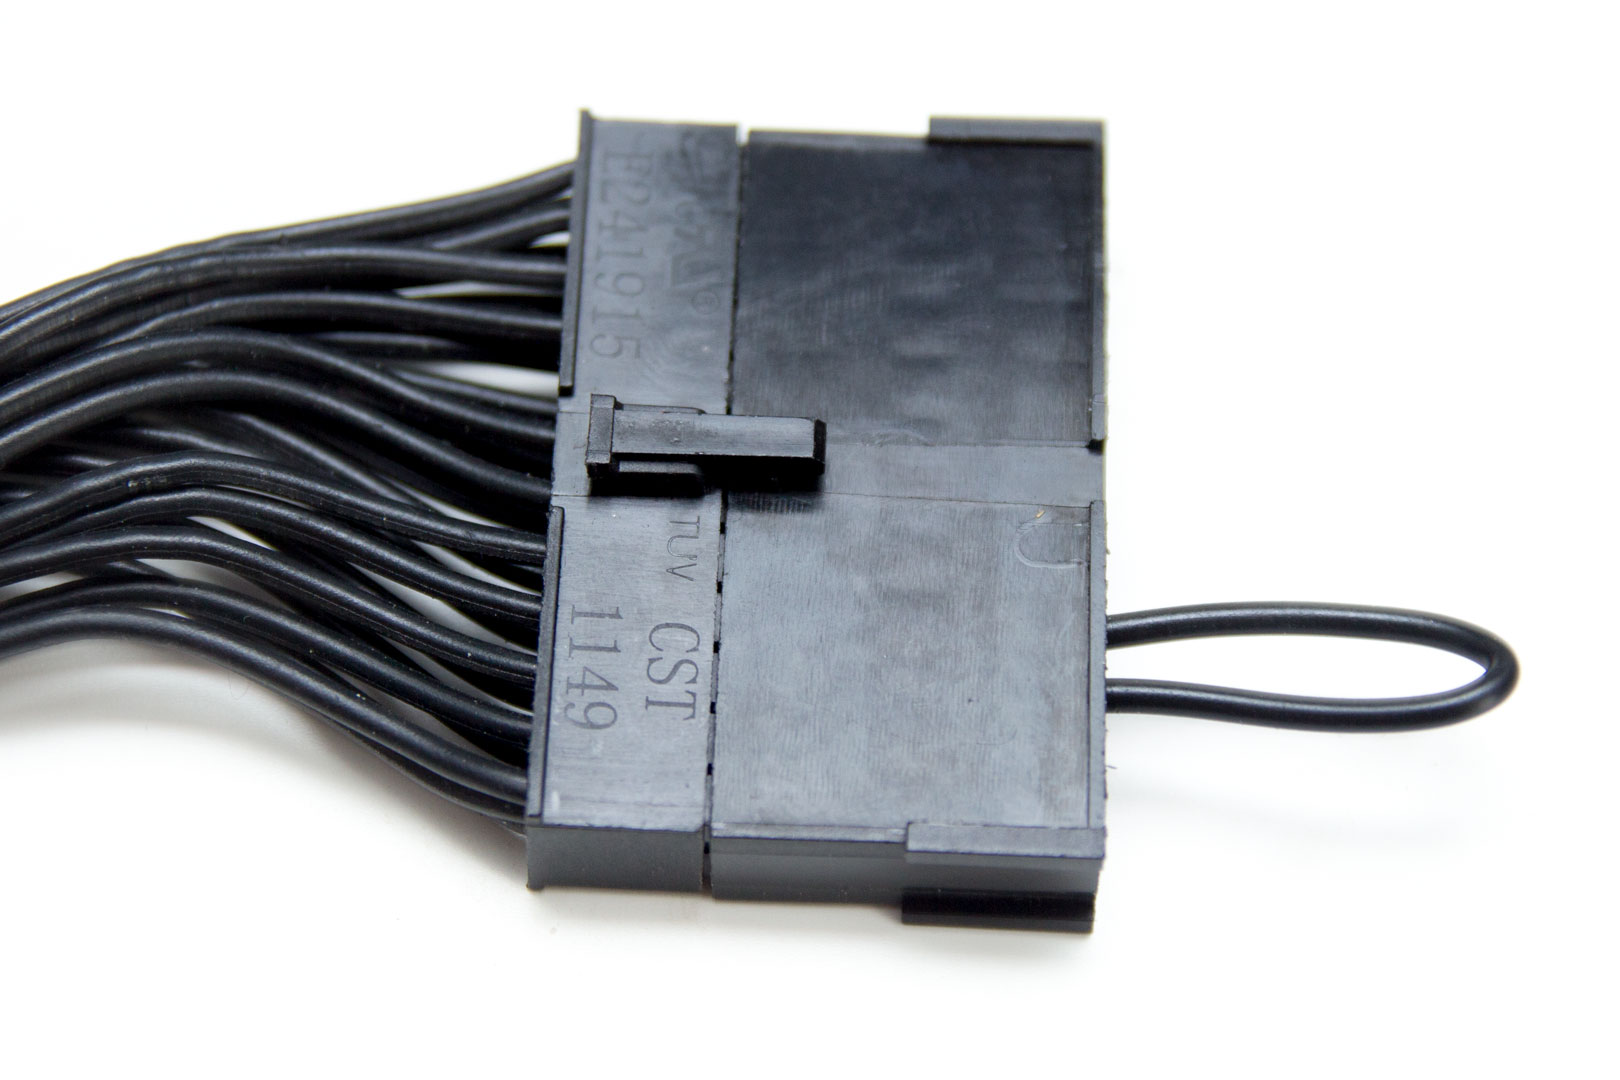
– Locate the main 24-pin ATX connector that connects to the motherboard.
– With the multimeter set to DC voltage mode, insert the positive (red) probe into the yellow +12V wire socket and the negative (black) probe into the black ground wire socket.
– Turn on the power to the PSU and check the voltage reading on the multimeter. A healthy PSU should provide around +12V of power.
– Repeat this process for other voltage outputs, such as the +5V and +3.3V rails.
– If the readings for any of the voltage outputs significantly deviate from the expected values or fluctuate irregularly, it may indicate a faulty PSU.
2. Using a power supply tester:
– Power off your computer and unplug it from the power source.
– Disconnect the PSU cables from the system components (motherboard, drives, etc.).
– Connect the power supply tester to the PSU. The tester will have connectors that match the PSU cables.
– Plug the PSU into a power outlet and turn on the power to the PSU.
– The power supply tester will display various voltage outputs and indicate whether they are within the acceptable range. It will also check other essential functions such as the power supply’s fan operation and power factor correction.
– If the power supply tester indicates any abnormalities, such as voltage fluctuations or lack of proper functionality, it may suggest a faulty PSU.
Remember, when testing your PSU, always prioritize safety precautions. Ensure the PSU is disconnected from all components and follow appropriate handling procedures. If you are unsure or uncomfortable performing these tests yourself, it is recommended to seek assistance from a professional technician who can accurately diagnose and test your PSU.
By effectively testing your PSU, you can gain insights into its performance and determine if it needs to be replaced to address any potential issues in your computer system.
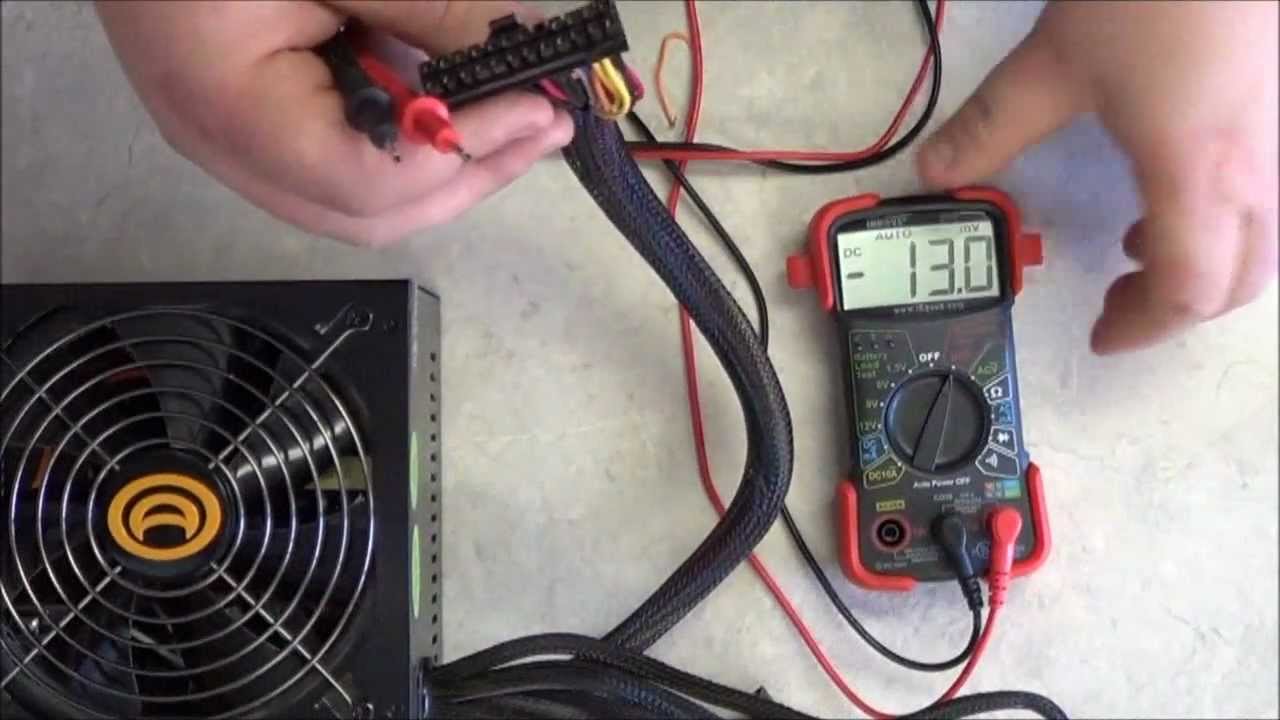
Using a multimeter
One of the methods to test the functionality of your power supply unit (PSU) is by using a multimeter. A multimeter is a versatile tool that can measure various electrical properties, including voltage. By measuring the voltage outputs of your PSU, you can determine if it is providing the correct levels of power to your computer components. Here’s how to test your PSU using a multimeter:
1. Power off your computer and unplug it from the power source: Before testing your PSU, it’s crucial to ensure the safety of both yourself and the computer system by turning off the power and disconnecting it from the wall outlet.
2. Open the computer case to access the PSU: Depending on your computer case, you may need to remove side panels or access covers to expose the internal components, including the PSU. Follow the manufacturer’s instructions or refer to your computer’s user manual for guidance.
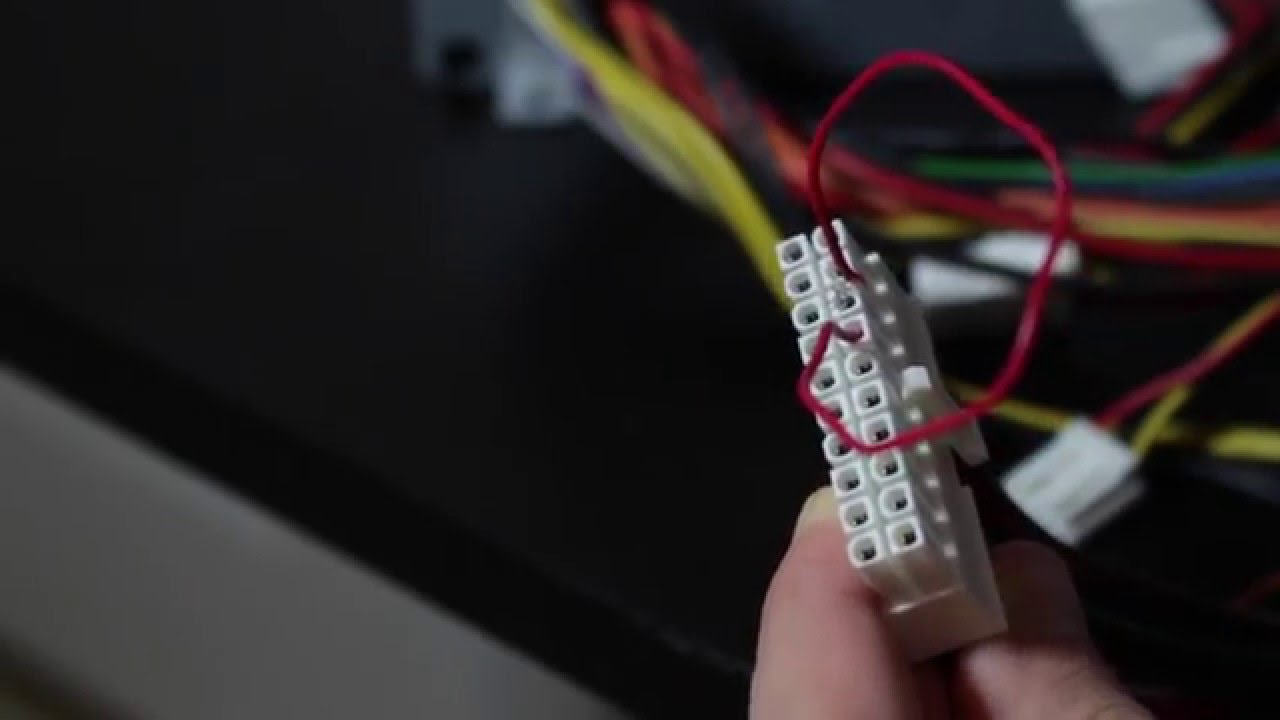
3. Locate the main 24-pin ATX connector that connects to the motherboard: The 24-pin ATX connector is a large, rectangular connector responsible for supplying power to the motherboard. It is usually located near the center or bottom of the motherboard. Identify this connector before proceeding.
4. With the multimeter set to DC voltage mode, insert the positive (red) probe into the yellow +12V wire socket and the negative (black) probe into the black ground wire socket: Ensure that your multimeter is set to measure DC voltage and set the range accordingly. Insert the multimeter probes into the corresponding sockets of the 24-pin ATX connector. The yellow wire is typically associated with +12V, and the black wire is the ground connection.
5. Turn on the power to the PSU and check the voltage reading on the multimeter: Switch on the power to the PSU using the switch on the rear or side of the unit. Observe the multimeter display and note the voltage reading. A healthy PSU should provide around +12V of power in this particular measurement point.
6. Repeat this process for other voltage outputs, such as the +5V and +3.3V rails: The 24-pin ATX connector also supplies other voltages, such as +5V, +3.3V, and others. Repeat the process by connecting the multimeter probes to the respective wire sockets and note the voltage readings. Compare them to the expected values specified by the manufacturer.
7. If the readings significantly deviate from the expected values or fluctuate irregularly, it may indicate a faulty PSU: Compare the measured voltages to the recommended values specified by the PSU manufacturer. If there are substantial deviations or irregular fluctuations, it is a strong indication of a faulty PSU that may need to be replaced.
Testing your PSU using a multimeter requires caution and precision. Ensure that you are familiar with the proper handling of a multimeter and follow safety procedures diligently. If you are unsure or uncomfortable performing these tests yourself, it is recommended to seek assistance from a professional technician who can accurately diagnose and test your PSU.
By utilizing a multimeter to test your PSU, you can gain valuable insights into its performance and ascertain whether it is functioning correctly or requires replacement.
Using a power supply tester
Another method to test the functionality of your power supply unit (PSU) is by using a power supply tester. A power supply tester is a specialized device designed specifically for testing PSUs. It helps to quickly assess the voltage outputs and other vital functions of the PSU. Here’s how to use a power supply tester:
1. Power off your computer and unplug it from the power source: Prior to testing the PSU, it’s important to ensure the safety of both yourself and the computer system by turning off the power and disconnecting it from the wall outlet.
2. Disconnect the PSU cables from the system components: Carefully detach all power cables that connect the PSU to the motherboard, drives, and other peripherals. Ensure that none of the power cables are connected to the system.
3. Connect the power supply tester to the PSU: Plug the power supply tester into the PSU’s 24-pin ATX connector. The power supply tester will have connectors that match the PSU cables. Match and connect the appropriate connectors from the power supply tester to the corresponding cables of the PSU.
4. Plug the PSU into a power outlet and turn on the power to the PSU: Connect the PSU to a power outlet using the power cord. Switch on the power to the PSU using the switch located on the rear or side of the unit.
5. Interpret the power supply tester readings: The power supply tester will display various voltage outputs and indicate whether they are within the acceptable range. It will also check other essential functions such as the power supply’s fan operation and power factor correction.
6. Assess the voltage readings and other indicators: Compare the voltage readings displayed on the power supply tester to the recommended values specified by the PSU manufacturer. Ensure that the readings are within the acceptable range. Pay attention to other indicators on the power supply tester, such as LED lights, that may indicate any abnormalities.
7. Identify any irregularities: If the power supply tester indicates any abnormalities, such as voltage fluctuations, lack of proper functionality, or failure of specific indicators, it may suggest a faulty PSU that requires further investigation or replacement.
Using a power supply tester simplifies the process of testing a PSU, providing quick and reliable indications of its health. However, note that power supply testers vary in design and features, so it’s important to consult the manufacturer’s instructions or user manual for accurate interpretation of the readings and indicators.
If you are unsure or uncomfortable performing these tests yourself, it is recommended to seek assistance from a professional technician who can accurately diagnose and test your PSU using specialized tools and equipment.
By utilizing a power supply tester, you can efficiently assess the voltage outputs and vital functions of your PSU, assisting in determining its functionality and identifying any potential issues.
Replacing a faulty PSU
If your power supply unit (PSU) is determined to be faulty or exhibiting signs of malfunction, replacing it is crucial to ensure the reliability and stability of your computer system. Here are the steps to follow when replacing a faulty PSU:
1. Power off your computer and unplug it from the power source: Before performing any hardware changes, make sure to turn off your computer and disconnect it from the wall outlet for safety purposes.
2. Open the computer case: Remove the side panel or access covers of your computer case to gain access to the internal components. Refer to the manufacturer’s instructions or your computer’s user manual for guidance on opening the case.
3. Disconnect the cables from the PSU: Carefully detach all power cables connected to the PSU. These cables connect to the motherboard, drives, graphics card, and other peripherals. Take note of the connections to ensure proper reconnection later.
4. Remove the faulty PSU: Locate the screws or fasteners securing the PSU to the case. Unscrew or unfasten them to release the PSU. Gently slide out the PSU from its mounting position, ensuring all cables are clear and disconnected.
5. Install the new PSU: Take the new PSU and align it with the mounting holes in the case. Carefully slide it into place, ensuring a secure fit. Use the screws or fasteners to secure the new PSU to the case.
6. Connect the cables to the new PSU: Attach the power cables to the proper connectors on the new PSU. Ensure that each cable is securely and correctly connected to the corresponding component, such as the motherboard, drives, and graphics card. Refer to the component’s documentation if needed.
7. Close the computer case: Put the side panel or access covers back on the computer case and secure them with the screws or fasteners. Ensure that they are properly aligned and tightened to maintain a secure enclosure.
8. Power on and test: Plug your computer back into the power source and turn it on. Monitor the startup process to ensure that the new PSU is properly supplying power to the components. Check for any error messages or unusual behavior that may indicate further issues.
Replacing a faulty PSU requires caution, attention to detail, and adherence to safety procedures. If you are unsure or uncomfortable performing the replacement yourself, it is advised to seek assistance from a professional technician who can properly install and test the new PSU.
When selecting a replacement PSU, ensure that it meets the power requirements of your computer system. Consider factors like wattage, efficiency rating, and any specific compatibility requirements for your components.
By successfully replacing a faulty PSU, you can restore the reliable power supply to your computer system, ensuring its smooth operation and minimizing the risk of component damage or unexpected shutdowns.
Conclusion
Understanding the role of a power supply unit (PSU) and its potential impact on a computer system is crucial for troubleshooting and maintaining the stability and performance of your system. A faulty PSU can cause various problems, including random shutdowns, overheating, power surges, inadequate power supply, and other issues that can disrupt your computing experience.
By recognizing the signs of a faulty PSU, such as random shutdowns, the appearance of the Blue Screen of Death (BSOD), unusual noises, or the presence of a burning smell or smoke, you can take appropriate action to resolve the underlying issues. Testing the functionality of your PSU using a multimeter or a power supply tester can help confirm any suspicions and provide insights into its health.
If a faulty PSU is identified, replacing it is necessary to restore the reliability and stability of your computer system. Properly replacing the PSU involves powering off the computer, disconnecting the cables, removing the faulty PSU, installing the new PSU, reconnecting the cables, and powering on and testing the system to ensure proper functionality.
Remember, it is always important to prioritize safety during any PSU-related tasks. If you are unsure or uncomfortable performing the procedures yourself, seek assistance from a professional technician who can accurately diagnose, test, and replace the PSU if needed.
By maintaining a healthy and functional PSU, you can ensure a stable power supply to your computer components, mitigate the risk of unexpected shutdowns or damage, and enjoy a reliable computing experience.