What is a PSU?
A Power Supply Unit (PSU) is a crucial component of a computer system that provides the necessary electrical energy to all the other components, ensuring their proper functioning. It is responsible for converting the raw AC power from the mains into a stable DC voltage that can be used by the computer’s internal components.
The PSU typically resides within the computer case and is connected to the motherboard and other hardware components, such as the CPU, graphics card, and storage devices, through a series of cables. It acts as the backbone of the computer’s power system, ensuring that all components receive the correct voltage levels and adequate power to operate efficiently.
PSUs come in various wattages and form factors, allowing users to choose the right one depending on their system’s power requirements. Higher wattage PSUs are necessary for systems with powerful processors, multiple graphics cards, and numerous peripherals, while lower wattage PSUs are suitable for basic office tasks or entry-level gaming systems.
In addition to supplying power, modern PSUs also incorporate safety features such as voltage regulation, over-current protection, short circuit protection, and thermal protection. These safeguards help prevent damage to the computer system and its components in case of power surges, fluctuations, or other electrical anomalies.
The quality of a PSU can significantly impact the overall stability and longevity of a computer system. Higher-quality PSUs are often more efficient, generate less heat, and have better power delivery, resulting in lower energy consumption, quieter operation, and decreased risk of component failure.
When building or upgrading a computer, it is essential to carefully consider the PSU’s capabilities and ensure that it meets the power requirements of the system. Testing the PSU is a crucial step in this process to ensure its proper functioning and identify any potential issues that may cause instability or damage to the system.
Why is testing the PSU important?
Testing the PSU is an essential step in maintaining the stability and reliability of your computer system. Here are several reasons why PSU testing should never be overlooked:
- Ensuring proper power delivery: The PSU is responsible for providing the correct voltage levels to the various components of your computer. Any inconsistencies in the power supply can lead to system instability, crashes, or even damage to hardware components. By testing the PSU, you can verify that it is delivering the required voltages within acceptable tolerances.
- Identifying faulty or failing PSUs: Over time, a PSU may develop issues such as voltage fluctuations, insufficient power output, or even complete failure. By testing the PSU, you can detect any abnormalities and determine if it needs to be replaced before it causes damage to other components.
- Preventing system crashes and data loss: Inadequate power supply can result in random system crashes, freezes, or spontaneous reboots. These issues can lead to data loss and disruption in productivity. Testing the PSU ensures that it is capable of consistently delivering the required power to your system, reducing the risk of such situations.
- Identifying compatibility issues: When upgrading or building a new computer, it’s crucial to ensure that the components are compatible with each other, including the PSU. Testing the PSU helps you verify that it can adequately power all the hardware components, especially in cases where you’re adding high-performance components like a powerful graphics card or multiple storage drives.
- Diagnosing system instability: If you’re experiencing frequent crashes, instability, or unusual behavior in your computer, it could be due to a faulty or insufficient PSU. By performing a PSU test, you can eliminate the power supply as a potential cause and focus on other areas of troubleshooting.
Overall, testing the PSU is a proactive measure that helps ensure the longevity and reliable operation of your computer system. It not only helps identify potential issues before they cause significant damage but also provides peace of mind that your system is receiving stable and sufficient power for optimal performance.
Safety precautions before testing the PSU
Before testing the PSU, it is important to take the necessary safety precautions to minimize the risk of accidents or damage to your computer system. Here are some essential safety measures to follow:
- Ensure the computer is powered off: Before attempting to test the PSU, make sure that the computer is completely powered off and unplugged from the electrical outlet. This will prevent any potential electrical shocks or damage to the components.
- Wear an anti-static wrist strap: Static electricity can damage sensitive computer components. To minimize the risk of static discharge, wear an anti-static wrist strap while handling the PSU or any other internal components of the computer.
- Disconnect all power cables: Before removing or installing the PSU, disconnect all power cables from the motherboard, graphics card, storage devices, and other components. This will ensure that there is no power running through the system during the testing process.
- Allow the PSU to discharge: Even after the computer is powered off and unplugged, residual electrical charge may still be present in the PSU capacitors. To discharge any remaining electrical energy, press the computer’s power button a few times or hold it down for a few seconds.
- Use a PSU tester: To avoid direct contact with electrical components, use a dedicated PSU tester or a multimeter with appropriate settings for measuring voltage. This will provide a safer and more accurate method of testing the PSU’s output.
- Avoid touching exposed wires or circuits: While testing the PSU, refrain from touching any exposed wires or circuits. Always handle the tester or multimeter probes by the insulated portions to prevent electrical shocks.
- Refer to the manufacturer’s instructions: Different PSU models may have specific testing procedures and requirements. Make sure to read the manufacturer’s instructions or consult their website for any additional safety precautions or guidelines specific to your PSU.
By following these safety precautions, you can ensure a safe testing process and minimize the risk of damage to your computer system or any harm to yourself. Remember, electricity can be dangerous, so it’s important to prioritize safety at all times when working with computer components.
Tools needed for testing the PSU
Before you begin testing the PSU, it’s important to gather the necessary tools to perform accurate and reliable measurements. Here are the essential tools you will need:
- PSU tester: A PSU tester is a specialized device designed specifically for testing power supply units. It provides an easy and convenient way to check the voltage outputs of the PSU without the need to disassemble the computer. PSU testers typically have multiple connectors and an LCD or LED display to show the voltage readings.
- Multimeter: A multimeter is a versatile tool that can be used for a wide range of electrical measurements. It allows you to test voltage, resistance, and current. Although a PSU tester is more convenient for testing PSUs, a multimeter can still be a useful backup tool to verify the accuracy of the readings.
- Anti-static wrist strap: An anti-static wrist strap is an important tool for protecting sensitive electronic components from static electricity. It helps to prevent electrostatic discharge (ESD) that can damage the PSU or other parts of the computer system during the testing process.
- Extension cord or power strip: Since you will be testing the PSU outside of the computer case, you may need an extension cord or power strip to connect the PSU to a power source. Make sure the cord or strip is in good condition and can handle the power requirements of the PSU.
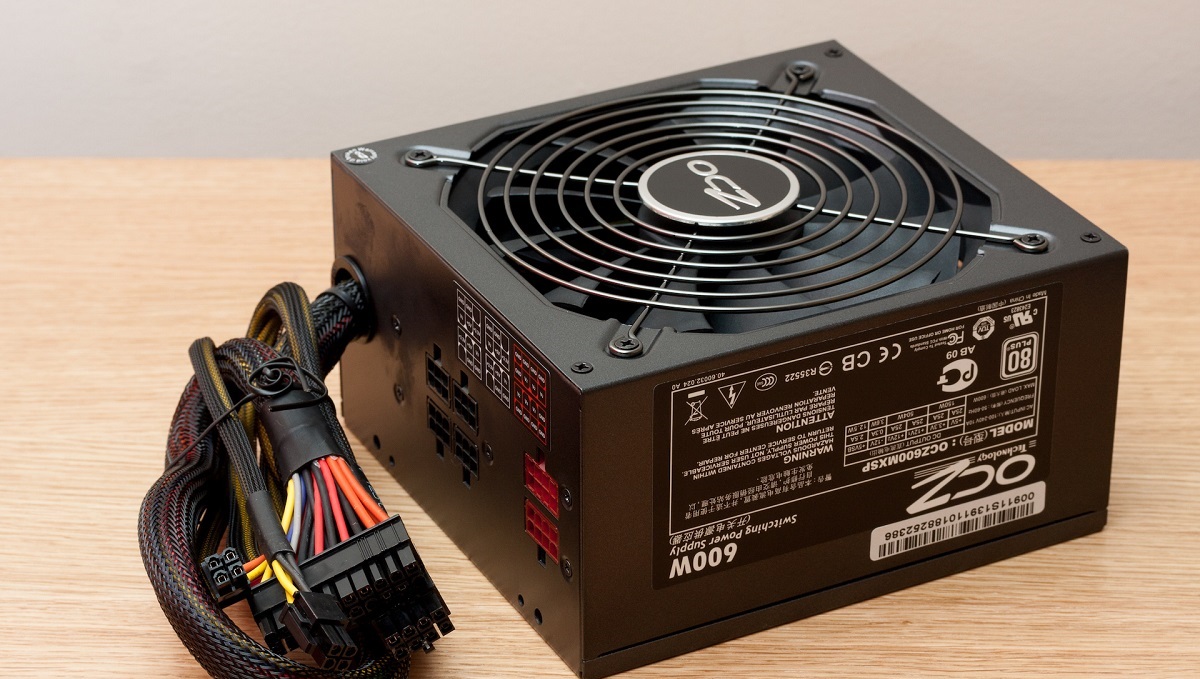
- Power supply unit: As odd as it may sound, you will need a spare PSU to connect to the PSU tester or multimeter. This is necessary to simulate the power load and measure the voltage outputs accurately. If you don’t have a spare PSU, you can purchase a dummy load specifically designed for PSU testing.
It’s important to ensure that all the tools you use are in good working condition, properly calibrated, and suitable for the voltage and power levels of the PSU you are testing. Using faulty or inappropriate tools can lead to inaccurate readings or damage to the equipment.
Lastly, always refer to the manufacturer’s instructions or user manuals for both the PSU tester and multimeter to understand their specific usage guidelines and safety precautions. This will ensure that you are using the tools correctly and obtaining reliable results during the PSU testing process.
Step by step guide to testing the PSU
Testing the PSU is a straightforward process that can be done with the right tools and precautions. Follow these steps to ensure an accurate and reliable PSU test:
- Prepare your workspace: Find a clean and well-lit area to work on, preferably on a non-static surface. Make sure you have all the necessary tools and safety gear within reach.
- Disconnect the power: Shut down your computer system and unplug it from the electrical outlet. This will prevent any electrical mishaps while testing the PSU.
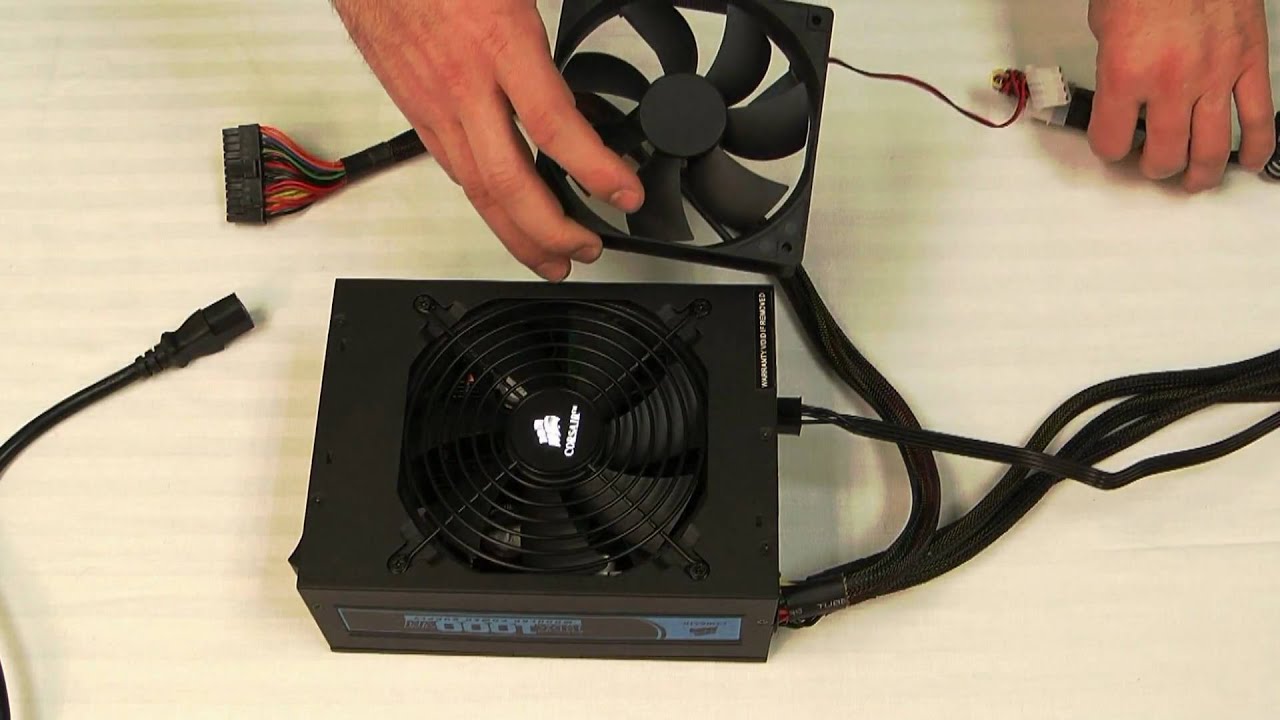
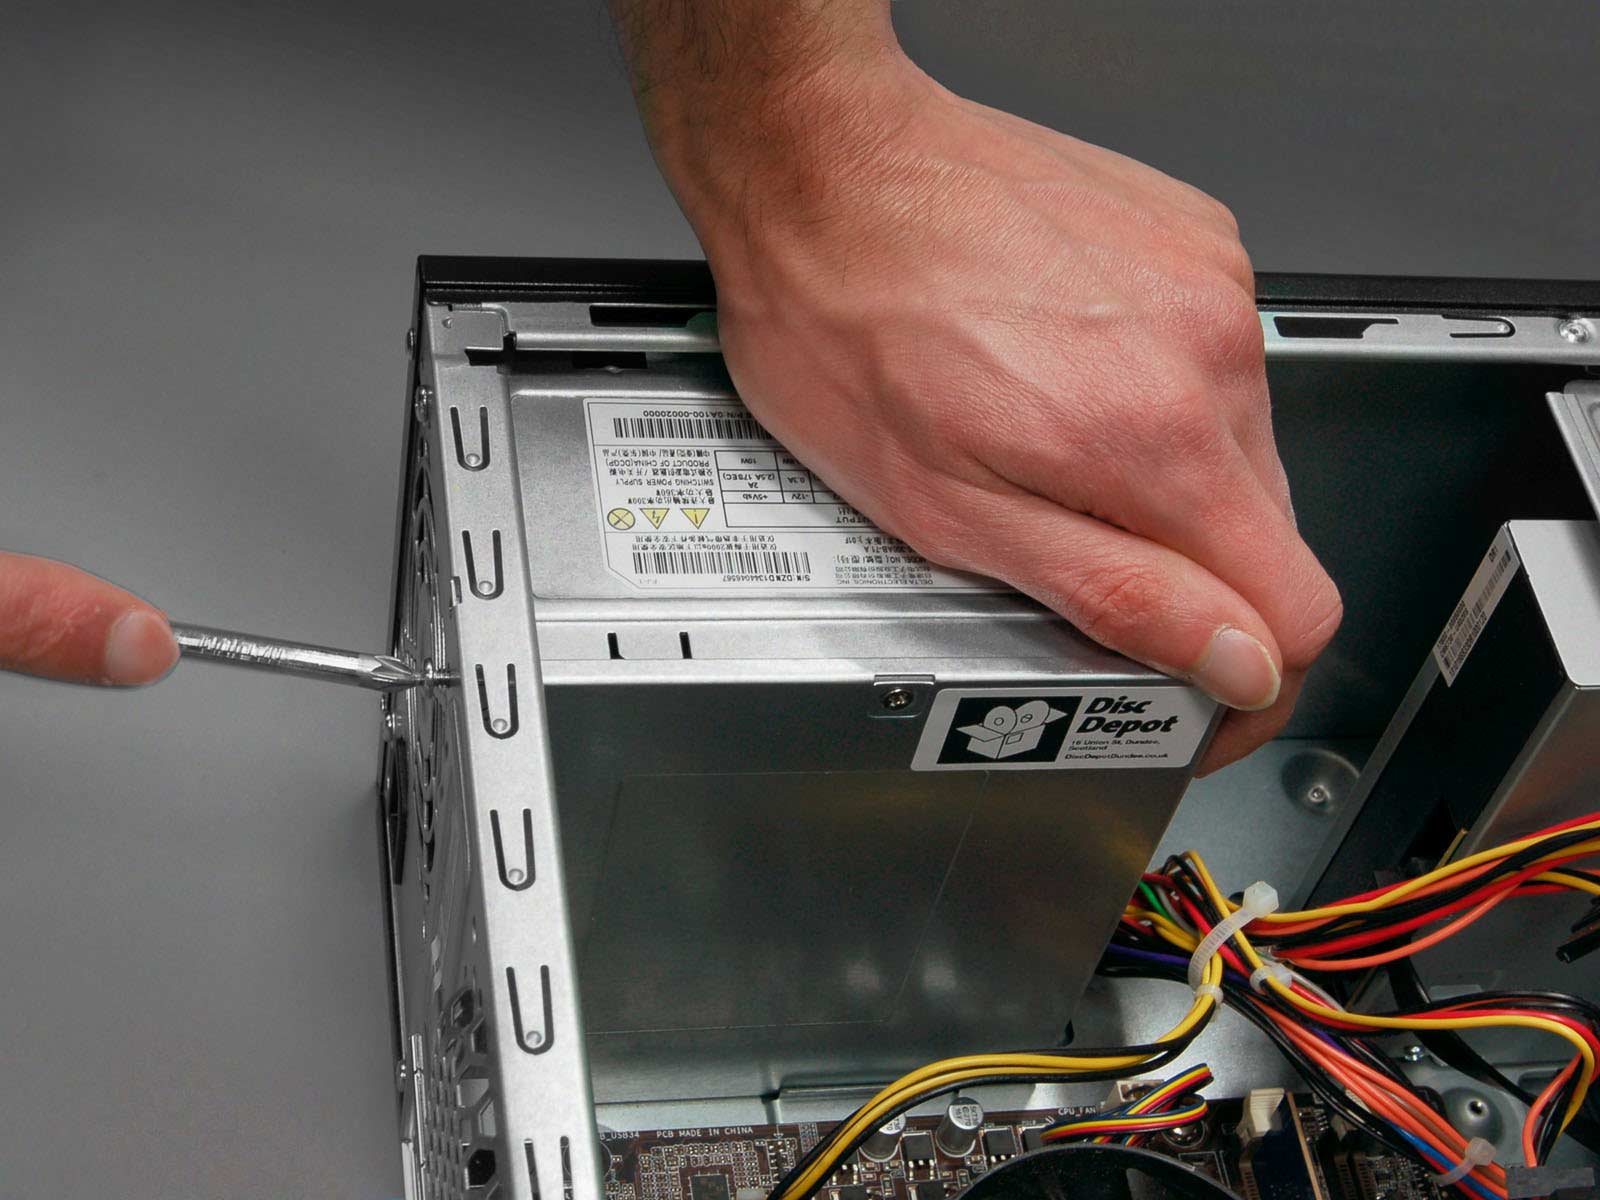
- Remove the PSU: Open your computer case and carefully disconnect all power cables connected to the PSU. Unscrew the PSU from its mounting bracket or cage and remove it from the case.
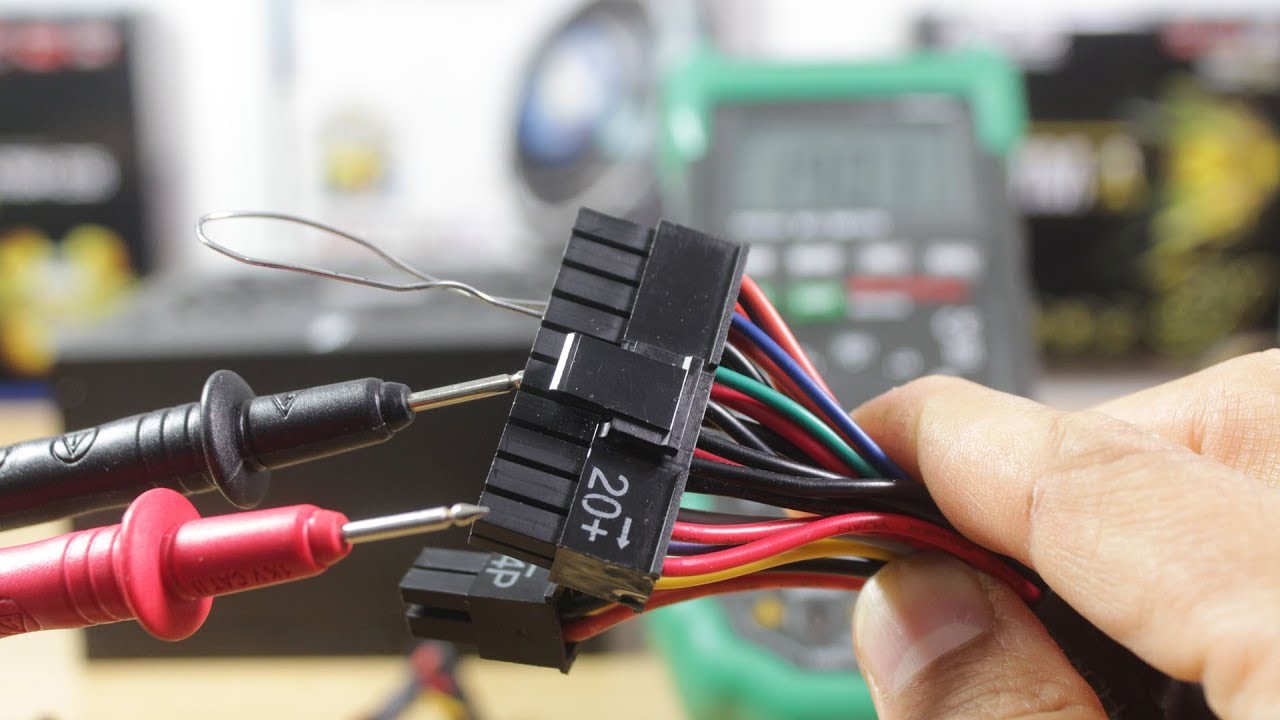
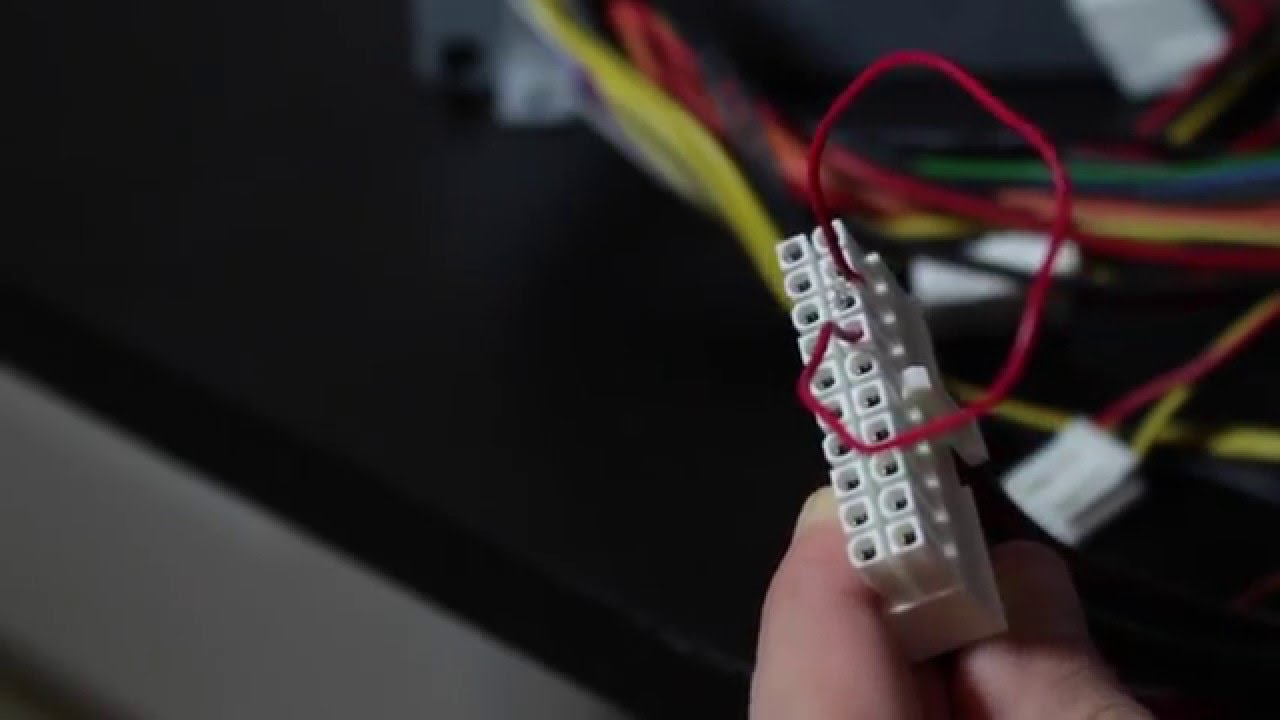
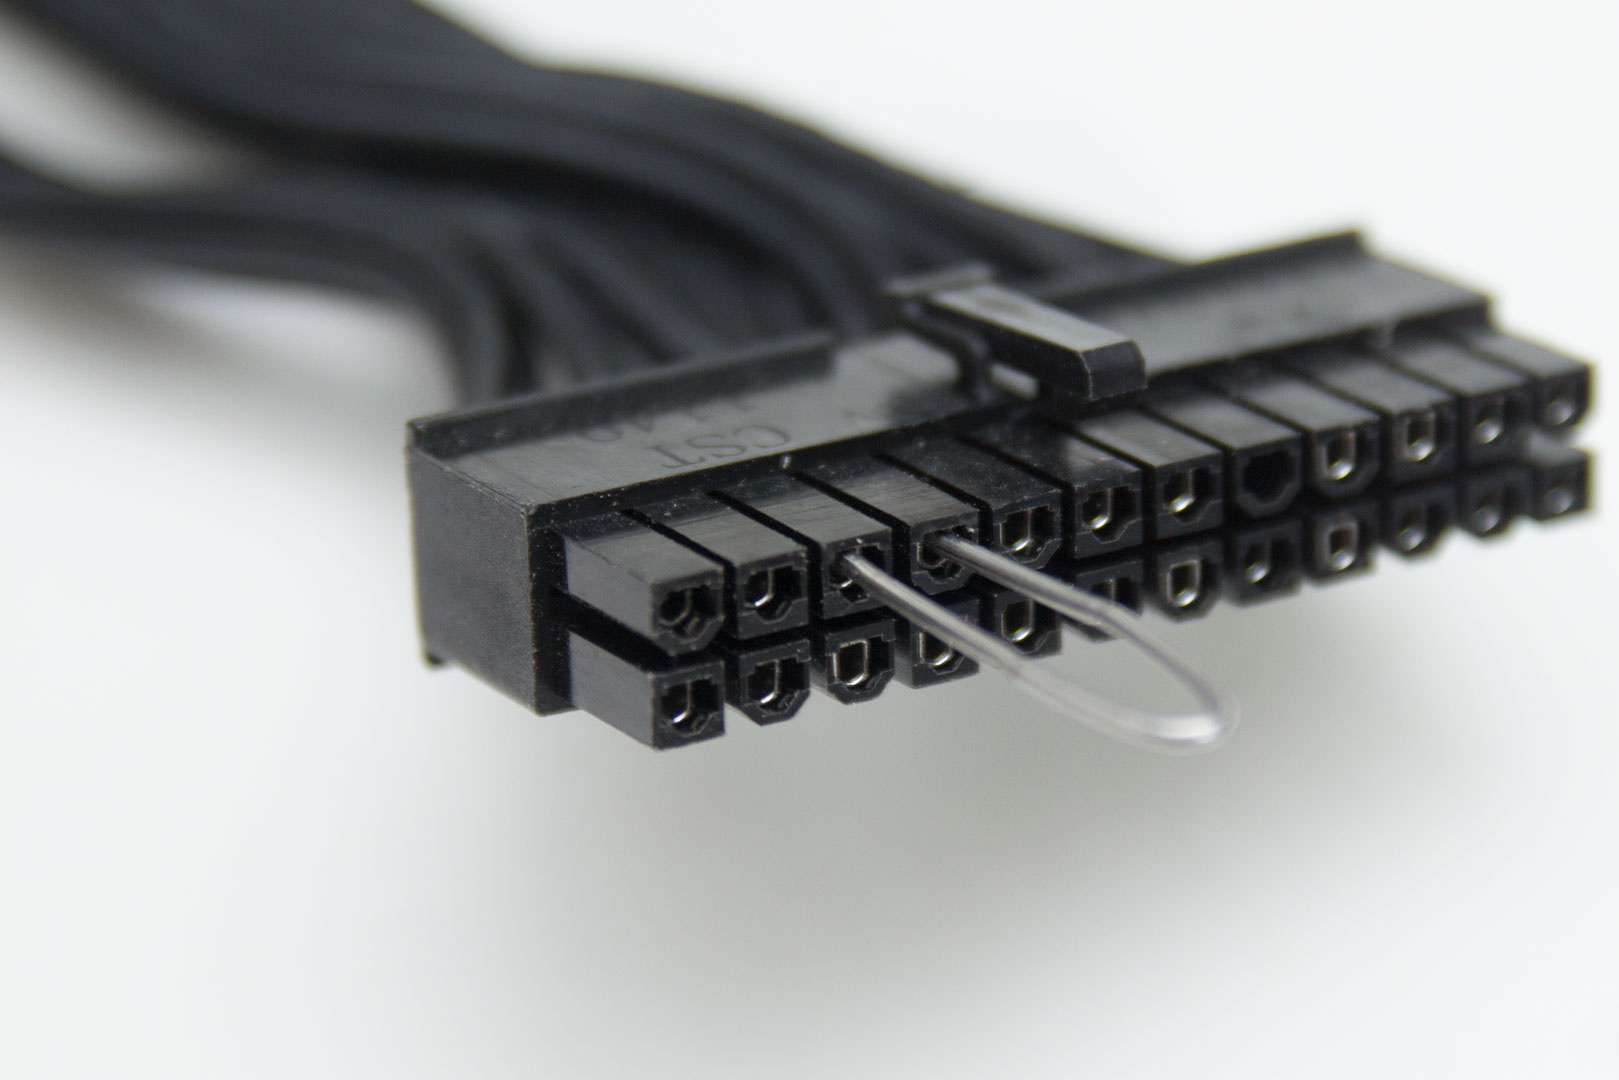
- Connect the PSU tester: Plug in the PSU tester connectors to the corresponding PSU cables, ensuring a secure connection. Depending on the specific PSU tester, it may have various connectors for the 24-pin ATX power cable, CPU power cable, SATA power cables, and PCIe power cables.
- Read the voltage outputs: Once the tester is connected, turn on the PSU using its power switch or by connecting it to a power source. The PSU tester display or the LED indicators will show the voltage readings for each cable. Ensure that the voltages are within the specified tolerance range, typically indicated by a green light or acceptable values on the tester display.
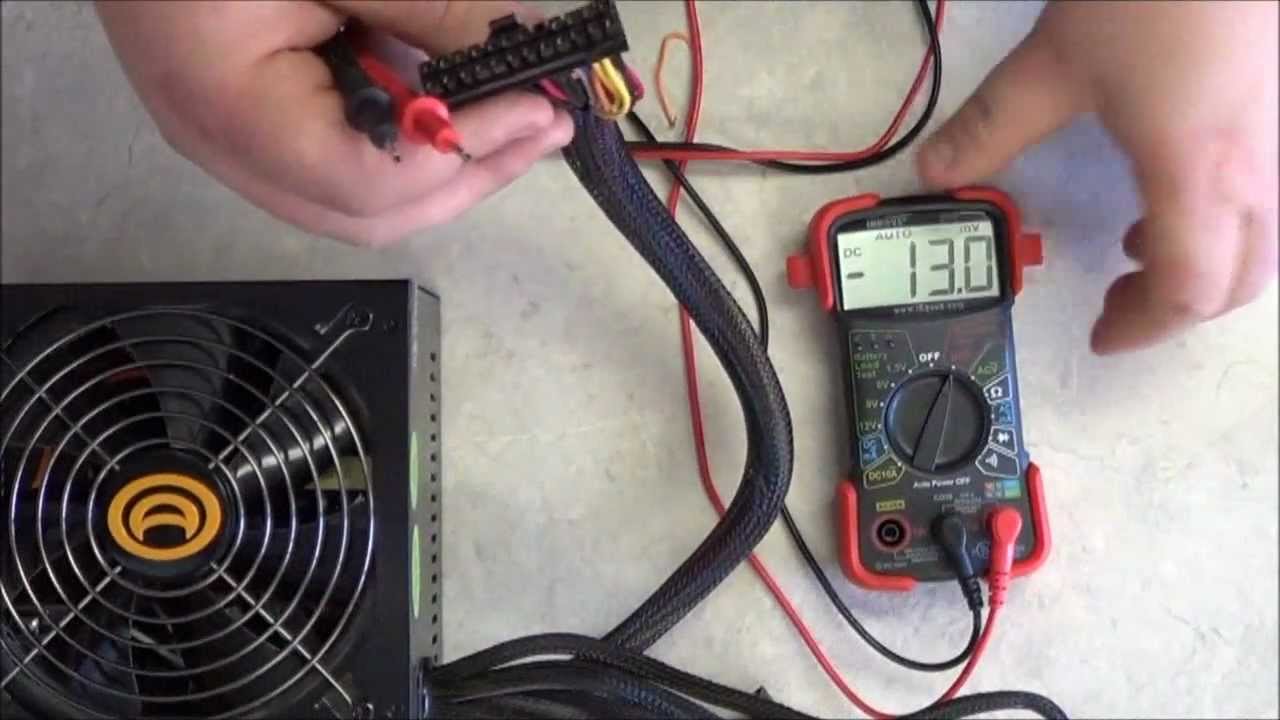
- Repeat the process with a multimeter (optional): If you have a multimeter available, you can use it to verify the voltage readings obtained from the PSU tester. Set the multimeter to measure DC voltage, connect the probes to the corresponding PSU cables, and compare the readings to the expected values.
- Inspect the fan and cooling: While the PSU is powered on, check if the fan is spinning properly and listen for any unusual noises. Inadequate cooling or a malfunctioning fan could indicate a faulty PSU that needs to be replaced.
- Disconnect the PSU tester: Once you have finished testing the PSU, turn off the PSU and unplug it from the power source. Disconnect the PSU tester from the PSU cables, ensuring a firm grip and avoiding any accidental damage to the connectors.
- Reassemble the computer: If the PSU passes the test, you can reinstall it back into the computer case. Make sure to reconnect all power cables securely and double-check that everything is properly connected.
- Power on the computer and monitor: Plug in your computer, power it on, and observe the system for any irregularities. If the PSU was the cause of any previous issues, they should be resolved now.
Remember to always follow the safety precautions mentioned earlier and refer to the PSU tester’s or multimeter’s user manuals for any specific instructions regarding their usage. If the PSU fails the test or you are uncertain about the results, it is advisable to consult a professional or consider replacing the PSU to ensure the stability and performance of your computer system.
Testing the voltage output
Testing the voltage output of the power supply unit (PSU) is a critical step in determining its functionality and ensuring stable power delivery to your computer components. Follow these steps to accurately test the voltage output:
- Prepare the necessary tools: Gather your PSU tester or multimeter, ensuring it is properly calibrated and suitable for measuring DC voltage. Make sure you have a clear view of the tester display or multimeter readings.
- Connect the PSU tester: If using a PSU tester, connect its cables to the corresponding PSU connectors, such as the 24-pin ATX power cable, CPU power cable, SATA power cables, and PCIe power cables. Ensure a snug and secure connection.
- Set up the multimeter (if using): If using a multimeter, set it to measure DC voltage. For most PSUs, the voltage range will be in the +12V, +5V, and +3.3V categories.
- Power on the PSU: Turn on the PSU either by using its power switch or connecting it to a power source, depending on the PSU tester or multimeter instructions.
- Read the voltage outputs: Check the readings on the PSU tester display or multimeter. Ensure that the voltage readings match the specified values for each cable. Typically, the +12V, +5V, and +3.3V voltages should be within a certain tolerance range, often indicated by a green light on the tester or acceptable values on the multimeter.
- Compare readings to specifications: Refer to the manufacturer’s specifications or the PSU’s documentation to confirm the correct voltage ranges for each cable. Ensure that the readings are within these specified ranges to ensure proper functionality.
- Inspect for voltage stability: Monitor the voltage readings for a period of time to check for stability. Unstable voltage levels can cause instability and system crashes. Stable, consistent voltage is crucial for the stable operation of your computer components.
- Record the readings (if necessary): If required, record the voltage readings for future reference or troubleshooting purposes. This can be useful in case you need to compare current readings to previous ones or provide information to a technician for further analysis.
- Power off the PSU: Once you have completed testing the voltage output, turn off the PSU by either using its power switch or disconnecting it from the power source.
By following these steps, you can accurately test the voltage output of your PSU. Remember to refer to the documentation provided with your PSU tester or multimeter for any specific instructions or guidelines specific to your device. If you notice any significant deviations or inconsistencies in the voltage readings, it may indicate a problem with your PSU that should be addressed to ensure the proper functioning of your computer system.
Testing the fan
Aside from ensuring proper voltage output, testing the fan of your power supply unit (PSU) is essential to evaluate its cooling efficiency and overall functionality. It is crucial to verify that the fan is operating correctly to prevent overheating and potential damage to your computer system. Follow these steps to test the PSU fan:
- Ensure safety precautions: Before testing the fan, make sure your computer is completely powered off, and disconnect the PSU from the power source. This will prevent any electrical accidents during the testing process.
- Inspect the PSU fan: Observe the PSU fan visually to check for any visible damage such as broken or bent blades, excessive dust buildup, or loose connections. Ensure that there are no obstructions preventing the fan from spinning.
- Power on the PSU: Connect the PSU to a power source without connecting it to your computer. Turn on the PSU using its power switch or, in some cases, by connecting it to the power source.
- Listen for the fan: Pay close attention to any noise coming from the PSU. You should be able to hear the fan spinning as it starts operating. A quiet and consistent spinning sound indicates that the fan is functioning normally.
- Check fan RPM (optional): If you have access to a hardware monitoring software or a motherboard with fan speed monitoring capabilities, you can use it to check the fan’s RPM (Rotations Per Minute). Consult the PSU’s documentation to determine the optimal RPM range for its fan.
- Inspect cooling performance: Feel the airflow coming out of the PSU. It should be steady and consistent. Place your hand near the PSU exhaust and ensure you can feel a noticeable stream of air. If there is minimal or no airflow, it could indicate a malfunctioning or obstructed fan.
- Note any abnormalities: Make note of any unusual noises, vibrations, or changes in fan speed during the testing process. These abnormalities may indicate a faulty fan that requires further inspection or replacement.
- Power off the PSU: Once you have completed testing the PSU fan, turn off the PSU by either using its power switch or disconnecting it from the power source.
By following these steps, you can effectively test the functionality and cooling performance of the PSU fan. It is important to keep the fan in good working condition to prevent component overheating and maintain the overall stability and longevity of your computer system. If you notice any issues or abnormalities during the fan testing, it is recommended to seek professional assistance or consider replacing the PSU to ensure optimal cooling and performance.
Troubleshooting common issues with the PSU
Power supply unit (PSU) issues can cause a range of problems in your computer system. If you encounter any of the following common issues, try these troubleshooting steps to identify and resolve the problem:
- No power: If your computer does not turn on at all, ensure that the PSU is securely connected to the power outlet and the power cable is properly plugged into the PSU. Check for any tripped circuit breakers or blown fuses. If the issue persists, the PSU may be faulty and require replacement.
- Intermittent power or unexpected shutdowns: If your computer randomly shuts down or experiences power fluctuations, check the CPU and PSU temperature. Ensure that the cooling system, including the PSU fan, is free from dust and debris. Overheating can cause unstable power supply and system shutdowns. Additionally, inspect the power cables for any signs of damage or loose connections.
- Unusual noises: If you hear strange clicking, grinding, or buzzing noises coming from the PSU, it may indicate a failing fan or internal component. Inspect the PSU fan for obstructions, clean it, and ensure it spins freely. If the noise persists, it is recommended to replace the PSU to avoid potential damage to the computer system.
- Voltage fluctuations: If you encounter unstable voltage readings or inconsistent power output, it could be due to a faulty PSU. Use a PSU tester or multimeter to measure the voltage output and compare it to the specifications provided by the manufacturer. If the readings significantly deviate from the expected values, it indicates a PSU issue that needs to be addressed.
- Overheating or excessive heat: If the PSU becomes excessively hot to the touch during normal operation, it may indicate insufficient cooling or a failing fan. Make sure the PSU fan is spinning properly and clear any dust or debris that may obstruct airflow. If the issue persists, consider replacing the PSU with a higher-quality and more efficient unit.
- Burning smell or smoke: If you notice a burning smell or see smoke coming from the PSU, immediately power off your computer and disconnect it from the power source. This could be an indication of a severe internal component failure, which poses a fire risk. Replace the PSU immediately and avoid using the computer until the issue is resolved.
It is important to remember that working with PSUs involves dealing with an electrical component, and safety precautions must be followed. If you are unsure about the troubleshooting steps or encounter more complex issues with your PSU, it is advisable to seek professional assistance from a qualified technician to avoid causing further damage to your computer system.
Conclusion
Testing the power supply unit (PSU) is an essential step in ensuring the stability and reliability of your computer system. By following a step-by-step guide and taking the necessary safety precautions, you can accurately assess the voltage output and functionality of the PSU.
The PSU plays a vital role in supplying power to all the components of your computer, and a faulty PSU can lead to system instability, crashes, and potential damage to your hardware. Therefore, regularly testing the PSU is crucial for preventing these issues and maintaining optimal performance.
During the testing process, it is essential to use the appropriate tools such as PSU testers or multimeters. These tools help measure the voltage output and ensure that it falls within the acceptable tolerance range specified by the manufacturer.
In addition to testing the voltage output, it is also important to check the functionality of the PSU fan. The fan helps keep the PSU and other components cool, preventing overheating and potential damage. Any abnormalities or noises from the fan should be addressed promptly to maintain proper cooling and prevent system instability.
If you encounter common issues with the PSU such as power fluctuations, unexpected shutdowns, or unusual noises, troubleshooting steps can help identify the underlying problem. However, if you are unsure or unable to resolve the issue, it is recommended to consult a professional technician for further assistance.
In conclusion, testing the PSU is a critical task that should not be overlooked. By ensuring proper voltage output and functionality of the fan, you can safeguard your computer system from potential issues, enhance its performance, and prolong its lifespan.