Introduction
Testing a Power Supply Unit (PSU) with a multimeter is a crucial step when troubleshooting electrical issues or when you want to ensure that your PSU is functioning properly. The PSU is responsible for providing power to all the components of your computer, making it an essential component to check if you are experiencing any system failures or irregularities.
This comprehensive guide will walk you through the step-by-step process of testing a PSU with a multimeter. By following these instructions, you can accurately measure the voltage output and resistance of your PSU, enabling you to identify any potential issues and take the necessary steps to remedy them.
Before we dive into the testing procedure, let’s first understand what a PSU is and why it is important. A PSU is an electrical device that converts the incoming AC power from your wall outlet into DC power, which is then fed to the components of your computer. It provides a stable and consistent power supply to ensure the smooth operation of your system. Any fluctuations or abnormalities in the PSU’s output can result in system instabilities, crashes, or even hardware damage.
By testing the PSU with a multimeter, you can measure the voltage output and resistance of the different connectors. This allows you to determine if there are any voltage irregularities or short circuits that may be causing issues with your computer’s performance. It is a simple and effective way to diagnose PSU problems and avoid the cost and hassle of replacing the entire unit unnecessarily.
Before we proceed with the testing process, it is important to note that working with electrical components can be dangerous if proper precautions are not taken. Always ensure that your computer is unplugged from the power source and discharge any static electricity by touching a grounded object before starting the testing process. Additionally, if you are not confident in performing these tests yourself, it is recommended to seek assistance from a qualified professional.
Overview of a PSU
A Power Supply Unit (PSU) is an essential component of a computer that converts the incoming AC power from an electrical outlet into DC power that can be used by the various components of the system. It is responsible for providing a stable and reliable power supply to ensure the proper functioning of these components.
A PSU typically consists of several key components, including a transformer, rectifier, capacitors, voltage regulators, and various connectors. The transformer is responsible for stepping down the high voltage from the electrical outlet to a lower voltage that is safe for the components. The rectifier converts the AC power to DC power, while capacitors help to smooth out any voltage fluctuations and provide additional stability to the supply. Voltage regulators ensure that the output voltage remains within the specified limits, preventing any damage to the components.
In modern computer systems, there are two types of PSUs commonly used: modular and non-modular. Non-modular PSUs have a fixed set of cables permanently attached to the unit, while modular PSUs allow you to connect only the cables you need, improving cable management and airflow within the system. Both types come in a range of wattages to accommodate different power requirements.
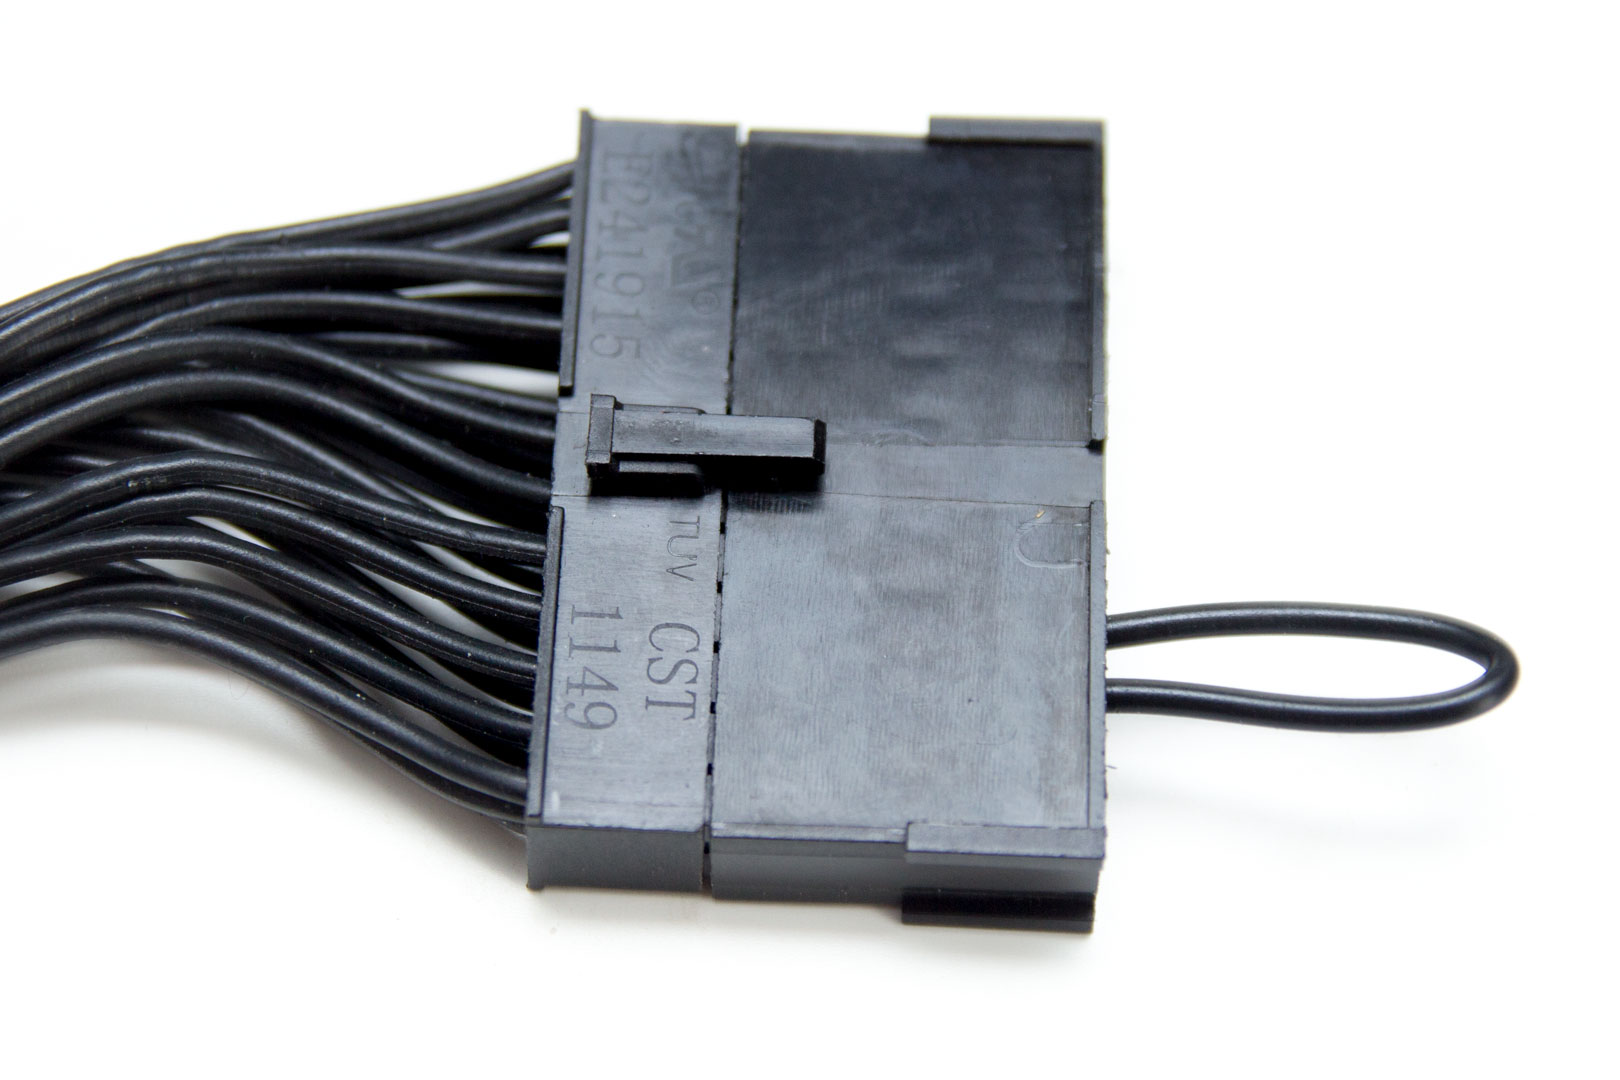
PSUs also have various connectors to supply power to different components of a computer, such as the motherboard, graphics card, hard drives, and peripherals. These connectors include the 24-pin ATX connector, 4-pin or 8-pin CPU power connector, SATA power connectors, and PCIe power connectors. Each connector delivers a specific voltage and current to the respective component it powers.
It is important to choose a PSU with an adequate power rating to ensure that it can meet the power requirements of your system. Insufficient power supply can result in system instability, crashes, and even damage to the components. Additionally, PSUs with higher efficiency ratings tend to generate less heat, consume less power, and operate more silently, making them ideal for energy-conscious users.
Understanding the different components and functionality of a PSU is essential when testing it with a multimeter. By having a basic understanding of its structure and purpose, you will be better equipped to identify any potential issues during the testing process and make informed decisions regarding troubleshooting or replacement.
Tools Needed
Before you can proceed with testing a PSU, you will need to gather a few essential tools. Having the right tools on hand will ensure that you can accurately measure the voltage output and resistance, allowing you to effectively diagnose any issues with your PSU. Here are the tools you will need:
- Multimeter: A multimeter is the primary tool you will use to test the voltage output and resistance of a PSU. It is a handheld device that can measure various electrical properties, including voltage, current, and resistance. Make sure you have a reliable multimeter with appropriate settings for DC voltage and resistance measurements.
- PSU Tester: While not strictly necessary, a PSU tester can be a useful tool for quick and easy initial diagnostics. It is a compact device specifically designed to test the voltage output of a PSU. It provides a simplified way to determine if the PSU is working properly or if it has any issues.
- Grounding Strap: To protect both yourself and the sensitive electronic components, it is recommended to use a grounding strap. This strap ensures that any static electricity is discharged safely before you handle the PSU or any other computer parts. It helps prevent any accidental damage caused by static electricity discharge.
- Screwdriver: Depending on the type of computer case you have, you may need a screwdriver to remove the side panels or access the PSU. Make sure you have the appropriate screwdriver that fits the screws in your computer case.
- User Manual: It is always a good idea to have the user manual or specifications of your specific PSU on hand. The manual provides important information about the connectors, pinouts, and voltage specifications of your PSU. This will help you identify the correct connectors to test and understand the acceptable voltage ranges.
By gathering these essential tools before you begin testing the PSU, you will be well-prepared to accurately measure the voltage output and resistance. This will help you identify any potential issues and make informed decisions regarding the next steps in troubleshooting or resolving any problems with your PSU.
Safety Precautions
When working with electrical components and conducting tests on a PSU, it is crucial to prioritize safety to prevent any accidents or damage. Here are some important safety precautions to keep in mind:
- Disconnect the Power: Before you start testing the PSU, ensure that your computer is completely powered off and unplugged from the electrical outlet. This will eliminate any risk of electrocution or damage to the components.
- Discharge Static Electricity: Static electricity can build up on your body and potentially damage sensitive electronic components. To prevent this, discharge any static electricity by touching a grounded object, such as a metal part of the computer case, before handling the PSU or any other internal parts.
- Use a Grounding Strap: Wearing a grounding strap is highly recommended, as it helps to prevent the buildup of static electricity on your body. This strap ensures that any static charge is safely discharged, reducing the risk of damaging the PSU or other computer components due to static discharge.
- Avoid Working on a Conductive Surface: When testing the PSU, it is important to work on a non-conductive surface, such as a wooden table or an anti-static mat. This will help prevent any accidental short circuits or electrical shocks that can occur when working on a conductive surface, such as metal.
- Be Cautious of Capacitors: Capacitors in the PSU can store electrical charge even after the power has been disconnected. To avoid any possible electric shock, allow the PSU to sit unplugged for a few minutes before handling it. This will give the capacitors enough time to discharge.
- Read the User Manual: Familiarize yourself with the user manual or specifications of your specific PSU. The manual will provide important safety guidelines and precautions specific to your PSU model, ensuring that you understand any potential risks and precautions you need to take while testing the PSU.
By following these safety precautions, you can minimize the risk of accidents, electrical hazards, and damage to yourself or your computer components. Remember, it is always better to prioritize safety and take the necessary precautions when working with electrical equipment.
Step 1: Preparation
Before you begin testing the PSU, it is important to make necessary preparations to ensure accurate measurements and a safe testing environment. Here’s what you need to do:
- Gather the Necessary Tools: Ensure that you have all the tools mentioned earlier, such as a multimeter, PSU tester (if available), grounding strap, screwdriver, and the user manual for your PSU. Having these tools readily available will make the testing process smoother and more efficient.
- Choose a Well-Ventilated Area: Select a well-ventilated area with adequate lighting for testing the PSU. Good ventilation will help dissipate any heat generated during the testing process, while proper lighting will ensure you can see and work with the connectors and components effectively.
- Power Off and Unplug the PC: Completely power off your computer and unplug it from the electrical outlet. This will ensure your safety while working with the PSU and prevent any electrical damage to the components.
- Ground Yourself: To avoid any damage to the PSU or computer components due to static electricity, put on a grounding strap and connect it to a grounded object. This will discharge any static electricity from your body and prevent any accidental static discharge.
- Open the Computer Case: Depending on your computer case, you may need to use a screwdriver to remove the side panels and gain access to the PSU. Follow the instructions in your computer’s manual to properly open the case without causing any damage.
- Locate the PSU: Identify the PSU inside your computer case. It is usually located at the top or bottom of the case, mounted at the back. The PSU will have a fan and a bundle of cables coming out of it, connecting to various components.
By completing these preparation steps, you are now ready to move on to the next step: setting up the multimeter. Ensuring that you have all the necessary tools, a safe working environment, and have properly prepared your computer for testing will make the entire process smoother and more effective.
Step 2: Setting Up the Multimeter
Setting up the multimeter correctly is essential to accurately measure the voltage output and resistance of the PSU. Follow these steps to properly configure your multimeter:
- Select DC Voltage Mode: Set your multimeter to the DC voltage mode. This mode allows you to measure the voltage output of the PSU. Most multimeters have a rotary dial or buttons to select the desired measurement mode. Refer to your multimeter’s user manual for specific instructions on how to switch to the DC voltage mode.
- Choose the Appropriate Voltage Range: Depending on the expected voltage output of your PSU, select the appropriate voltage range on the multimeter. If you are unsure, start with a larger range, such as 20V, and adjust as needed during the testing process. This will ensure that you get an accurate measurement without causing any damage to the multimeter.
- Connect the Test Leads: The test leads of your multimeter consist of a red lead for positive (+) and a black lead for negative (-). Connect the red lead to the VΩmA port or the port labeled for voltage measurements. Connect the black lead to the COM port or the common ground port.
- Check the Multimeter’s Calibration: Before starting the testing, it is important to make sure that your multimeter is properly calibrated. Some multimeters come with a calibration adjustment feature. If yours has this feature, follow the instructions in the user manual to calibrate it for accurate measurements.
- Verify the Multimeter’s Battery: Check the battery level of your multimeter to ensure it has sufficient power for accurate readings. If the battery is low, replace it with a new one to avoid any measurement errors.
- Double-Check the Connections: Before moving on to the next steps, double-check the connections of the test leads to ensure they are securely plugged into the correct ports on the multimeter. Loose connections can result in inaccurate measurements.
By following these steps to set up your multimeter correctly, you will be ready to proceed with testing the voltage output and resistance of your PSU in the next steps. Take your time to ensure that the multimeter is properly configured and calibrated to obtain accurate measurements and diagnose any potential issues with your PSU effectively.
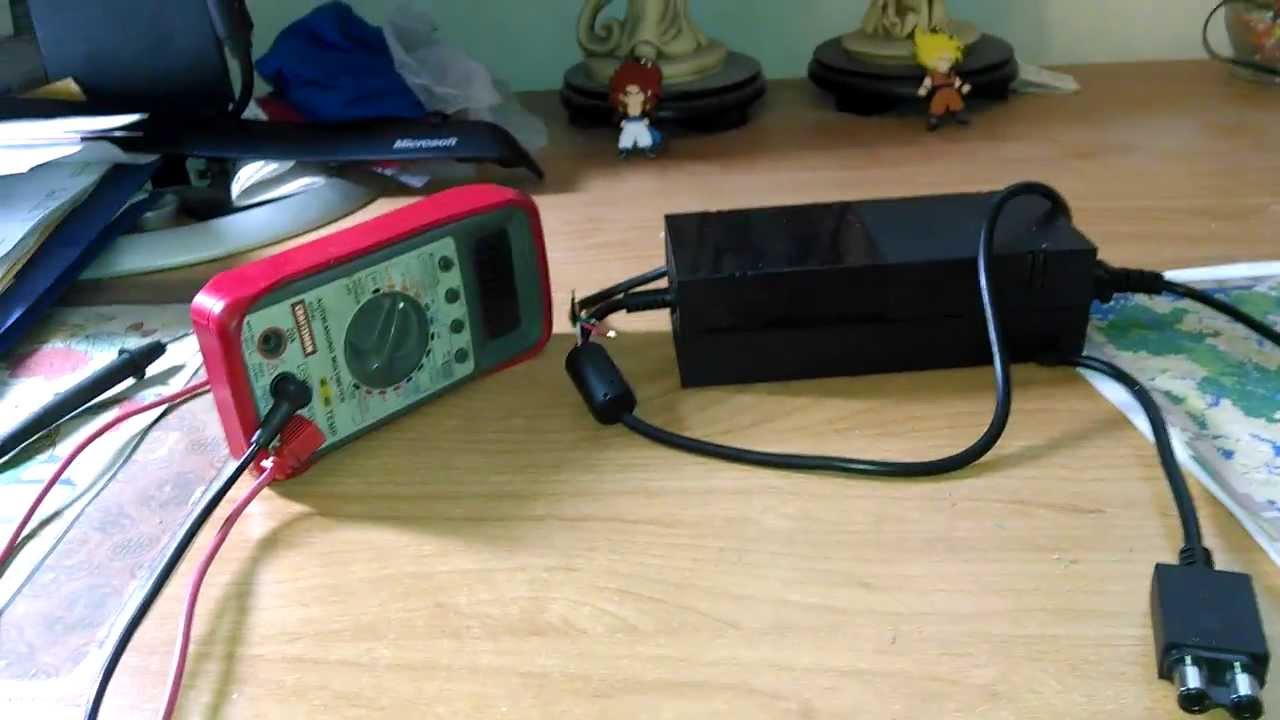
Step 3: Disconnecting the PSU
Before proceeding with testing the PSU, it is crucial to disconnect it from the power source and ensure a safe working environment. Follow these steps to disconnect the PSU:
- Turn Off the PSU: Locate the power switch on the back of the PSU and ensure that it is switched off. This will cut off the power supply to the components and prevent any electrical accidents during the testing process.
- Unplug the Power Cord: Disconnect the power cord from the electrical outlet to fully isolate the PSU from the power source. This will prevent any accidental power supply and protect you from electric shock while working with the PSU.
- Unplug the PSU Cables: Inside the computer case, identify the cables coming out of the PSU and connected to various components, such as the motherboard, hard drives, and peripherals. Carefully unplug all the cables from their respective connectors.
- Label the Cables: To ensure easy reconnection later, it is recommended to label each cable before disconnecting them. You can use small stickers or tape to mark the cables and note down their corresponding connectors.
- Remove the PSU: Depending on your computer case, you may need to unscrew the PSU from the back of the case or remove any mounting brackets holding it in place. Follow the instructions in your computer’s manual to safely remove the PSU without causing any damage to the components or cables.
- Keep the PSU in a Safe Location: Once the PSU is disconnected and removed, place it in a safe location where it won’t be at risk of damage or accidentally come into contact with any liquids or metallic objects.
By properly disconnecting the PSU, you eliminate any power supply and reduce the risk of electrical accidents. This step ensures that you can perform the necessary tests safely and accurately without any interference from the power source. Remember to label the cables for easy reconnection later and keep the disconnected PSU in a secure place until you have finished testing and are ready to re-install it.
Step 4: Testing the Voltage Output
Now that you have properly prepared and disconnected the PSU, you can proceed with testing the voltage output. Follow these steps:
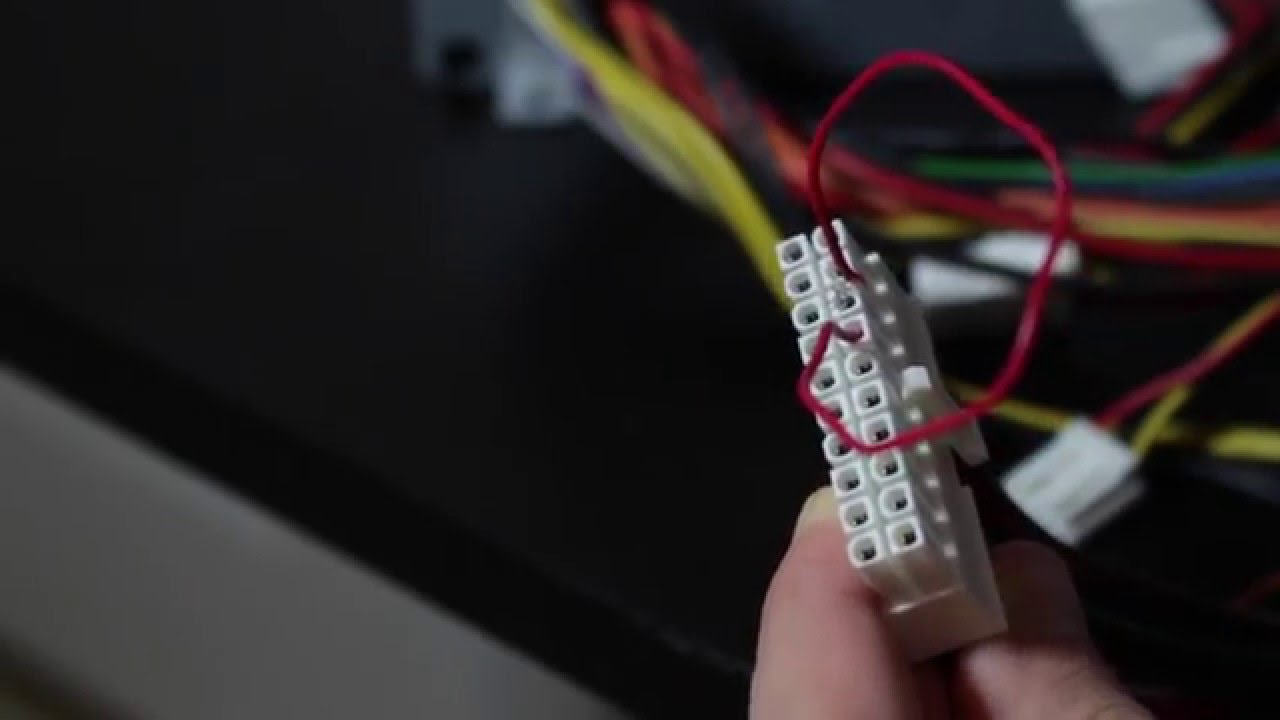
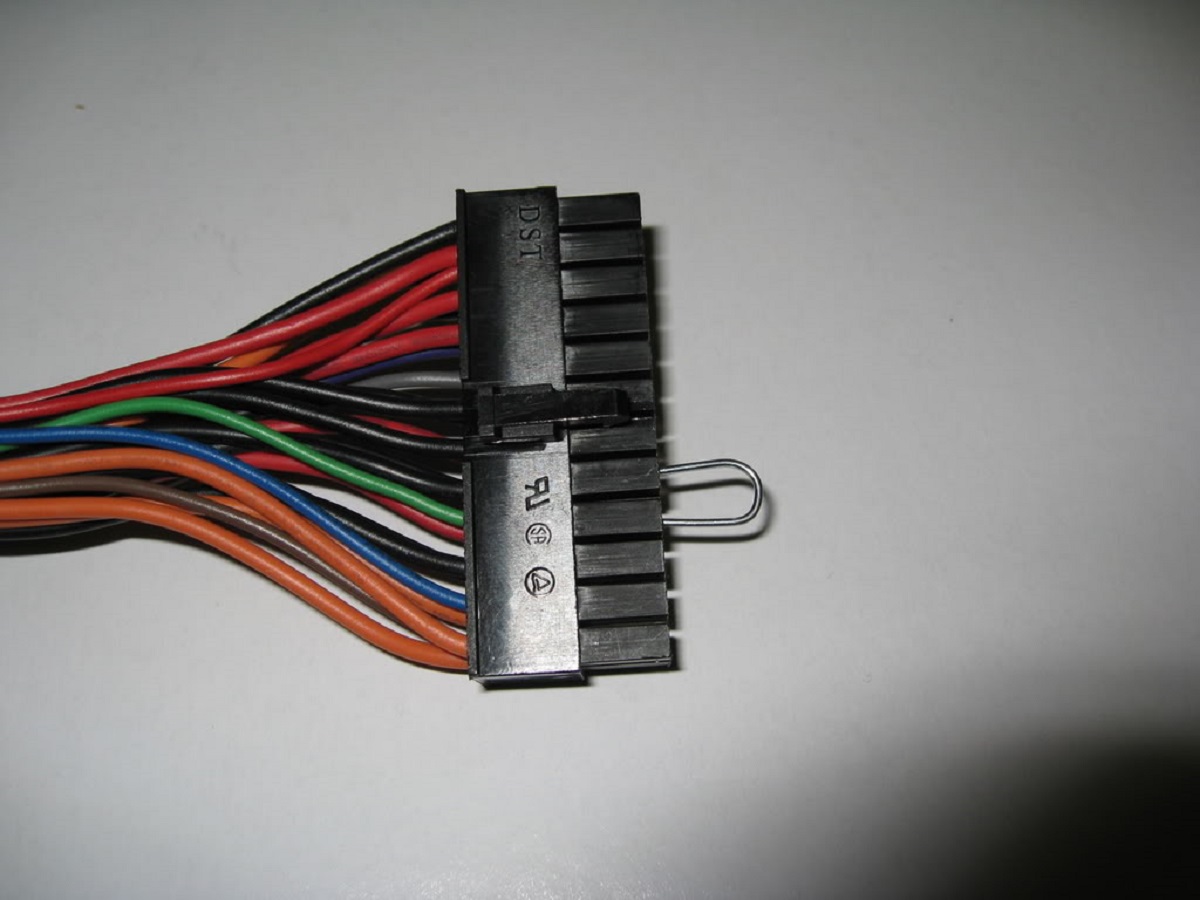
- Select the Connector to Test: Identify the connector you want to test on the PSU. Each connector supplies power to different components, such as the motherboard, graphics card, or hard drives. Refer to your PSU’s user manual or specifications to identify the appropriate connector.
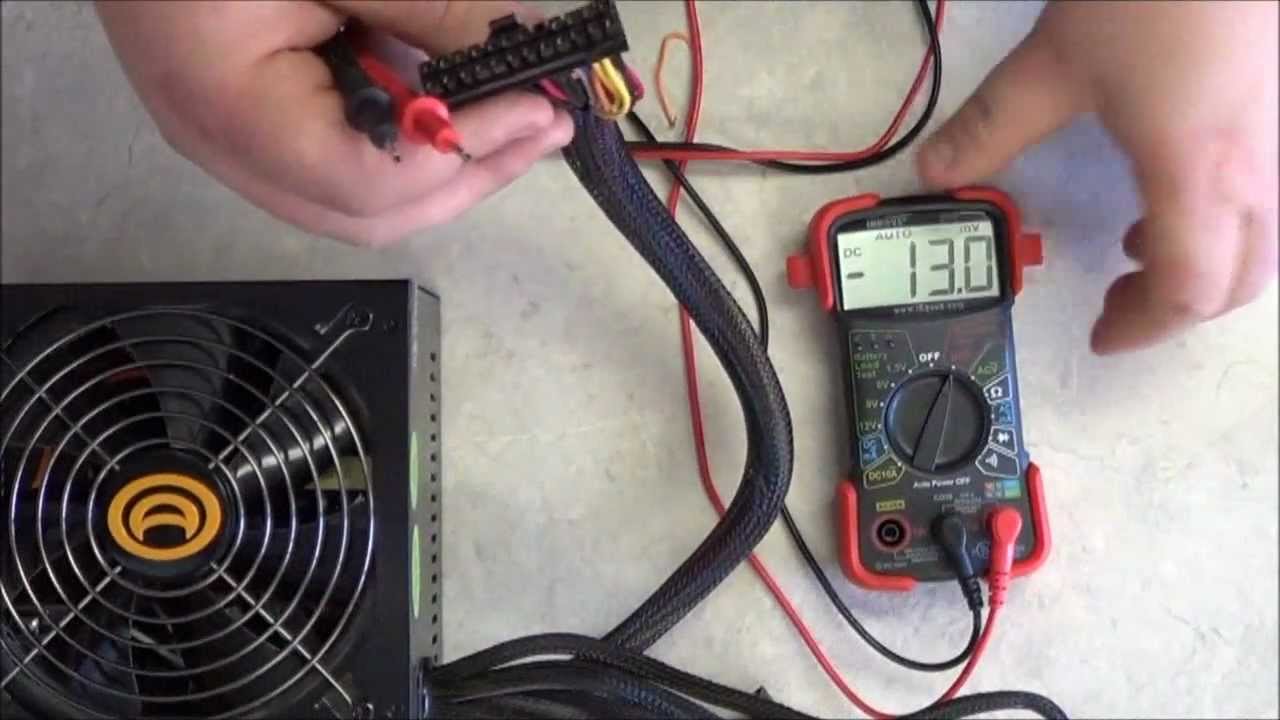
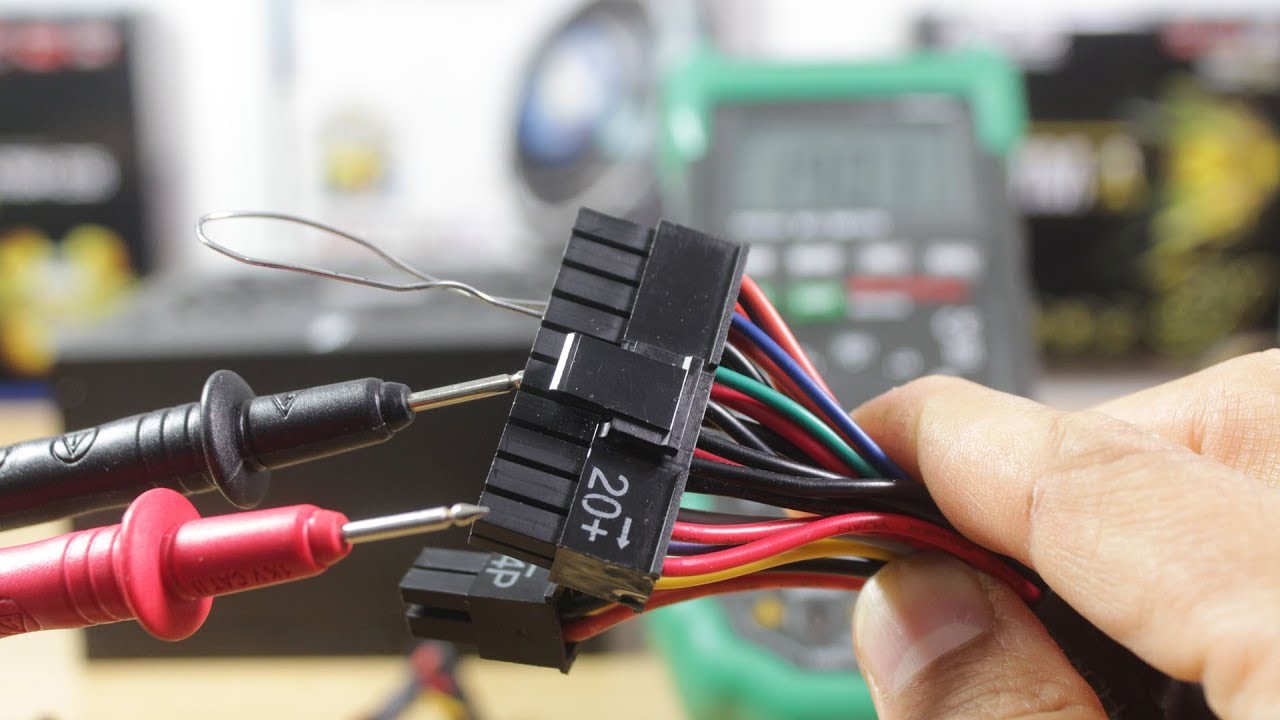
- Connect the Multimeter: Take the red lead of the multimeter and connect it to the positive (+) terminal of the connector you want to test. Connect the black lead to the negative (-) terminal of the same connector. Ensure that the metal probes of the multimeter are securely touching the metal pins inside the connector.
- Power On the PSU: Turn on the PSU by flipping the power switch at the back. This will supply power to the PSU and allow you to measure the voltage output of the selected connector.
- Read the Voltage Measurement: Look at the multimeter display to read the voltage measurement of the selected connector. It will display the voltage value in volts (V). Compare the measured voltage with the specifications provided in your PSU’s user manual to ensure it falls within the acceptable range.
- Repeat for Other Connectors: If desired, repeat the same process for testing the voltage output of other connectors on the PSU. Remember to disconnect and reconnect the multimeter leads each time you change the connector being tested.
- Switch Off the PSU: Once you have finished testing the voltage output of all the desired connectors, turn off the PSU by flipping the power switch at the back.
By following these steps, you can accurately measure the voltage output of the PSU’s connectors and ensure they are supplying the correct voltage to the respective components. This will help you identify any potential voltage irregularities that may be causing issues with the performance or stability of your computer system.
Note that PSU voltage readings might show slight variations due to load fluctuations or components’ power requirements. However, significant deviations from the specified voltage ranges may indicate underlying issues or the need for further investigation or PSU replacement.
Step 5: Testing the Resistance
In addition to testing the voltage output of the PSU, it is also important to test the resistance. This step allows you to check for any potential short circuits or irregularities in the PSU’s connectors. Follow these steps to test the resistance:
- Select the Connector to Test: Choose the connector you want to test for resistance. It is recommended to test each connector individually to ensure accurate results.
- Set the Multimeter to Resistance Mode: Change the multimeter’s mode to the resistance or Ω (Ohm) setting. This mode allows you to measure the resistance of the selected connector.
- Connect the Multimeter Leads: Take the red and black leads of the multimeter and connect them to the corresponding pins or terminals of the selected connector. Ensure a good contact between the metal probes and the pins.
- Read the Resistance Measurement: Look at the multimeter display to read the resistance measurement. The resistance value will be displayed in ohms (Ω). Depending on the connector being tested, compare the measured resistance value against the specifications provided in your PSU’s user manual to determine if it falls within an acceptable range.
- Repeat for Other Connectors: If desired, repeat the same process for testing the resistance of other connectors on the PSU. Disconnect and reconnect the multimeter leads each time you change the connector being tested.
By testing the resistance of the PSU’s connectors, you can identify any potential short circuits or abnormalities that could affect the performance and stability of your computer system. A significantly low resistance may indicate a short circuit, while a high resistance value may suggest poor contact or a faulty connection.
It is important to note that the exact resistance values depend on the specific connector being tested and the PSU model. Therefore, referring to the user manual or specifications of your PSU is crucial to determine the acceptable resistance range for each connector.
Remember to power off the PSU and disconnect it from the power source before proceeding with testing the resistance. Always follow proper safety precautions and handle the connectors and multimeter leads with care to avoid any electrical accidents.
Step 6: Interpreting the Results
After testing the voltage output and resistance of the PSU, it is important to interpret the results correctly. This step will help you identify any potential issues and determine the next course of action. Here’s how to interpret the results:
- Voltage Output: Compare the measured voltage values with the specifications provided in your PSU’s user manual. If the measured voltage falls within the acceptable range, it indicates that the PSU is supplying the correct voltage to the components. However, significant deviations from the specified values may indicate an issue with the PSU or potential components’ power requirements.
- Resistance: Consider the measured resistance values and compare them with the acceptable ranges provided in the PSU’s user manual. If the measured resistance falls within the specified range, it indicates a good connection with no short circuits or irregularities. However, unusually low or high resistance values may suggest a short circuit or poor connection that requires further investigation or corrective action.
- Overall Assessment: Based on the voltage output and resistance test results, assess the overall performance and condition of the PSU. If both the voltage output and resistance are within the specified ranges, it indicates that the PSU is functioning properly. However, if there are significant deviations or irregularities, further troubleshooting may be necessary to identify the root cause and resolve any issues.
- Consider Other Factors: Keep in mind that factors such as component power requirements, load fluctuations, and PSU efficiency can also impact the test results. If you notice slight deviations from the specified ranges, consider these factors in your assessment. Additionally, if you are experiencing any specific issues with your computer system, take them into account to form a comprehensive understanding of the PSU’s performance.
Interpreting the results of the voltage output and resistance tests will help you determine if any action needs to be taken regarding your PSU. If the results are within the acceptable ranges and your computer system is functioning properly, it indicates that the PSU is likely in good condition. However, if there are significant deviations or persistent issues, it may be necessary to seek further assistance from a professional or consider replacing the PSU.
Remember that accurate interpretation is crucial for effective troubleshooting and decision-making related to your PSU. If you are unsure about the results or need additional guidance, consult the user manual of your PSU or seek assistance from a qualified technician.
Conclusion
Testing a PSU with a multimeter is a valuable skill that allows you to diagnose potential issues and ensure the proper functioning of your computer system. By following the step-by-step process outlined in this guide, you can accurately measure the voltage output and resistance of the PSU, identify any irregularities or faults, and take appropriate action.
Throughout the testing process, it is crucial to prioritize safety by disconnecting the PSU from the power source, grounding yourself, and taking necessary precautions to prevent electrical accidents. Additionally, ensure that you have the required tools, such as a multimeter and PSU tester if available, to effectively perform the tests.
Interpreting the results of the voltage output and resistance tests is essential for assessing the overall performance of the PSU. By comparing the measured values with the specifications provided in the user manual, you can determine if the PSU is functioning within acceptable ranges or if further troubleshooting or action is required.
Remember that while testing a PSU with a multimeter can provide valuable insights, it is always recommended to seek assistance from a qualified professional if you are unsure or uncomfortable performing the tests yourself. They can provide additional guidance and expertise to accurately assess and address any issues.
Regularly testing the PSU’s voltage output and resistance can help you identify potential issues early on, ensuring the stable and reliable operation of your computer system. By maintaining a well-functioning PSU, you can protect your components from damage and prevent system instabilities or failures.
Take the time to familiarize yourself with the specific procedures and guidelines provided by the manufacturer of your PSU. Each PSU may have slightly different specifications and requirements for testing, so it is important to reference the user manual and follow their instructions.
By utilizing the knowledge and techniques outlined in this guide, you can confidently test a PSU with a multimeter and effectively troubleshoot any potential issues, ensuring optimal performance and longevity of your computer system.
Additional Tips and Troubleshooting
When testing a PSU with a multimeter, here are some additional tips and troubleshooting steps to further enhance your testing process:
- Testing PSU Under Load: To get a more accurate assessment of the PSU’s performance, consider testing it under load. This can be done by connecting the PSU to a system or using a PSU load tester. Testing under load can reveal any voltage drops or instability that may occur when the PSU is under heavy usage.
- Checking for Loose Connections: If you encounter abnormal voltage readings or inconsistencies during testing, check all the PSU and component connections. Ensure that the cables are securely connected and that there are no loose or damaged pins or sockets. Loose connections can result in voltage fluctuations and poor performance.
- Replacing Faulty PSU Cables: If you suspect a specific cable may be causing issues, such as voltage drops or resistance irregularities, consider replacing it with a known working cable. Faulty cables can negatively impact the performance of the PSU and cause system instabilities.
- Upgrading to a Higher Wattage PSU: If you frequently experience power-related issues or if your system requires additional power due to upgrades or overclocking, it may be necessary to upgrade to a higher wattage PSU. This ensures a stable power supply and prevents any power-related limitations.
- Professional Assistance: If you are unsure about testing a PSU yourself or if you encounter persistent issues even after testing, it is advisable to seek assistance from a professional technician. They can provide expert guidance, diagnose any underlying issues, and offer appropriate solutions.
- Monitor Temperature: Keep an eye on the temperature of the PSU during testing. Excessive heat can cause the PSU to malfunction or fail. Ensure that the PSU’s fan is functioning properly, and consider improving the system’s overall cooling to maintain optimal temperature levels.
- Regular Maintenance: Perform regular maintenance on your PSU, including removing dust buildup, ensuring proper airflow, and inspecting for any physical damage. Regular maintenance can help prevent issues and prolong the lifespan of the PSU.
Remember, troubleshooting and testing a PSU can sometimes require technical expertise and knowledge. If you encounter persistent issues or are unsure about the results of your testing, it is always best to consult a professional. They can provide a comprehensive assessment, perform advanced diagnostics, and offer tailored solutions suited to your specific needs.
By following these additional tips and troubleshooting steps, you can enhance your testing process, address any potential issues, and maintain a stable and reliable power supply for your computer system.