Introduction
A power supply unit (PSU) is a vital component of any electronic device, providing the necessary electrical power to enable its operation. Whether you are a tech enthusiast or a professional in the field, testing a power supply unit is an essential skill to ensure the proper functioning and reliability of your electronic equipment. In this guide, we will explore how to test a power supply unit using a multimeter.
Testing a power supply unit allows you to diagnose and determine if it is delivering the correct voltage and amperage to your device. This is crucial because a faulty power supply unit can lead to system instability, random shutdowns, and even damage to other components of your device.
To effectively test a power supply unit, you will need a few tools, such as a multimeter, which is a versatile instrument used to measure voltage, current, and resistance. Additionally, you should follow some safety precautions to protect yourself and the equipment from any potential harm during the testing process.
In this step-by-step guide, we will walk you through the process of testing a power supply unit using a multimeter. By the end of this tutorial, you will have the knowledge and confidence to determine if your power supply unit is functioning correctly, saving you time and money by avoiding unnecessary repairs or replacements.
What is a Power Supply Unit (PSU)?
A power supply unit (PSU) is a crucial component in electronic devices that converts the available electrical power from an outlet or source into the appropriate voltage and current required by the device. It is responsible for supplying consistent and reliable power to all the components within the device, ensuring their proper functioning.
The main purpose of a power supply unit is to transform alternating current (AC) into direct current (DC) and regulate the voltage supplied to each component. This ensures that the electronic device receives a stable flow of power, preventing any fluctuations or surges that could potentially damage the components.
Power supply units come in various types and form factors, depending on the specific requirements of the device they are intended for. Some common types of power supply units include ATX (Advanced Technology Extended), which is widely used in desktop computers, and external power adapters for smaller devices like laptops and chargers.
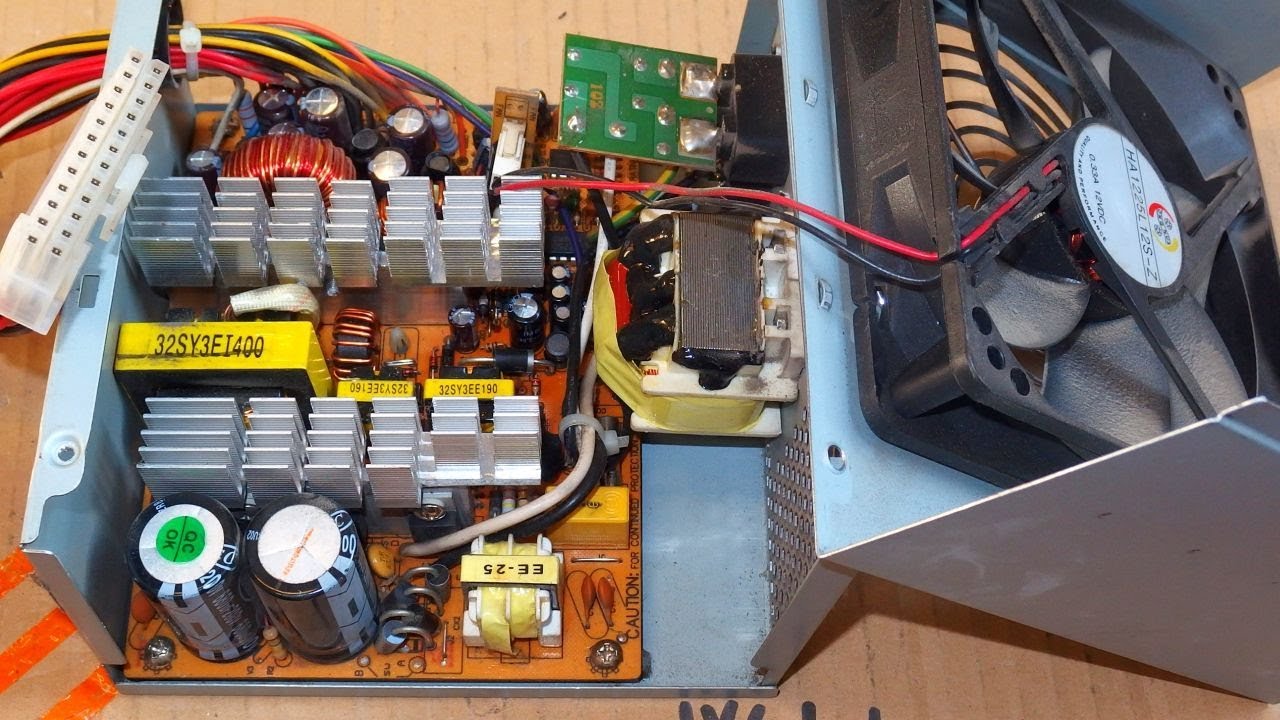
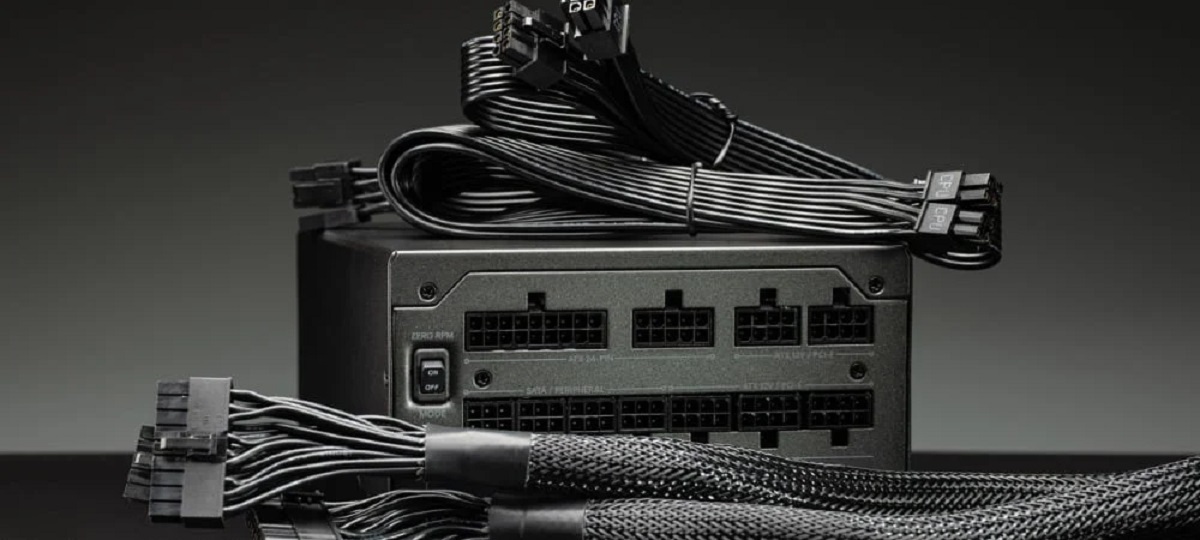
A power supply unit consists of several components, including transformers, rectifiers, capacitors, and voltage regulators. These components work together to convert, regulate, and distribute power to the various parts of the electronic device. The power supply unit also includes several connectors and cables to facilitate the connection between the unit and the device’s components.
When selecting a power supply unit, it is essential to consider factors such as the wattage, efficiency rating, and the number of connectors available. The wattage determines the maximum power output of the unit, while the efficiency rating indicates how well it converts AC power to DC power. Having an adequate number of connectors ensures compatibility with the device’s components.
Overall, a power supply unit is a critical component that ensures the proper functioning and longevity of electronic devices. By converting and regulating the power supply, it provides the necessary electrical energy for the device to perform its intended tasks. Understanding the role and functionality of a power supply unit is essential when testing and troubleshooting any issues related to power supply in electronic devices.
Why Test a Power Supply Unit?
Testing a power supply unit (PSU) is a crucial step in troubleshooting and maintaining the performance and reliability of electronic devices. Here are some key reasons why it is necessary to test a power supply unit:
1. Ensuring Proper Voltage and Amperage: A power supply unit provides the necessary electrical power to the components of an electronic device. By testing the PSU, you can ensure that it is delivering the correct voltage and amperage required by the device. Incorrect voltage or amperage can lead to unstable performance, random shutdowns, or even component damage.
2. Diagnosing Power-related Issues: If a device is experiencing power-related issues, such as not turning on or experiencing intermittent power failures, testing the power supply unit can help identify if it is the cause of the problem. By ruling out or confirming PSU issues, you can narrow down the troubleshooting process and focus on other potential sources of the problem.
3. Preventing Damage to Components: A faulty power supply unit can send excessive electrical voltage or current to the device’s components, potentially causing damage or a complete system failure. By regularly testing the PSU, you can detect any abnormalities in voltage or amperage and take preventive measures to minimize the risk of component damage.
4. Maximizing System Stability: An unstable or unreliable power supply can lead to system crashes, freezes, or unexpected errors. By testing the PSU, you can ensure that it is providing a consistent and stable power supply to the device, allowing for smooth operation and reducing the likelihood of system failures.
5. Cost-saving: Testing a power supply unit can help you determine if it is functioning correctly or if it needs to be replaced. By identifying PSU issues early on, you can avoid unnecessary expenses on replacing other components, mistakenly assuming they are faulty.
Overall, testing a power supply unit is crucial for maintaining the optimal performance, reliability, and longevity of electronic devices. By verifying that the PSU is providing the correct voltage and amperage, you can prevent potential damage to components, diagnose power-related issues, and ensure the stability of the system. Regular testing of the PSU is a valuable practice that can save time, money, and frustration in the long run.
Tools Needed to Test a Power Supply Unit
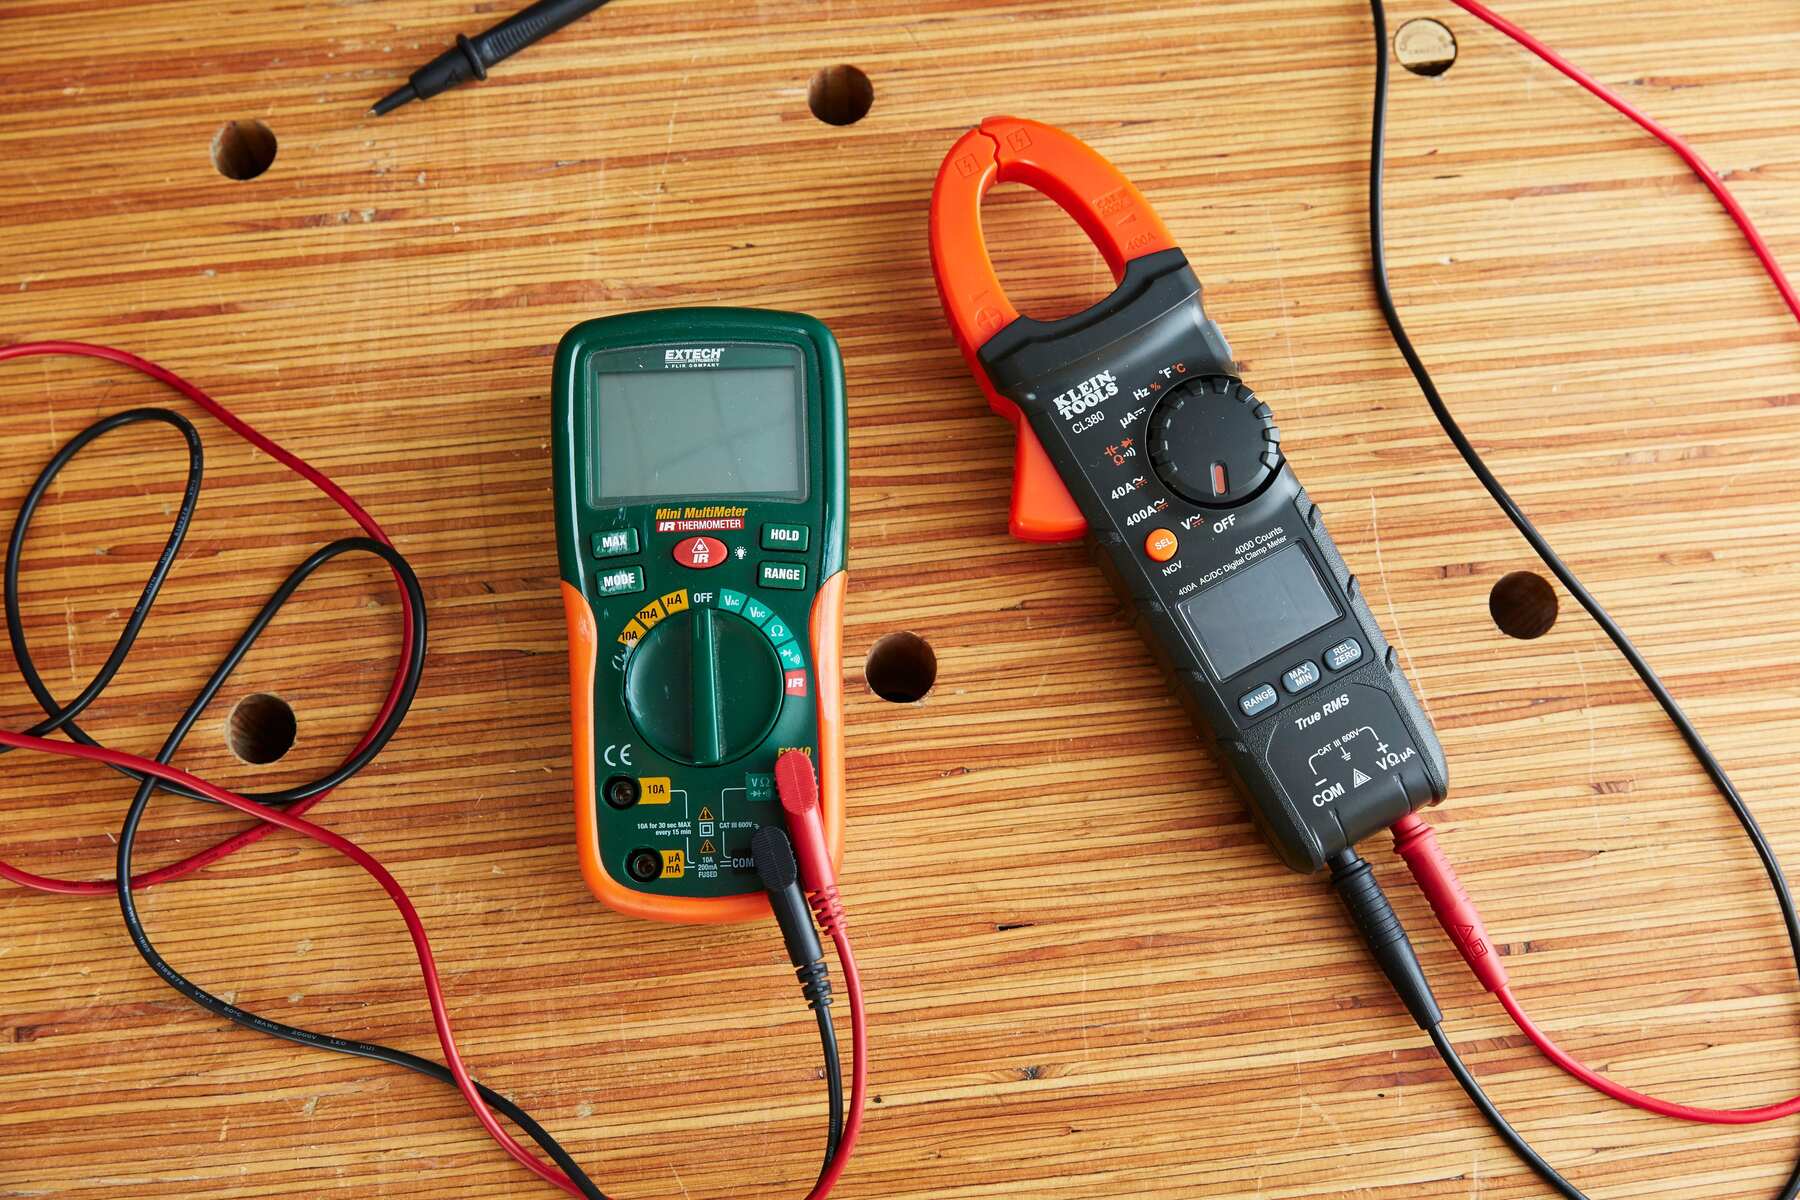
When it comes to testing a power supply unit (PSU), you will need a few essential tools to ensure accurate measurements and a safe testing process. The following tools are necessary for testing a power supply unit:
1. Multimeter: A multimeter is a versatile instrument that measures various electrical properties such as voltage, current, and resistance. It is the primary tool used for testing a power supply unit. Make sure to have a reliable multimeter that can measure both AC and DC voltage and amperage accurately.
2. Power Supply Tester: While not mandatory, a power supply tester is a specialized tool specifically designed for testing power supply units. It provides an easy and quick way to check the voltage levels and overall functionality of the PSU. Power supply testers are available in different types, including plug-in testers and digital testers.
3. Grounding Strap or ESD Mat: When working with electronic components, it is essential to prevent the buildup and discharge of static electricity, which can damage sensitive parts. A grounding strap or an electrostatic discharge (ESD) mat helps to dissipate static electricity and protect both you and the equipment during the testing process.
4. Power Supply Load Tester (Optional): A power supply load tester is a useful tool for determining the maximum load capabilities and efficiency of a power supply unit. It helps simulate the load conditions of the device to ensure the PSU can handle the required power demands.
5. Testing Cables and Connectors: You will need various cables and connectors to establish proper connections between the power supply unit, multimeter, and any other testing tools. Ensure that you have the necessary cables and connectors for accurate testing and measurements.
6. Safety Equipment: Last but not least, safety should always be a priority when working with electrical components. Some essential safety equipment includes insulated gloves, safety glasses, and a fire extinguisher. These items will help minimize the risks associated with electrical hazards during the testing process.
With these tools at hand, you will have everything you need to properly test a power supply unit. It is important to use high-quality, reliable tools to ensure accurate readings and maintain a safe testing environment. Remember to follow the manufacturer’s instructions for each tool and take necessary precautions to protect yourself and the equipment during the testing process.
Safety Precautions
When working with electrical components and testing a power supply unit (PSU), it is important to prioritize safety to prevent any potential accidents or damage. Here are some essential safety precautions you should follow during the testing process:
1. Ensure Proper Electrical Isolation: Before beginning any work, make sure to disconnect the device from the power source and unplug the power supply unit. This eliminates the risk of electric shock while handling the components.
2. Wear Personal Protective Equipment (PPE): Always wear appropriate personal protective equipment, such as insulated gloves and safety glasses. These safeguards protect your hands and eyes while handling electrical components.
3. Work in a Well-Ventilated Area: Ensure that your work area is properly ventilated to prevent the buildup of heat or fumes. This is especially important during prolonged testing sessions or when dealing with high-power devices.
4. Avoid Moisture and Liquids: Keep all liquids, including water, beverages, and cleaning solutions, away from the testing area. Moisture and liquids can damage the components and pose a higher risk of electrical shock.
5. Use Grounding Straps or ESD Mats: To prevent electrostatic discharge (ESD) that can damage sensitive components, wear a grounding strap or work on an ESD mat. These tools help dissipate static electricity safely.
6. Double-Check Connections: Before applying power or making any readings, ensure that all connections between the multimeter, power supply unit, and other tools are secure and properly insulated. Loose or faulty connections can cause inaccurate readings or potential short circuits.
7. Use Proper Tools and Equipment: Use high-quality tools and equipment that are designed for electrical work. This includes using an appropriately rated multimeter and following the manufacturer’s instructions for all testing tools.
8. Never Touch Exposed Wires: Avoid touching exposed wires or leads while the power supply unit is connected or being tested. This can cause electrical shocks or short circuits.
9. Do Not Overload the Power Supply: Be mindful of the power limits of the equipment you are testing. Overloading the power supply unit can lead to overheating and component failure.
10. Follow Manufacturer’s Guidelines: Read and follow the user manual and safety guidelines provided by the manufacturer of your power supply unit. These guidelines provide specific instructions and additional safety precautions for your specific model.
By following these safety precautions, you can minimize the risk of accidents, electrical shocks, and damage to both yourself and the equipment. Always ensure that you are well aware of the potential hazards associated with working with electricity and take the necessary steps to protect yourself and maintain a safe testing environment.
Step 1: Disconnecting the Power Supply Unit
Before testing a power supply unit (PSU), it is crucial to disconnect it from the power source and the device it is supplying power to. This ensures your safety and prevents any potential damage to the components. Follow these steps to disconnect the power supply unit:
1. Turn off the Device: If the device is turned on, shut it down properly through the operating system or by pressing the device’s power button. Wait until the device completely powers down before proceeding.
2. Unplug the Device: Once the device is turned off, unplug it from the wall outlet or power strip. This severs the electrical connection between the device and the power source.
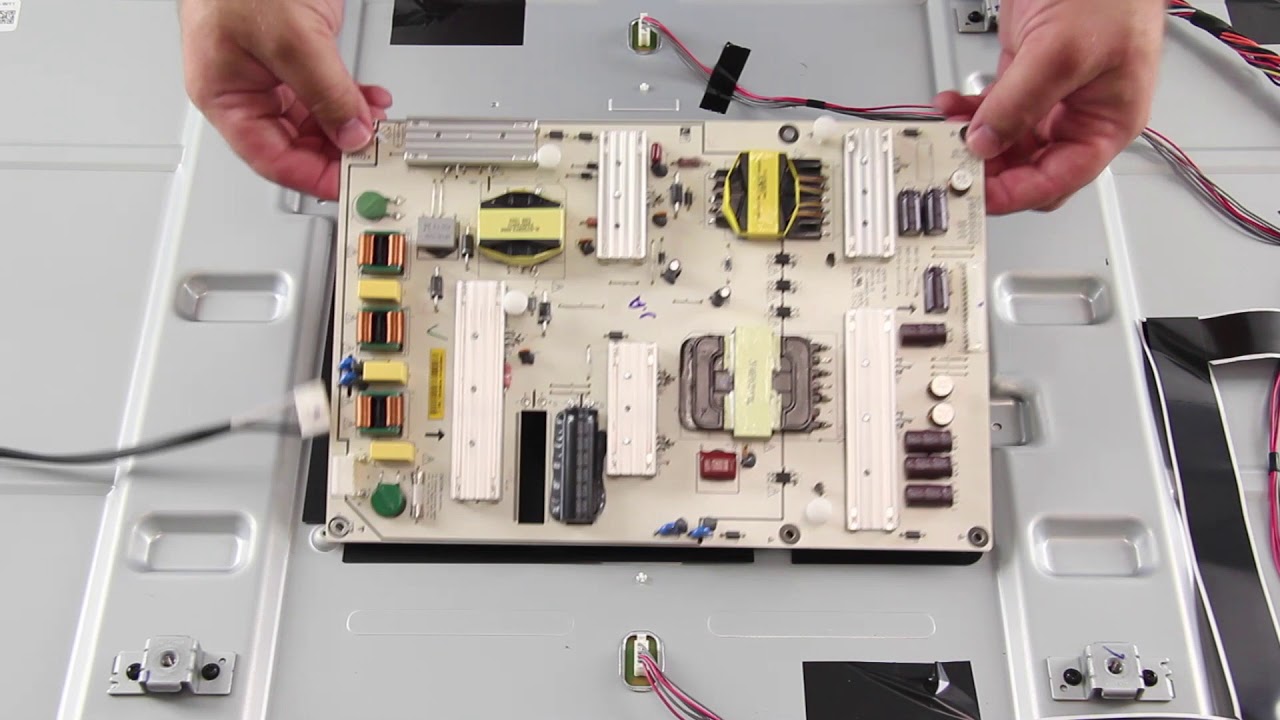
3. Locate the Power Supply Unit: Identify the location of the power supply unit within the device. This is usually a rectangular box-shaped component with cables and connectors leading to various parts of the device.
4. Unplug the Power Supply Unit: Disconnect the cables and connectors that are connected to the power supply unit. Carefully remove each connector by holding onto the plastic housing or tab and gently pulling it away from the power supply unit. Take note of the type and position of each connector for reassembly later.
5. Remove the Power Supply Unit: In some cases, the power supply unit may be securely mounted or enclosed inside the device. Follow the manufacturer’s instructions or consult the device’s user manual on how to remove the power supply unit. This may involve removing screws or releasing mounting brackets.
6. Check for Residual Power: Even after disconnecting the power supply unit, it is possible for residual power to remain in the device. To discharge any residual power, press and hold the device’s power button for a few seconds. This helps ensure complete disconnection of the power supply unit.
By following these steps, you have successfully disconnected the power supply unit from the device. This preliminary step is crucial to ensure your safety during the testing process. Remember to handle the power supply unit and its connectors carefully to avoid any damage.
Step 2: Setting Up Your Multimeter
Once you have disconnected the power supply unit (PSU), the next step is to set up your multimeter for testing. The multimeter will allow you to measure the voltage and amperage of the power supply unit accurately. Follow these steps to set up your multimeter:
1. Select the Proper Function: Set the multimeter to the appropriate function for the type of measurement you’ll be making. For voltage testing, switch the multimeter to the DC voltage (V) function. For amperage testing, switch to the DC current (A) function. Ensure you are using the correct range for the expected values of the power supply unit.
2. Switch on the Multimeter: Turn on the multimeter by pressing the power button or rotating the dial with the power symbol. Check the multimeter display to ensure it powers on and is functioning correctly.
3. Set the Range (If Necessary): Depending on the multimeter model, you may need to manually set the range for voltage and amperage measurements. If the range is not preset, adjust the range switch or selection dial to an appropriate setting based on the expected values of the power supply unit.
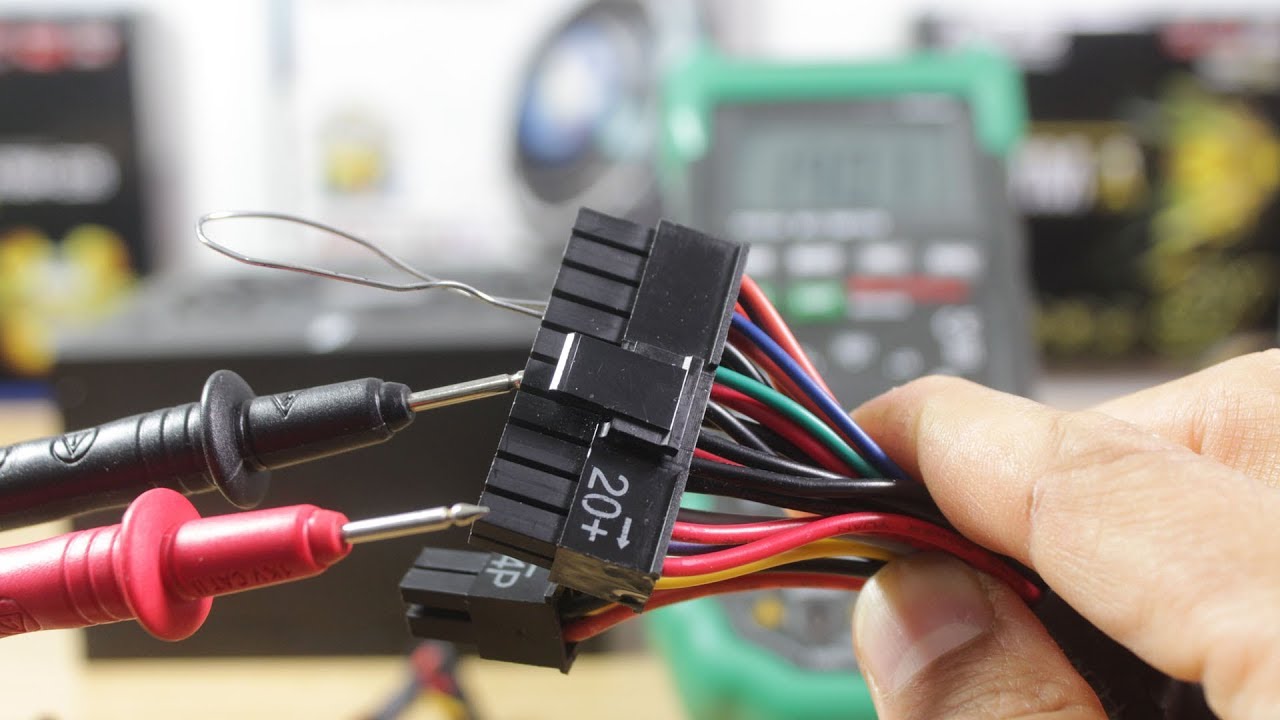
4. Connect the Multimeter Probes: Connect the multimeter probes to the corresponding ports on the multimeter. The red probe is for the positive (+) terminal, and the black probe is for the negative (-) terminal.
5. Select the Proper Probe Mode: Some multimeters have multiple probe modes, such as voltage, current, and resistance. Ensure that the multimeter is set to the correct mode for voltage or current measurements, depending on the test you plan to perform.
6. Verify the Multimeter Functionality: To ensure accurate readings, test the multimeter by measuring a known voltage or current source. Connect the probes to a stable power source and verify that the multimeter displays the expected measurements.
7. Set the Multimeter to the Correct Polarity (If Applicable): If your multimeter has a polarity setting, be sure to set it correctly for the voltage measurement. This ensures that positive (+) and negative (-) voltages are correctly indicated on the display.
By following these steps, you have properly set up your multimeter for testing the power supply unit. It is important to double-check that the multimeter is functioning correctly and calibrated to provide accurate readings. Once the multimeter is ready, you can move on to the next step of testing the voltage or amperage of the power supply unit.
Step 3: Testing the Power Supply Unit’s Voltage
With your multimeter set up and ready, you can now proceed to test the voltage of the power supply unit (PSU). By measuring the voltage output, you can determine if the PSU is supplying the correct voltage to your electronic device. Follow these steps to test the power supply unit’s voltage:
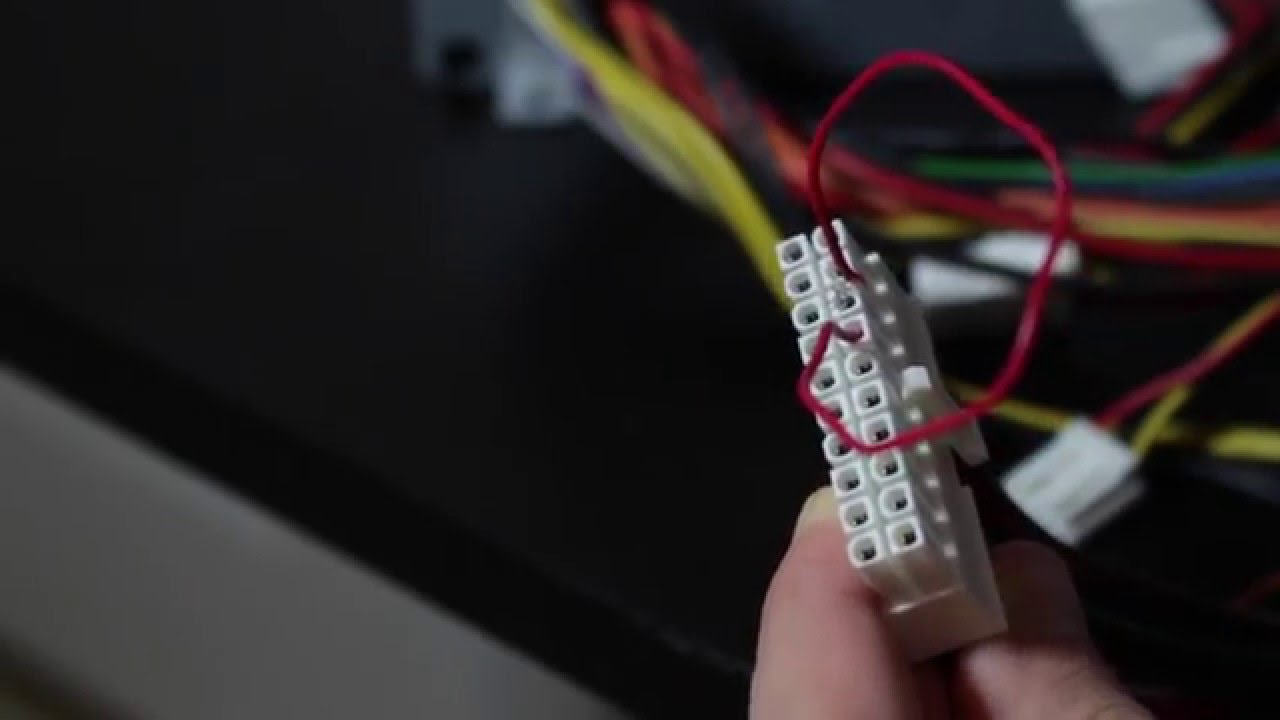
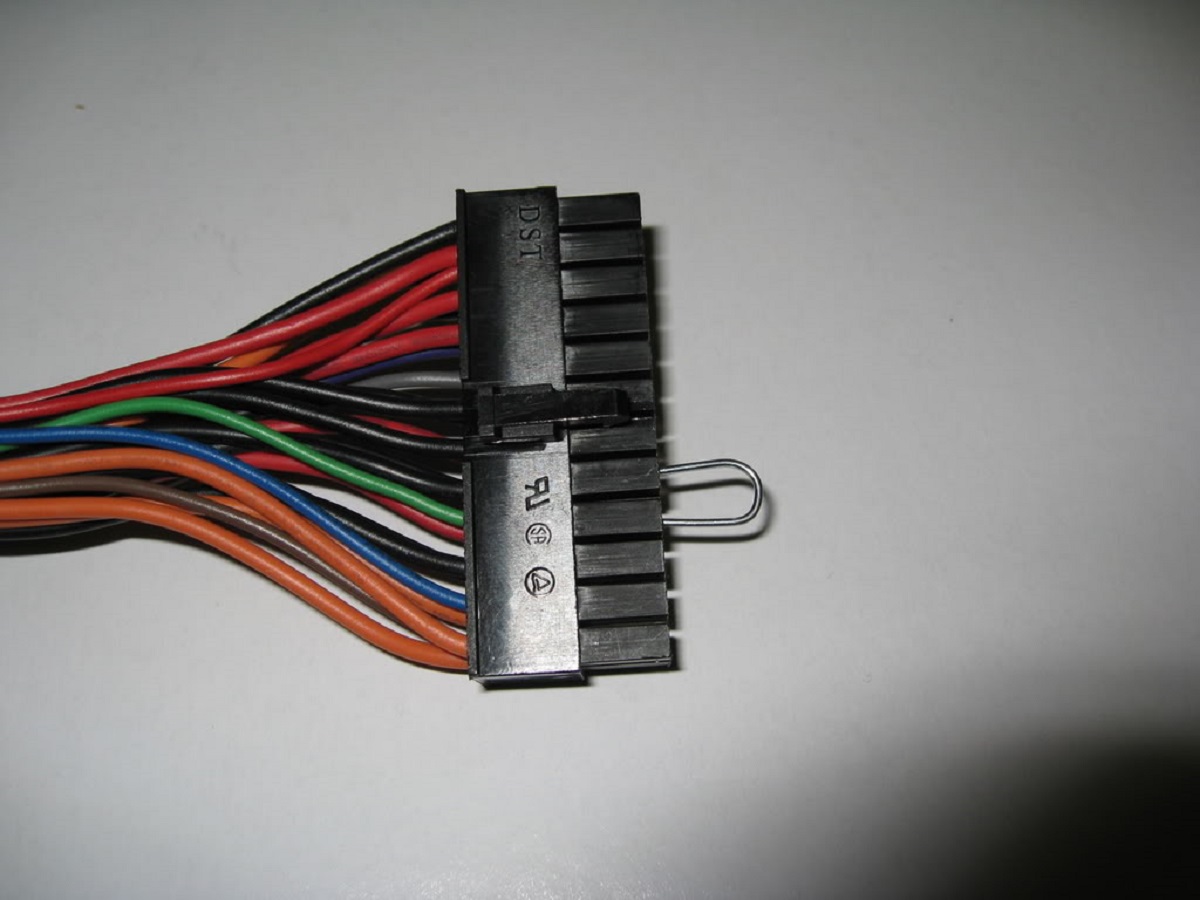
1. Locate the Voltage Pins: Identify the voltage pins or connectors on the power supply unit. These pins are typically labeled with voltage values, such as +12V, +5V, or +3.3V. Refer to the manufacturer’s documentation or the device’s user manual for the specific location and labeling of the voltage pins.
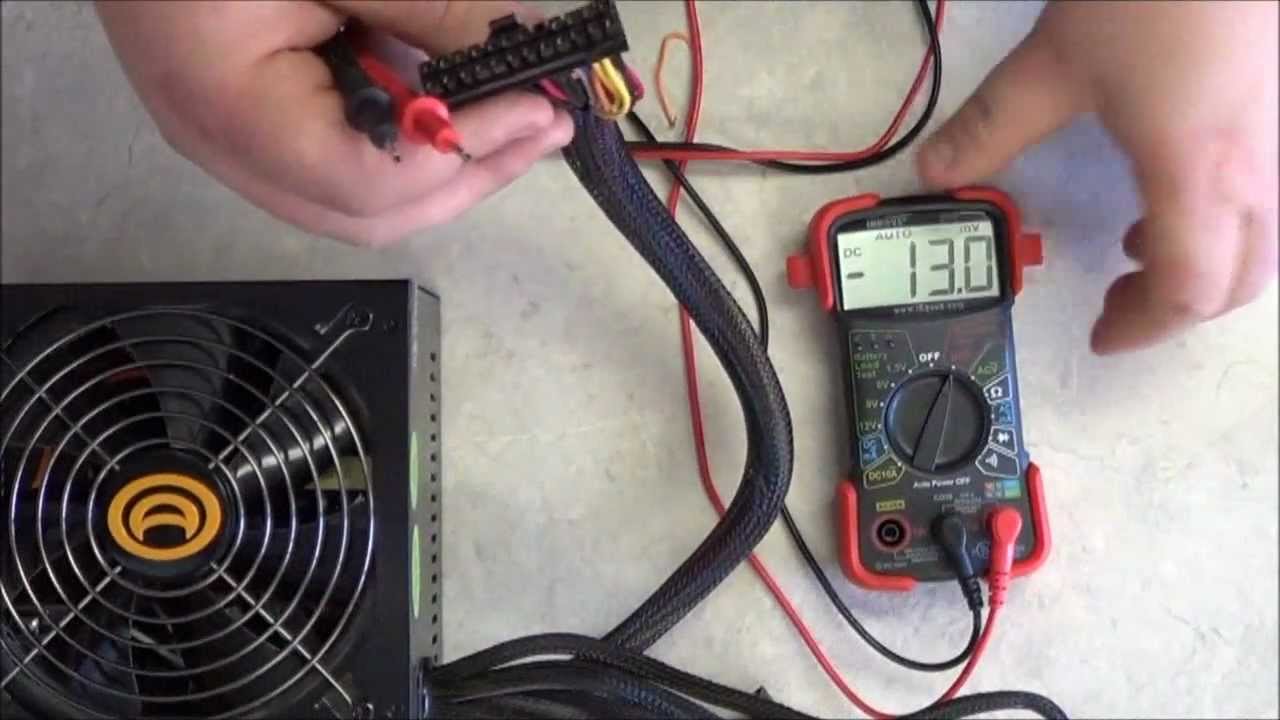
2. Connect the Multimeter Probes: Take the red probe of the multimeter and connect it to the positive (+) voltage pin on the power supply unit. Connect the black probe to the negative (-) voltage pin. Ensure a secure and stable connection between the probes and the pins.
3. Read the Voltage: Once the probes are in place, turn on the power supply unit. Observe the multimeter display and the voltage measurement it shows. Note the voltage reading for each tested pin.
4. Compare with Specifications: Compare the measured voltage readings with the specifications provided by the manufacturer of the power supply unit. Ensure that the measured voltage is within an acceptable range. Any significant deviations from the specified voltage may indicate a problem with the power supply unit.
5. Perform Multiple Measurements (If Applicable): If your power supply unit has multiple voltage pins, repeat steps 2 to 4 for each voltage pin to verify their accuracies. This ensures that all voltage outputs are functioning correctly.
6. Document the Results: Record the voltage readings obtained from each tested pin. This documentation will be helpful if you need to refer back to the measurements during troubleshooting or when comparing with future tests.
7. Disconnect the Multimeter Probes: Once the voltage testing is complete, disconnect the multimeter probes from the voltage pins of the power supply unit. Take extra care to avoid accidental contact with other components or cables.
By following these steps, you can accurately measure the voltage output of the power supply unit using a multimeter. Remember to compare the measured values with the manufacturer’s specifications to determine if the voltage is within acceptable limits. Testing the voltage will help you identify any potential issues with the power supply unit, ensuring reliable and stable power delivery to your electronic device.
Step 4: Testing the Power Supply Unit’s Amperage
After testing the voltage of the power supply unit (PSU), the next step is to measure its amperage. Amperage refers to the amount of electrical current flowing through the PSU. Testing the amperage can help you ensure that the power supply unit is capable of delivering the required current for your electronic device. Follow these steps to test the power supply unit’s amperage:
1. Locate the Amperage Pins or Connectors: Identify the amperage pins or connectors on the power supply unit. These may be labeled with the letter “A” or “I” to indicate current. Refer to the manufacturer’s documentation or the device’s user manual for the specific location and labeling of the amperage pins.
2. Set the Multimeter to Current Mode: Switch your multimeter to the DC current (A) mode. Ensure that the multimeter is capable of reading the expected amperage range of the power supply unit. If necessary, adjust the current range setting to a suitable value.
3. Connect the Multimeter in Series: To measure the amperage, you will need to connect the multimeter in series with the power supply unit. Ensure that the power supply unit is off and disconnected from the device. Connect the red multimeter probe to the positive (+) amperage pin or connector, and connect the black probe to the positive (+) wire or lead going to the device. This creates a complete circuit for current flow.
4. Turn on the Power Supply Unit: Once the multimeter is properly connected, turn on the power supply unit. Take note of any warning signs or abnormal behavior during the test, such as abnormal noises or excessive heat.
5. Read the Amperage: Observe the multimeter display, which should now indicate the amperage flowing through the power supply unit. Take note of the amperage reading.
6. Compare with Specifications: Compare the measured amperage with the specifications provided by the manufacturer of the power supply unit. Ensure that the measured amperage falls within the expected range. Any significant deviations may indicate an issue with the power supply unit’s current output.
7. Perform Multiple Measurements (If Applicable): If your power supply unit has multiple amperage pins or connectors, repeat steps 3 to 6 for each amperage measurement. This helps ensure that all current outputs are functioning correctly.
8. Document the Results: Record the amperage readings obtained from each tested pin or connector. This documentation will be useful for future reference and comparisons.
9. Disconnect the Multimeter Probes: Once you have completed testing the amperage, disconnect the multimeter probes from the power supply unit and the device. Take care to avoid any accidental contact with other components or live circuits.
By following these steps, you can accurately measure the amperage of the power supply unit using a multimeter. Checking the amperage ensures that the power supply unit is capable of providing the required current for your electronic device. Testing the amperage helps in identifying any potential issues and ensures the reliable operation of your device.
Step 5: Analyzing the Readings and Troubleshooting
Once you have tested the voltage and amperage of the power supply unit (PSU), it is time to analyze the readings and troubleshoot any potential issues that may have been detected. Analyzing the readings will help you determine the overall health and functionality of the power supply unit. Follow these steps to analyze the readings and troubleshoot any problems:
1. Compare Readings with Specifications: Start by comparing the voltage and amperage readings obtained from the power supply unit with the manufacturer’s specifications. Check if the measured values fall within the acceptable range. Significant deviations from the specified values may indicate a problem with the power supply unit.
2. Consider Voltage Ripple: Along with the voltage and amperage readings, it is worth checking the voltage ripple or fluctuations from the power supply unit. Excessive voltage ripple can cause stability issues in the electronic device. Consult the manufacturer’s specifications to confirm the allowed voltage ripple.
3. Identify Unusual Readings: Look out for any abnormal or inconsistent readings during the testing process. If you notice significant fluctuations, instability, or readings outside the expected range, it could suggest a faulty power supply unit or another underlying issue.
4. Verify Correct Wattage: Calculate the wattage output of the power supply unit by multiplying the measured voltage with the measured amperage. Compare this wattage value with the rated wattage provided by the manufacturer. Ensure that the calculated wattage falls within the rated range.
5. Perform Additional Tests (Optional): Depending on the specific requirements of your device and the available testing tools, you may perform further tests to validate the power supply unit’s performance. This may include load testing, efficiency testing, or conducting thermal tests if applicable.
6. Troubleshoot Identified Issues: If any issues or discrepancies are detected during the analysis, it is time to troubleshoot the problem. Start by checking the connections between the power supply unit and the device, ensuring they are secure and in good condition. Look for any signs of physical damage or loose connections that may affect the power supply unit’s performance.
7. Consult Manufacturer Documentation: Refer to the manufacturer’s documentation or service manuals for troubleshooting guidance specific to the power supply unit model. Follow their recommended steps to address the identified issues.
8. Seek Professional Assistance (If Necessary): If the troubleshooting process does not resolve the issues or if you are unsure about performing further repairs, it is advisable to seek the assistance of a professional technician. They have the expertise and proper tools to diagnose and repair power supply unit problems accurately.
By following these steps, you can analyze the readings obtained from testing the power supply unit and determine if any troubleshooting is necessary. Identifying and addressing potential issues will help ensure the proper functioning and reliability of the power supply unit in your electronic device.
Conclusion
Testing a power supply unit (PSU) with a multimeter is a vital step in ensuring the proper functioning and reliability of your electronic devices. By accurately measuring the voltage and amperage of the PSU, you can identify any potential issues and take appropriate actions to address them.
In this guide, we covered the essential steps to test a power supply unit with a multimeter. We started by disconnecting the power supply unit from the device and setting up the multimeter for testing. We then proceeded to test the voltage and amperage, comparing the readings with the manufacturer’s specifications. Lastly, we analyzed the readings and performed troubleshooting if necessary.
By conducting these tests, you can prevent device instability, component damage, and system failures caused by a faulty power supply unit. Regularly testing your PSU is an important maintenance practice to ensure optimal performance and longevity of your electronic devices.
Remember to always prioritize safety when working with electrical components. Take necessary precautions, such as wearing personal protective equipment, working in a well-ventilated area, and following proper grounding procedures.
If you encounter significant deviations from the expected readings or require additional assistance with troubleshooting, it is recommended to consult the manufacturer’s documentation or seek professional help from a qualified technician.
By testing your power supply unit with a multimeter, you can have peace of mind knowing that your electronic devices are receiving the correct voltage and amperage for their optimal functioning.