Tips for Installing a PSU
Installing a power supply unit (PSU) in your computer is a crucial task that ensures proper power distribution and functionality. Whether you are replacing an old PSU or installing a new one, it is important to follow the right steps to ensure a successful installation. Here are some tips to help you along the way:
1. Choose the right PSU: Before starting the installation process, make sure to choose a suitable PSU for your computer. Consider the wattage, efficiency rating, and compatibility with your hardware to ensure optimal performance.
2. Gather the necessary tools and materials: To install a PSU, you will need a Phillips screwdriver, cable ties, and possibly an anti-static wrist strap. Gather these tools in advance to avoid any interruptions during the installation.
3. Prepare your computer for installation: Before opening your computer case, power off the device and unplug it from the wall outlet. This will prevent any accidental shocks or damage to your components.
4. Remove the old PSU: Carefully disconnect all the cables connected to the old PSU. Unscrew the mounting screws securing the PSU to the case and gently slide it out. Set the old PSU aside for disposal or keep it as a backup if it is still functional.
5. Attach the new PSU: Place the new PSU into the case, aligning it with the screw holes. Secure it to the case using the mounting screws. Make sure the fan faces towards the appropriate ventilation area for proper airflow.
6. Connect cables and components: Refer to the PSU’s manual and the motherboard’s documentation to properly connect the necessary cables. Pay attention to the 24-pin motherboard power connector, CPU power connector, and additional power connectors required for your peripherals.
7. Close up the computer: Once all the cables are connected, double-check their connections and make sure they are secure. Use cable ties to organize and manage the cables, ensuring good airflow and neatness in the case. Close the computer case and tighten the screws to secure it.
8. Test the PSU installation: Plug the computer back into the power outlet and turn it on. Ensure that all components receive power and your computer boots up properly. Monitor the system for any irregularities or issues.
9. Troubleshoot common issues: In case you encounter any problems after installing the PSU, such as power fluctuations or system instability, refer to the troubleshooting guide supplied with your PSU or seek assistance from a professional.
By following these tips, you can confidently install a PSU in your computer and ensure proper power supply to all the components. The installation process may vary depending on your specific hardware, so always consult the manuals provided by the manufacturers for detailed instructions.
Gathering the Necessary Tools and Materials
Before embarking on the installation of a power supply unit (PSU) in your computer, it’s important to gather all the necessary tools and materials. Having everything at hand will ensure a smooth and efficient installation process. Here is a list of essential items you’ll need:
1. Phillips screwdriver: A Phillips screwdriver is a must-have tool in any computer enthusiast’s arsenal. It will be used to remove screws securing the old PSU and to attach the new one to the case.
2. Cable ties: Cable ties are essential for cable management. They allow you to neatly organize and secure the cables, preventing them from obstructing airflow or tangling with other components.
3. Anti-static wrist strap (optional): While not essential, an anti-static wrist strap can be helpful during the installation process. It helps discharge any static electricity from your body, preventing damage to sensitive computer components.
4. Replacement PSU: Of course, you’ll need a new PSU to install. Ensure you choose a PSU that is compatible with your computer’s hardware specifications and power requirements.
5. Manufacturer manuals: It’s crucial to have the manuals provided by the PSU manufacturer and your computer’s motherboard manufacturer. These guides will provide detailed instructions on how to properly connect the cables and ensure a successful installation.
6. Safety precautions: While not physical tools, safety precautions are essential. These include turning off your computer and unplugging it from the wall outlet before beginning the installation. This minimizes the risk of electric shock and damage to your components.
7. Workspace: Set up a clear and spacious workspace to comfortably work on your computer. Make sure you have adequate lighting and good ventilation to prevent overheating.
8. Replacement screws (if needed): In some cases, you may need replacement screws to secure the new PSU to the case. If the new PSU doesn’t come with screws or the existing ones are damaged, be sure to have a few spare screws on hand.
By gathering these tools and materials before starting the installation process, you’ll be well-prepared to tackle the task at hand. Having everything within reach will save you time and prevent unnecessary interruptions. Remember to refer to the manufacturer manuals for any specific requirements or instructions related to your particular hardware.
Choosing the Right PSU
When it comes to installing a power supply unit (PSU) in your computer, choosing the right one is crucial for optimal performance and compatibility. Here are some essential factors to consider when selecting a PSU:
1. Wattage: Determine the power requirements of your computer by considering the components you have or plan to install. A PSU with a higher wattage than required can offer room for future upgrades, while an insufficient wattage may cause system instability or shut down.
2. Efficiency rating: Look for a PSU with a high-efficiency rating, such as 80 Plus Bronze, Silver, Gold, or Platinum. A higher efficiency rating ensures that the PSU converts more power from the outlet into usable energy, reducing electricity waste and saving you money in the long run.
3. Compatibility: Ensure that the PSU is compatible with your computer’s hardware. Check the specifications of your motherboard, graphics card, and other components to verify the required connectors and power supply form factor (ATX, Micro ATX, etc.).
4. Modular or non-modular: Modular PSUs allow you to detach unnecessary cables, improving cable management and airflow within the case. Non-modular PSUs come with fixed cables, which can be more cost-effective but may lead to cluttered cables and reduced airflow.
5. Brand and reliability: Stick with reputable brands known for producing reliable PSUs. Research customer reviews and ratings to ensure the PSU you choose has a track record of reliability and performance.
6. Noise level: Consider the noise level of the PSU, especially if you value a quiet computer. Look for PSUs with quiet cooling fans or fanless designs if noise is a concern for you.
7. Warranty and customer support: Check the warranty duration and customer support provided by the manufacturer. A longer warranty period indicates the manufacturer’s confidence in their product, and good customer support can be invaluable if you encounter any issues or need assistance.
By carefully considering these factors, you can choose a PSU that meets your computer’s power requirements, is compatible with your hardware, and offers reliability and efficiency. Always refer to the manufacturer’s specifications and consult experts or online resources for additional guidance in making the right selection.
Preparing Your Computer for Installation
Before installing a new power supply unit (PSU) in your computer, it is important to prepare your system to ensure a smooth and successful installation. Here are some crucial steps to follow:
1. Power off and unplug: Firstly, power off your computer and unplug it from the wall outlet. This is crucial to prevent any electrical shocks or damage to your components during the installation process.
2. Ground yourself: Grounding yourself is essential to discharge any static electricity that could potentially harm your sensitive computer parts. One way to do this is by wearing an anti-static wrist strap, which helps to prevent static build-up by grounding you to the computer case.
3. Find a suitable workspace: Choose a clean and well-lit workspace where you can comfortably work on your computer. Make sure the area is free from any static-inducing materials, such as carpet or synthetic fabrics that could generate static electricity.
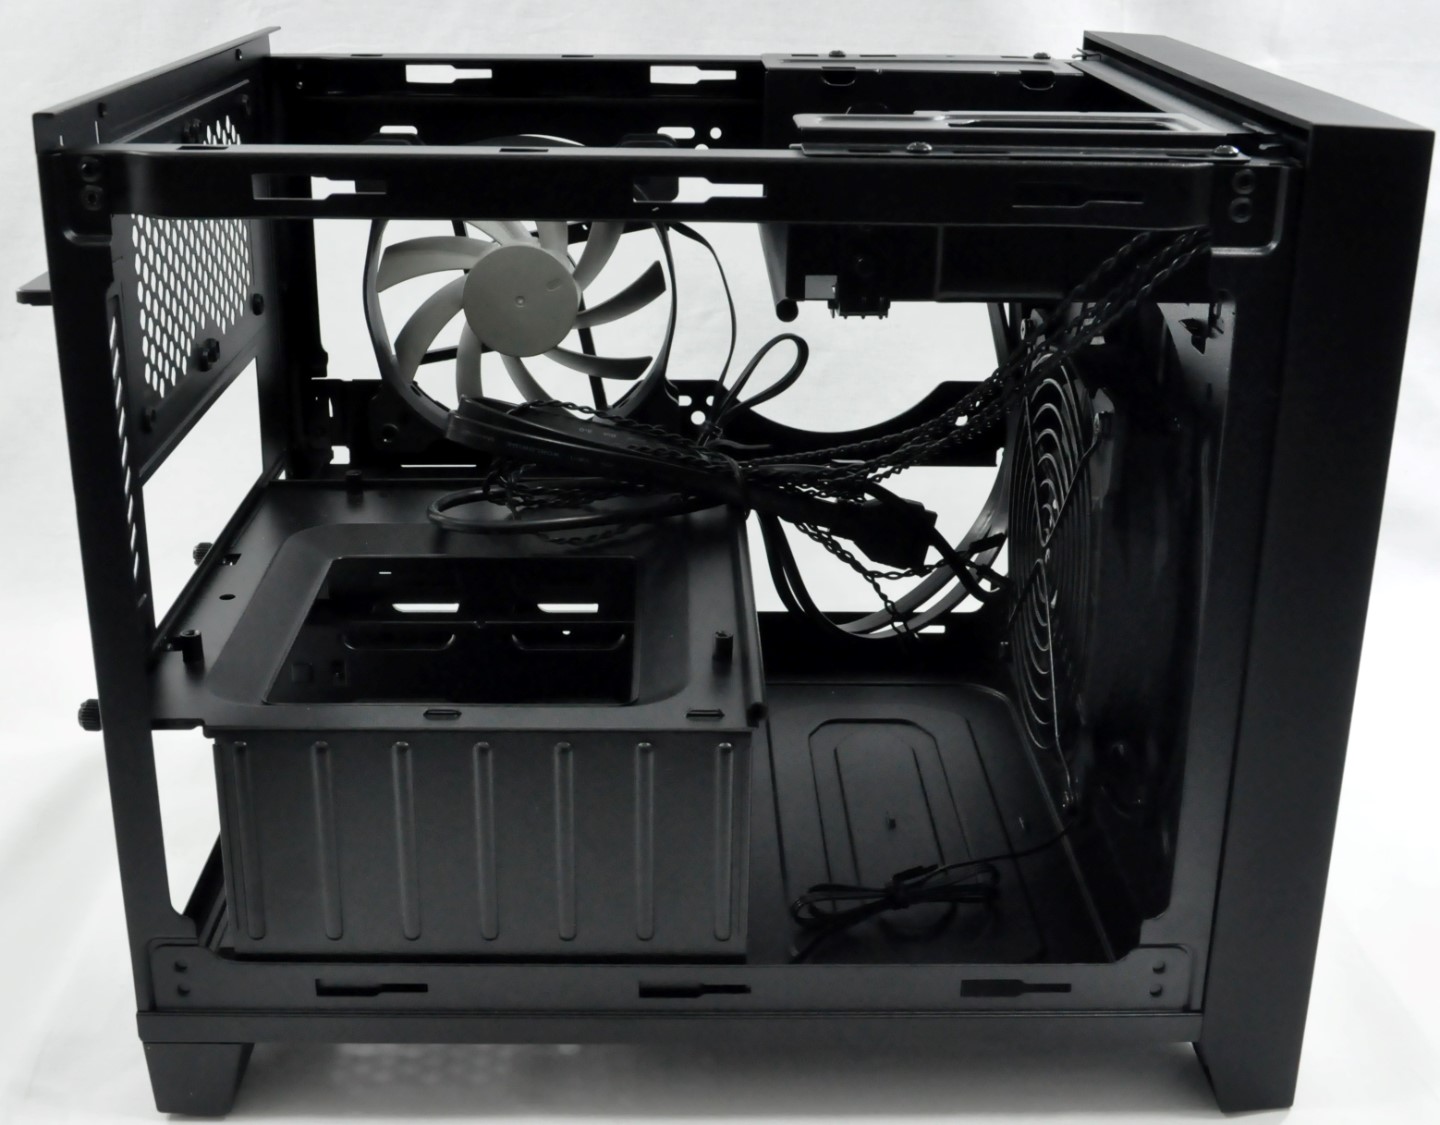
4. Open the computer case: Depending on the type of computer case you have, there are different methods to open it. Usually, there are screws on the back or side panel that need to be removed. Refer to your computer case manual for specific instructions on how to properly open the case.
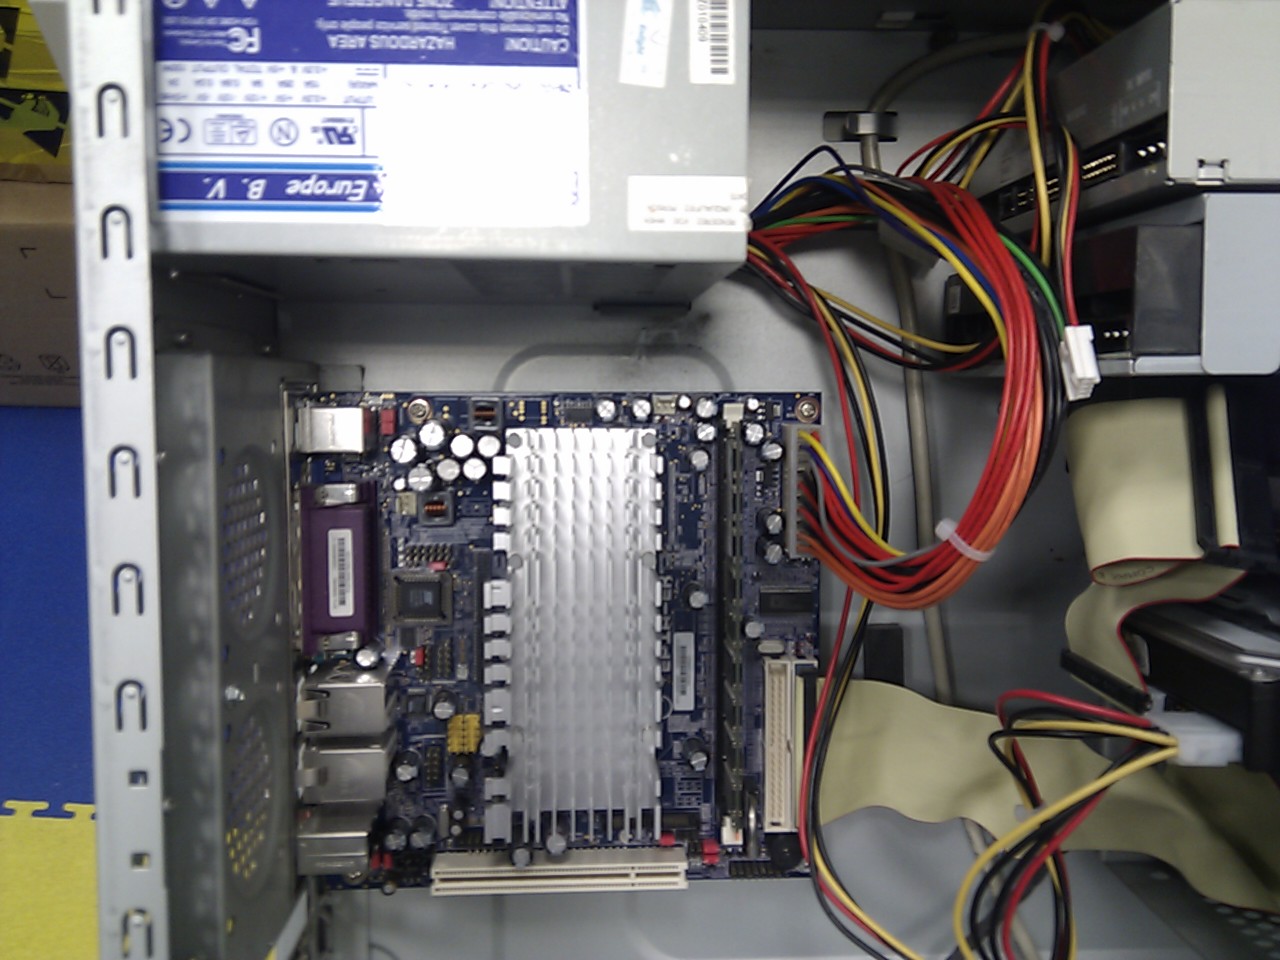
5. Assess the internal components: Once the case is open, take a moment to familiarize yourself with the internal components of your computer. Identify the location of the existing PSU, which is often situated at the top or bottom of the case at the rear.
6. Take necessary precautions: Before handling any components, take precautions to avoid any accidental damage. Avoid touching any exposed circuitry or sensitive parts, and handle components with care, holding them by the edges or designated areas.
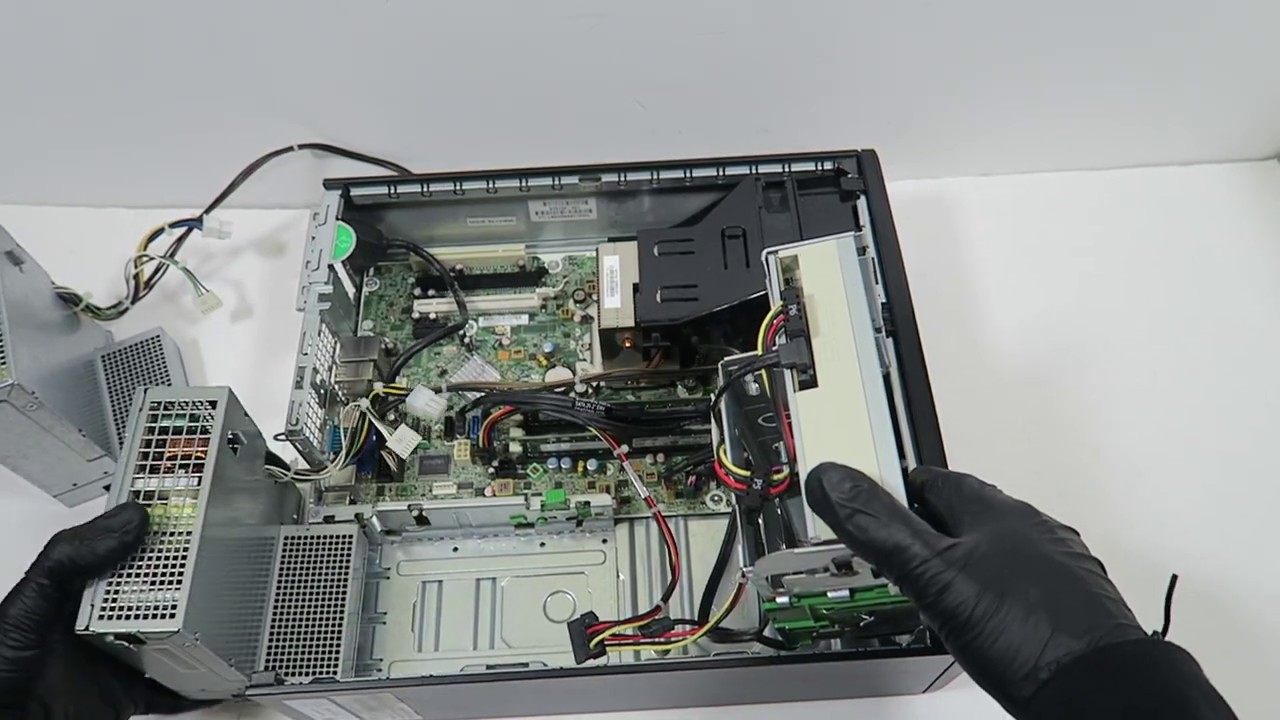
7. Disconnect power cables: Carefully disconnect the power cables connected to the existing PSU from the motherboard, graphics card, storage drives, and any other peripherals. Take note of the connectors used and their locations for reference during the installation of the new PSU.
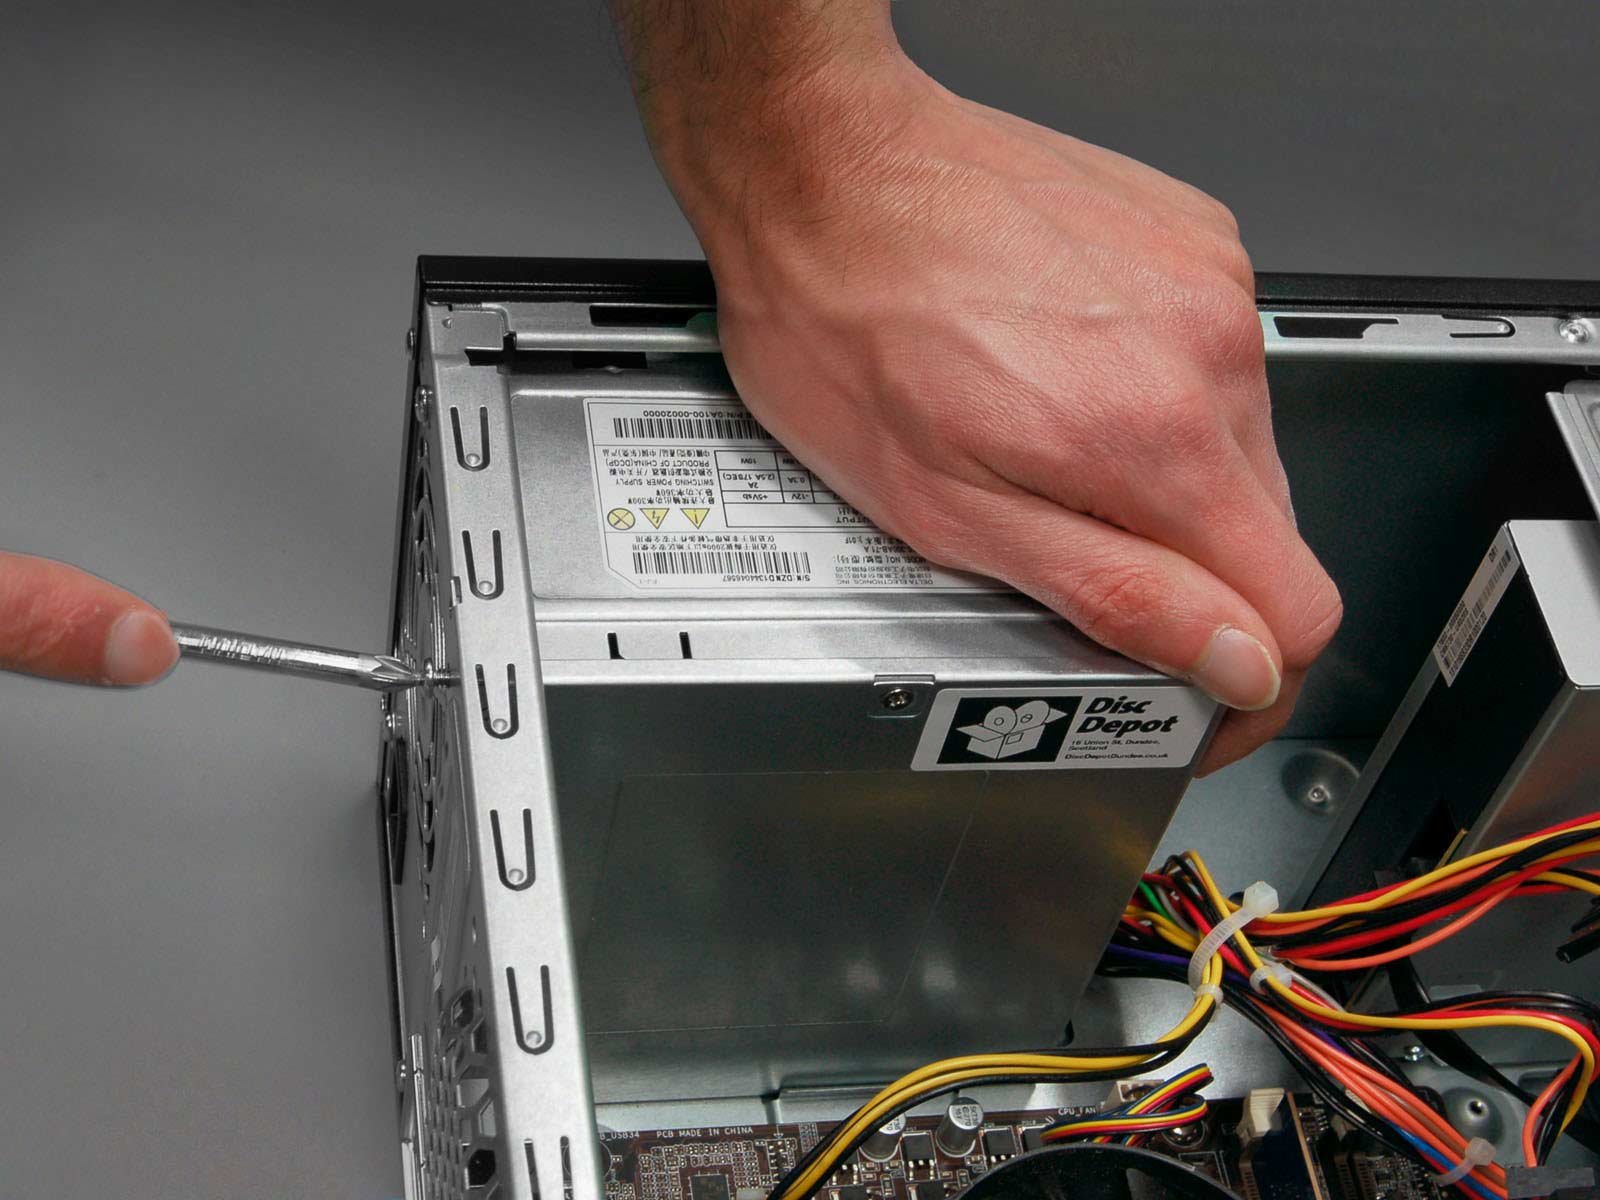
8. Remove the old PSU: Depending on your computer case, the old PSU may be secured with screws or brackets. Use a Phillips screwdriver to unfasten the screws or remove any mounting brackets to release the old PSU from the case.
9. Handle the old PSU: Set the old PSU aside in a safe location or properly dispose of it following local regulations. Make sure to handle it with care, as residual electrical charge may still be present even when the unit is powered off.
By following these preparatory steps, you will ensure a safe and organized installation process for your new PSU. Remember to consult your computer’s manual and any accompanying documentation for specific instructions related to your particular hardware configuration.
Removing the Old PSU
When installing a new power supply unit (PSU) in your computer, it is essential to properly remove the old PSU. Here are the steps to safely and efficiently remove the old PSU from your system:
1. Ensure safety precautions: Before proceeding, ensure that your computer is powered off and unplugged from the wall outlet. This will prevent any electrical shocks or damage to your components during the removal process.
2. Disconnect power cables: Identify the power cables connected to the old PSU. There will be connectors leading to the motherboard, graphics card, storage drives, and other peripherals. Gently unplug each cable from its respective connector.
3. Take note of cable locations: While disconnecting the cables, take note of their locations to ensure proper reconnection with the new PSU. You can label the cables or take a picture for reference if needed.
4. Remove mounting screws or brackets: In most cases, the old PSU will be secured to the computer case with mounting screws or brackets. Use a Phillips screwdriver to remove the screws or disengage any brackets holding the PSU in place.
5. Slide out the old PSU: After removing the mounting screws or brackets, gently slide the old PSU out of its position. Be cautious not to damage any other components or cables within the case.
6. Set aside or dispose of the old PSU: Once the old PSU is removed, find a safe and secure location to set it aside. Alternatively, dispose of it following local regulations and guidelines for electronic waste disposal.
7. Clean the area: Take a moment to clean the area where the old PSU was located. Use compressed air or a soft brush to remove any dust or debris that accumulated over time. A clean workspace ensures better airflow within your computer case.
8. Inspect cables and connectors: While the old PSU is out of the case, it’s a good opportunity to inspect the power cables and connectors for any signs of damage or wear. Replace any cables that appear frayed or damaged.
9. Keep screws and brackets: If the screws or brackets used to secure the old PSU are in good condition, it may be useful to keep them for future use. Store them in a labeled container to avoid misplacement.
By following these steps, you can safely remove the old PSU from your computer. Remember to exercise caution while handling the old PSU and to keep your workspace clean and organized during the removal process.
Attaching the New PSU
Attaching the new power supply unit (PSU) is a vital step in the installation process. Here are the necessary steps to ensure a secure and proper attachment of the new PSU:
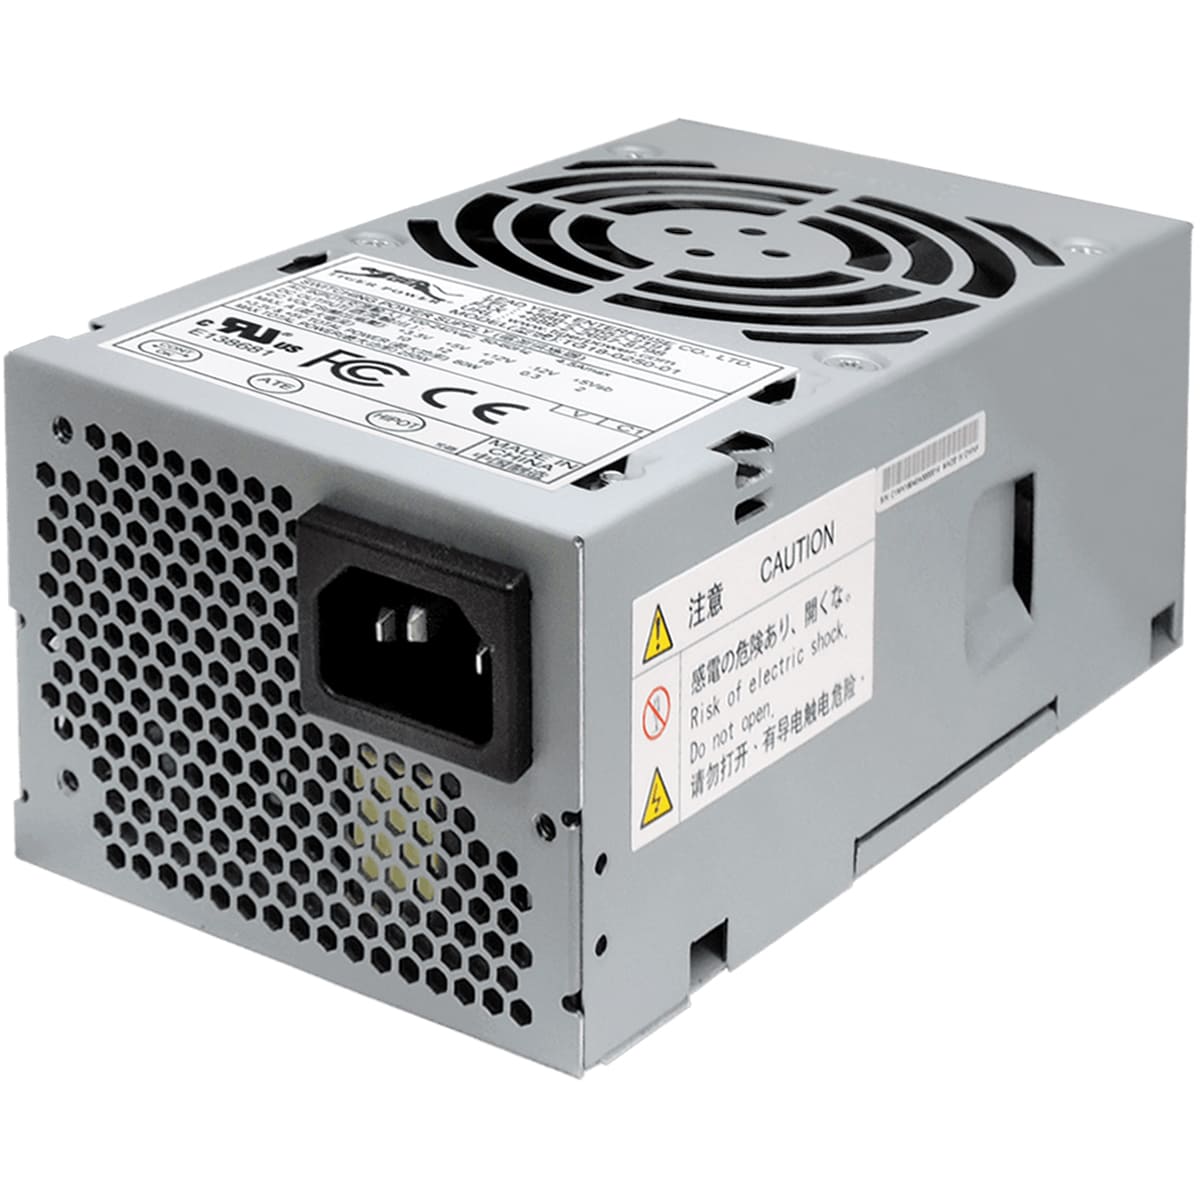
1. Position the new PSU: Place the new PSU in the designated area within your computer case. Align it with the mounting holes and ensure that the rear fan is facing the appropriate ventilation area.
2. Secure the PSU: Use the mounting screws or brackets that were used to secure the old PSU to attach the new PSU to the case. Tighten the screws or secure the brackets firmly, ensuring that the new PSU is snugly fitted in its position.
3. Connect the power cables: Referencing the notes or pictures you took earlier, connect the power cables from the new PSU to their respective connectors on the motherboard, graphics card, storage drives, and other peripherals. Ensure a secure and proper connection for each cable.
4. 24-pin motherboard power connector: Connect the 24-pin power connector from the new PSU to the corresponding socket on the motherboard. This connector provides power to the main components of your computer.
5. CPU power connector: Connect the power cable from the new PSU to the CPU power socket on the motherboard. This connector supplies power to the processor, ensuring its proper functioning.
6. Additional power connectors: If required, connect any additional power connectors from the new PSU to the peripherals or graphics card. These connectors will vary depending on the hardware configuration of your computer.
7. Cable management: Organize and manage the cables coming from the new PSU for neatness and improved airflow within the case. Use cable ties or other cable management solutions to secure and arrange the cables to avoid tangling or obstructing other components.
8. Double-check connections: Before closing up the computer case, double-check all your cable connections. Ensure that each cable is properly seated in its respective socket and that none are loose or disconnected.
9. Ensure proper ventilation: Verify that the fans in the PSU and the computer case have enough clearance to ensure proper ventilation. This will prevent overheating and maintain optimal performance of the components.
By following these steps, you can ensure a secure attachment of the new PSU in your computer. Take your time to verify the connections and ensure proper cable management before moving on to the next steps of the installation process.
Connecting Cables and Components
Once you have securely attached the new power supply unit (PSU) in your computer, it’s time to connect the necessary cables and components. Properly connecting these cables will ensure that power is distributed appropriately and that your system operates smoothly. Here are the steps to follow:
1. Refer to manufacturer documentation: Consult the manuals provided by the PSU manufacturer and your computer’s motherboard manufacturer for specific instructions on cable connections. These documents will outline the required cables and their corresponding connections.
2. 24-pin motherboard power connector: Connect the 24-pin power connector from the PSU to the corresponding socket on the motherboard. This connector supplies power to the main components of your computer, such as the CPU, RAM, and motherboard circuits.
3. CPU power connector: Connect the CPU power cable from the PSU to the designated CPU power socket on the motherboard. This connector ensures a stable power supply to the processor.
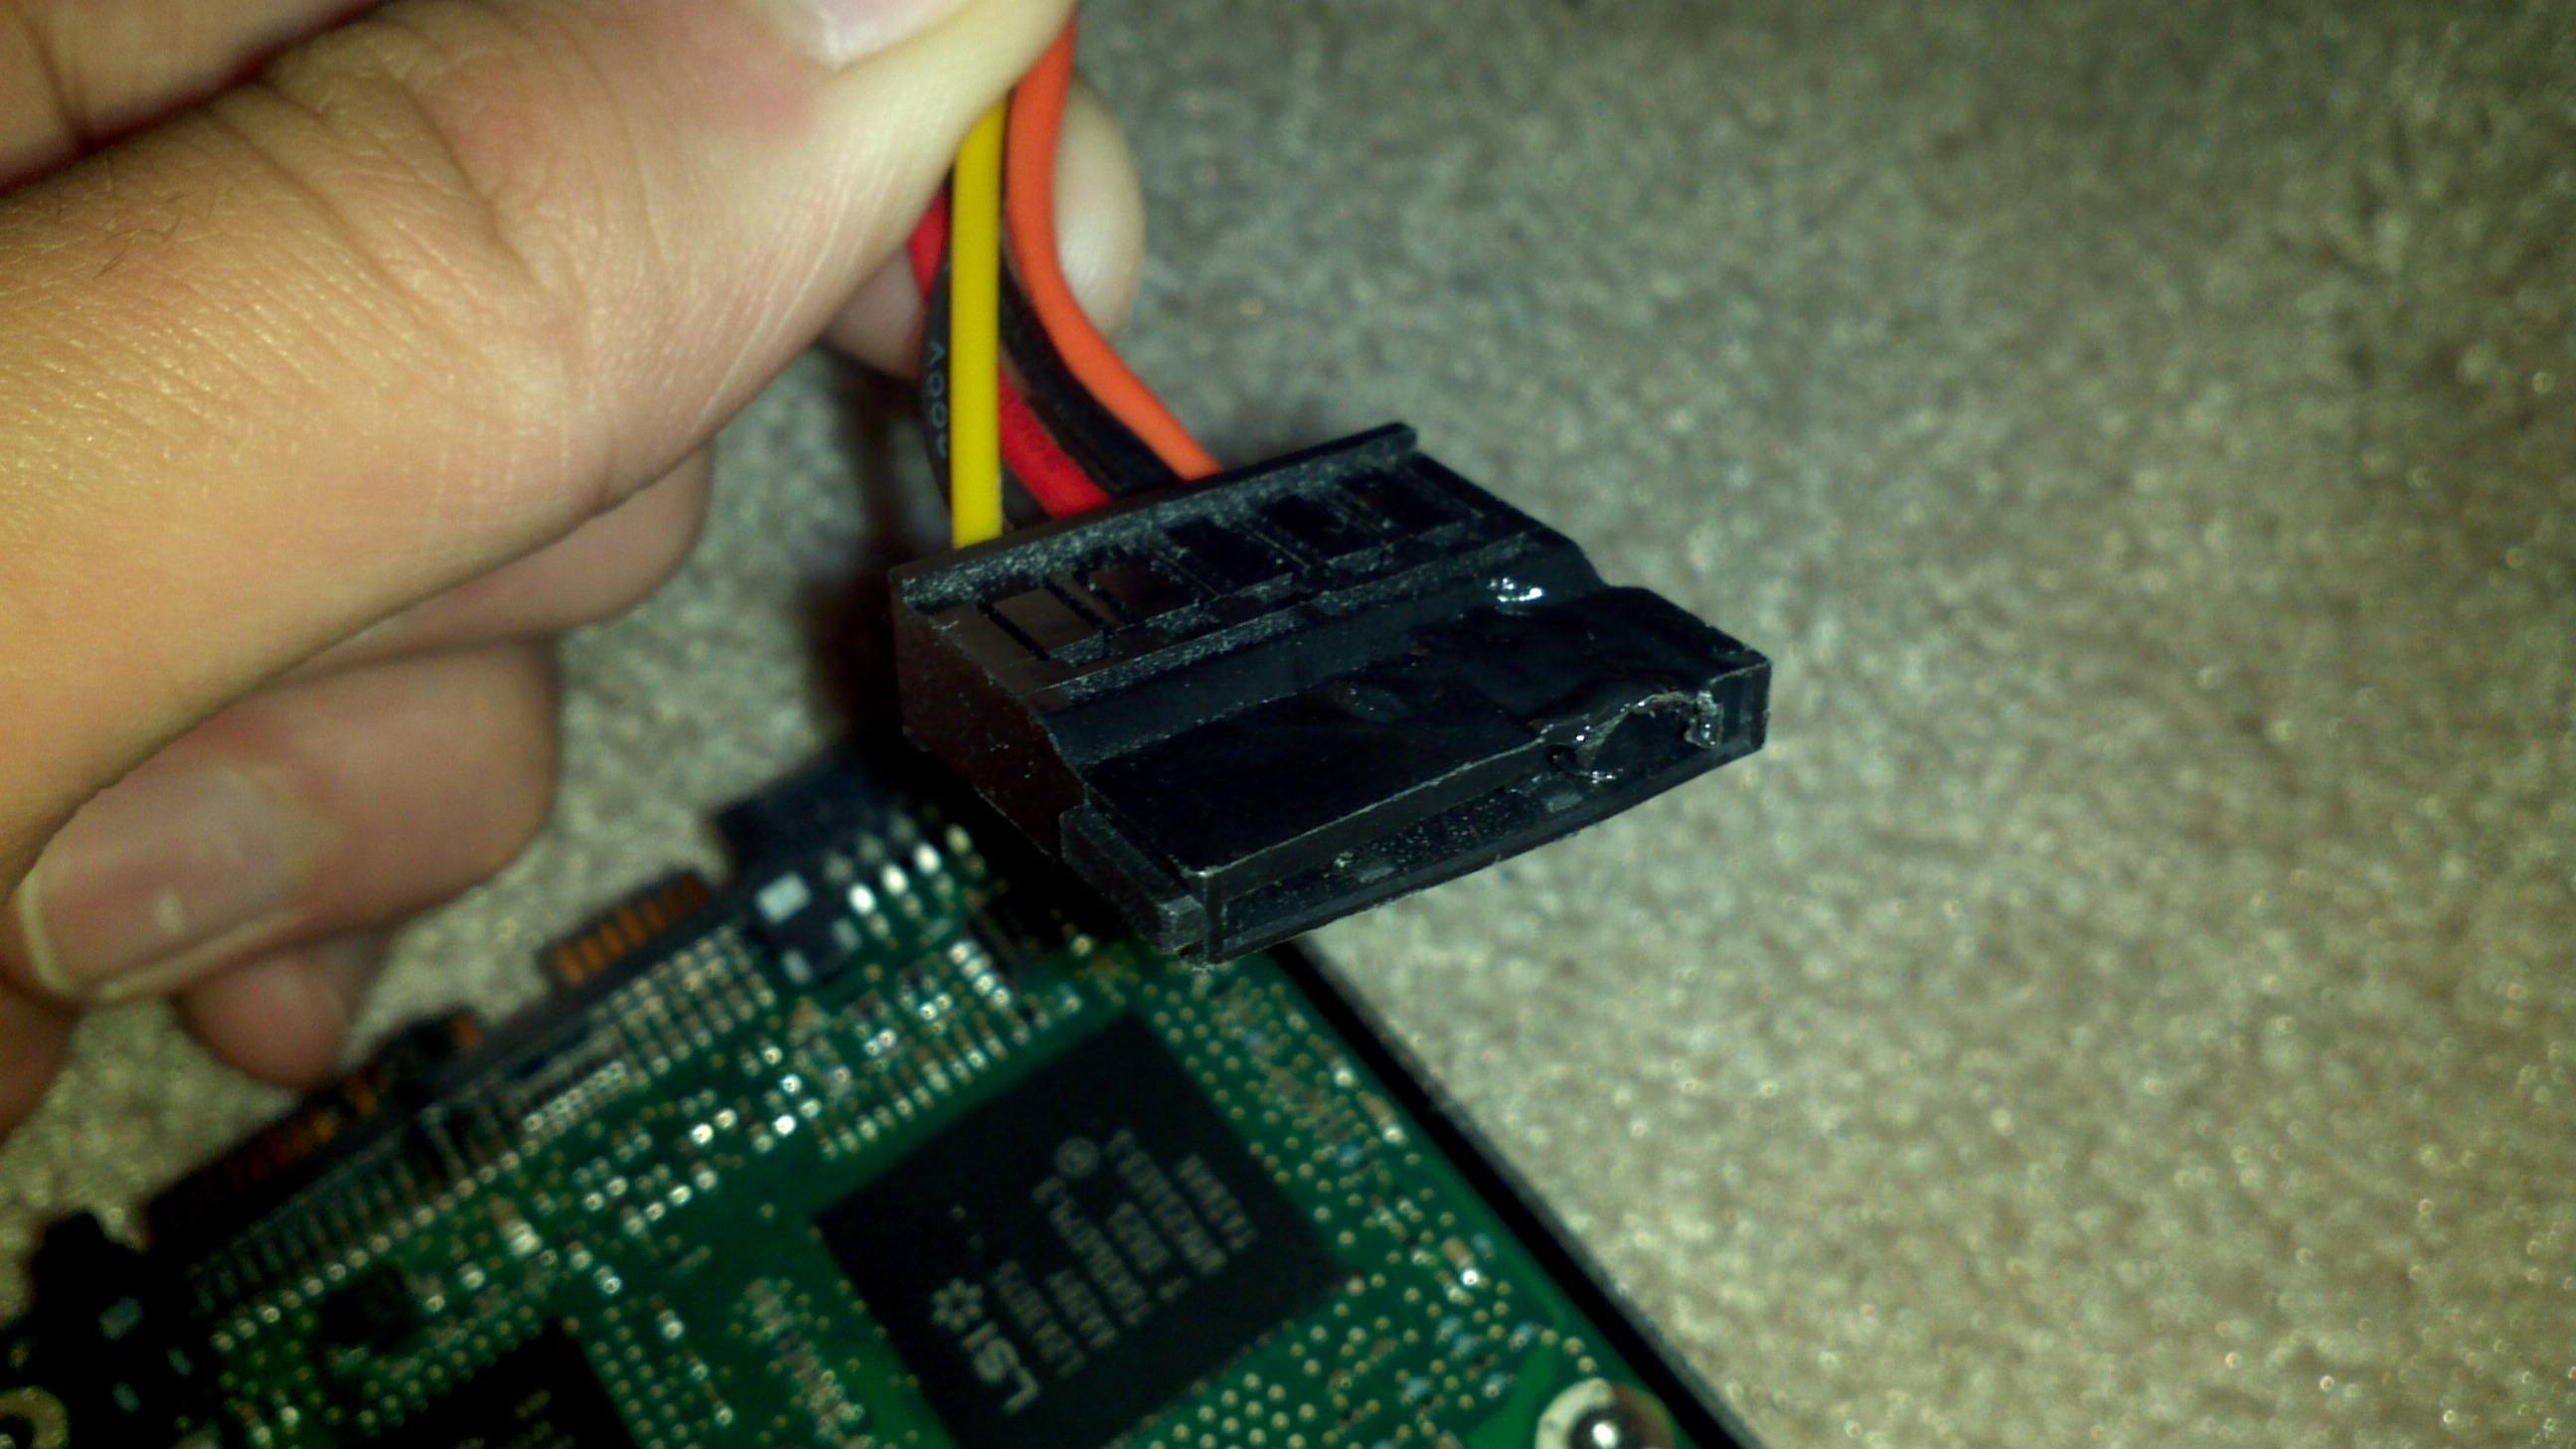
4. SATA and Molex connectors: Connect the SATA or Molex connectors from the PSU to the storage drives, such as hard drives and solid-state drives (SSDs). These connectors provide power to the drives, allowing them to function properly.
5. Graphics card power connectors: If your graphics card requires additional power, connect the appropriate PCIe power cables from the PSU to the graphics card. Refer to the graphics card’s documentation for the specific power requirements and connector types.
6. Peripheral power connectors: Connect any additional power connectors from the PSU to peripherals such as optical drives, fans, or liquid cooling systems. These connectors ensure proper power supply to these components.
7. Front panel connectors: Connect the front panel connectors (Power SW, Reset SW, HDD LED, etc.) from the case to the designated header pins on the motherboard. Refer to the motherboard’s documentation to ensure proper placement.
8. USB and audio connectors: Connect the USB and audio cables from the front panel of the case to the corresponding headers on the motherboard. These connections enable the use of USB ports and audio jacks on the front of the case.
9. Check all connections: Once all the cables are connected, double-check each connection to ensure they are secure. Loose connections may result in power issues or component malfunctions.
10. Organize and manage cables: Use cable ties or other cable management solutions to organize and secure the cables, promoting better airflow and a cleaner appearance inside the case. This step helps to prevent cable tangling and keeps the components free from obstructions.
By following these steps, you can successfully connect the necessary cables and components to your newly-installed PSU. Take your time to ensure each connection is secure and refer to the documentation for any specific instructions related to your particular hardware configuration.
Closing Up the Computer
After connecting all the necessary cables and components to your new power supply unit (PSU), it’s time to close up your computer. Properly closing the case ensures the protection of internal components and maintains optimal airflow. Follow these steps to securely close your computer:
1. Double-check connections: Before closing the case, double-check all the cable connections to make sure they are securely fastened. Verify that each cable is properly seated in its respective socket and none are loose or disconnected.
2. Ensure cable organization: Take a moment to ensure that the cables are neatly organized and managed inside the case. Use cable ties or other cable management solutions to secure and arrange the cables for better airflow and aesthetics.
3. Verify clearance: Check that there is adequate clearance between the components, especially the PSU and the graphics card, CPU cooler, and other large components. Ensure that there are no cable obstructions or potential sources of interference.
4. Fit the side panel: Place the side panel of the computer case back into position. Align it properly and gently slide it into place until it is secured in its natural closing position. Some cases may have screws or latches to secure the panel.
5. Tighten screws: If your computer case uses screws to secure the side panel, use a screwdriver to tighten them. Ensure that the screws are securely fastened but avoid overtightening, as this may damage the case or strip the screws.
6. Power cable management: Arrange the power cables outside the case in a neat and organized manner. Use cable clips or ties to secure them to the back of the case or in designated cable management areas, if available.
7. Clean the exterior: Take a moment to wipe down the exterior of the computer case with a soft cloth to remove any smudges, fingerprints, or dust. A clean and dust-free exterior enhances the appearance of your computer setup.
8. Plug in and power on: Once everything is securely closed up, plug your computer back into the wall outlet and power it on. Ensure that all components receive power and that your computer boots up properly.
9. Monitor for any issues: Keep an eye on the computer for any unusual behavior or errors during the initial startup and subsequent usage. If you notice any issues, consult the troubleshooting section of your PSU or seek assistance from a professional if needed.
By following these steps, you can confidently close up your computer after installing the new PSU. A properly closed and organized case not only protects your components but also ensures optimal performance and airflow, leading to a more efficient system overall.
Testing the PSU Installation
After successfully installing a new power supply unit (PSU) in your computer, it is crucial to test the installation to ensure that everything is functioning properly. Proper testing can help identify any potential issues or errors before they cause further complications. Here are the steps to effectively test the PSU installation:
1. Check power delivery: Turn on your computer and monitor the power delivery to various components. Ensure that all components, including the motherboard, CPU, graphics card, and storage drives, receive power and start up without any issues.
2. Monitor system performance: While the computer is running, pay attention to its overall performance. Ensure that it is running smoothly without any unexpected freezes, crashes, or slowdowns. Run some resource-intensive tasks or programs to stress-test the system and observe how it handles the load.
3. Verify fan operation: Ensure that all fans, including the ones in the PSU, are properly functioning. Monitor the fan speeds and make sure they are spinning without any unusual noises. Overheating can occur if the fans are not operating as intended.
4. Check temperature levels: Monitor the temperature levels of various components, especially the CPU and graphics card. You can use software utilities or BIOS settings to check the temperature readings. Ensure that the temperatures remain within safe operating limits, as overheating can damage your hardware.
5. Test power stability: Monitor the overall power stability of your system. Check for any sudden voltage drops or spikes that may indicate faulty power supply. You can use software tools or a dedicated voltage tester to measure the voltages at various points on the motherboard and ensure they remain within acceptable ranges.
6. Run diagnostics tools: Use system diagnostic tools to thoroughly test the functionality of your hardware, including the PSU. These tools can help identify any potential issues or errors that may have been overlooked during the installation process.
7. Monitor for any unusual behavior: Keep an eye out for any unusual behavior, error messages, or system instability during and after the testing process. Take note of any issues and investigate them further to identify the underlying cause.
8. Address any issues: If you encounter any issues or abnormalities during the testing process, refer to the troubleshooting guide provided by the PSU manufacturer or seek assistance from a professional. It’s important to address any problems promptly to avoid further damage or system instability.
By following these testing steps, you can ensure that the newly installed PSU is functioning as expected and providing the necessary power to your computer’s components. Testing is a critical step in the installation process and helps to ensure the long-term stability and reliability of your system.
Troubleshooting Common Issues
While installing a new power supply unit (PSU) in your computer, you may encounter certain issues that can hinder the proper functioning of your system. Here are some common problems that may arise during or after the installation process, along with troubleshooting steps:
1. System not powering on: If your computer fails to power on after installing the new PSU, double-check the connection between the PSU and the motherboard. Ensure that the 24-pin power connector is securely attached. Also, verify that the PSU is switched on and properly plugged into the wall outlet.
2. Unexpected system shutdowns: If your computer is experiencing sudden shutdowns or reboots, it may be due to inadequate power supply. Check if the new PSU provides sufficient wattage for your system. Consider upgrading to a higher wattage PSU if necessary.
3. Unstable system performance: If you are facing frequent crashes, freezes, or system instability after installing the new PSU, it may indicate a compatibility issue. Verify that the PSU is compatible with your motherboard and other hardware components. Update the motherboard’s BIOS firmware to ensure better compatibility.
4. Fan noise or overheating: If the fans in your PSU are making excessive noise or if your system is overheating, ensure that the PSU is properly ventilated. Check if the fan is functioning correctly and that no cables are obstructing airflow. Clean any accumulated dust or debris that may be affecting cooling.
5. Error messages or hardware failures: If you encounter error messages or hardware failures after installing the new PSU, check the connections between the PSU and the affected components. Ensure that all cables are properly seated and that there are no loose connections. Test the affected components, such as the graphics card or storage drives, on another system to determine if the issue lies with the PSU or with the component itself.
6. Power fluctuations or voltage irregularities: If you notice power fluctuations or irregular voltage levels, such as sudden drops or spikes, it may indicate a faulty PSU. Test the PSU using a dedicated voltage tester or consult a professional to assess the issue. Consider swapping the PSU with a known working unit to confirm if it is the source of the problem.
7. Incompatible connectors or cables: If you encounter issues with incompatible connectors or cables, ensure that you have selected the correct PSU with the required connectors for your specific hardware. Consult the manuals and documentation of both the PSU and your components to ensure proper compatibility.
8. Seeking professional assistance: If you have exhausted troubleshooting options and are still experiencing difficulties, it may be necessary to seek professional assistance. Certified technicians or IT experts can diagnose and resolve complex issues that may require specialized knowledge or equipment.
By troubleshooting these common issues, you can address potential problems that may arise during or after the installation of a new PSU. Remember to refer to the documentation provided with your PSU and consult technical support if needed. With patience and careful investigation, most issues can be resolved, ensuring a smooth and functional system.
Final Thoughts and Recap
Installing a power supply unit (PSU) in your computer is a task that requires careful consideration and attention to detail. By following the proper steps and guidelines, you can ensure a successful installation process and avoid potential issues. Here is a recap of the key points to remember:
1. Choose the right PSU: Select a PSU that meets the power requirements of your system, has an appropriate efficiency rating, and is compatible with your hardware.
2. Gather the necessary tools and materials: Ensure you have the required tools such as a screwdriver and cable ties to facilitate the installation process.
3. Prepare your computer for installation: Power off and unplug your computer, ground yourself, and find a suitable workspace before opening the case.
4. Remove the old PSU: Disconnect the power cables, remove the mounting screws or brackets, and safely remove the old PSU from the case.
5. Attach the new PSU: Position the new PSU, secure it with mounting screws, and ensure the fan is facing the appropriate direction for optimal airflow.
6. Connect cables and components: Refer to the manufacturer’s documentation to properly connect the cables, including the 24-pin motherboard power connector, CPU power connector, and additional power connectors required for your peripherals.
7. Close up the computer: Double-check all connections, organize and manage cables for better airflow, and securely close the computer case.
8. Test the PSU installation: Power on the computer, monitor power delivery, check system performance, and ensure proper fan operation and temperature levels.
9. Troubleshoot common issues: Address any issues that arise during or after the installation process, such as system power issues, instability, or compatibility problems.
By following these guidelines, you can successfully install a new PSU in your computer, ensuring proper power supply and optimal performance of your system. If you encounter any difficulties or uncertainties, it is recommended to consult the documentation provided by the PSU and your computer’s manufacturers, or seek assistance from a professional technician.
Remember, proper installation and maintenance of your PSU contribute to the long-term reliability and functionality of your computer. With care and attention, you can enjoy a stable and efficient system powered by a well-installed PSU.