Introduction
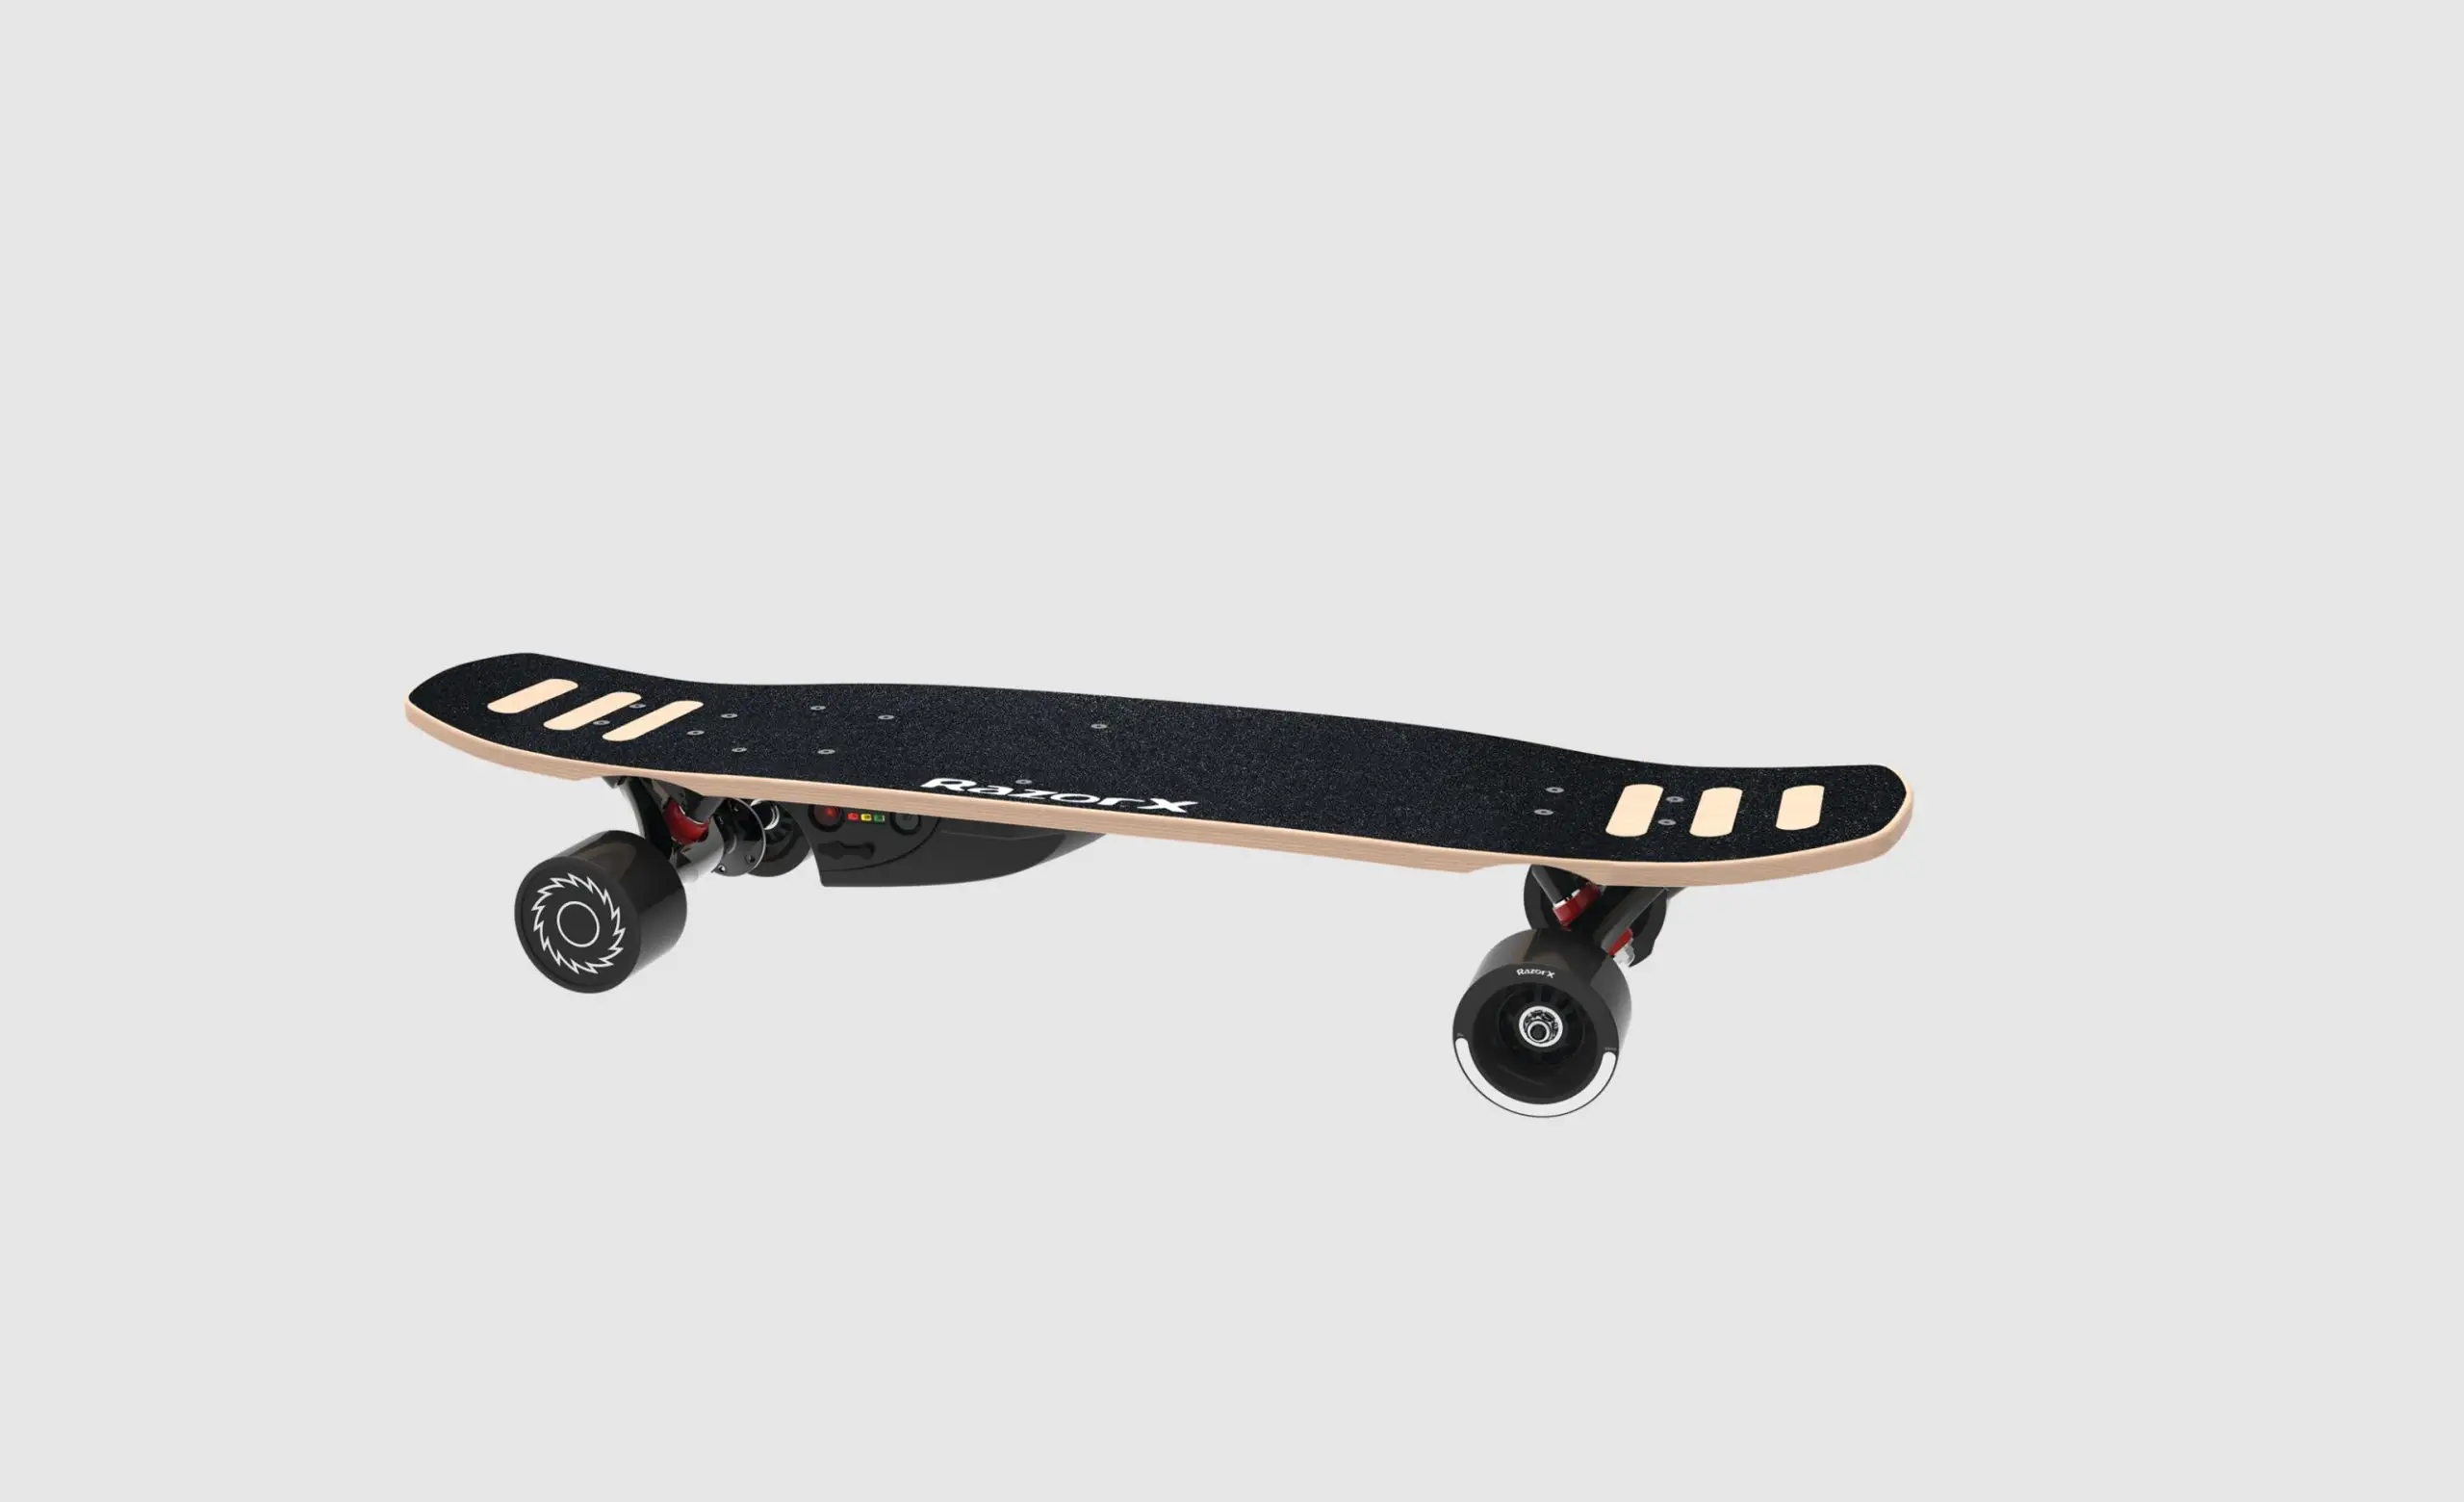
Electric skateboards have gained popularity in recent years, offering a thrilling and eco-friendly mode of transportation. If you’re an avid skateboarder or just someone who loves innovative gadgets, building your own electric skateboard can be a rewarding project. Not only does it allow you to customize your board to your specific needs, but it also gives you the satisfaction of riding a self-built, high-performance machine.
However, before you embark on this electrifying adventure, it’s essential to have a solid understanding of how to wire an electric skateboard. Proper wiring ensures the seamless integration of the motor, battery, and other electronic components, ensuring a smooth and controlled ride.
In this guide, we will walk you through the step-by-step process of wiring an electric skateboard. We’ll cover the necessary tools and materials, safety precautions, and provide detailed instructions to help you wire your skateboard like a pro. So, whether you’re a newbie or an experienced skateboarding enthusiast, let’s dive in and discover how to bring your electric skateboard to life!
Safety Precautions
Before you begin wiring your electric skateboard, it’s crucial to prioritize safety and take necessary precautions. Here are some essential safety measures to keep in mind:
- Protective Gear: Always wear a helmet, knee pads, elbow pads, and wrist guards while riding an electric skateboard. These protective gears can minimize the risk of severe injuries in case of accidents or falls.
- Electricity Awareness: Be aware that working with electricity poses certain risks. Ensure that your hands are dry, and you are in a well-ventilated area to avoid any possibility of electrocution or fire hazards.
- Disconnect Power Source: Before starting any wiring work, disconnect the power source. This means removing the battery from the electric skateboard to prevent any accidental electrical shocks.
- Double-Check Connections: Before riding your electric skateboard, double-check all the connections, including motor connections, battery connections, and ESC connections. Loose or incorrect connections can lead to malfunctioning and may compromise your safety.
- Proper Insulation: Ensure that all exposed wires and connections are properly insulated, using electrical tape, heat shrink tubing, or other suitable insulating materials. This step prevents short circuits and reduces the risk of electrical issues.
- Familiarize Yourself with User Manual: Read and understand the user manuals provided by the manufacturers of the components you are using. This will help you gain a deeper understanding of the wiring process and any specific safety guidelines that need to be followed.
By adhering to these safety precautions, you can minimize the chances of accidents or injuries while wiring and riding your electric skateboard. Always prioritize safety and take necessary measures to protect yourself and others.
Tools and Materials
Before diving into the process of wiring your electric skateboard, it’s important to gather all the necessary tools and materials. Having the right equipment will make the task more efficient and ensure that you have everything you need at hand. Here’s a list of the essential tools and materials you will need:
Tools:
- Screwdriver set (Phillips and flathead)
- Hex key set
- Wire strippers
- Wire cutters
- Soldering iron and solder
- Heat gun or lighter
- Electrical tape
- Zip ties
Materials:
- Electric skateboard deck
- Truck set
- Motor mount
- Electric skateboard motor
- Electronic Speed Controller (ESC)
- Skateboard wheels
- Skateboard bearings
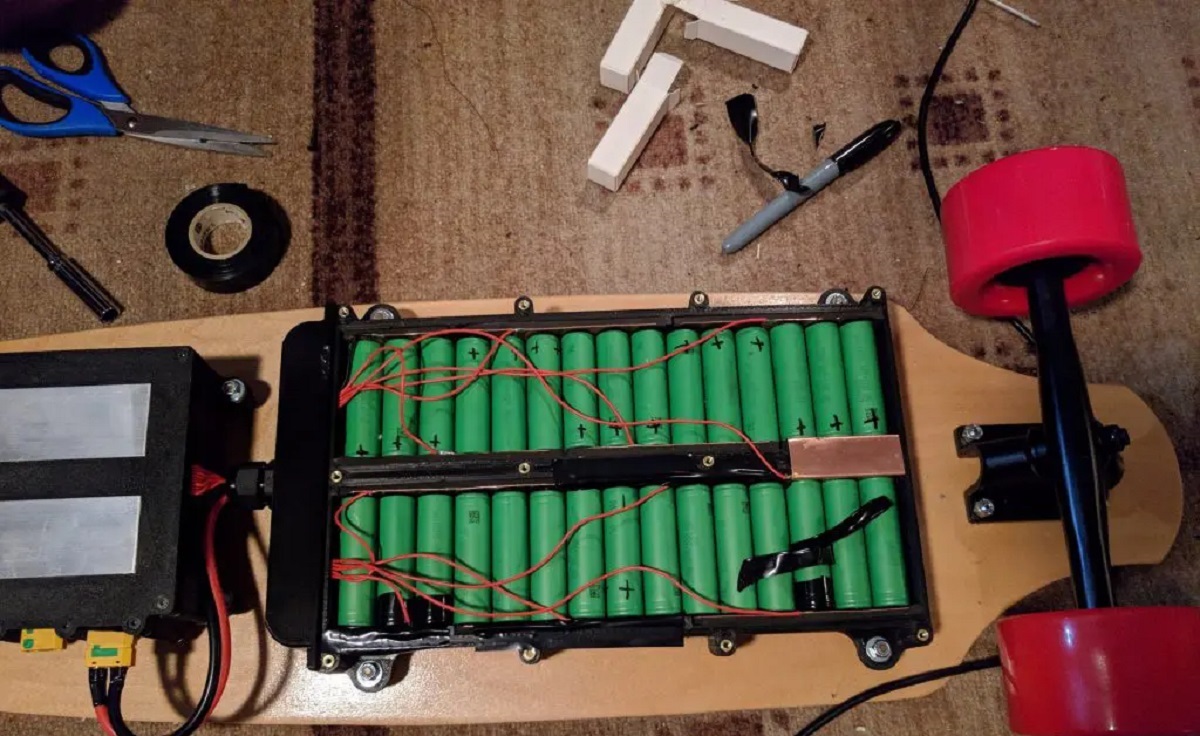
- Lithium-ion battery pack
- Battery charger
- Remote control transmitter and receiver
- Mounting hardware (screws, nuts, and bolts)
When selecting these components, it’s essential to ensure their compatibility and quality. Research reputable brands and read user reviews to make informed choices. Additionally, consider the specifications and power requirements that align with your desired riding experience.
Having these tools and materials ready will streamline the wiring process and enable you to complete the project efficiently. Take the time to gather everything before you begin, and make sure you have a clean and organized workspace to work comfortably.
Step 1: Gather all the necessary components
Before you embark on the process of wiring your electric skateboard, it’s important to gather all the necessary components. Having everything you need at hand will ensure a smooth and streamlined process. Here’s a breakdown of the essential components you will need:
Electric Skateboard Deck:
Start by selecting an electric skateboard deck that suits your preferences and riding style. Consider the shape, size, and material of the deck to ensure it meets your needs. Make sure it has enough space to accommodate your chosen electronic components.
Truck Set:
Next, you’ll need a truck set that includes the baseplate, hanger, and bushings. Choose trucks that are compatible with your skateboard deck and provide a stable and smooth ride.
Motor Mount:
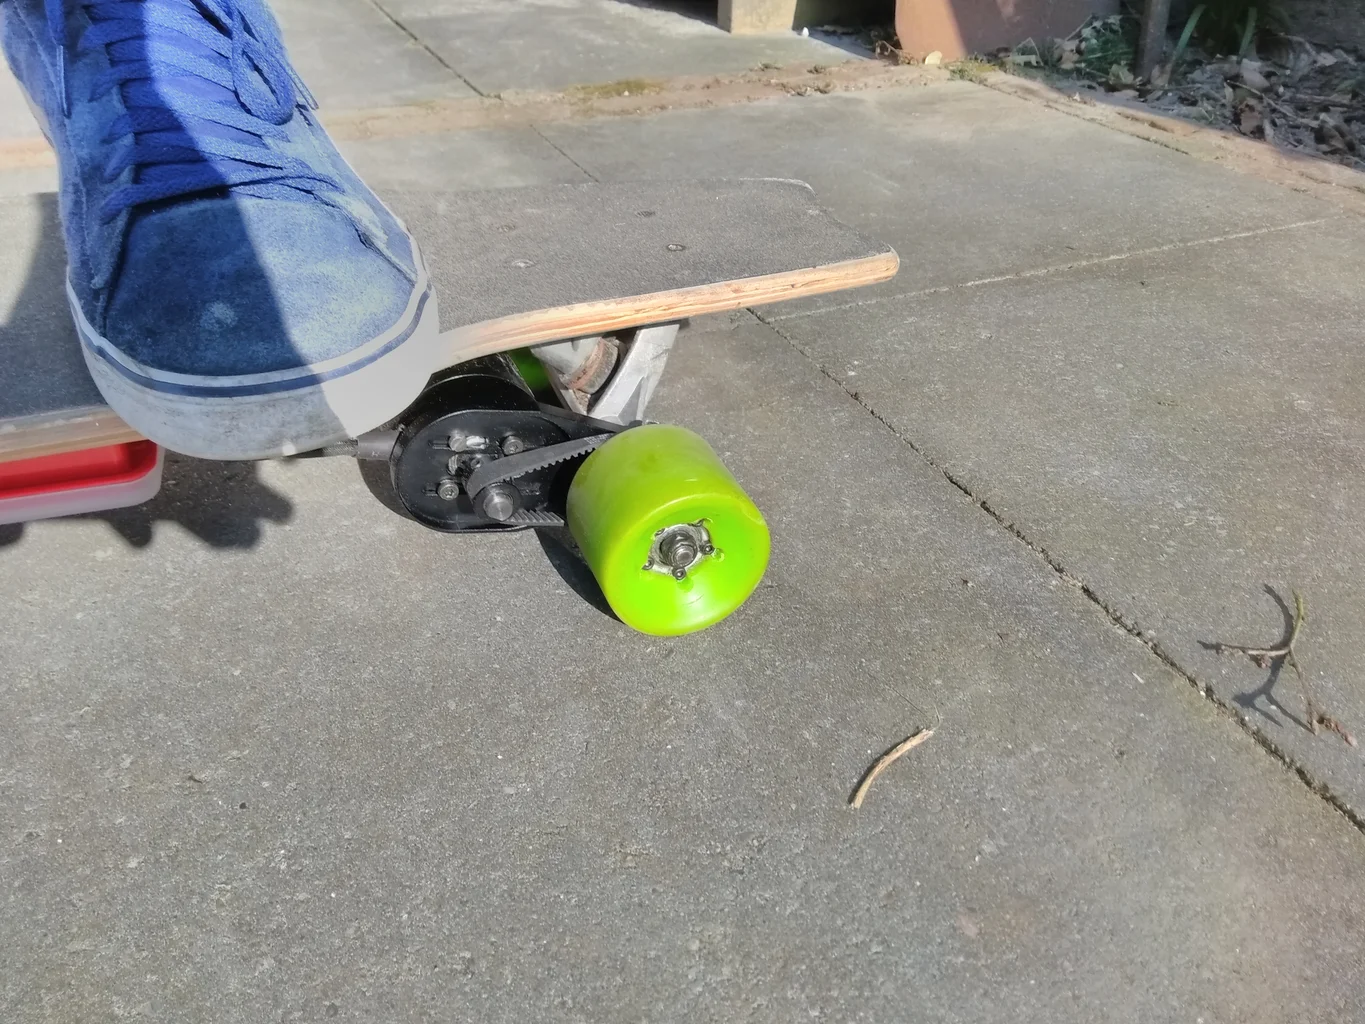
Select a motor mount that fits your chosen electric skateboard motor. Ensure it is made of sturdy materials and provides a secure attachment for the motor to the truck.
Electric Skateboard Motor:
Choose a motor that delivers the desired power and torque for your electric skateboard. Consider the motor’s size, KV rating (RPM per volt), and wattage to suit your riding preferences and intended terrain.
Electronic Speed Controller (ESC):
An ESC controls the motor’s speed and acceleration, providing a smooth and controlled riding experience. Choose an ESC that is compatible with your motor and offers features like regenerative braking and programmable settings.
Skateboard Wheels and Bearings:
Select high-quality skateboard wheels and bearings that provide a smooth and comfortable ride. Consider the durometer rating of the wheels and the ABEC rating of the bearings to match your riding style and surface conditions.
Lithium-ion Battery Pack:
Choose a lithium-ion battery pack that provides sufficient power and range for your electric skateboard. Consider the voltage, capacity, and discharge rating of the battery to meet your desired riding requirements.
Battery Charger:
Ensure you have a compatible battery charger that can safely and efficiently charge your lithium-ion battery pack. Follow the manufacturer’s guidelines for charging and maintenance to prolong the lifespan of your battery.
Remote Control Transmitter and Receiver:
Select a reliable remote control transmitter and receiver that allows you to control the speed and braking of your electric skateboard. Opt for a model with a comfortable grip and reliable signal transmission.
Mounting Hardware:
Lastly, gather the necessary screws, nuts, and bolts to secure the various components to your electric skateboard. Make sure you have the appropriate sizes and lengths to ensure a secure and stable assembly.
By gathering all these components before you start wiring your electric skateboard, you’ll have everything you need at hand, minimizing any delays or complications during the process. Take the time to carefully select high-quality components to ensure a reliable and enjoyable riding experience.
Step 2: Assemble the motor mount and trucks
Once you have gathered all the necessary components for your electric skateboard, it’s time to assemble the motor mount and trucks. This step is crucial as it provides the foundation for attaching the motor and ensuring stability and proper functioning. Follow these steps to assemble the motor mount and trucks:
- Start by attaching the motor mount to the truck’s baseplate. Place the motor mount on the truck and align it with the mounting holes on both the baseplate and the motor mount itself.
- Using the appropriate screws and bolts, secure the motor mount to the baseplate. Make sure to tighten them firmly but not excessively, as overtightening can damage the threads or the components.
- Double-check the alignment and stability of the motor mount. Ensure that it is securely fastened and does not wobble or move when subjected to slight pressure.
- Once the motor mount is securely attached, it’s time to install the trucks onto the skateboard deck. Place the trucks on the underside of the deck, aligning them with the pre-drilled holes.
- Insert the screws provided with the truck set through the mounting holes on the deck and into the holes on the trucks. Start threading the screws by hand to ensure they are properly aligned.
- Using a screwdriver or a drill with the appropriate bit, tighten the screws until the trucks are securely attached to the skateboard deck. Be careful not to overtighten, as it can cause damage to the deck or strip the screws.
- Give the trucks a gentle shake to ensure they are firmly attached and do not have any significant movement.
- With the motor mount and trucks now assembled, take a moment to inspect the overall stability and alignment of the components. Make any necessary adjustments or tighten any loose screws or bolts.
By following these steps, you have now successfully assembled the motor mount and trucks of your electric skateboard. This solid foundation sets the stage for the next steps of wiring and installing the electronic components. Take your time to ensure everything is securely attached and aligned before moving on to the next steps.
Step 3: Install the battery and ESC
With the motor mount and trucks assembled, it’s time to move on to installing the battery and Electronic Speed Controller (ESC) on your electric skateboard. The battery provides the power source, while the ESC controls the motor’s speed and acceleration. Follow these steps to properly install the battery and ESC:
- Identify an appropriate location on your skateboard deck to mount the battery. Consider factors such as weight distribution, accessibility, and protection from impacts or excessive vibrations.
- Using the provided mounting hardware, secure the battery to the skateboard deck. Follow the manufacturer’s instructions for the specific mounting method recommended for your battery model.
- Ensure the battery is mounted securely and does not move or wobble when shaking the skateboard. Double-check that the battery’s cables or connectors are not interfering with the motor mount, trucks, or wheels.
- Next, locate a suitable position on your electric skateboard to install the ESC. Common locations include the underside of the skateboard deck or inside an enclosure specifically designed for the ESC.
- Secure the ESC using the provided mounting hardware or adhesive. Make sure it is positioned securely and does not interfere with the functionality or balance of the skateboard.
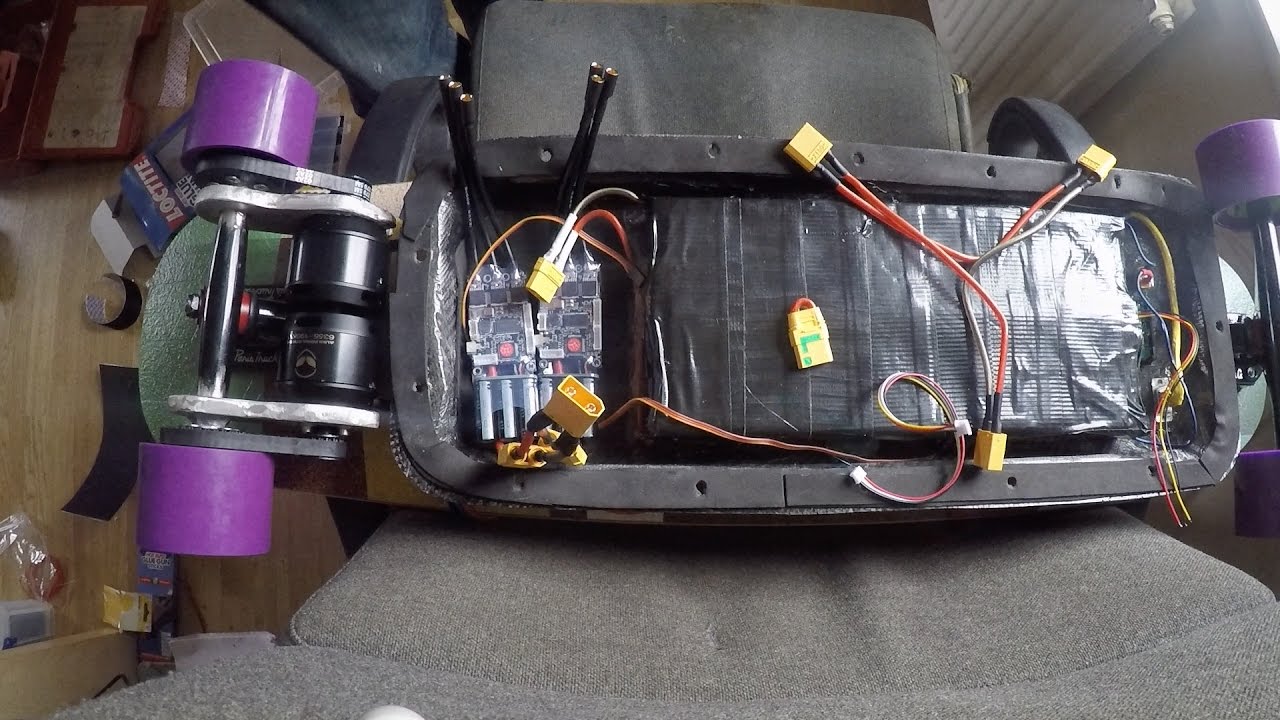
- Take the time to organize and route the wires from the battery and ESC neatly along the skateboard’s underside. Use zip ties or adhesive-backed clips to secure and guide the wires, reducing the risk of tangles or damage.
- Inspect the installation of the battery and ESC, ensuring all connections are secure and free from any potential damage. Check that the wires are not pinched or strained when the skateboard is in motion.
- Lastly, test the positioning and balance of your skateboard with the installed battery and ESC. Ensure it feels stable and balanced when lifted off the ground and when you stand on it.
By following these steps, you have successfully installed the battery and ESC on your electric skateboard. Ensuring proper mounting and wire management is crucial to maintain the functionality and safety of your skateboard. Take your time to double-check the installations and ensure everything is securely attached before proceeding to the next steps in the wiring process.
Step 4: Connect the motor to the ESC
With the battery and Electronic Speed Controller (ESC) installed, it’s time to connect the motor to the ESC on your electric skateboard. This step is essential as it establishes the connection between the motor and the controller, allowing the ESC to regulate the motor’s speed and acceleration. Follow these steps to properly connect the motor to the ESC:
- Identify the motor wires and ESC wires. Most electric skateboard motors have three wires, usually color-coded as phase wires, while the ESC has corresponding three-phase wires.
- Strip off a small section of insulation from each end of the motor and ESC wires using wire strippers. This will expose the conductive wire beneath for a reliable connection.
- Take note of the color coding of the wires. Typically, the motor wires will match the color code specified by the ESC manufacturer. However, it’s essential to verify the specific color-coding in the user manual or instructions provided.
- Arrange the motor and ESC wires side by side, ensuring they are correctly aligned for connection.
- Using a soldering iron, carefully solder each pair of matching wires together. Apply a small amount of solder and ensure a robust connection between the wires. Be cautious not to apply excessive heat that may damage the insulation or other components.
- After soldering the connections, use heat shrink tubing to cover each soldered joint. Slide the heat shrink tubing over the soldered area and use a heat gun or lighter to shrink the tubing, providing insulation and protection for the connections.
- Double-check all the motor-to-ESC connections, ensuring that each wire is securely soldered and insulated with heat shrink tubing.
- Inspect the overall wiring to ensure there are no loose connections or exposed wires that could cause short circuits or electrical hazards.
By following these steps, you have successfully connected the motor to the ESC on your electric skateboard. Properly soldering and insulating the wires ensures a reliable and secure connection, minimizing the risk of malfunctioning or electrical issues. Take your time to double-check the connections and ensure everything is properly soldered and insulated before moving on to the next steps in the wiring process.
Step 5: Wire the receiver to the ESC
After connecting the motor to the Electronic Speed Controller (ESC), the next step in wiring your electric skateboard is to wire the receiver to the ESC. The receiver serves as the link between the remote control and the ESC, allowing you to control the speed and braking of the skateboard. Follow these steps to properly wire the receiver to the ESC:
- Locate the receiver, which is typically a small module that receives signals from the remote control transmitter.
- Identify the signal wire, power wire, and ground wire ports on both the receiver and the ESC. These ports may be labeled or marked for easy identification.
- Connect the signal wire from the receiver to the signal port on the ESC. Ensure a secure connection by inserting the wire into the port and using a small amount of pressure to push it in. Double-check that the connection is snug and not loose.
- Connect the power wire from the receiver to the power port on the ESC. Similarly, make sure the connection is secure and that the wire is properly inserted into the port. Ensure proper polarity—the positive wire connects to the positive terminal, and the negative wire connects to the negative terminal.
- Connect the ground wire from the receiver to the ground port on the ESC. Double-check the connection to ensure a secure and proper ground connection.
- Inspect all the connections between the receiver and the ESC to ensure they are secure and properly inserted into the respective ports.
- Organize and route the wires along the skateboard’s underside, keeping them neat and clear of any potential obstructions or interference.
- Ensure that there are no loose wires or exposed connections that could cause electrical hazards or interfere with the functionality of the receiver and ESC.
By following these steps, you have successfully wired the receiver to the Electronic Speed Controller (ESC) on your electric skateboard. Properly connecting and securing the wires ensures a reliable and consistent signal transmission between the remote control and the ESC, allowing for smooth control of the skateboard’s speed and braking. Take the time to inspect the connections and ensure everything is securely connected before proceeding to the next steps in the wiring process.
Step 6: Connect the battery to the ESC
After wiring the receiver to the Electronic Speed Controller (ESC), the next step in wiring your electric skateboard is to connect the battery to the ESC. This step establishes the power source for your skateboard, allowing the ESC to control the motor’s speed and acceleration. Follow these steps to properly connect the battery to the ESC:
- Identify the positive and negative terminals on both the battery and the ESC. These terminals are usually labeled, marked, or color-coded for easy identification.
- Ensure that the power switch on the ESC is in the off position before connecting the battery.
- Connect the positive wire from the battery to the positive terminal on the ESC. Insert the wire securely into the terminal and ensure a snug connection.
- Connect the negative wire from the battery to the negative terminal on the ESC. Similarly, ensure a secure and proper connection.
- Double-check all the connections between the battery and the ESC to ensure they are secure and properly inserted into the respective terminals.
- Inspect the overall wiring to ensure that there are no loose connections or exposed wires that could cause short circuits or electrical hazards.
- Once all the connections are secure, turn on the power switch on the ESC to supply power to the electronic system.
- Double-check that the battery and ESC are functioning properly. Prepare for your first test ride by ensuring the remote control is connected and the motor responds appropriately to the remote control’s commands.
By following these steps, you have successfully connected the battery to the Electronic Speed Controller (ESC) on your electric skateboard. Properly securing the connections and ensuring the correct polarity is essential to prevent electrical issues and ensure the reliable and safe operation of your electric skateboard. Take the time to inspect the connections and ensure everything is securely connected and functioning properly before proceeding to the next steps in the wiring process.
Step 7: Test the functionality of the electronic system
After connecting the battery to the Electronic Speed Controller (ESC), it’s important to test the functionality of the electronic system on your electric skateboard. This step ensures that all the components are working properly, allowing you to identify and address any potential issues before riding. Follow these steps to test the functionality of the electronic system:
- Ensure that the battery is fully charged before testing the electronic system.
- Turn on the remote control transmitter and make sure it is properly synced with the receiver on the skateboard.
- With the skateboard placed on a flat and stable surface, turn on the power switch on the ESC to provide power to the electronic system.
- Using the remote control, gradually increase the throttle and observe the response from the motor. The motor should start spinning smoothly and progressively increase in speed.
- Test the braking function by gradually reducing the throttle and observing the motor’s deceleration. The motor should slow down smoothly and come to a complete stop.
- Ensure that the acceleration and braking response from the motor is consistent and controllable. If there are any irregularities or issues, such as sudden jerks or delays in response, troubleshoot the electronic connections and configurations.
- Check if the remote control is providing accurate and responsive control over the motor’s speed and braking. If there are any issues with the remote control’s functionality, ensure it is properly synced and powered.
- If everything is functioning properly, take the skateboard for a short test ride in a safe and open area. Pay attention to the motor’s performance, braking, and overall stability of the skateboard.
- Monitor the battery’s voltage during the test ride, ensuring that it does not drop significantly or become excessively hot.
- If you notice any unusual behavior or issues during the test, stop riding and troubleshoot the potential problems. It could be a loose connection, misconfigured settings, or any other technical issue that needs to be addressed.
By following these steps and thoroughly testing the functionality of the electronic system, you are ensuring a safe and enjoyable riding experience on your electric skateboard. It allows you to identify any issues or improvements needed before embarking on longer rides or more challenging terrains.
Step 8: Secure and tidy up the wiring
Once you have tested the functionality of the electronic system on your electric skateboard, it’s time to secure and tidy up the wiring. Proper organization and management of the wires not only improve the aesthetics of your skateboard but also ensure the longevity and reliability of the electrical components. Follow these steps to secure and tidy up the wiring:
- Inspect the entire wiring system, including the motor, ESC, battery, and receiver connections. Check for any loose wires, exposed connectors, or areas where the wires could potentially become entangled or damaged.
- Secure the wires using zip ties or adhesive-backed clips. Group together wires that run parallel to each other and use zip ties to hold them together. This reduces the chances of them coming loose or getting tangled during rides.
- Make sure to leave some slack in the wires to allow for movement as the skateboard flexes or turns. Avoid pulling the wires too tight to prevent strain on the connections.
- Use electrical tape or heat shrink tubing to cover any exposed connectors or soldered joints. This provides insulation and protection against moisture, dust, and other potential sources of damage.
- If you have excess wire length, neatly coil it up and secure it out of the way to prevent it from interfering with the skateboard’s moving parts or getting caught on anything.
- Ensure that all wires are clear of moving components such as wheels, trucks, or the motor pulley. Check for any potential points of friction or contact that might cause damage to the wires.
- Inspect the battery’s mounting and make sure it is securely fastened to the skateboard deck. Double-check for any potential issues with the battery’s stability and vibration resistance.
- Check all the connections one final time to ensure that they are secure and properly insulated. Pay attention to areas where components are mounted or where the wires transition between different components.
- Give the skateboard a final visual inspection to ensure that the wiring is neatly organized, tucked away, and not dangling or exposed in any way.
- Properly secure any enclosures or covers to protect the electronic components from external elements such as water, dirt, or impacts. This helps to extend their lifespan and maintain their functionality.
By following these steps to secure and tidy up the wiring, you are not only improving the overall appearance of your electric skateboard but also ensuring the longevity and reliability of the electrical system. Well-organized and protected wiring reduces the risk of performance issues, damage, and accidents caused by loose or exposed connections. Take the time to neatly secure and manage the wiring to maintain the optimal operation and safety of your electric skateboard.
Conclusion
Wiring an electric skateboard may seem like a daunting task, but with the right knowledge and guidance, it can be a rewarding experience. By following the step-by-step process outlined in this guide, you can successfully wire your own electric skateboard and have it ready for thrilling rides.
Throughout the process, we emphasized the importance of safety precautions, such as wearing protective gear and working in a well-ventilated area. Taking these measures ensures not only your safety but also the longevity and performance of the electrical components.
We also highlighted the significance of gathering the necessary tools and materials before starting the project. Having everything at hand saves time and minimizes potential delays during the process.
Each step, from assembling the motor mount and trucks to connecting the battery and ESC, required attention to detail and careful execution. Proper wiring, soldering, and insulation of connections play a crucial role in ensuring the efficient and safe operation of your electric skateboard.
Finally, we emphasized the importance of testing the functionality of the electronic system before getting on your skateboard. This step allows you to identify any potential issues and troubleshoot them, guaranteeing a smooth and enjoyable riding experience.
By securing and tidying up the wiring, you not only improve the aesthetics of your electric skateboard but also protect the components from damage and maintain their reliability over time.
In conclusion, the process of wiring an electric skateboard requires patience, attention to detail, and adherence to safety precautions. With proper planning and execution, you can successfully wire your electric skateboard and embark on thrilling rides with confidence and excitement.


