Introduction
Welcome to the world of electric skateboards, where the thrill of cruising on a board meets the power of an electric motor. Electric skateboards have become increasingly popular, offering a fun and eco-friendly way to navigate through the city streets. While there are many high-end electric skateboards available on the market, they often come with hefty price tags. But fear not, because in this article, we will show you how to make a cheap electric skateboard.
Building your own electric skateboard not only allows you to save money but also gives you the freedom to customize it to your liking. Plus, it’s a great DIY project that allows you to learn more about the inner workings of electric skateboards.
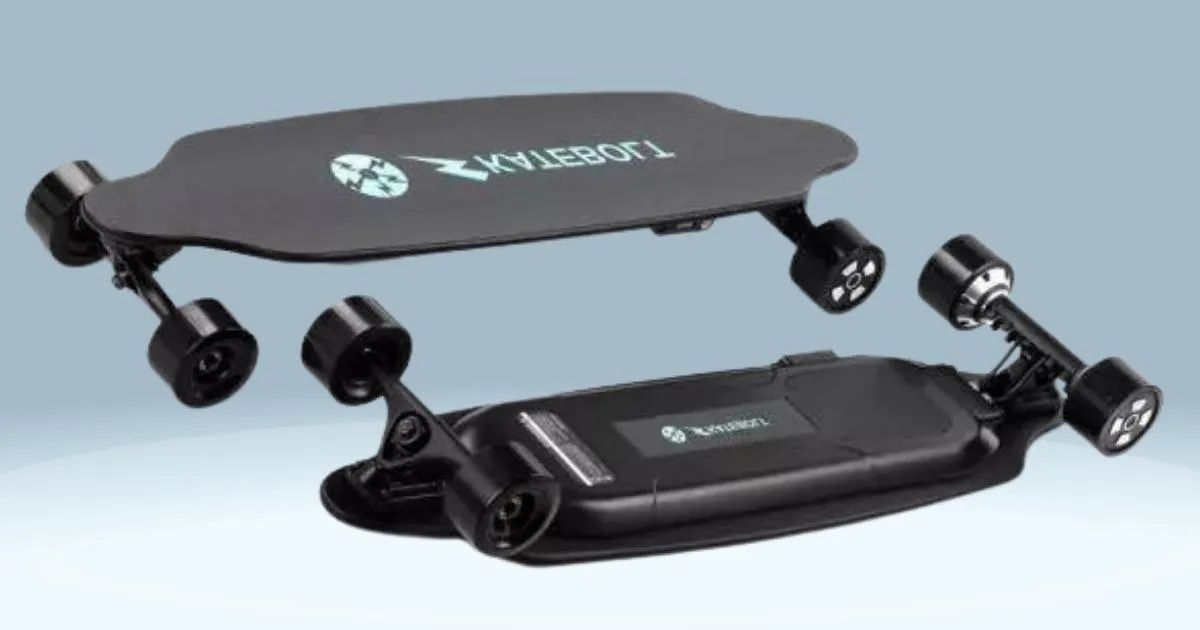
Before we dive into the nitty-gritty of building a cheap electric skateboard, it’s important to have a basic understanding of the components that make it tick. At its core, an electric skateboard consists of four essential parts – the skateboard deck, the motor, the battery, and the motor controller.
In the following steps, we will guide you through the process of selecting the right components, gathering the necessary electronics, and assembling your cheap electric skateboard. So, grab your tools, put on your DIY hat, and get ready to cruise the streets in style!
Materials Needed
Before you embark on your journey to build a cheap electric skateboard, it’s important to gather all the necessary materials. Here’s a list of the essential components you’ll need:
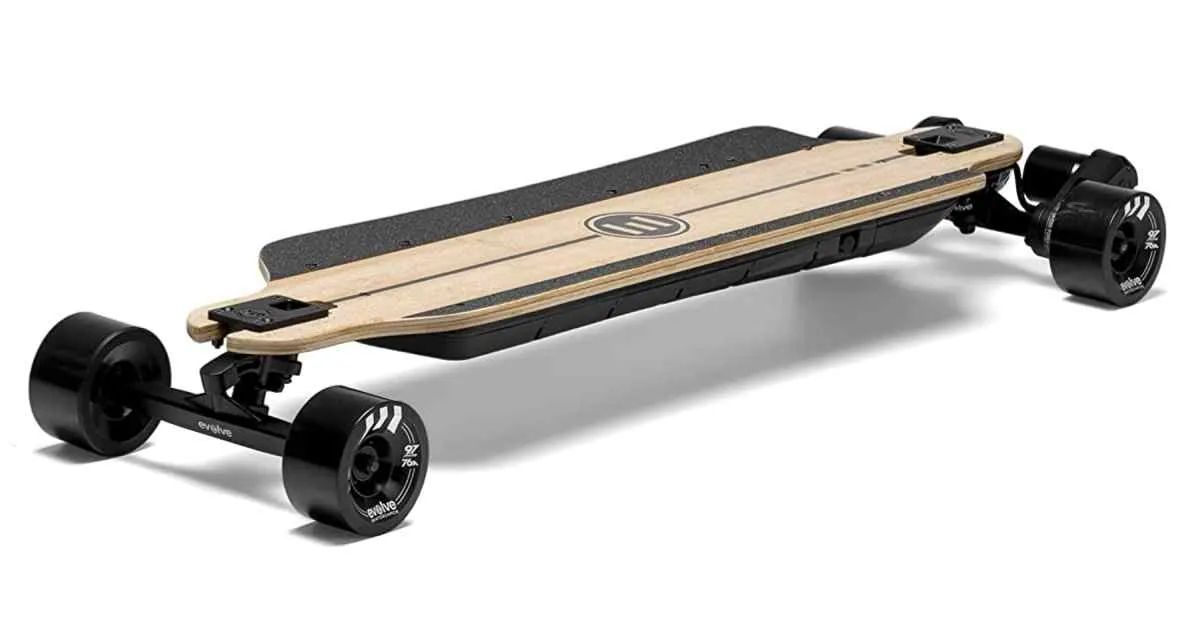
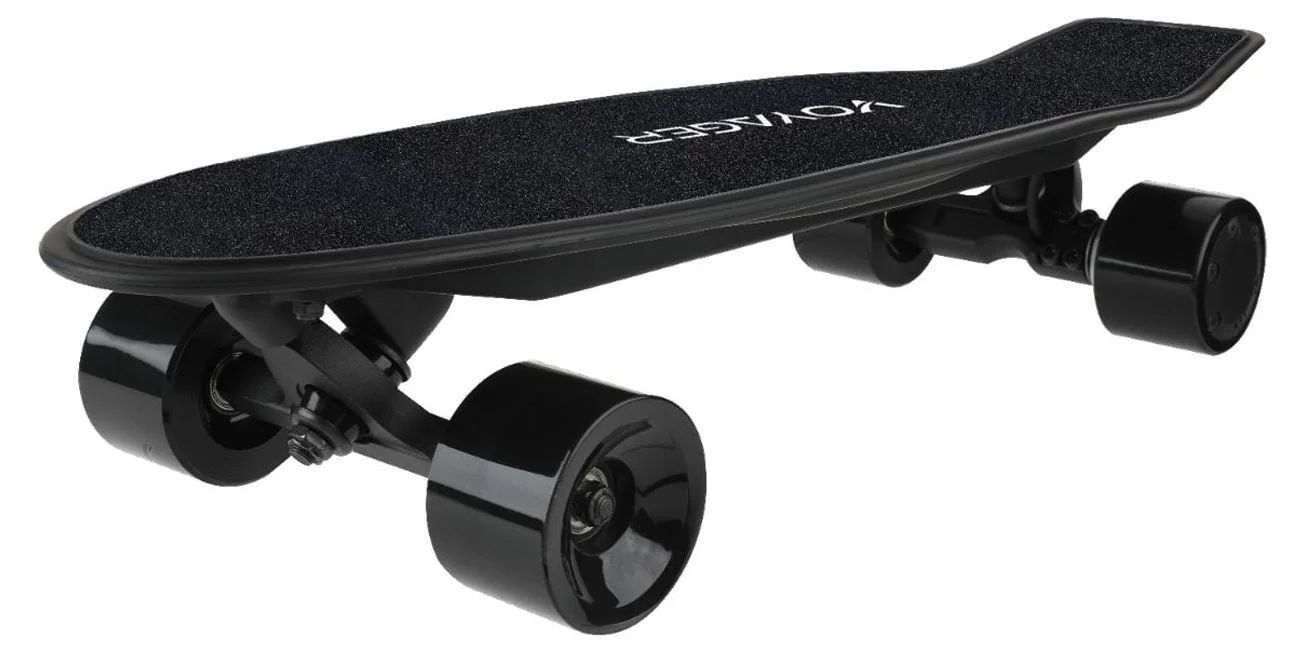
- Skateboard Deck: Start with a sturdy and reliable skateboard deck that suits your riding style and preferences. Look for a deck made from durable materials such as maple or bamboo.
- Motor: The heart of your electric skateboard, the motor will provide the power needed to propel you forward. Choose a motor that offers a good balance between speed and torque, depending on your desired riding experience.
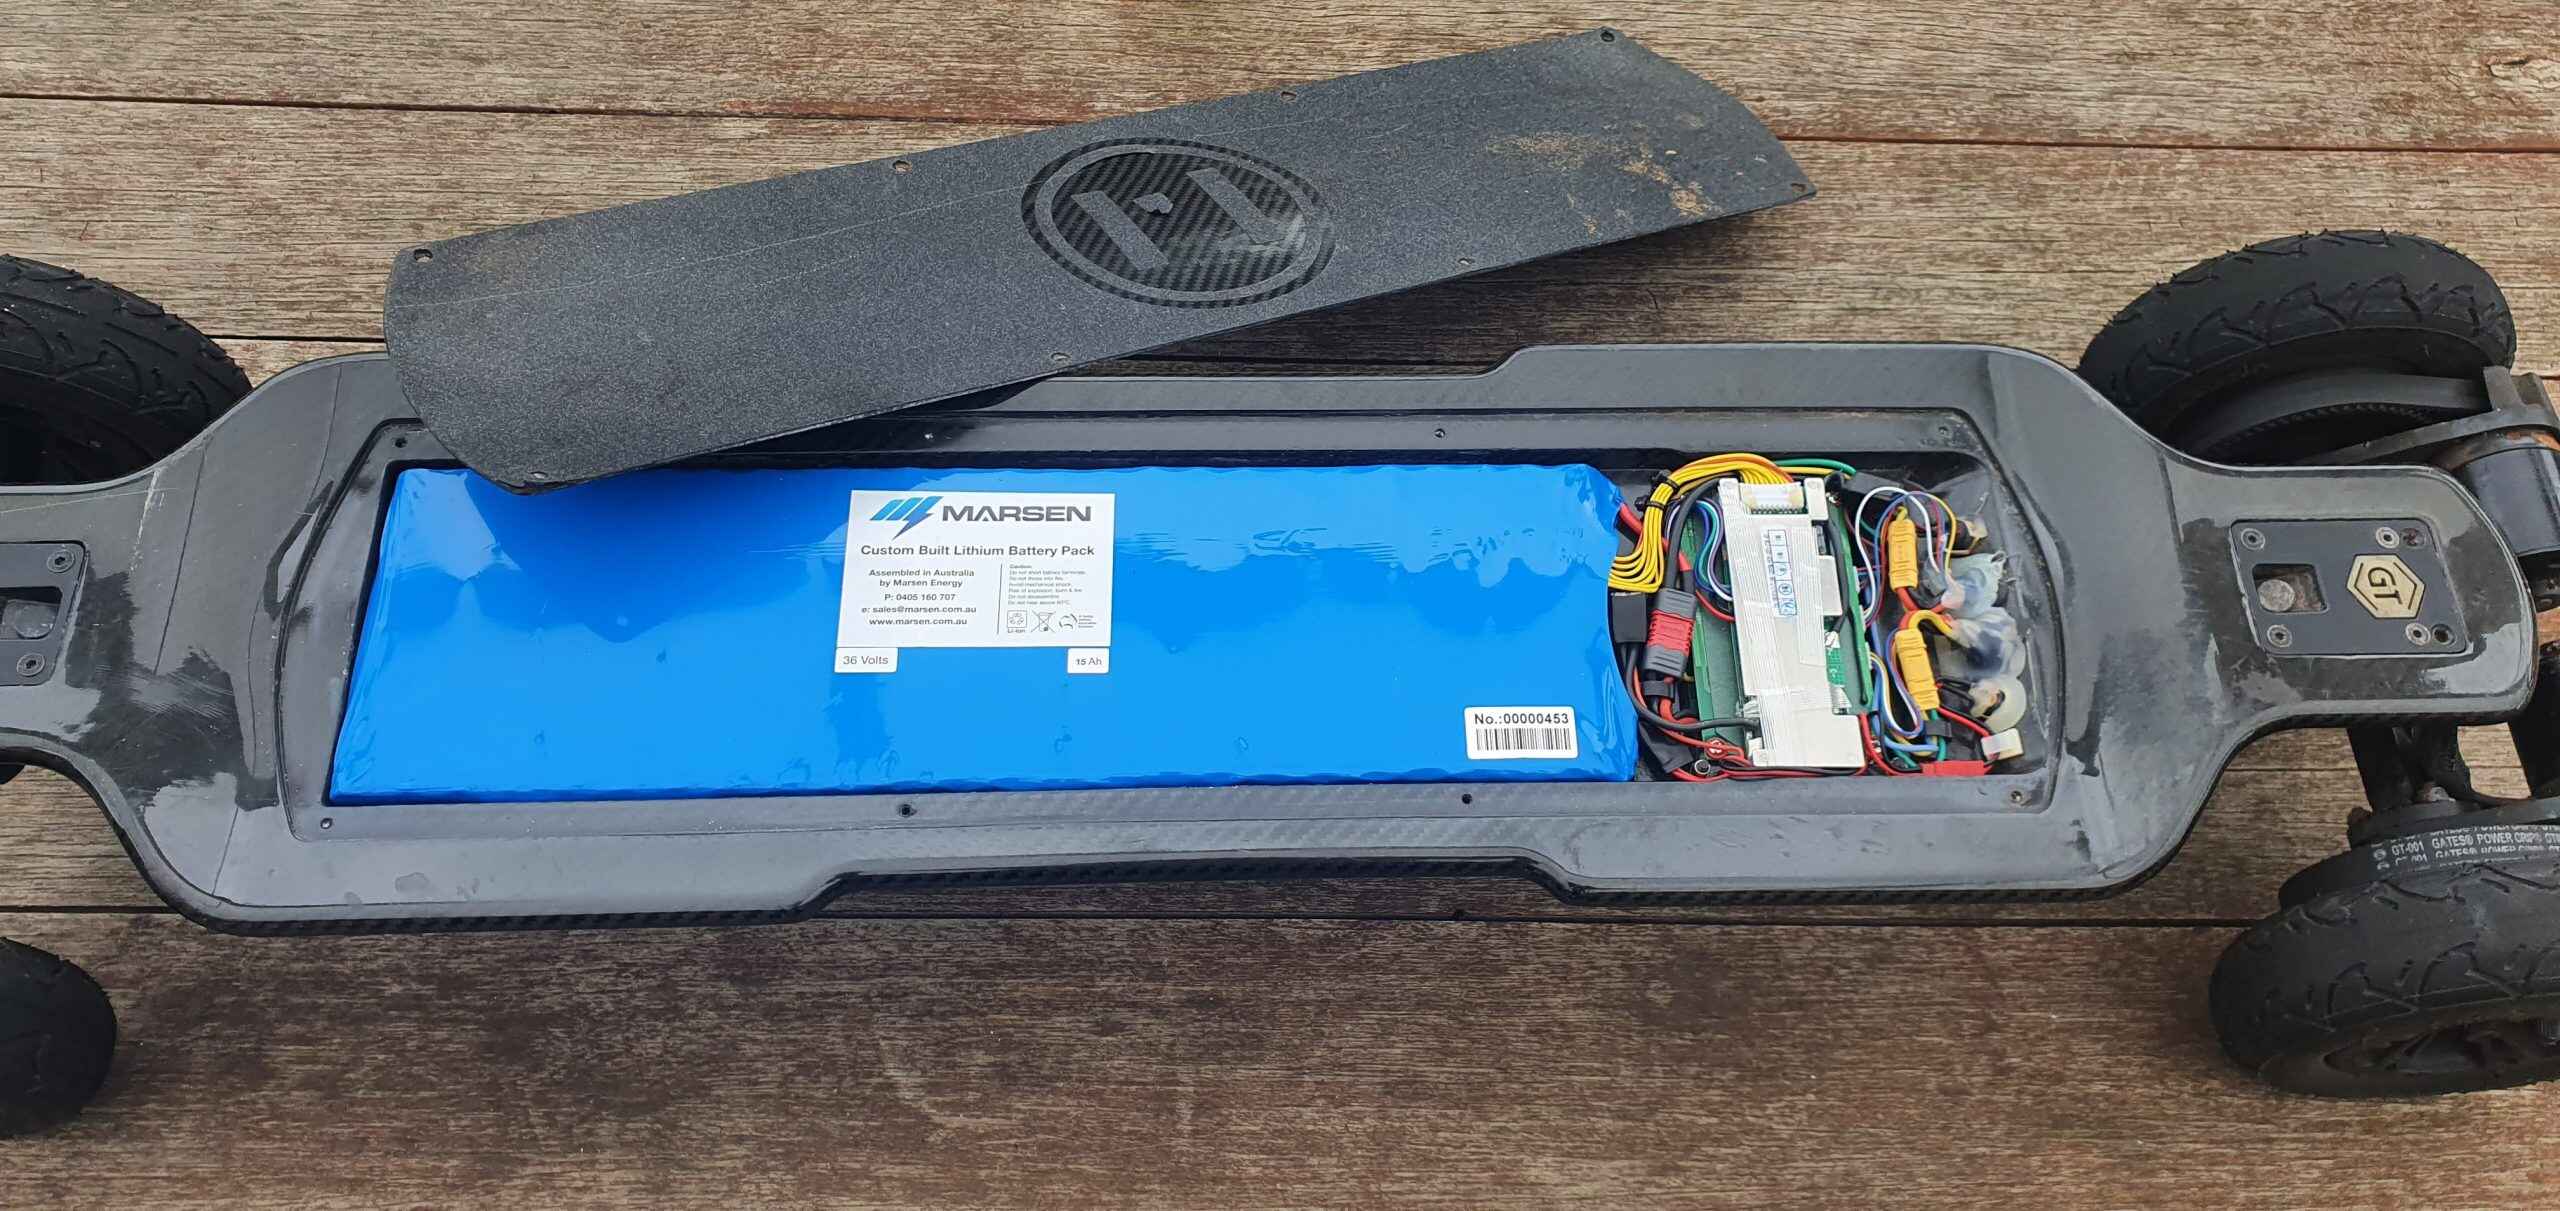
- Battery: Select a high-quality lithium-ion battery that can provide sufficient power to drive your skateboard. Consider factors such as capacity, voltage, and weight to determine the ideal battery for your needs.
- Motor Controller: The motor controller acts as the brain of your electric skateboard, regulating the power flow from the battery to the motor. Choose a controller that is compatible with your motor and offers the desired features such as speed control and regenerative braking.
- Electronics and Wiring: You will need various electronic components such as connectors, wires, and soldering equipment to assemble and connect the different parts of your electric skateboard.
- Mounting Hardware: Ensure you have the necessary mounting hardware such as screws, bolts, and brackets to securely attach the motor, motor controller, and battery to your skateboard deck.
- Tools: Gather a set of basic tools including a screwdriver, wrench, and pliers to assist you in the assembly process.
- Safety Gear: Don’t forget to prioritize safety by investing in a good-quality helmet, knee and elbow pads, and wrist guards to protect yourself while riding.
Keep in mind that the specific components and materials you choose may vary based on your budget, desired performance, and personal preferences. By ensuring you have all the necessary materials, you’ll be well-prepared to embark on the exciting journey of building your cheap electric skateboard.
Step 1: Choosing the Right Skateboard Deck
The skateboard deck you choose will serve as the foundation for your electric skateboard, so it’s crucial to select one that suits your riding style and preferences. Here are some key factors to consider:
Size and Shape: Skateboard decks come in various sizes and shapes. The width of the deck will affect stability and balance, while the length will determine maneuverability. Choose a size that suits your body type and riding preferences. Additionally, consider the shape of the deck, such as whether it has a concave or flat design, as this can affect your comfort and control on the board.
Material: Skateboard decks are commonly made from layers of maple or bamboo. Maple decks are known for their durability and stiffness, providing a stable and solid ride. Bamboo decks, on the other hand, offer more flexibility and a smoother ride. Consider your preference for rigidity versus flex when choosing the material for your deck.
Deck Style: Beyond the basic features, you can also consider the style and design of the deck. Many brands offer a variety of graphics and artwork on their decks, allowing you to personalize your electric skateboard and make it visually appealing.
Compatibility: Ensure that the skateboard deck you choose is compatible with the other components you plan to use, such as the motor and battery. Check the dimensions and mounting options to ensure a proper fit.
Budget: Set a budget for your skateboard deck, as prices can vary depending on the brand, material, and design. While it’s tempting to go for the cheapest option, remember that quality and durability are important factors to consider to ensure a safe and enjoyable ride.
Take your time to research different skateboard decks, read reviews, and consider your own preferences before making a decision. Remember, the skateboard deck is the canvas upon which you will ultimately build your cheap electric skateboard, so choose wisely to ensure a solid foundation for your project.
Step 2: Selecting the Motor
When it comes to selecting the motor for your electric skateboard, there are a few factors to consider to ensure optimal performance and a smooth riding experience. Here are some key points to keep in mind:
Power and Speed: The power and speed of the motor will determine how fast your electric skateboard can go. Higher wattage motors generally offer more power and can achieve higher speeds. Consider your desired speed and performance requirements to choose a motor that suits your needs.
Motor Type: There are two common types of motors used in electric skateboards:
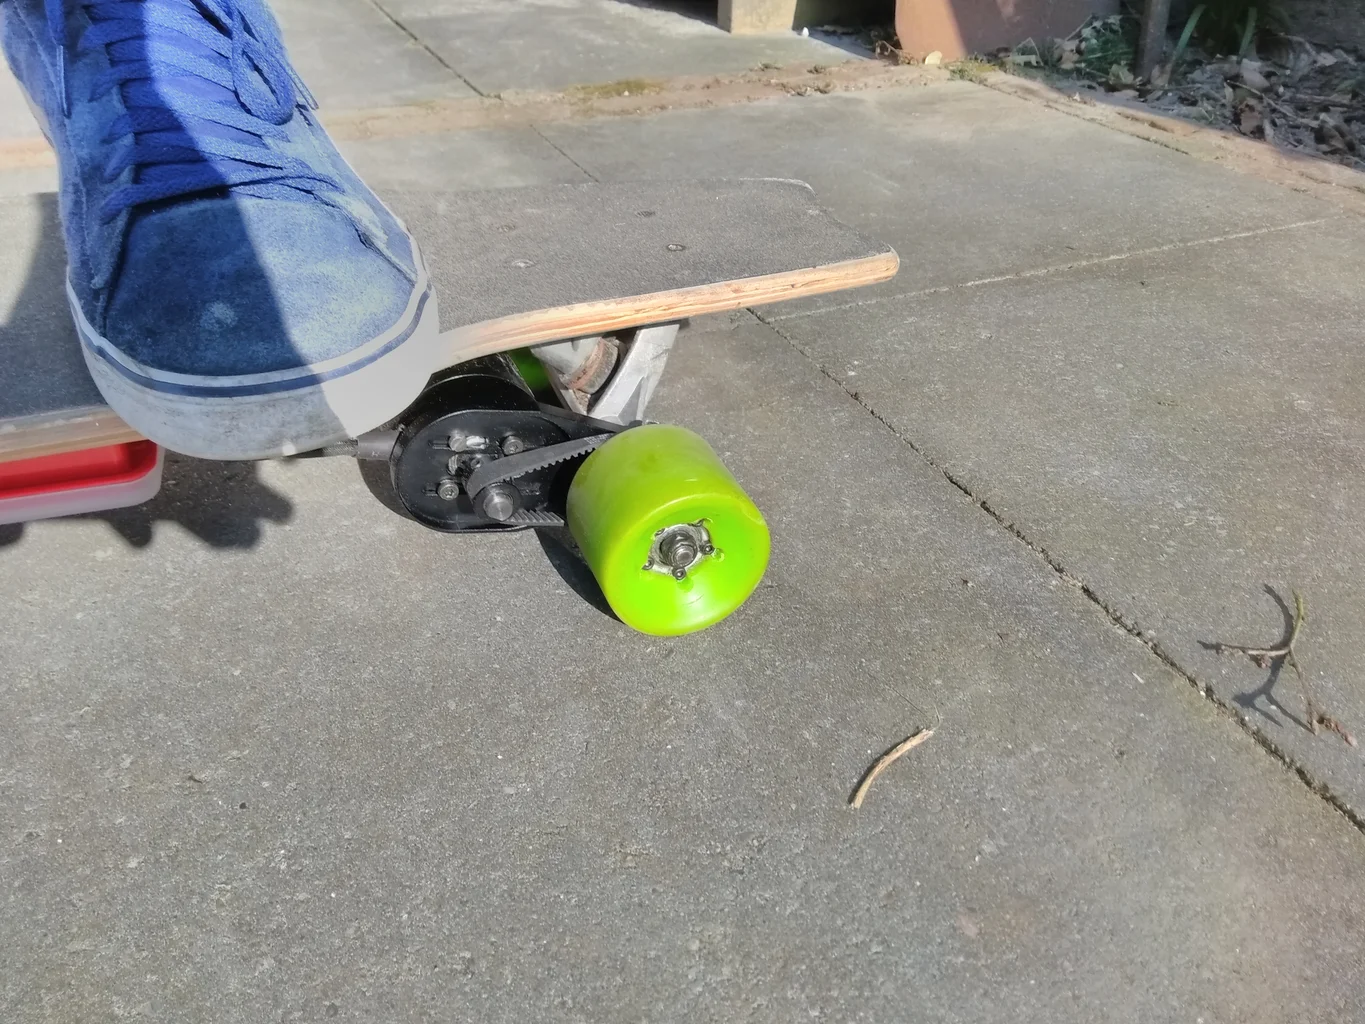
- Hub Motors: These motors are integrated into the wheels of the skateboard, providing a sleek and compact design. Hub motors are known for their simplicity and ease of maintenance. They also offer regenerative braking capabilities, allowing you to recharge the battery while braking.
- Belt Drive Motors: Belt drive motors are mounted on the skateboard’s underside and use a pulley and belt system to transfer power to the wheels. They offer more torque and control, making them suitable for off-road or hilly terrains. However, they require periodic maintenance and have a slightly more complex setup.
Motor Compatibility: Ensure that the motor you choose is compatible with your deck and motor controller. Check the mounting options and dimensions to ensure a proper fit.
Budget: Consider your budget when selecting a motor. While high-performance motors may come with a higher price tag, it’s important to find a balance between cost and quality to ensure a reliable and enjoyable ride.
Brand and Reviews: Research different brands and read customer reviews to get an understanding of the quality and reliability of different motors. Look for motors with good reviews and a reputation for durability and longevity.
By considering these factors, you’ll be able to narrow down your options and choose a motor that aligns with your riding style, budget, and performance requirements. Remember, the motor is the powerhouse of your electric skateboard, so make a wise choice to ensure an exhilarating ride ahead.
Step 3: Choosing the Battery
Choosing the right battery for your electric skateboard is crucial as it determines the range and overall performance of your ride. Consider the following factors when selecting a battery:
Capacity: Battery capacity is measured in ampere-hours (Ah) and determines the amount of energy the battery can store. Higher capacity batteries will provide a longer range but may be heavier and more expensive. Consider your daily commuting needs and choose a battery that offers sufficient range for your desired rides.
Voltage: Voltage plays a significant role in the performance of your electric skateboard. Higher voltage batteries can deliver more power, resulting in increased acceleration and speed. However, it’s important to ensure that the battery voltage is compatible with your chosen motor and motor controller.
Battery Chemistry: Lithium-ion batteries are the most common choice for electric skateboards due to their high energy density, long lifespan, and lightweight. They are available in different variations such as Lithium-ion Polymer (LiPo) and Lithium Iron Phosphate (LiFePO4). Consider the pros and cons of each chemistry, including factors like energy efficiency, safety, and cost.
Weight and Size: The weight and size of the battery will impact the overall weight and balance of your skateboard. Choose a battery that is lightweight and compact while still providing sufficient power and range. Ensure that it is compatible with the mounting options available on your skateboard deck.
Battery Management System (BMS): A reliable BMS is essential for the safe and efficient operation of your battery. The BMS regulates charging, discharging, and balancing of cells to prevent overcharging, overheating, and other potential hazards. It’s advisable to choose a battery with a built-in BMS or to include a separate BMS in your setup.
Price: Battery prices vary based on capacity, voltage, and brand. While it can be tempting to opt for the cheapest option, prioritize quality and reliability to ensure a safe and consistent power supply for your electric skateboard.
By carefully considering these factors, you can choose a battery that strikes a balance between range, performance, weight, and cost. A well-selected battery will provide you with the power needed to cruise through the streets with confidence and enjoy an extended and thrilling ride.
Step 4: Selecting the Motor Controller
The motor controller is a vital component of your electric skateboard as it regulates the power flow between the battery and the motor. When choosing a motor controller, consider the following factors:
Compatibility: Ensure that the motor controller you choose is compatible with your motor and battery. Check the voltage and current ratings to ensure a proper match. Additionally, verify that the controller supports the type of motor you have, whether it’s a hub motor or belt drive motor.
Features: Look for motor controllers that offer features such as variable speed control, regenerative braking, and programmable settings. These features can enhance your riding experience and provide greater control over your skateboard’s performance.
Smooth Acceleration and Deceleration: A good motor controller should provide smooth acceleration and deceleration, ensuring a seamless and comfortable ride. Look for controllers with a proven track record of providing smooth and precise speed control.
Reliability and Build Quality: Choose a motor controller from a reputable brand known for producing reliable and durable products. Read reviews and feedback from users to gain insight into the performance and reliability of different motor controllers.
Size and Mounting Options: Consider the size and form factor of the motor controller to ensure it can be easily mounted on your skateboard deck. Opt for a compact and lightweight controller if you have limited space or prefer a sleeker design.
Budget: Set a budget for your motor controller and consider the balance between cost and quality. While it’s tempting to choose the cheapest option, investing in a reliable motor controller will contribute to the overall safety and performance of your electric skateboard.
Warranty and Support: Check the warranty and customer support provided by the motor controller manufacturer. A solid warranty and accessible customer support will provide peace of mind and assistance in case you encounter any issues or have questions during the installation or usage process.
By considering these factors, you’ll be able to select a motor controller that is compatible, reliable, and offers the features you desire. A well-chosen motor controller will ensure smooth and efficient power transmission, allowing you to enjoy a thrilling and controlled ride on your electric skateboard.
Step 5: Gathering the Electronics and Wiring
Now that you have chosen the essential components for your electric skateboard, it’s time to gather the necessary electronics and wiring to bring your creation to life. Here’s what you’ll need to consider:
Connectors and Cables: Look for high-quality connectors and cables that are compatible with the components you have selected. Ensure that they can handle the current and voltage required for your electric skateboard. It’s advisable to use connectors with proper insulation and secure locking mechanisms to prevent any loose connections.
Soldering Equipment: Depending on your setup, you might need soldering equipment to connect wires and components. Have a soldering iron, solder wire, and other necessary tools on hand to ensure secure and reliable connections.
Switches and Buttons: Consider adding switches or buttons to control the power supply to your electric skateboard. These can be mounted conveniently on your skateboard deck or within easy reach while riding.
Battery Enclosure: If your battery does not come with an integrated enclosure, you may need to acquire a suitable enclosure to protect the battery and ensure it is securely mounted on your skateboard deck. Look for enclosures that are waterproof and durable, providing adequate protection for your battery.
Wire Management: Use zip ties, adhesive mounts, or other wire management solutions to keep the wiring neat and organized. This will prevent tangling, reduce the risk of accidental damage, and make troubleshooting or modifications easier down the line.
Electronic Speed Controller (ESC): Depending on your motor and motor controller setup, you may need an electronic speed controller to regulate the power output from the battery to the motor. Ensure that the ESC is compatible with your chosen motor and motor controller.
Additional Accessories: Consider any additional accessories you might need, such as a voltage meter, power switch, or remote control. These items can enhance the functionality and convenience of your electric skateboard.
It’s crucial to pay attention to the quality of the electronics and wiring components to ensure reliability and safety. Always double-check the compatibility of each item and refer to the manufacturer’s guidelines for proper installation and usage.
By gathering the necessary electronics and wiring with care, you’ll be ready to move on to the next step of assembling your cheap electric skateboard.
Step 6: Assembling the Skateboard
Now that you have gathered all the necessary components for your electric skateboard, it’s time to put them all together. Follow these steps to assemble your skateboard:
1. Prepare the Deck: Ensure that your skateboard deck is clean and free of any debris. Place it on a flat surface and gather all the components you need for the assembly.
2. Attach the Trucks: Start by attaching the trucks to the deck. Use the appropriate mounting hardware and make sure to tighten the bolts securely. Ensure that the trucks are aligned properly and that they are evenly mounted on the deck.
3. Install the Motor Controller: Determine the ideal location for the motor controller on your skateboard deck. Ensure that it is securely mounted and positioned in a convenient and accessible spot, taking care to leave enough space for other components.
4. Connect the Electronics: Begin connecting the various components together. Follow the wiring diagram or the manufacturer’s instructions to ensure correct and secure connections. Double-check all connections to avoid any loose wires or potential hazards.
5. Mount the Battery: If your battery has a dedicated enclosure, attach it securely to your skateboard deck using the appropriate mounting hardware. Ensure that the battery is positioned in a way that maintains balance and stability while riding.
6. Secure the Wiring: Use zip ties, adhesive mounts, or other wire management solutions to secure and organize the wiring. This will prevent any accidental damage or interference while riding. Ensure that all wires are properly insulated and away from moving parts.
7. Test the Connections: Before finalizing the assembly, conduct a thorough test of all the connections and components. Check for proper functionality, such as motor response to the remote control or throttle, and ensure that all connections are secure and free from any shortcuts or loose wires.
8. Finalize the Assembly: Once you are satisfied with the connections and functionality, make any final adjustments and double-check all the bolts and screws to ensure everything is tightened properly. Take a final look at the overall setup to ensure everything is in place and ready for your first test ride.
Proper assembly is crucial for the safe and efficient operation of your electric skateboard. Take your time, follow the instructions provided by the component manufacturers, and ensure that all connections are secure. By completing this step accurately, you’ll be one step closer to experiencing the thrill of riding your very own cheap electric skateboard.
Step 7: Installing the Motor and Motor Controller
Installing the motor and motor controller is a crucial step in building your electric skateboard. Follow these steps to ensure a proper installation:
1. Positioning the Motor: Determine the ideal location for mounting the motor on the skateboard deck. Make sure it is aligned with the truck and centered on the deck for optimal balance. Check if any additional hardware or brackets are required for the motor installation.
2. Secure the Motor: Use the appropriate mounting hardware to secure the motor to the skateboard deck. Make sure the motor is tightly fastened and does not have any loose parts or movement. Double-check the alignment to ensure the motor is perpendicular to the deck.
3. Connect the Motor Wires: Connect the motor wires to the motor controller following the manufacturer’s instructions. Ensure you have a proper connection with no loose or exposed wires. Use connectors or soldering, depending on the type of connectors provided with your motor and motor controller.
4. Mount the Motor Controller: Determine the best location for mounting the motor controller on the skateboard deck. Ensure it is securely mounted and positioned in a way that allows for easy accessibility and protection from impact or water damage.
5. Connect the Motor Controller: Connect the motor controller to the battery and motor. Follow the wiring diagram provided by the manufacturer to ensure correct and secure connections. Double-check the connections and make sure all wires are properly insulated.
6. Secure the Wiring: Bundle the motor and motor controller wires together using zip ties or other wire management solutions. This will help keep the wires organized and prevent them from getting tangled or damaged. Make sure the wiring is secure and does not interfere with the moving parts of the skateboard.
7. Test the Motor: Before finalizing the installation, conduct a test to ensure the motor and motor controller are functioning correctly. Test the acceleration, braking, and overall performance. Make any necessary adjustments or troubleshooting if you encounter any issues.
8. Finalize the Installation: Once you are satisfied with the motor and motor controller performance, make sure all the bolts and screws are tightened properly. Check the overall setup to ensure everything is in place and ready for a test ride.
Proper installation of the motor and motor controller is essential for a safe and enjoyable riding experience. Take your time, follow the manufacturer’s instructions, and ensure secure connections. By completing this step accurately, you’ll be ready to experience the power and thrill of your electric skateboard.
Step 8: Mounting the Battery
Mounting the battery securely is an important step in building your electric skateboard. Follow these steps to ensure a safe and stable installation:
1. Choose the Mounting Location: Determine the ideal location for mounting the battery on your skateboard deck. Consider the weight distribution, accessibility, and overall balance of the board. Choose a position that ensures stability and does not hinder your ability to ride comfortably.
2. Prepare the Mounting Surface: Ensure that the surface where you will mount the battery is clean and free from any debris. You can use a grip tape or adhesive material to create a non-slip surface that helps secure the battery in place.
3. Install Battery Mounts or Enclosure: Depending on your battery type, you may need to use battery mounts or an enclosure to secure the battery to the skateboard deck. Follow the manufacturer’s instructions to properly install the mounts or enclosure. Make sure they are securely attached to the deck and provide adequate protection for the battery.
4. Position and Secure the Battery: Place the battery in the mounting area and ensure it sits securely in the mounts or enclosure. Use the appropriate mounting hardware to secure the battery in place. Make sure it is tightly fastened and does not have any movement or wobble.
5. Ensure Wiring Accessibility: Position the battery in a way that allows easy access to the wiring connections. This will make it easier to connect or disconnect the battery if needed, and simplify future maintenance or modifications.
6. Check for Clearance: Verify that there is enough clearance between the battery and other components, such as the motor and motor controller. Ensure that the wiring does not interfere with any moving parts and that there is no risk of accidental damage or short circuits.
7. Double-Check Connections: Before finalizing the battery installation, double-check all the wiring connections to ensure they are secure and properly insulated. Verify that the battery connections are correctly aligned with the motor controller or any wiring harnesses.
8. Test the Battery: After mounting the battery, conduct a final test to ensure it is functioning properly and providing the expected power output. Check that all components connected to the battery, such as the motor and motor controller, are responding correctly.
By properly mounting the battery, you ensure a secure and stable power source for your electric skateboard. Take the time to position and secure the battery correctly and double-check all the connections. With the battery securely in place, you’re one step closer to experiencing the thrill of riding your completed electric skateboard.
Step 9: Testing and Troubleshooting
Once you have assembled your electric skateboard and mounted all the components, it’s essential to test and troubleshoot any issues that may arise. Here’s what you need to do:
1. Safety First: Put on all the necessary safety gear, including a helmet, knee pads, and elbow pads, before testing the skateboard. Safety should always be a priority when riding any type of skateboard.
2. Initial Test Ride: Take your electric skateboard to a safe and open area, preferably a smooth and flat surface, for your first test ride. Start slowly and gradually increase speed to get a feel for the acceleration and braking system. Pay attention to any vibrations, noises, or irregularities that may indicate a problem.
3. Monitor Battery Performance: Keep an eye on the battery’s performance during the test ride. Note how much distance you cover and whether the battery’s charge is depleting faster than anticipated. This will help you determine the battery’s range and whether any adjustments are needed.
4. Check Motor Functionality: Evaluate the motor performance during the test ride. Ensure that it is functioning properly, providing smooth acceleration and responsive braking. Check if the motor is getting excessively hot, which could indicate an issue with the motor controller or wiring.
5. Assess Handling and Stability: Pay attention to how the skateboard handles and its overall stability. Make sure the trucks are turning smoothly, and the board feels balanced while riding. Note any wobbling or instability, as this may indicate a need for adjustments or fine-tuning.
6. Troubleshooting: If you encounter any issues during the test ride, such as poor acceleration, weak braking, or irregularities in performance, it’s time to troubleshoot. Check the connections, wiring, and settings of the motor controller and ensure that all components are properly installed and functioning. Refer to the manufacturer’s instructions or seek guidance from online forums or communities that specialize in electric skateboards.
7. Fine-Tuning: Depending on the test ride results and any troubleshooting conducted, you may need to make adjustments. This could include fine-tuning the motor controller settings, tightening bolts and screws, or repositioning components for better balance and performance. Take the necessary steps to optimize the operation of your electric skateboard.
8. Repeat Testing: After any adjustments or troubleshooting, perform additional test rides to ensure that the issues have been resolved and that the electric skateboard is operating as expected.
It’s important to spend sufficient time testing and troubleshooting to ensure the safety and functionality of your electric skateboard. By taking the necessary steps to identify and address any issues, you can enjoy a smooth and exhilarating riding experience on your newly built electric skateboard.
Conclusion
Congratulations! You have successfully built your very own cheap electric skateboard. By following the steps outlined in this guide, you have learned how to select the right components, assemble them, and troubleshoot any issues that may arise. Now, you can experience the thrill of cruising through the streets while enjoying the power and efficiency of an electric motor.
Building your electric skateboard not only provides a fun and fulfilling DIY project but also allows you to create a personalized and customized ride that suits your preferences. From choosing the perfect skateboard deck to selecting the motor, battery, and motor controller, each step in the process was essential in creating a functional and enjoyable electric skateboard.
As you continue to ride your electric skateboard, it’s important to remember safety precautions. Always wear the necessary protective gear and follow traffic rules and regulations. Regularly inspect your skateboard for any signs of wear, and perform routine maintenance to keep it in optimal condition.
Furthermore, feel free to continue exploring and improving your electric skateboard’s performance and customization. You can experiment with different motors, batteries, or even upgrade to advanced features such as Bluetooth connectivity or regenerative braking.
Lastly, don’t forget to share your knowledge and passion for electric skateboards with others. Help beginners who are interested in building their own electric skateboards by sharing your experiences and insights. Join online communities and forums to connect with fellow riders and learn from their experiences as well.
Building a cheap electric skateboard is not only a cost-effective option but also a rewarding experience that allows you to unleash your creativity and technical skills. So, get out there, ride with pride, and enjoy the freedom and excitement that comes with riding your very own DIY electric skateboard!