Introduction
Welcome to the world of solid-state drives (SSDs), where speed and performance reign supreme. If you’re a tech enthusiast or a computer-savvy individual, you’ve probably heard of the M.2 SSD – a small, yet powerful storage solution that has become increasingly popular in recent years.
But what exactly is an M.2 SSD? In simplest terms, it is a form factor for storage devices that connects to your motherboard directly via the M.2 slot. This compact design offers a multitude of benefits, including faster data transfer speeds, a smaller footprint, and improved thermal efficiency.
While the primary function of an M.2 SSD is to store and retrieve data, there may come a time when you need to wipe the drive clean. Whether you’re selling your computer, passing it on to a family member, or simply looking to start fresh, securely wiping your M.2 SSD is crucial to ensure your sensitive information doesn’t fall into the wrong hands.
In this guide, we will explore different methods for wiping an M.2 SSD, ranging from software-based solutions to physical destruction. But before we dive into those details, it’s essential to consider a few important factors.
Firstly, make sure you have a backup of any important data you want to keep. Once you wipe your M.2 SSD, all data will be permanently deleted, so it’s essential to have a copy stored elsewhere.
Secondly, ensure that you are using a reliable power source and that your computer is plugged in throughout the process. Sudden power loss during the wiping process may cause data corruption or damage to your drive.
Lastly, it is crucial to verify whether your M.2 SSD contains sensitive information that falls under data protection regulations. If so, consult appropriate guidelines to ensure compliance during the wiping process.
Now that we’ve covered the important considerations, let’s dive into the various methods for wiping an M.2 SSD. Whether you opt for built-in Windows tools, third-party software, or the complete physical destruction of your drive, we’ve got you covered.
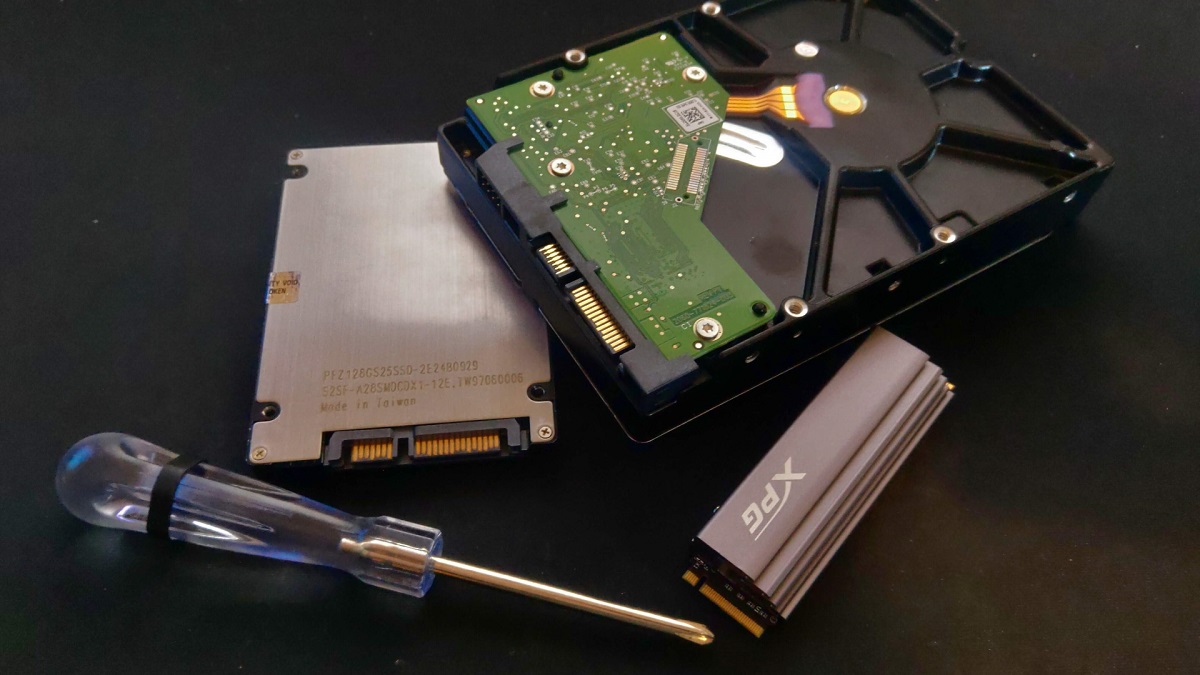
What is an M.2 SSD?
If you’re familiar with traditional hard drives (HDDs), you’ll notice a significant difference when it comes to M.2 SSDs. An M.2 SSD, also known as Next Generation Form Factor (NGFF), is a solid-state storage device that offers high-performance storage in a compact form factor.
Unlike traditional HDDs that use spinning disks and mechanical components to store and retrieve data, M.2 SSDs rely on flash memory technology. This means that there are no moving parts, resulting in faster read and write speeds, improved durability, and lower power consumption.
One of the key advantages of M.2 SSDs is their small size, making them ideal for thin and lightweight laptops, ultrabooks, and compact desktop systems. These drives are typically around 22mm wide and come in different lengths, such as 30mm, 42mm, 60mm, 80mm, and 110mm. The length of the drive determines the available storage capacity.
M.2 SSDs connect directly to the motherboard through the M.2 slot, eliminating the need for cumbersome cables. The M.2 slot supports various interfaces, including SATA (Serial ATA) and PCIe (Peripheral Component Interconnect Express), with PCIe being the preferred choice for faster performance.
With advancements in technology, M.2 SSDs now offer incredible speeds. The latest NVMe (Non-Volatile Memory Express) protocol allows for lightning-fast data transfer rates, significantly surpassing those of traditional HDDs. This means that you can experience faster boot times, quicker application launches, and improved overall system responsiveness.
Furthermore, M.2 SSDs excel in terms of durability and reliability. With no moving parts, they are less susceptible to physical shock, making them more resilient in mobile devices. Additionally, M.2 SSDs have a longer lifespan compared to traditional HDDs, as they can withstand a higher number of read and write cycles.
In summary, an M.2 SSD is a compact, high-performance storage device that uses flash memory technology to offer faster speeds, improved durability, and lower power consumption. Its small size and direct connection to the motherboard make it suitable for thin and lightweight devices, providing a significant boost to overall system performance.
Why would you want to wipe an M.2 SSD?
There are several scenarios where you might find it necessary or beneficial to wipe an M.2 SSD and ensure that all data on the drive is permanently erased. Let’s explore some common reasons why you would want to wipe an M.2 SSD:
- Selling or donating your computer: If you’re planning to sell or give away your computer, it’s crucial to wipe the M.2 SSD to protect your personal and sensitive information. This ensures that the new owner won’t have access to any of your files, documents, or online accounts.
- Upgrading to a new M.2 SSD: If you’re replacing your current M.2 SSD with a new one, you may want to wipe the old drive before disposing of it. This prevents any potential data recovery attempts on the old drive and ensures that your personal information stays secure.
- Reselling or recycling the M.2 SSD: If you’re planning to resell or recycle your M.2 SSD, wiping the drive is essential. By doing this, you eliminate the risk of any sensitive data falling into the wrong hands, protecting both your personal information and your privacy.
- Facing performance issues: Over time, an M.2 SSD may experience performance degradation due to fragmented files, excessive writes, or outdated firmware. Wiping the drive and starting fresh can help resolve such performance issues and restore your SSD to its optimal functionality.
- Suspected malware or virus infection: If you suspect that your M.2 SSD may be infected with malware or viruses, wiping the drive can help remove any malicious software that traditional antivirus programs may not detect. This ensures a clean slate and helps safeguard your system from potential security threats.
Regardless of the reason, it’s important to note that wiping an M.2 SSD permanently erases all data on the drive. Therefore, it’s crucial to have a backup of any important files or documents before proceeding with the wiping process.
By understanding when and why you need to wipe an M.2 SSD, you can take the necessary steps to protect your data, privacy, and system performance. Next, we’ll explore important considerations to keep in mind before wiping an M.2 SSD.
Important considerations before wiping an M.2 SSD
Before proceeding with the process of wiping an M.2 SSD, it’s essential to keep a few important considerations in mind. These considerations will help ensure a smooth and successful wiping process while safeguarding your data and system integrity. Let’s take a look at what you should keep in mind:
- Backup your data: Before wiping an M.2 SSD, it’s crucial to create a backup of any important files, documents, or data that you want to keep. Once the wiping process is complete, all data on the drive will be permanently erased, and there will be no way to recover it.
- Power source and stability: It is essential to ensure that your computer is connected to a reliable power source throughout the wiping process. Sudden power loss during the process can potentially lead to data corruption or damage to the SSD. Make sure your laptop or desktop is plugged in and the battery is fully charged.
- Compliance with data protection regulations: If you are wiping an M.2 SSD that contains sensitive information, such as personal or financial data, it’s important to ensure compliance with applicable data protection regulations. Consult appropriate guidelines to ensure that you follow the necessary steps and protocols to protect sensitive data during the wiping process.
- Verify additional storage devices: Before wiping the M.2 SSD, make sure to verify that you have additional storage devices available to store the backup data or any necessary files. It could be an external hard drive, cloud storage, or another internal storage device. This will ensure that you have a secure location to transfer and store your important data.
- Authentication credentials: If your M.2 SSD is protected by encryption or password authentication, ensure that you have the necessary credentials to access the drive after the wiping process. Without the correct credentials, you may be unable to access the drive, rendering it useless.
By keeping these considerations in mind, you can confidently proceed with the process of wiping an M.2 SSD. Whether you plan to use built-in Windows tools, third-party software, or physically destroy the drive, these considerations will help ensure a successful and secure wiping process.
Method 1: Using built-in Windows tools to wipe an M.2 SSD
Windows provides built-in tools that allow you to securely wipe an M.2 SSD without the need for third-party software. These tools offer a convenient and effective way to erase your drive completely. Here’s how you can use the built-in Windows tools to wipe an M.2 SSD:
- Backup your data: Before proceeding with the wiping process, it’s essential to create a backup of any important data on your M.2 SSD. Once the wiping process begins, all data on the drive will be permanently erased.
- Access the Disk Management utility: Press the Windows key + R to open the Run dialog box. Type “diskmgmt.msc” and hit Enter. This will open the Disk Management utility in Windows.
- Select and format the M.2 SSD: In the Disk Management utility, locate your M.2 SSD from the list of available drives. Right-click on it and select “Format”. Choose the file system and allocation unit size, and ensure that the “Perform a quick format” option is unchecked. Click “OK” to begin the formatting process. This will erase all data on the drive.
- Perform a secure erase (optional): If you want to ensure that the data on your M.2 SSD is completely irrecoverable, you can perform a secure erase using the ATA Secure Erase command. This command is supported by some SSD manufacturers and can be accessed through specific firmware or utility tools provided by the manufacturer.
- Verify the wiping process: Once the formatting or secure erase process is complete, verify that the data on your M.2 SSD has been successfully wiped by checking that no files or partitions remain on the drive.
Using the built-in Windows tools to wipe an M.2 SSD is a straightforward process that can be carried out without the need for additional software. However, keep in mind that these methods may not be as secure as using dedicated third-party software or physically destroying the drive. If you require a higher level of security, consider exploring other methods discussed in this guide.
Now that you know how to use built-in Windows tools to wipe an M.2 SSD, let’s explore another method – using third-party software to wipe the drive.
Method 2: Using third-party software to wipe an M.2 SSD
If you prefer a more comprehensive and secure method to wipe your M.2 SSD, using third-party software is a viable option. There are numerous software tools available that offer advanced features for securely erasing data from your drive. Follow these steps to use third-party software to wipe an M.2 SSD:
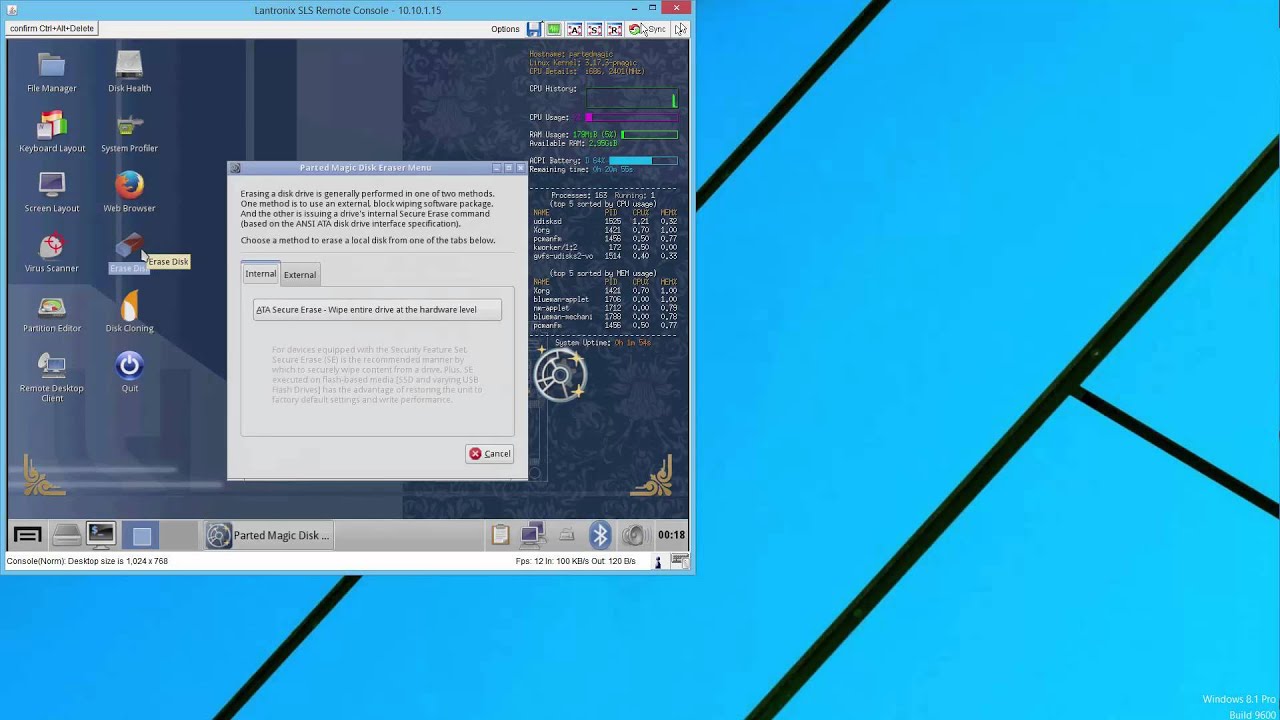
- Choose a reliable third-party software: Research and select a reputable software tool that specializes in secure data erasure. Some popular options include CCleaner, DBAN (Darik’s Boot and Nuke), and Parted Magic. Ensure that the software supports wiping M.2 SSDs.
- Backup your data: Before initiating the wiping process, create a backup of any important data on your M.2 SSD. Once the wiping process starts, all data on the drive will be permanently deleted.
- Install and launch the software: Follow the installation instructions provided by the chosen third-party software tool. Once installed, launch the software on your computer.
- Select the M.2 SSD to wipe: In the software interface, locate and select your M.2 SSD from the list of available drives. Ensure that you have chosen the correct drive to avoid accidentally wiping the wrong drive.
- Choose the wiping method: Most third-party software tools offer different wiping algorithms or methods. Depending on your requirements, select the desired method. Common options include DoD 5220.22-M (three-pass), Gutmann (35-pass), or a custom method. Note that more passes generally result in a more secure wipe, but also take longer to complete.
- Start the wiping process: Once you have selected the wiping method, initiate the wiping process. The software tool will begin overwriting the entire M.2 SSD with random data, ensuring that the erased data is unrecoverable.
- Verify the wiping process: After the wiping process is complete, the third-party software tool will typically provide a verification step to ensure that all data on the M.2 SSD has been successfully wiped. Verify that there are no remaining files or partitions on the drive.
Using third-party software to wipe an M.2 SSD offers more advanced features and customization options compared to built-in Windows tools. These tools are specifically designed to ensure the secure erasure of data from your drive. However, it’s crucial to choose a reputable and trusted software tool to ensure reliable and effective results.
Now that you’ve learned how to wipe an M.2 SSD using third-party software, let’s explore another method – physically destroying the M.2 SSD for complete data destruction.
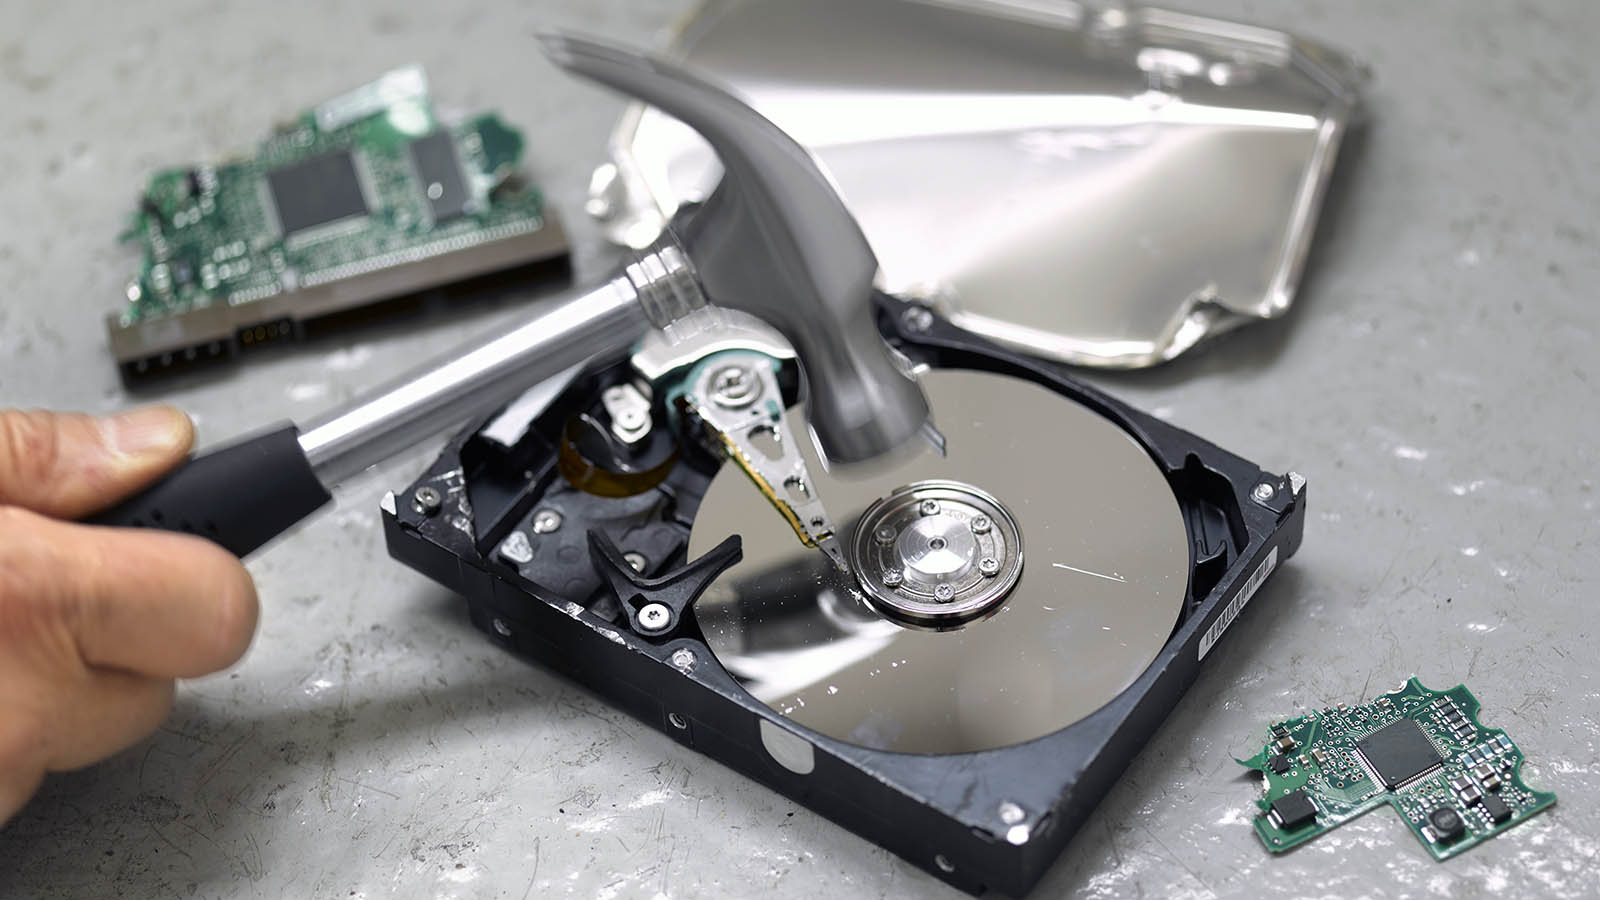
Method 3: Physically destroying an M.2 SSD for complete data destruction
If you want to ensure the highest level of data destruction and prevent any possibility of data recovery, physically destroying your M.2 SSD is the most extreme method. This method ensures that no traces of data remain on the drive. Here’s how you can physically destroy an M.2 SSD:
- Backup your data: As always, before proceeding with any data destruction method, it’s crucial to create a backup of any important data on your M.2 SSD. Once you physically destroy the drive, you will not be able to recover any data from it.
- Take safety precautions: When dealing with physical destruction, it’s important to prioritize safety. Ensure that you are wearing protective gloves and goggles to avoid any injuries during the process.
- Disassemble the M.2 SSD: Using a small screwdriver or other appropriate tools, carefully disassemble your M.2 SSD. This will expose the internal components, including the NAND chips and controller. Be cautious not to damage the surrounding components on your motherboard.
- Damage the NAND chips: Locate the NAND chips on the M.2 SSD, which are rectangular in shape and typically covered by a metal heat spreader or label. Use a hammer, pliers, or other sturdy tools to physically break or crush the NAND chips. This will render them unreadable and ensure complete destruction of the data stored on the SSD.
- Dispose of the destroyed M.2 SSD: After ensuring that the NAND chips are irreparably damaged, properly dispose of the destroyed M.2 SSD. You can consult local recycling facilities or electronic waste disposal services for guidelines on how to dispose of electronic devices safely and responsibly.
Physically destroying your M.2 SSD is an extreme method that guarantees complete data destruction, leaving no chance of recovery. However, it’s important to note that this method permanently renders the SSD unusable. Therefore, only resort to this method if you have no intention of using or repurposing the M.2 SSD in the future.
By following these steps, you can ensure that any data on your M.2 SSD is completely destroyed and irretrievable. Physically destroying the drive is the most effective way to ensure that no traces of sensitive information remain, making it an ideal method for those with highly sensitive data or security concerns.
Now that you’ve learned about the methods for wiping an M.2 SSD, it’s important to consider some tips for securely wiping your drive. We’ll explore these tips in the next section.
Tips for securely wiping an M.2 SSD
When it comes to securely wiping an M.2 SSD, there are a few additional tips you can follow to ensure the process is thorough and effective. These tips will help you maximize the security of your data and minimize the risk of any potential data recovery. Here are some important tips to keep in mind:
- Use multiple wiping methods: If you’re using software-based methods, consider using multiple wiping algorithms or passes. Each pass will overwrite the data on the drive, making it more difficult or even impossible to recover. The more passes you use, the more secure the wipe.
- Verify the wiping process: After performing the wiping process, verify that all data on the M.2 SSD has been successfully erased. Use data recovery tools or software to check if any recoverable data remains on the drive. If any traces of data are found, repeat the wiping process or consider using a more secure method.
- Consider self-encrypting drives (SEDs): If security is a top priority, consider using self-encrypting drives (SEDs) that offer hardware-based encryption. By enabling and later disabling the encryption, you effectively render the data on the drive unreadable without the encryption key. This adds an additional layer of security when wiping the drive.
- Keep the drive physically secure: While performing the wiping process, ensure the M.2 SSD remains physically secure. Prevent unauthorized access to the drive and keep it within your sight throughout the process. This reduces the risk of anyone tampering with the drive or attempting to recover data from it.
- Document the wiping process: Maintain a record of the steps you followed during the wiping process, including the software used, the wiping method chosen, and any verification steps taken. This documentation can be useful for future reference or in case you need to provide proof of data erasure.
- Consider professional data destruction services: If you have highly sensitive data or if you are unsure about performing the wiping process yourself, consider employing professional data destruction services. These specialized companies have expertise in securely wiping and destroying data storage devices, ensuring compliance with data protection regulations.
By following these tips, you can enhance the security of your data and ensure that the wiping process is thorough and effective. Remember, securely wiping an M.2 SSD is of utmost importance when protecting your sensitive information from falling into the wrong hands.
With the knowledge of various wiping methods, as well as these helpful tips, you can confidently proceed to secure the contents of your M.2 SSD. Whether you choose built-in Windows tools, third-party software, or physical destruction, the chosen method should align with your specific security requirements and personal preferences.
Conclusion
Wiping an M.2 SSD is a necessary step to ensure the security and privacy of your data, especially when you plan to sell, donate, or dispose of your computer. Throughout this guide, we explored various methods for securely wiping an M.2 SSD, including using built-in Windows tools, third-party software, and physically destroying the drive.
If you choose to use the built-in Windows tools, you can easily format your M.2 SSD or perform a secure erase, ensuring that data is permanently erased. However, for a more comprehensive and secure wipe, using third-party software provides advanced features and customization options.
In extreme cases where the highest level of data destruction is required, physically destroying the M.2 SSD ensures complete irrecoverability of the data. This method offers peace of mind, but renders the drive unusable.
Before proceeding with any wiping method, it’s important to consider a few key points. Backup your data to safeguard important files, ensure a stable power source to avoid data corruption during the wiping process, and comply with data protection regulations when applicable.
Additionally, we provided some useful tips to enhance the security and effectiveness of the wiping process. Using multiple wiping methods, verifying the wiping process, considering self-encrypting drives, and keeping the drive physically secure are just a few measures to take for a more secure wipe.
Remember, the method you choose should align with your specific security requirements, personal preferences, and the sensitivity of the data stored on your M.2 SSD.
By following the guidelines and best practices outlined in this guide, you can confidently and securely wipe your M.2 SSD, ensuring that your data is irretrievable and protecting your privacy.