Introduction
When it comes to securely wiping an SSD drive on Windows 10, it’s essential to understand the intricacies involved in order to protect your sensitive data. Solid State Drives (SSDs) have become increasingly popular due to their faster speeds and improved performance compared to traditional hard disk drives. However, wiping an SSD drive requires different considerations and methods than wiping a standard hard drive. In this article, we will explore the various methods to effectively wipe an SSD drive on Windows 10 while adhering to best practices for data security.
Before diving into the different methods, it’s important to grasp why wiping an SSD drive is necessary. When you delete files from an SSD drive, the data isn’t immediately erased. Instead, the drive marks those sectors as available for reuse. This means that until those sectors are overwritten with new data, the original information can potentially be recovered. This poses a significant risk if you are selling or disposing of your SSD drive, as your personal or confidential data may still be accessible to someone with the right tools and intentions.
To ensure the complete removal of your data from an SSD drive, it’s essential to follow proper precautions before initiating the wiping process. Firstly, make sure to back up any important data that you want to keep. This will prevent any accidental loss of files during the wiping process. Additionally, disabling any encryption or security features on the SSD drive will allow for a smoother and more effective wiping process.
In this article, we will explore four different methods to wipe an SSD drive on Windows 10. These methods include using Secure Erase, utilizing the Diskpart command, employing third-party software like CCleaner or Parted Magic, and performing a clean installation of Windows 10. Each method has its own advantages and considerations, and we will discuss them in detail to help you choose the most appropriate method for your specific needs. By following the step-by-step instructions provided in this article, you can ensure your SSD drive is securely wiped, protecting your sensitive data from unauthorized access.
Understanding SSD Drives
To effectively wipe an SSD drive on Windows 10, it’s important to have a basic understanding of how these drives function. Unlike traditional hard disk drives (HDDs) that use spinning disks and magnetic storage, SSD drives store data using flash memory chips. This fundamental difference brings several advantages, including faster access times, improved durability, and lower power consumption.
SSD drives consist of multiple NAND flash memory chips that store data in cells. Each cell can represent a 0 or 1, and the organization of these cells determines how data is stored and accessed. SSD drives use a technology called wear leveling to distribute data evenly across the cells, preventing certain cells from wearing out faster than others. This improves the overall lifespan and performance of the drive.
Another crucial aspect of SSD drives is the TRIM command. TRIM helps maintain the drive’s performance by informing the operating system which blocks of data are no longer in use. When files are deleted, the drive no longer needs to store those blocks, and the TRIM command instructs the SSD to mark them as available for future writes. This optimization ensures that the drive performs at its best.
Understanding the inner workings of SSD drives is essential when it comes to wiping them. As mentioned earlier, simply deleting files does not guarantee their complete removal from an SSD drive. The data still resides on the drive until it gets overwritten by new information. Therefore, specific methods need to be employed to wipe the drive securely and prevent any potential data recovery attempts.
It’s also worth noting that SSD drives have a limited number of write cycles per cell. This means that continuously writing and rewriting data to an SSD drive can lead to deterioration over time. However, for the purpose of wiping the drive, this limitation is not a concern, as the process only requires a one-time write of new data to ensure the complete removal of the original information.
Now that we have a grasp on the fundamental aspects of SSD drives, we can explore the different methods available to securely wipe them on a Windows 10 operating system. These methods will ensure that your sensitive data is permanently removed from the drive, protecting your privacy and ensuring that the drive can be safely reused or disposed of without any risk of unauthorized access.
Why Wipe an SSD Drive?
Wiping an SSD drive on Windows 10 is crucial for several important reasons. When you decide to sell or dispose of your SSD drive, you don’t want your personal or confidential data to fall into the wrong hands. Simply deleting files or formatting the drive is not enough, as the data can still be recovered with specialized software or techniques. To ensure the complete removal of your data and protect your privacy, it is essential to wipe the SSD drive using secure methods.
One of the main reasons to wipe an SSD drive is to prevent unauthorized access to your sensitive information. Whether it’s personal files, financial documents, or confidential business data, you want to ensure that this information cannot be recovered once it leaves your possession. By wiping the SSD drive, you eliminate the risk of someone retrieving your data and misusing it.
Wiping an SSD drive is also important for compliance purposes. Many industries, such as healthcare and finance, have strict regulations regarding data privacy. If you are in a profession that deals with sensitive client information, wiping the SSD drive before reusing or disposing of it is a necessary step to comply with these regulations. By doing so, you demonstrate your commitment to protecting confidential data and maintaining regulatory compliance.
In addition to data security and compliance, wiping an SSD drive can also improve its performance and longevity. Over time, SSD drives can accumulate unnecessary files, temporary data, and remnants of deleted files. These remnants can take up valuable space and potentially impact the drive’s performance. By wiping the drive, you start fresh with a clean slate, allowing the operating system and applications to run more efficiently and effectively.
Furthermore, wiping an SSD drive before donating or recycling it promotes environmental responsibility. By securely removing your data, you prevent anyone else from accessing and potentially misusing that data. This ensures the privacy and security of your personal information and helps contribute to a safer digital environment for everyone.
Overall, wiping an SSD drive on Windows 10 is essential for data privacy, compliance, performance optimization, and environmental responsibility. By taking the necessary steps to securely remove your data, you can have peace of mind knowing that your information will not be compromised and that your SSD drive can be safely reused or recycled without any risk of data breaches.
Precautions Before Wiping an SSD Drive
Before initiating the process of wiping an SSD drive on Windows 10, it is important to take certain precautions to ensure a smooth and successful operation. By following these precautions, you can protect your data, prevent any accidental loss, and optimize the effectiveness of the wiping process.
The first precaution is to back up any important data that you want to keep. Wiping an SSD drive permanently deletes all data on it, so making a backup ensures that you have a copy of your files before proceeding. This step is especially critical if there are any files or documents that you cannot afford to lose.
Next, it is advisable to disable any encryption or security features on the SSD drive. Some SSD drives, particularly those used in enterprise environments, may have built-in encryption or security settings. Disabling these features before wiping the drive can prevent any complications or conflicts during the wiping process. Consult your SSD drive’s documentation or manufacturer’s website for instructions on how to disable encryption or security features.
In addition, it is important to ensure that you have the necessary power and connectivity to complete the wiping process. Make sure that your SSD drive is connected to a reliable power source, such as a mains power outlet or a UPS (Uninterruptible Power Supply). Sudden power loss during the wiping process can cause data corruption or damage to the SSD drive.
Furthermore, ensure that your computer is in a stable and secure environment during the wiping process. Avoid any physical disturbances or interruptions that could potentially disrupt the wiping operation. It is recommended to perform the wiping process on a stable desk or surface and to avoid moving or jostling the computer or SSD drive during the process.
Finally, consider using a separate computer or a bootable USB drive to perform the wiping process. This can minimize the risk of accidentally wiping the wrong drive or encountering operating system conflicts. By using a different computer or booting from a USB drive, you can focus solely on the wiping process without worrying about inadvertent data loss or unintended consequences.
By taking these precautions before wiping an SSD drive, you can safeguard your data, prevent any accidental loss, and ensure the smooth execution of the wiping process. Remember to back up your important data, disable any encryption or security features, ensure reliable power and connectivity, create a stable environment, and consider using a separate computer or bootable USB drive. These precautions will help you maintain data integrity and maximize the success of the wiping operation.
Different Methods to Wipe an SSD Drive on Windows 10
There are several methods available to effectively wipe an SSD drive on Windows 10. Each method offers its own advantages and considerations, allowing you to choose the one that best suits your needs and preferences. Let’s explore the four different methods for wiping an SSD drive on Windows 10.
Method 1: Using Secure Erase:
One of the most effective methods for wiping an SSD drive is utilizing the Secure Erase feature. This method is specifically designed to securely erase data from SSD drives and ensures that the data cannot be recovered. Secure Erase works by resetting the SSD drive to its original factory state, effectively eliminating all data on the drive. To use this method, you will need to download a Secure Erase utility from your SSD drive manufacturer’s website and follow the provided instructions.
Method 2: Using Diskpart Command:
The Diskpart command is a built-in command-line utility in Windows 10 that allows you to manage disks and partitions. While it is primarily used for managing hard disk drives, it can also be used to wipe an SSD drive. By using the Diskpart command and performing a clean command on the SSD drive, you can remove all existing partitions and data. However, it’s important to note that this method may not be as effective as Secure Erase when it comes to wiping an SSD drive.
Method 3: Using Third-Party Software:
There are various third-party software tools available that specialize in securely wiping SSD drives. Examples of such software include CCleaner, Parted Magic, and DBAN (Darik’s Boot and Nuke). These tools offer simple user interfaces and advanced wiping algorithms to ensure that the data is irrecoverable. Before using any third-party software, ensure that you download it from a reputable source and follow the instructions provided by the software developer.
Method 4: Performing a Clean Install of Windows 10:
Another method to wipe an SSD drive is by performing a clean installation of Windows 10. This method involves reinstalling the operating system, which effectively formats the SSD drive and removes all existing data. However, it’s important to note that this method will also erase all other files and applications on the computer, so make sure to back up any important data before proceeding with this method.
When choosing a method to wipe your SSD drive, it’s important to consider factors such as efficiency, security, ease of use, and compatibility. Research each method further, understand its limitations, and follow the instructions carefully to ensure a successful wiping process. By selecting the appropriate method and adhering to the guidelines, you can confidently wipe your SSD drive on Windows 10 and protect your data from unauthorized access.
Method 1: Using Secure Erase
One of the most effective methods for securely wiping an SSD drive on Windows 10 is to use the Secure Erase feature. This method is specifically designed for SSD drives and ensures that the data is permanently removed and cannot be recovered. Secure Erase works by resetting the SSD drive to its original factory state, essentially erasing all the data on the drive.
To use Secure Erase, you will need to download a Secure Erase utility from the manufacturer’s website of your SSD drive. Most major SSD manufacturers provide their own Secure Erase tool for users to download and use. It’s important to ensure that you download the utility from a trusted source to avoid any potential security risks.
Once you have downloaded the Secure Erase utility, follow the provided instructions to create a bootable USB drive or CD/DVD. This bootable media will allow you to run the Secure Erase utility outside of the operating system environment, ensuring that all data on the SSD drive can be wiped without any conflicts or interruptions.
When you have the bootable media ready, restart your computer and boot from the USB drive or CD/DVD that contains the Secure Erase utility. The utility will guide you through the process, providing options to select the SSD drive you want to wipe. Be cautious and double-check the drive selection to ensure that you are wiping the correct drive, as this process is irreversible.
Once you have confirmed the drive selection, initiate the Secure Erase process. This process may take some time to complete, depending on the size and speed of your SSD drive. The Secure Erase utility will send commands to the SSD drive to erase all data and restore it to its factory state. When the process is finished, you can exit the utility, remove the bootable media, and restart your computer.
It’s important to note that using Secure Erase on an SSD drive will also remove the operating system and all other data on the drive. Therefore, it is recommended to back up any important data before proceeding with the Secure Erase process. Once the process is complete, you will need to reinstall the operating system and any necessary applications.
Using Secure Erase is one of the most reliable methods for securely wiping an SSD drive on Windows 10. By following the instructions provided by the manufacturer’s Secure Erase utility, you can ensure the complete removal of your data and protect your privacy. Remember to back up your data before initiating the Secure Erase process and be cautious when selecting the drive to avoid any accidental data loss.
Method 2: Using Diskpart Command
Another method to consider when wiping an SSD drive on Windows 10 is by utilizing the Diskpart command. While Diskpart is primarily used for managing partitions and volumes on hard disk drives, it can also be used to wipe an SSD drive. However, it’s important to note that this method may not be as effective as using Secure Erase, and some data remnants may still remain on the drive.
To begin, open the Command Prompt on your Windows 10 computer with administrative privileges. You can do this by searching for “Command Prompt” in the Start menu, right-clicking on it, and selecting “Run as administrator”.
In the Command Prompt, type “diskpart” and press Enter. This will launch the Diskpart command-line utility.
Next, type “list disk” and press Enter. This will show you a list of all the disks connected to your computer. Identify the number assigned to the SSD drive you want to wipe.
Once you have identified the SSD drive, type “select disk X” (replace X with the number assigned to your SSD drive) and press Enter.
Now, type “clean all” and press Enter. This command will start the process of wiping the SSD drive. Please note that this process may take a significant amount of time, depending on the size of the drive.
Once the wiping process is complete, you can exit the Diskpart utility by typing “exit” and pressing Enter.
It’s important to note that using the Diskpart command to wipe an SSD drive may not completely erase all data on the drive. While it removes the drive’s partitions and most of the data, some remnants may still exist. For a more secure and thorough wiping process, it is recommended to use the Secure Erase feature or other dedicated third-party software.
If you choose to utilize the Diskpart command, be cautious and double-check the drive number to ensure you are wiping the correct SSD drive. Additionally, back up any important data before proceeding with the wiping process, as all data on the drive will be permanently erased.
While the Diskpart command can be used as a basic method to wipe an SSD drive on Windows 10, it’s important to consider the limitations and potential data remnants. For a more comprehensive and secure wiping process, explore other methods such as Secure Erase or dedicated third-party software.
Method 3: Using Third-Party Software (e.g., CCleaner, Parted Magic)
If you prefer a user-friendly and comprehensive method to wipe an SSD drive on Windows 10, using third-party software can be a viable option. There are several reputable tools available, such as CCleaner, Parted Magic, and DBAN (Darik’s Boot and Nuke), that offer advanced wiping algorithms to ensure the complete removal of data from your SSD drive.
One popular tool, CCleaner, provides a secure drive wiping feature called “Drive Wiper.” This feature allows you to choose specific drives, including your SSD drive, and overwrite the data with random patterns, making it virtually impossible to recover. CCleaner also offers an intuitive user interface, making it easy to navigate and use the drive wiping feature.
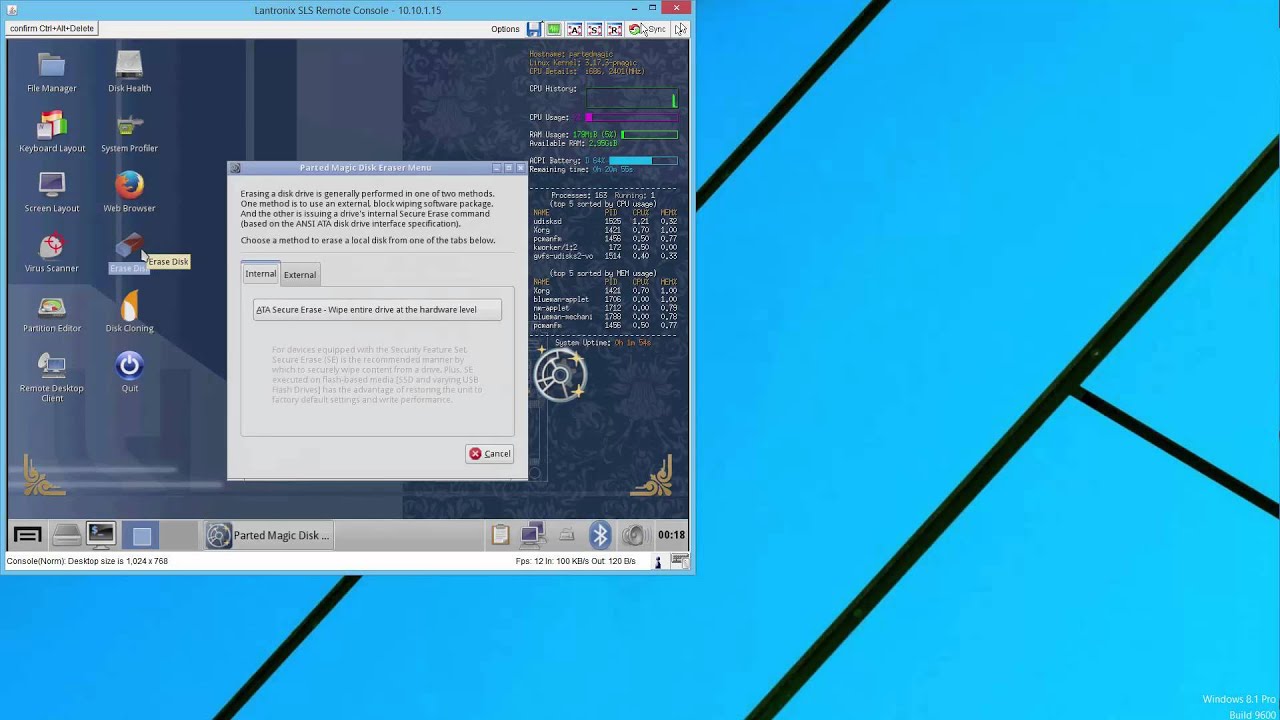
Another reliable option is Parted Magic. Parted Magic is a Linux-based operating system that provides various disk management tools, including a secure erasure feature. With Parted Magic, you can boot your computer into the operating system and use the built-in secure erasure tool to wipe your SSD drive. The interface is straightforward, and the tool offers different erasure methods, such as DoD 5220.22-M and Gutmann.
DBAN (Darik’s Boot and Nuke) is another popular choice for securely wiping SSD drives. It is a standalone boot disk that allows you to wipe multiple drives simultaneously using various erasure methods. DBAN offers enhanced security features, such as data verification and reporting, to ensure the successful and thorough wiping of your SSD drive.
Before using any third-party software, ensure that you download it from a reputable source and verify its authenticity. Always check for updates and follow the software’s instructions for proper usage. Additionally, consider creating a backup of your important data before proceeding with the wiping process, as these tools will permanently erase all data on the drive.
Using third-party software to wipe an SSD drive provides convenience, flexibility, and advanced wiping algorithms to ensure data security. They offer user-friendly interfaces and various erasure methods, allowing you to choose the level of security that meets your needs. Remember to select the software that suits your requirements, follow the instructions provided, and take necessary precautions to protect your data and privacy during the wiping process.
While third-party software can be very effective, it’s important to use reputable and trusted tools to ensure the best results. Always research and read reviews before using any third-party software for SSD drive wiping, and choose a tool that suits your specific requirements and preferences.
Method 4: Performing a Clean Install of Windows 10
Performing a clean installation of Windows 10 is another method that can effectively wipe an SSD drive. This method involves reinstalling the operating system, which formats the drive and removes all existing data. However, it’s important to note that this method will also erase all other files and applications on your computer, so be sure to back up any important data before proceeding.
To begin, you will need a Windows 10 installation media, such as a bootable USB drive or a DVD. Make sure you have a valid Windows 10 license key before proceeding with the clean installation.
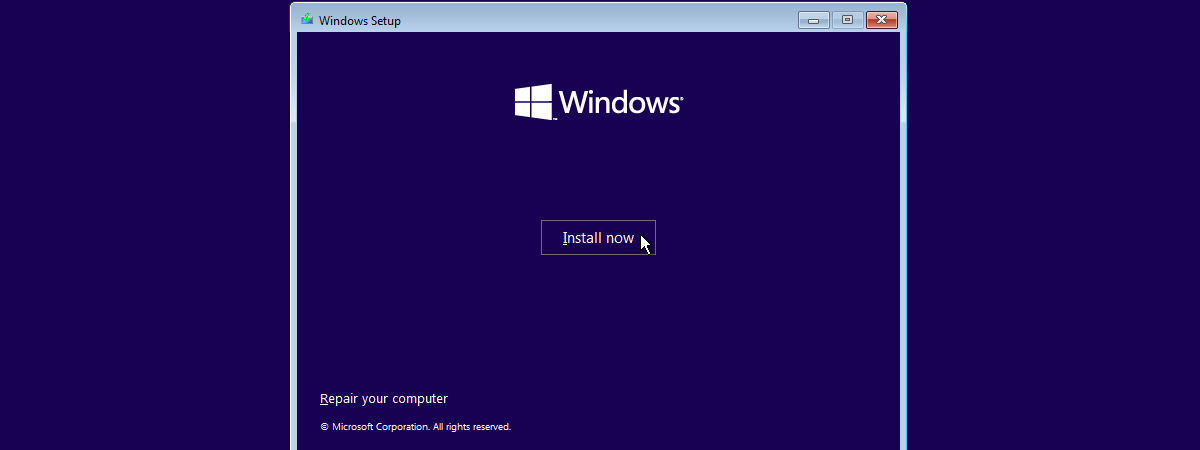
Firstly, insert the Windows 10 installation media into your computer and restart it. During the startup process, access the boot options menu by pressing the designated key (typically F12) and select the option to boot from the installation media.
Follow the on-screen prompts to set your language preferences, accept the license terms, and choose the installation type. Select the option to perform a “Custom” installation, which allows you to choose the drive on which to install Windows 10.
At this point, you will see a list of available drives. Select the SSD drive that you want to wipe and click on the “Format” option. Formatting the SSD drive will erase all existing data and prepare it for the clean installation of Windows 10.
Once the formatting process is complete, proceed with the installation of Windows 10 by following the on-screen instructions. This will involve selecting the appropriate drive to install the operating system, creating a user account, and configuring other settings. Be patient as the installation process may take some time.
After the clean installation of Windows 10 is complete, you will have a fresh operating system and a wiped SSD drive. Remember to reinstall any necessary applications and restore your backed-up data to complete the setup of your computer.
Performing a clean installation of Windows 10 provides a comprehensive method to wipe an SSD drive, ensuring the complete removal of data on the drive. However, the process is irreversible, and all existing files and applications will be permanently deleted. Therefore, it is crucial to back up any important data and ensure that you have the necessary installation media and license key before proceeding.
Consider performing a clean installation of Windows 10 if you want a fresh start, have backed up your data, and are willing to reinstall all necessary applications. This method provides a secure and thorough wiping process, giving you peace of mind knowing that your SSD drive is free from any remnants of previous data.
Conclusion
Wiping an SSD drive on Windows 10 is an important step to protect your data privacy and ensure the secure disposal or reuse of your drive. By understanding the nuances of SSD drives and following the appropriate methods, you can effectively wipe your SSD drive and prevent unauthorized access to your sensitive information.
In this article, we explored different methods for wiping an SSD drive on Windows 10. Using the Secure Erase feature provided by the SSD drive manufacturer is one of the most reliable methods, as it resets the drive to its factory state, permanently erasing all data. Utilizing the Diskpart command, a built-in command-line utility, can also be used to wipe an SSD drive; however, its effectiveness may be limited.
Third-party software such as CCleaner, Parted Magic, or DBAN offer more comprehensive and user-friendly solutions for securely wiping SSD drives. These tools provide advanced wiping algorithms and flexible options to ensure data privacy and irreversibly erase all data on the drive.
Performing a clean installation of Windows 10 is another method to wipe an SSD drive effectively. However, it is important to note that this method will also erase all other files and applications on your computer, so backing up your important data is essential before proceeding.
Before initiating any wiping process, it is crucial to take precautions, such as backing up your data and disabling encryption or security features on the SSD drive. These steps will prevent any accidental data loss and ensure a smoother wiping operation.
Ultimately, the method you choose to wipe your SSD drive will depend on your specific needs and preferences. Consider factors such as data security, ease of use, and compatibility with your SSD drive before making a decision. Regardless of the method you choose, always follow the instructions provided by the manufacturer or software developer to ensure a successful and secure wiping process.
By following the techniques outlined in this article and adhering to best practices for data security, you can confidently wipe your SSD drive on Windows 10, protecting your sensitive information and ensuring its secure disposal or reuse. Remember to back up your data, take necessary precautions, and choose the method that aligns best with your requirements.