Introduction
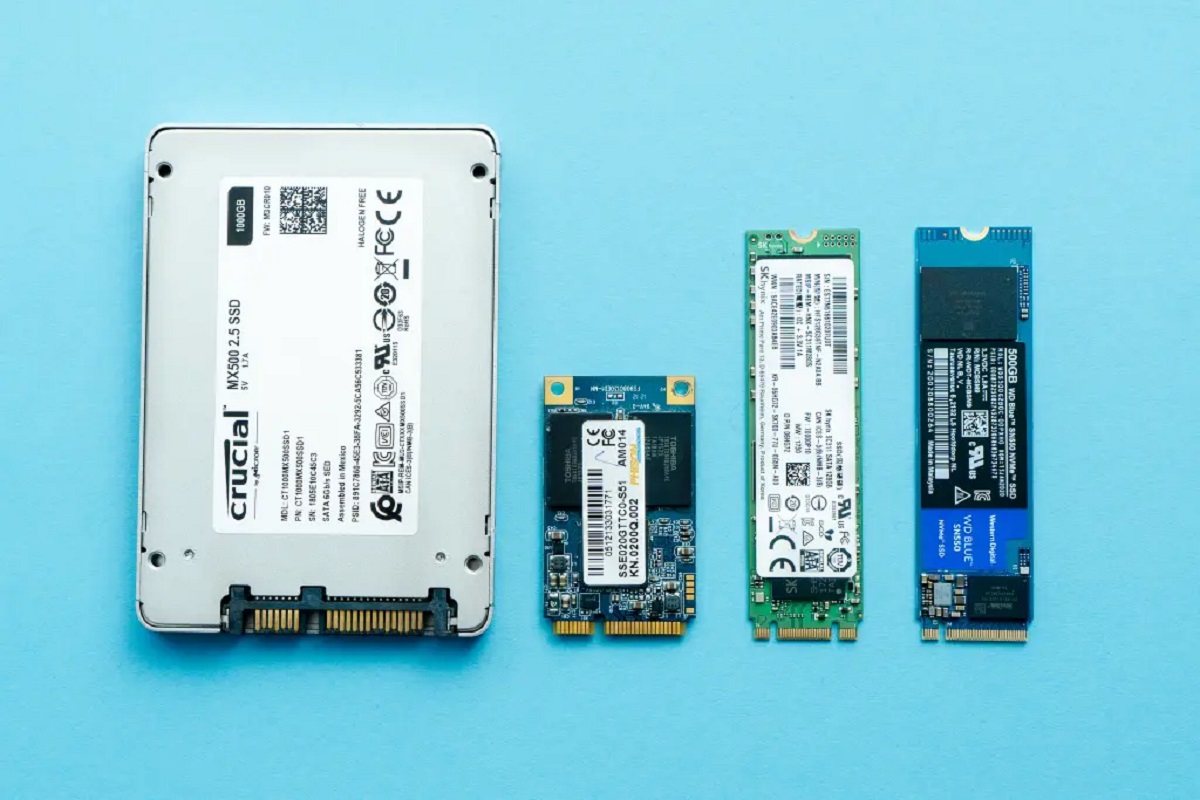
Welcome to the world of solid-state drives (SSDs), where speed and performance reign supreme. SSDs have become increasingly popular due to their ability to deliver faster read and write speeds compared to traditional hard disk drives (HDDs). However, one drawback of SSDs is their relatively limited capacity, especially when compared to HDDs.
As an SSD user, it’s important to manage your storage effectively to ensure optimal performance and get the most out of your drive. This means periodically freeing up space on your SSD to maintain its efficiency and prevent it from becoming overloaded.
In this article, we will explore the reasons why it is crucial to free up space on your SSD and provide you with practical steps to accomplish this task. By following these steps, you can maximize your storage capacity and ensure your SSD continues to operate at its best.
Whether you’re using your SSD for gaming, multimedia editing, or everyday computing, the information shared in this article will help you declutter your drive and optimize its performance. So let’s dive in and explore the various methods to free up space on your SSD and enjoy a seamless computing experience.
Why is it important to free up space on your SSD?
Keeping your SSD storage optimized and free from unnecessary clutter is essential for several reasons. Let’s take a look at why it’s important to regularly free up space on your SSD:
1. Improved Performance: As SSDs rely on memory cells to store data, having limited free space can inhibit their performance. When the drive is near capacity, it can take longer to find and access data, resulting in slower read and write speeds. By freeing up space, you allow the drive to allocate new data more efficiently, leading to improved overall performance.
2. Longevity of the Drive: SSDs have a limited number of write cycles before they begin to wear out. When the drive nears its maximum capacity, it undergoes more frequent read/write operations and experiences increased wear and tear. Freeing up space reduces these operations, ultimately prolonging the lifespan of your SSD.
3. Room for Updates and Upgrades: Regularly clearing space on your SSD ensures that you have sufficient room for future updates and upgrades. Operating system and software updates often require significant space, so having a well-managed SSD enables you to install them without issues. Additionally, if you plan to upgrade your SSD in the future, freeing up space makes the migration process smoother.
4. Data Organization: Over time, files can become disorganized, making it harder to locate specific documents, photos, or videos. By regularly decluttering your SSD, you can organize your files and folders more effectively, making it easier to find what you need when you need it.
5. Security and Privacy: Frequent storage cleanup reduces the risk of unwanted data exposure. By removing unnecessary files, you minimize the chances of sensitive information falling into the wrong hands if your SSD is lost, stolen, or hacked. It’s good practice to keep only the necessary files on your SSD and store personal or sensitive data in more secure locations.
Overall, regularly freeing up space on your SSD is crucial for maintaining optimal performance, prolonging the drive’s lifespan, and ensuring you have enough room for future updates and upgrades. It also helps keep your data organized and your system secure. In the following sections, we will explore various steps to help you achieve this efficiently.
Assessing your SSD storage
Before diving into the process of freeing up space on your SSD, it’s important to assess your current storage usage. This will give you a better understanding of which areas are taking up the most space and where you can focus your efforts. Here are a few methods to assess your SSD storage:
1. File Explorer or Finder: Open your file explorer or finder and navigate to your SSD drive. Right-click on the drive and select “Properties” (Windows) or “Get Info” (Mac) to view the total capacity, available space, and the breakdown of file types occupying your storage.
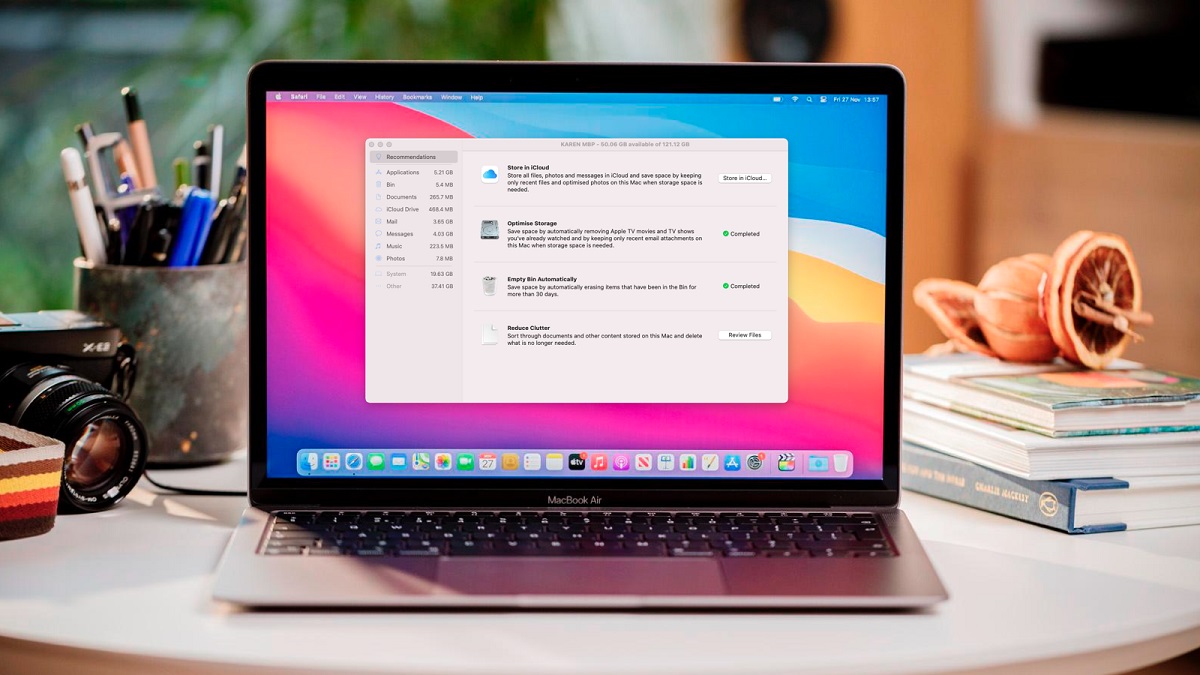
2. Storage Management Tools: Many operating systems provide built-in storage management tools that offer detailed insights into your storage usage. For Windows users, you can access the Storage settings by searching for it in the Windows search bar. Mac users can open the “About This Mac” window and go to the “Storage” tab for a visual representation of their storage usage.
3. Third-Party Applications: There are numerous third-party applications available that provide a more in-depth analysis of your SSD storage. These applications can give you a comprehensive breakdown of disk usage, file sizes, and even suggest areas where you can free up space. Some popular options include WinDirStat (Windows), DaisyDisk (Mac), and TreeSize (Windows).
Once you have assessed your SSD storage, you will have a better understanding of which files and folders are consuming the most space. This knowledge will guide you in the next steps of cleaning up and optimizing your SSD storage. In the following sections, we will explore practical steps to free up space and maintain an efficient SSD storage system.
Step 1: Clean up unnecessary files
One of the most effective ways to free up space on your SSD is to clean up unnecessary files. Over time, our systems accumulate a variety of files that are no longer needed, taking up valuable storage space. Here are some steps to help you clean up unnecessary files:
1. Delete old and duplicate files: Start by going through your files and folders and identifying any old or duplicate files that are no longer required. Old documents, duplicate photos, and redundant files can easily accumulate and take up significant space.
2. Clear your downloads folder: The downloads folder is often a dumping ground for files that we only need temporarily. Go through your downloads folder and delete any files that you no longer need. Remember to also clear out your browser’s downloads history.
3. Empty the recycle bin or trash: When you delete files, they are often moved to the recycle bin (Windows) or trash (Mac) instead of being permanently removed. Emptying these bins will free up space on your SSD by permanently deleting these files.
4. Remove unused software installers: If you have installed software using an installer file, it’s important to remove the installer after installation. These installer files can take up a significant amount of space if left unchecked.
5. Clean up browser cache and temporary files: Web browsers store temporary files and cache data to improve browsing speed. However, these files can accumulate over time and take up valuable space. Use the built-in options in your browser to clear the cache and delete temporary files.
6. Uninstall unused applications: Take a look at your installed applications and identify any that you no longer use. Uninstalling these applications will not only free up space but also remove any associated files and components that may be stored on your SSD.
Remember, before deleting any files, it’s always a good idea to back up important data to a separate storage device or cloud storage service.
By cleaning up unnecessary files, you can quickly reclaim valuable space on your SSD, improving performance and ensuring that you have ample storage available for important files and applications. In the next step, we will explore how to uninstall unused applications to further optimize your SSD storage.
Step 2: Uninstall unused applications
Uninstalling unused applications is an efficient way to free up space on your SSD and streamline your system. Over time, we tend to accumulate a collection of applications that we no longer use or need. By uninstalling these applications, you can reclaim valuable storage space and improve the overall performance of your SSD. Here are the steps to uninstall unused applications:
1. Windows: On Windows, you can uninstall applications by going to the “Control Panel” and selecting “Uninstall a program” or “Add or Remove Programs” option. From there, you can browse the list of installed applications, select the ones you want to uninstall, and follow the on-screen prompts to remove them.
2. Mac: On Mac, you can uninstall applications by opening the “Applications” folder and dragging the unwanted application to the “Trash” bin. Alternatively, you can use the “Launchpad” to find the application, press and hold the Option key until the icons start to jiggle, and click the “X” button to uninstall.
During the uninstallation process, some applications may prompt you to confirm additional preferences, such as removing associated files or preferences. Make sure to carefully review these prompts and select the appropriate options to fully remove the application and its related data.
While uninstalling applications, it’s important to note that some system-critical applications and files should not be removed unless you are sure of their purpose. If you are unsure, it’s advisable to seek guidance or do some research before proceeding.
Regularly reviewing and uninstalling unused applications will not only free up disk space on your SSD but also reduce the clutter in your system. This can lead to improved system performance, faster boot times, and smoother overall operation.
Once you have uninstalled unnecessary applications, it’s recommended to restart your computer to ensure all changes take effect. In the next step, we will explore how to remove temporary files to further optimize your SSD storage.
Step 3: Remove temporary files
Temporary files are created by various applications and processes as they perform tasks on your computer. These files are meant to be temporary and are usually no longer needed once their task is completed. Removing temporary files is an important step in freeing up space on your SSD and maintaining optimal system performance. Here’s how you can remove temporary files:
1. Windows: On Windows, you can use the built-in Disk Cleanup tool to remove temporary files. Simply search for “Disk Cleanup” in the Windows search bar, select the drive where your operating system is installed (typically the C: drive), and click on the “OK” button to initiate the scan. Once the scan is complete, you can select the types of files you want to remove, including temporary files, and click on the “OK” button to delete them.
2. Mac: On Mac, you can use the built-in “Storage Management” tool to remove temporary files. Go to the “Apple” menu, select “About This Mac,” then click on the “Storage” tab. Click on the “Manage” button, and the tool will scan your system for temporary files. From there, you can select the files you want to remove and click on the “Delete” button to free up space.
3. Third-Party Tools: There are also third-party applications available that can help you remove temporary files and reclaim disk space. Some popular options include CCleaner (Windows), CleanMyMac (Mac), and BleachBit (cross-platform). These tools provide more advanced cleaning options and can help you target specific areas where temporary files may accumulate.
By removing temporary files, you not only free up valuable space on your SSD but also eliminate unnecessary clutter that can affect system performance. It’s important to note that while removing temporary files is generally safe, it’s always a good idea to review the files and verify that they are indeed temporary and not needed for any ongoing processes.
In the next step, we will explore how utilizing cloud storage can help you offload files and further optimize your SSD storage.
Step 4: Utilize cloud storage
Cloud storage has become increasingly popular as a solution for managing and storing files offsite. By utilizing cloud storage services, you can effectively offload files from your SSD, freeing up valuable space and keeping your data accessible from anywhere. Here’s how you can utilize cloud storage to optimize your SSD:
1. Choose a cloud storage provider: There are numerous cloud storage providers available, such as Google Drive, Dropbox, Microsoft OneDrive, and iCloud. Research and choose a provider that suits your needs in terms of storage capacity, security features, and pricing.
2. Upload files to the cloud: Once you have selected a cloud storage service, begin uploading files from your SSD to the cloud. This can be done by installing the provider’s desktop or mobile application, creating a folder or directory for the files you want to offload, and using the application to upload them to the cloud.
3. Organize files and folders: Take the opportunity to organize your files and folders within the cloud storage. Create specific folders and subfolders to keep different types of files organized and easily accessible. This will help you locate and retrieve files whenever needed.
4. Selective sync: Some cloud storage providers offer the option for selective sync. This allows you to choose which files or folders to sync with your computer, meaning you can keep certain files exclusively in the cloud and save space on your SSD by not downloading them to your local system.
5. Access files on demand: Cloud storage allows you to access your files on demand, meaning you can download and use them only when needed. This reduces the need for local storage and keeps your SSD clutter-free.
6. Backup important files: Cloud storage also serves as a reliable backup solution for your important files. By storing your files in the cloud, you have an additional layer of protection in case of hardware failure or other data loss incidents.
By utilizing cloud storage, you can free up significant space on your SSD while keeping your files safe and accessible. However, it’s important to take security measures, such as enabling two-factor authentication and using strong passwords, to safeguard your data in the cloud.
In the next step, we will explore how to optimize system settings to further enhance your SSD performance.
Step 5: Optimize system settings
Optimizing your system settings can play a significant role in freeing up space on your SSD and improving overall performance. By tweaking certain settings, you can reduce unnecessary file storage and minimize resource usage. Here are some steps to optimize your system settings:
1. Adjust virtual memory: Virtual memory is a feature that uses a portion of your SSD space as an extension of the physical RAM. By adjusting virtual memory settings, you can minimize its impact on your SSD storage. To do this, go to the System Properties (Windows) or Preferences (Mac) and modify the virtual memory settings accordingly.
2. Change default file locations: By default, some applications use your SSD as the location for storing temporary and cache files. You can change these default locations to a different drive or partition with more storage capacity. For example, you can change the default location of your browser’s download folder or your system’s temporary files folder.
3. Disable hibernation: Hibernation, a feature that stores the current state of your system on the SSD, can take up a significant amount of space. If you rarely use the hibernation feature, you can disable it to free up space. Open the Command Prompt as an administrator (Windows) and type “powercfg /hibernate off” to disable hibernation.
4. Clear system restore points: System restore points are created by the system to help you roll back to a previous state if needed. However, these restore points can consume a significant amount of disk space. You can adjust the amount of space allocated for restore points or manually delete older restore points to save space.
5. Disable unnecessary startup programs: Many applications automatically start when you boot up your system, consuming valuable system resources. Review the list of startup programs and disable any that are unnecessary, reducing the system’s load and freeing up resources.
6. Regularly update your operating system: Keeping your operating system up to date ensures that you have the latest bug fixes, security patches, and performance improvements. These updates often include optimizations that can help enhance SSD performance and efficiency.
By optimizing your system settings, you can minimize the impact on your SSD storage and maximize performance. Remember to carefully review and research any changes you make to ensure they are compatible with your system and won’t cause any undesired effects. With optimized system settings, you can further optimize your SSD storage and overall computing experience.
In the next step, we will explore how using external storage devices can help alleviate space constraints on your SSD.
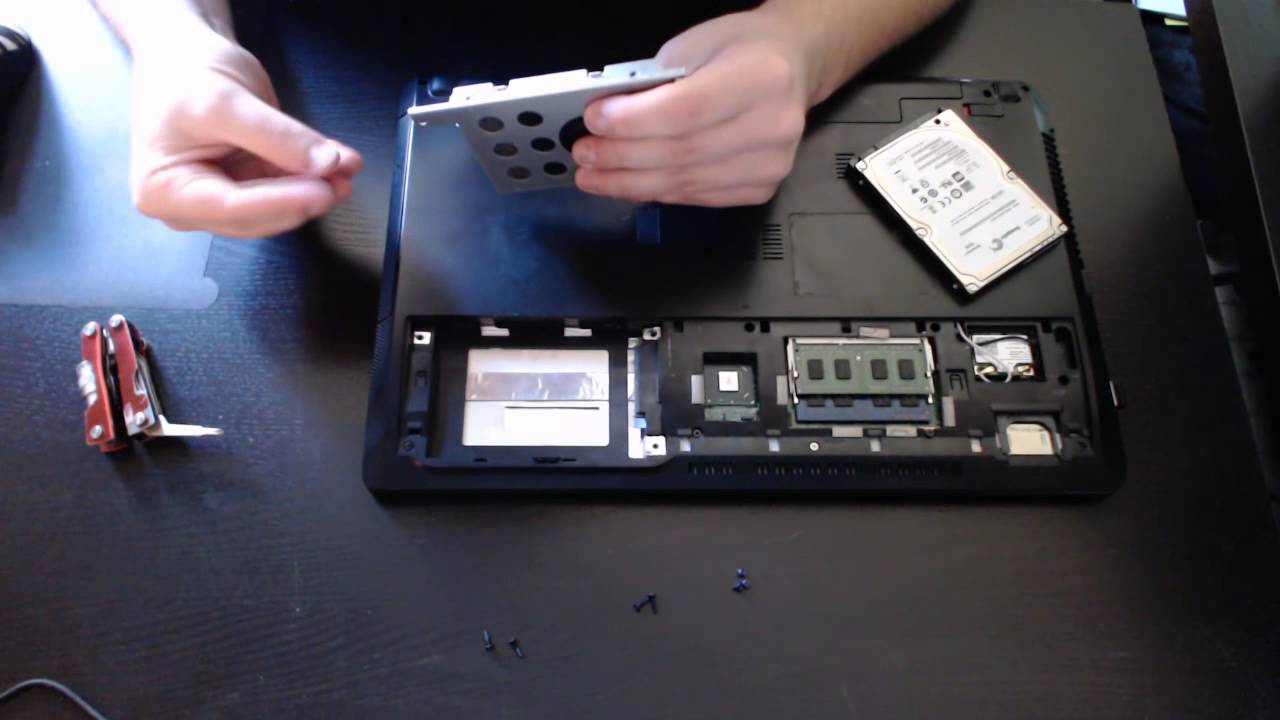
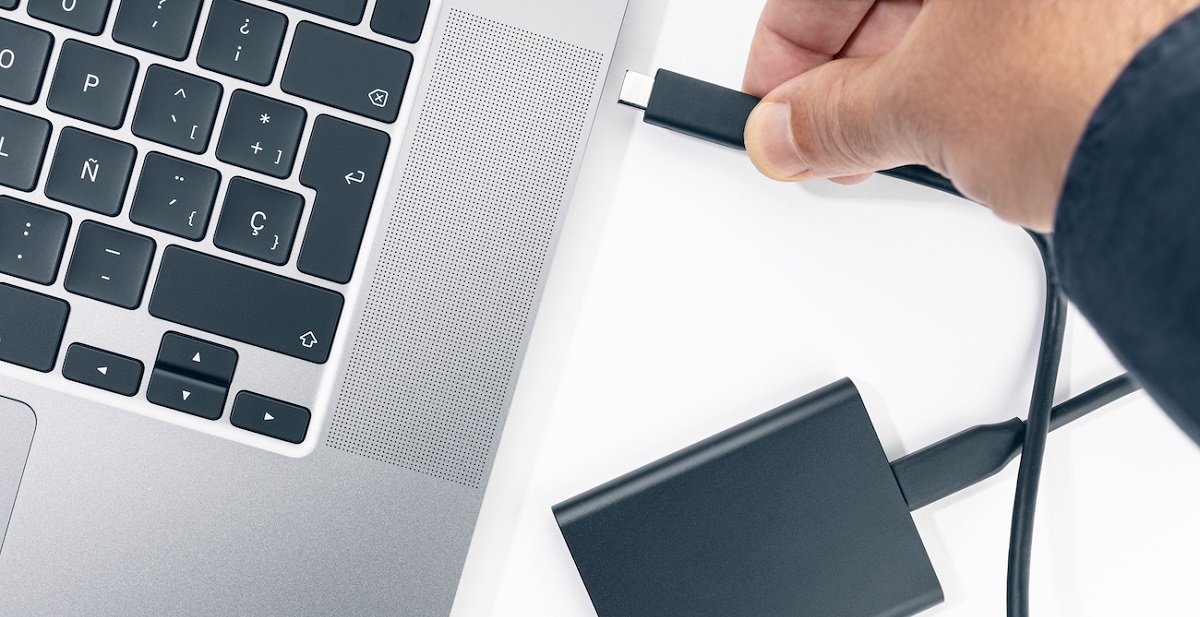
Step 6: Use external storage devices
When it comes to freeing up space on your SSD, utilizing external storage devices is a practical solution. External storage devices offer additional capacity that can supplement your SSD, allowing you to offload files and ease the burden on your internal storage. Here are some ways you can use external storage devices to optimize your SSD:
1. External hard drives: External hard drives provide a significant amount of storage space that can be used to store less frequently accessed files, multimedia, or backups. Connect the external hard drive to your computer and transfer files from your SSD that you don’t need immediate access to.
2. USB flash drives: USB flash drives are portable and convenient for transferring smaller files or documents from your SSD. These drives are available in various capacities and can be easily plugged into your computer’s USB port to transfer files back and forth.
3. Network-attached storage (NAS): NAS devices are essentially hard drives or storage arrays connected to your network, providing shared storage accessible by multiple devices. You can use NAS devices to offload larger files or create backups of your important data, freeing up space on your SSD while still having easy access to your files.
4. Cloud storage: As mentioned in a previous step, cloud storage services allow you to store files remotely, accessible from anywhere with an internet connection. Uploading files to the cloud not only provides an additional storage location but also acts as a backup and enables seamless access to your files across multiple devices.
When utilizing external storage devices, it’s important to properly organize and manage your files. Create specific folders or directories on the external device and maintain a well-structured filing system to easily locate and manage your stored files.
By utilizing external storage devices, you effectively expand the storage capacity of your system, thereby reducing the burden on your SSD. This allows you to keep the most frequently accessed files on your SSD while offloading less critical files to external storage, leading to improved SSD performance and better organization of your data.
In the final step, we will explore how to optimize your SSD performance by utilizing the TRIM feature.
Step 7: Optimize SSD with TRIM
TRIM is a feature specifically designed for SSDs to maintain their performance and extend their lifespan. Enabling the TRIM feature on your SSD can help improve overall performance and efficiency. Here’s how you can optimize your SSD with TRIM:
1. Check TRIM support: First, confirm if your SSD supports TRIM. Most modern SSDs do support this feature, but it’s always a good idea to double-check the manufacturer’s specifications or documentation for your specific SSD model.
2. Enable TRIM on Windows: If you’re using Windows, TRIM is usually enabled by default. However, it’s worth verifying the TRIM status on your system. Open Command Prompt as an administrator, and then type the following command: “fsutil behavior query DisableDeleteNotify”. If it returns “DisableDeleteNotify = 0,” TRIM is already enabled. If it returns “DisableDeleteNotify = 1,” you can enable TRIM by typing the command: “fsutil behavior set DisableDeleteNotify 0” and pressing Enter.
3. Enable TRIM on Mac: For Mac users, TRIM is also typically enabled by default for Apple-supported SSDs. To check its status, open Terminal and enter the command: “sudo trimforce enable”. Follow the on-screen prompts to enable TRIM if it’s not already enabled.
4. Monitor TRIM status: Regularly check the TRIM status on your SSD to ensure it remains enabled. You can do this by using third-party SSD monitoring tools, such as CrystalDiskInfo (Windows) or SMART Utility (Mac), which provide detailed information about your SSD, including the TRIM status.
Enabling TRIM on your SSD allows the operating system to communicate with the drive and efficiently manage deleted data blocks. This helps maintain optimal performance by reducing write amplification and preventing performance degradation over time.
It’s important to note that some operating systems, such as Linux, automatically enable TRIM by default, so no additional configuration may be necessary.
By optimizing your SSD with TRIM, you ensure that your drive functions at its best, providing enhanced performance, longevity, and efficiency. Combined with the previous steps, including cleaning up unnecessary files, uninstalling unused applications, removing temporary files, utilizing cloud storage, optimizing system settings, and using external storage devices, you can create a well-optimized SSD storage system that maximizes available space and improves overall performance.
With these steps, you can effectively manage your SSD storage, ensuring it remains clutter-free, efficient, and capable of delivering fast and reliable performance for your computing needs.
Conclusion
Freeing up space on your SSD is crucial for maintaining optimal performance, prolonging the drive’s lifespan, and ensuring you have enough room for future updates and upgrades. By following the steps outlined in this article, you can declutter your SSD and create a more efficient storage system.
Starting with assessing your SSD storage, you gain a better understanding of what is taking up the most space and where to focus your efforts. Cleaning up unnecessary files, uninstalling unused applications, and removing temporary files help clear out the clutter and reclaim valuable storage space.
Utilizing cloud storage allows you to offload files and access them from anywhere, reducing the reliance on your SSD. Optimizing system settings, such as adjusting virtual memory and disabling hibernation, further minimizes the impact on your SSD storage.
Using external storage devices, such as external hard drives and USB flash drives, provides additional capacity to store less frequently accessed files. Lastly, enabling the TRIM feature optimizes your SSD’s performance and efficiency.
By implementing these steps, you can create a well-organized, efficient, and high-performing SSD storage system. Regularly maintaining and optimizing your SSD will ensure it continues to serve you well for years to come.
Remember to always back up important files and exercise caution when making changes to your system settings or removing files. With careful management and optimization, your SSD can provide you with fast and reliable storage, enhancing your overall computing experience.