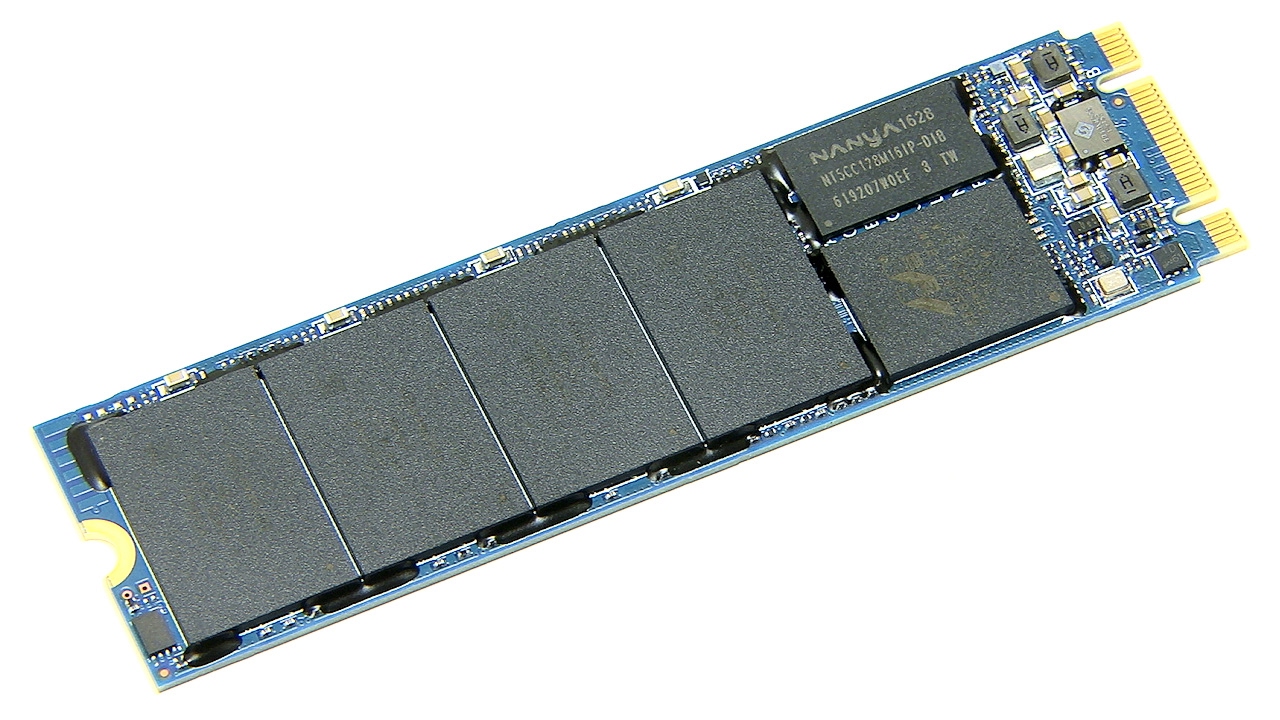
What is an M.2 SSD?
An M.2 SSD, also known as Next Generation Form Factor (NGFF) SSD, is a solid-state drive that is designed to be smaller, faster, and more efficient than traditional storage options. It is a compact, rectangular-shaped device that connects directly to the motherboard of a computer system.
Unlike conventional storage drives such as hard disk drives (HDDs) or 2.5-inch solid-state drives (SATA SSDs), M.2 SSDs use the PCIe (Peripheral Component Interconnect Express) interface to achieve faster data transfer rates. They come in different lengths, widths, and key notches to accommodate various applications and motherboard specifications.
M.2 SSDs utilize NAND flash memory technology, which enables them to perform at significantly higher speeds compared to traditional drives. This results in faster boot times, quicker application launches, and improved overall system responsiveness.
Another notable feature of M.2 SSDs is their compact size. They are typically smaller than standard 2.5-inch drives, allowing for more flexibility in terms of installation and space-saving within a computer chassis. This is particularly useful for compact form-factor systems such as laptops, Ultrabooks, and small form-factor desktops.
Furthermore, M.2 SSDs are not only limited to storage applications. They can also be used to upgrade the performance of other components such as Wi-Fi modules, Bluetooth modules, and more, thanks to their versatility and support for multiple protocols.
Overall, M.2 SSDs are a groundbreaking storage solution that offers faster speeds, smaller form factors, and increased flexibility for modern computing devices. With their high performance and compact design, they have become an essential component in many systems, providing users with a superior computing experience.
Advantages of M.2 SSDs
M.2 SSDs offer several advantages over traditional storage options. Here are some of the key benefits:
- Faster Performance: One of the primary advantages of M.2 SSDs is their incredible speed. They utilize the PCIe interface, which allows for faster data transfers compared to SATA drives. This results in quicker boot times, faster application launches, and improved overall system performance.
- Compact Form Factor: M.2 SSDs are smaller and more compact than traditional storage drives. This makes them ideal for devices with limited space, such as laptops and small form-factor PCs. Their compact size also allows for more flexibility in system design and installation.
- Enhanced Reliability: M.2 SSDs use NAND flash memory technology, which is known for its durability and reliability. Unlike traditional hard drives with moving parts, M.2 SSDs have no mechanical components, making them less susceptible to damage from shocks, vibrations, or accidental drops.
- Energy Efficiency: M.2 SSDs are designed to be energy-efficient. They consume less power than traditional drives, which results in lower heat generation and reduced energy consumption. This not only contributes to longer battery life for portable devices but also helps to keep system temperatures lower, leading to better overall system performance and longevity.
- Compatibility and Scalability: M.2 SSDs are compatible with various interfaces and protocols, including PCIe and SATA. This allows for easy integration into different systems and provides scalability for future upgrades. Additionally, the M.2 form factor supports different lengths, key notches, and storage capacities, offering flexibility for different usage scenarios.
Overall, M.2 SSDs provide significant advantages in terms of speed, size, reliability, energy efficiency, and compatibility. With their superior performance and compact design, they have become the preferred choice for many users looking to enhance storage and system performance in their devices.
Installing an M.2 SSD
Installing an M.2 SSD is a straightforward process that can greatly improve the storage and performance of your computer. Here are the steps to install an M.2 SSD:
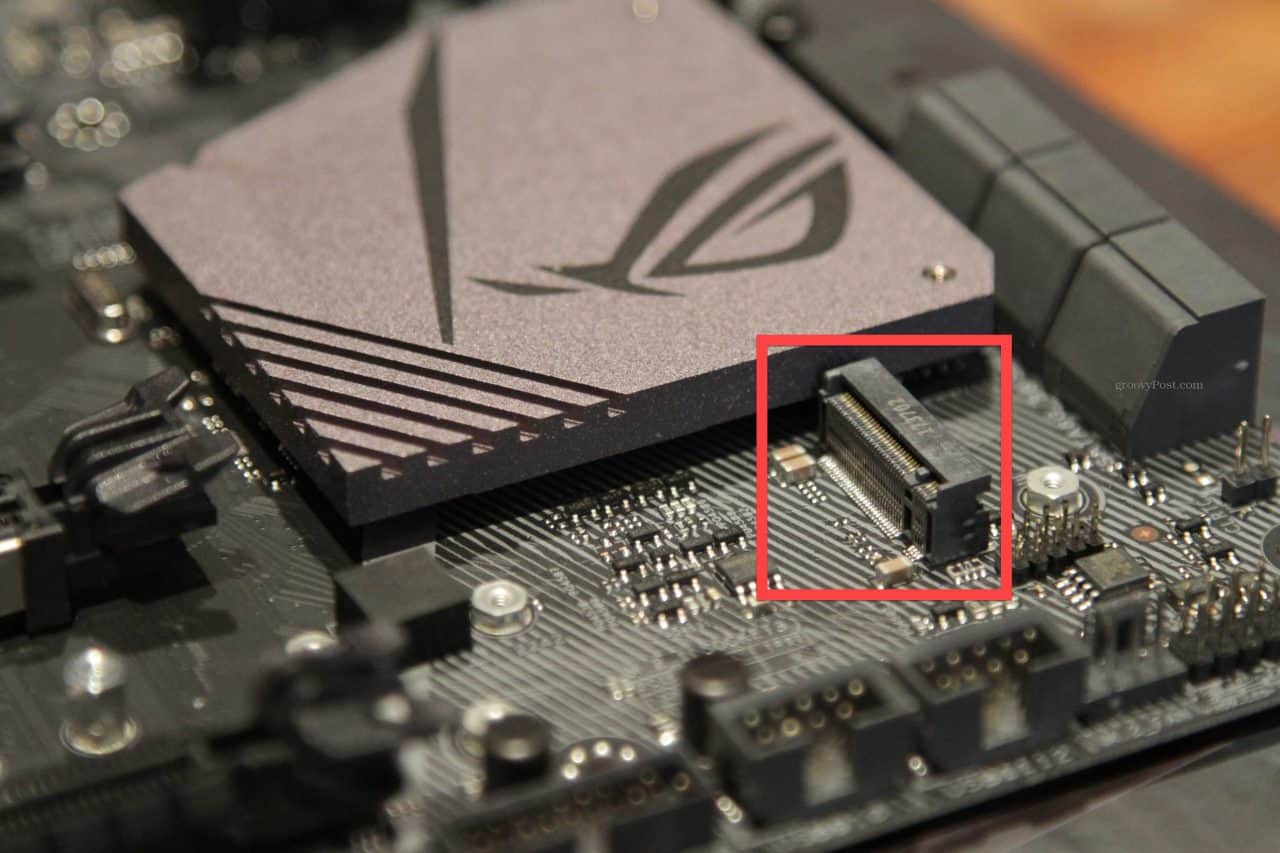
- Check Compatibility: Before purchasing an M.2 SSD, ensure that your motherboard supports M.2 slots and the appropriate key type for the SSD. Refer to your motherboard’s manual or specifications to determine compatibility.
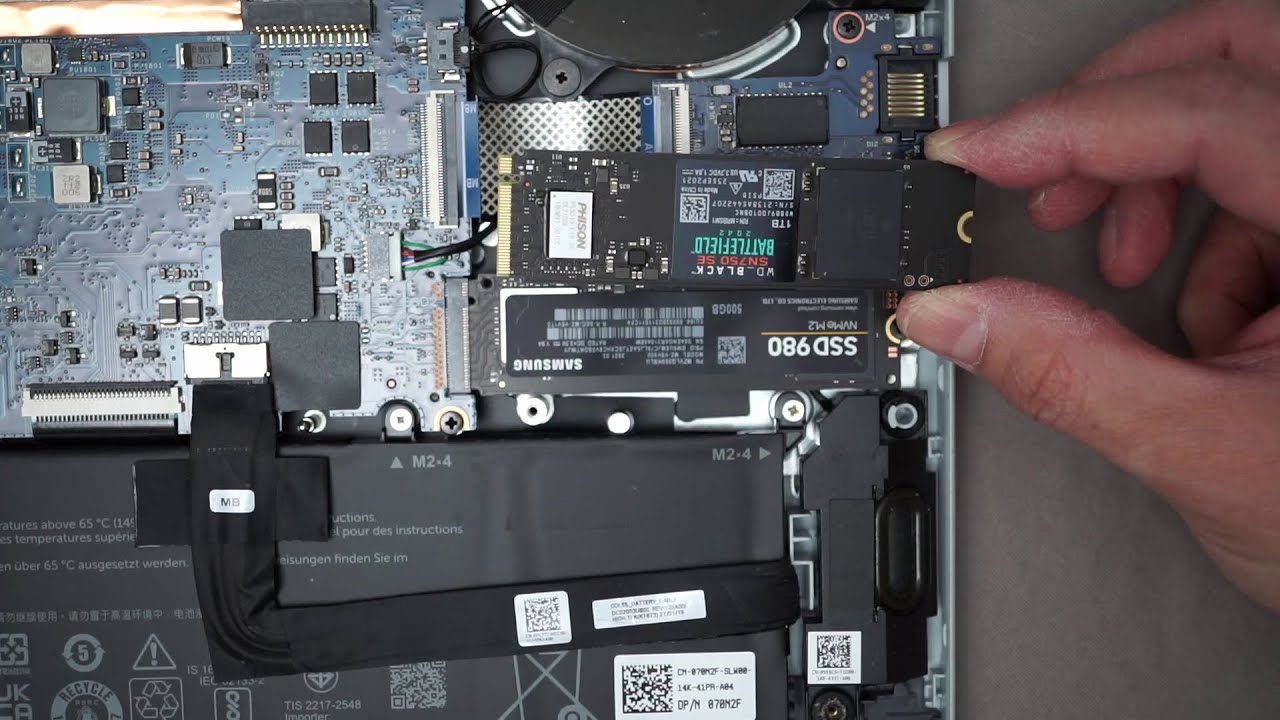
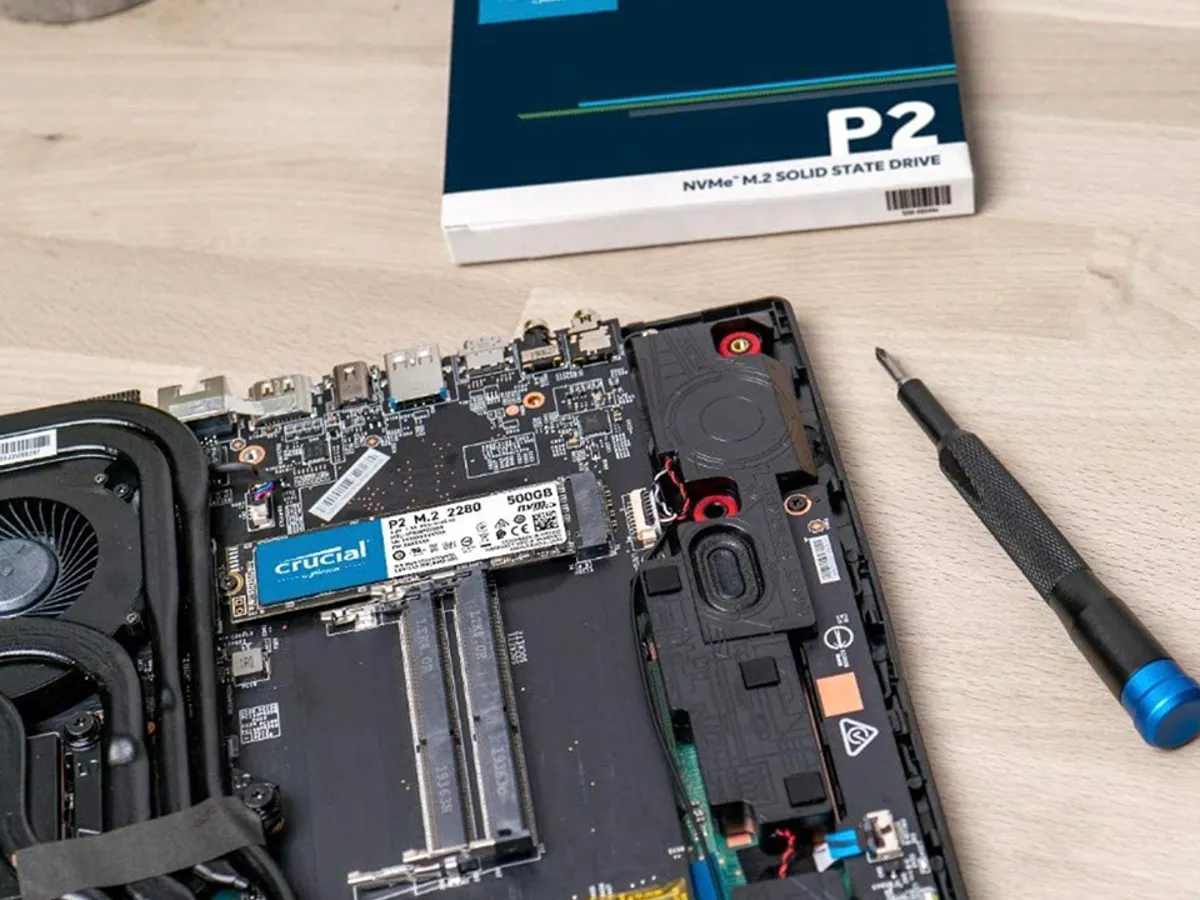
- Prepare the System: Power off your computer and disconnect the power cable. Open the computer case and locate the M.2 slot on the motherboard. The slot is usually labeled and located near the CPU or other expansion slots.
- Insert the M.2 SSD: Carefully insert the M.2 SSD into the slot at a 30-45 degree angle. Align the notches on the SSD with the key slot on the motherboard. Gently push the SSD down until it is fully seated and the gold contacts are securely connected.
- Secure the SSD: Most M.2 SSDs come with a small screw to secure them to the motherboard. Use the provided screw to fasten the SSD to the designated standoff or heatsink on the motherboard. Be careful not to overtighten the screw.
- Close the Case: Once the SSD is properly installed, close the computer case and reconnect all cables. Make sure everything is properly connected before powering on the system.
- Configure the BIOS: Power on your computer and enter the BIOS settings by pressing the designated key on startup (usually Del or F2). Navigate to the storage or boot options and make sure the M.2 SSD is detected. If it is not detected, check the connection and ensure that the BIOS is updated to the latest version.
- Format and Partition: After the M.2 SSD is recognized by the BIOS, you will need to format and partition the drive. This can be done through the Disk Management tool in Windows or a similar utility in other operating systems.
That’s it! You have successfully installed an M.2 SSD in your computer. Enjoy the improved storage performance and faster data transfers provided by your new SSD.
Configuring the BIOS for M.2 SSD
Configuring the BIOS is an essential step after installing an M.2 SSD to ensure that the drive is properly recognized and utilized by your computer. Here’s how to configure the BIOS for an M.2 SSD:
- Power on your Computer: Turn on your computer and immediately press the appropriate key (usually Del or F2) to enter the BIOS setup.
- Navigate to the BIOS Settings: Once in the BIOS setup, navigate to the storage or boot options. The location of these settings may vary depending on the motherboard manufacturer.
- Enable the M.2 Slot: Look for an option to enable the M.2 slot or change the storage mode. It is usually labeled as “M.2 Configuration,” “Storage Configuration,” or something similar. Enable the M.2 slot if it is disabled.
- Choose the Appropriate Mode: Depending on the M.2 SSD and motherboard compatibility, you might have a choice between SATA and NVMe modes. If you have an NVMe SSD, select NVMe mode for the best performance. If you have a SATA-based M.2 SSD, choose SATA mode.
- Save and Exit: Once you have made the necessary changes, save the settings and exit the BIOS setup. The computer will restart with the new BIOS settings applied.
After configuring the BIOS for the M.2 SSD, your computer should detect and recognize the drive properly. You can then proceed to format and partition the M.2 SSD to make it ready for use.
Note that the procedure may vary slightly depending on the motherboard manufacturer and BIOS version. Consult your motherboard’s manual or manufacturer’s website for specific instructions if needed.
Formatting and Partitioning the M.2 SSD
After installing and configuring the M.2 SSD in your computer, the next step is to format and partition the drive to prepare it for use. Here’s how to format and partition an M.2 SSD:
- Open Disk Management: In Windows, right-click on the Start menu and select “Disk Management” from the list of options. This will open the Disk Management utility.
- Locate the M.2 SSD: In the Disk Management window, look for the M.2 SSD. It should be listed there, labeled as “Disk X.” Note its size to ensure you’re selecting the correct drive.
- Initialize the M.2 SSD: Right-click on the M.2 SSD and select “Initialize Disk.” Choose the appropriate partition style (MBR or GPT) and click “OK” to proceed.
- Create a New Partition: Right-click on the unallocated space of the M.2 SSD and select “New Simple Volume.” Follow the on-screen instructions to specify the partition size, assign a drive letter, and choose the file system (NTFS is recommended for Windows).
- Format the Partition: Once the new partition is created, right-click on it and select “Format.” Choose the file system, allocation unit size, and volume label. Click “OK” to start the formatting process.
- Assign a Drive Letter: After the partition is formatted, right-click on it and select “Change Drive Letter and Paths.” Click “Add” and choose a drive letter for the partition. Click “OK” to confirm and assign the drive letter.
- Repeat if Necessary: If you want to create additional partitions on the M.2 SSD, repeat steps 4-6 for each desired partition. Adjust the size and file system according to your needs.
Once the formatting and partitioning process is complete, the M.2 SSD will be ready for use. You can now start transferring data to the drive or install the operating system on it for improved performance and storage capabilities.
Note that the steps may vary slightly depending on your operating system and disk management software. Consult the documentation or online resources specific to your operating system for detailed instructions if needed.
Transferring Data to the M.2 SSD
Once you have installed, configured, and formatted your M.2 SSD, it’s time to transfer your data to the new drive. Here are a few methods to efficiently transfer data to an M.2 SSD:
- Manual Copy and Paste: The simplest method is to manually copy and paste your files and folders from the old storage drive to the M.2 SSD. Open Windows Explorer or Mac Finder and navigate to the location of your files. Select the files or folders you want to transfer, right-click, and choose “Copy.” Then, navigate to the M.2 SSD, right-click, and choose “Paste” to transfer the data.
- Migration Software: Many SSD manufacturers provide migration software that simplifies the process of transferring your entire operating system and data to the new drive. These tools clone your existing drive to the M.2 SSD, ensuring that all data, settings, and applications are transferred seamlessly.
- Disk Imaging Software: Disk imaging software, such as Acronis True Image or Macrium Reflect, allows you to create an image of your existing drive and restore it to the M.2 SSD. This method is useful if you want to keep an exact copy of your existing drive, including the operating system and all files.
- Cloud Storage or External Drive: If you prefer not to transfer everything at once, you can utilize cloud storage services or an external drive. Upload your important files to cloud storage or copy them to an external drive, then download or transfer them to the M.2 SSD after the initial setup.
- Reinstall Applications: If you’re upgrading your primary drive to the M.2 SSD, it is recommended to reinstall your software and applications directly onto the new drive. This ensures that the applications are optimized for the faster storage and takes full advantage of the M.2 SSD’s performance benefits.
Choose the method that best suits your needs and preferences. Once the data transfer is complete, remember to update any shortcuts or file paths to point to the new location on the M.2 SSD. Enjoy the increased speed and responsiveness offered by your M.2 SSD!
Maintaining and Troubleshooting an M.2 SSD
Like any storage device, it’s important to properly maintain and troubleshoot your M.2 SSD to ensure optimal performance and reliability. Here are some tips for maintaining and troubleshooting your M.2 SSD:
- Keep Firmware Updated: Regularly check for firmware updates from the manufacturer’s website and install them as recommended. Firmware updates often include bug fixes, performance enhancements, and compatibility improvements for the M.2 SSD.
- Monitor Drive Health: Use drive health monitoring software provided by the SSD manufacturer to keep an eye on the health and performance of your M.2 SSD. This software can provide insights into the drive’s temperature, wear level, and other important diagnostic information.
- Enable TRIM: TRIM is a feature that allows the operating system to inform the SSD which blocks of data are no longer in use. Enabling TRIM helps maintain the SSD’s performance over time. Make sure TRIM is enabled in your operating system and that it supports TRIM for the M.2 SSD.
- Avoid Extreme Temperatures: M.2 SSDs are sensitive to temperature extremes. Avoid exposing the drive to high temperatures or excessive heat. Ensure that your computer’s cooling system is functioning properly to prevent overheating of both the M.2 SSD and other components.
- Regularly Back up Your Data: It’s important to back up your important data regularly, regardless of the type of storage device you’re using. This ensures that your data is protected in case of any unexpected failures or issues with the M.2 SSD.
- Troubleshooting: If you encounter issues with your M.2 SSD, the first step is to check the connections. Ensure that the SSD is firmly seated in the M.2 slot and that the connectors are clean. If the drive is not detected, try updating the BIOS to the latest version and checking for any driver updates.
- Seek Technical Support: If troubleshooting steps don’t resolve the issue, contact the SSD manufacturer’s technical support for further assistance. They can provide guidance specific to your SSD model and help troubleshoot any persistent problems you may encounter.
By following these maintenance and troubleshooting tips, you can maximize the durability, performance, and lifespan of your M.2 SSD. Remember to address any issues promptly to ensure a smooth computing experience with your M.2 SSD.
Conclusion
M.2 SSDs have revolutionized the storage landscape, offering faster performance, compact form factors, and enhanced reliability for modern computing devices. With their use of PCIe interface and NAND flash memory technology, M.2 SSDs deliver blazing-fast speeds, resulting in quicker boot times, faster application launches, and improved overall system responsiveness.
The advantages of M.2 SSDs go beyond speed. Their compact size makes them ideal for devices with limited space, such as laptops and small form-factor PCs. They are also more energy-efficient, generating less heat and consuming less power which contributes to longer battery life and better overall system performance.
Installing an M.2 SSD is a straightforward process, requiring compatibility checks, proper insertion into the M.2 slot, and secure mounting. Configuring the BIOS and formatting the drive are crucial steps to ensure optimal performance and compatibility.
Transferring data to an M.2 SSD can be done through manual copy and paste, migration software, disk imaging software, or cloud storage and external drives. It is important to choose the method that best suits your needs and preferences.
Maintaining and troubleshooting your M.2 SSD involves keeping the firmware updated, monitoring drive health, enabling TRIM, avoiding extreme temperatures, and regular data backups. If issues arise, checking connections, updating drivers, and seeking technical support from the manufacturer may help resolve them.
In conclusion, M.2 SSDs have become an essential component for users looking to enhance storage and system performance. By harnessing their speed, reliability, and compact design, M.2 SSDs provide a superior computing experience, enabling faster data access, smoother multitasking, and improved overall efficiency.