Introduction
Welcome to this comprehensive guide on how to use Arduino Uno with a 3D printer! If you’re an enthusiast looking to delve into the world of 3D printing or an experienced hobbyist wanting to enhance your skills, Arduino Uno is an excellent choice for controlling your 3D printer.
Arduino Uno is a microcontroller board that provides a powerful and flexible platform for creating interactive projects. By connecting your Arduino Uno to a 3D printer, you can control various aspects of the printing process and unlock a world of possibilities in the realm of additive manufacturing.
In this guide, we will take you through a step-by-step journey, starting with the basics of Arduino Uno and gradually progressing to the intricacies of 3D printing. We will explore how to wire Arduino Uno to your 3D printer, configure the necessary settings, and ultimately control the printer using Arduino Uno.
Along the way, we will address common issues that you may encounter and provide troubleshooting tips to help you overcome any obstacles that stand in your way. By the end of this guide, you will have a solid understanding of how to use Arduino Uno to optimize your 3D printing experience.
Whether you are a beginner or an advanced user, this guide is designed to provide you with the knowledge and skills necessary to leverage the power of Arduino Uno in the context of 3D printing. So, let’s dive in and explore the fascinating combination of Arduino Uno and 3D printing!
Part 1: Getting Started with Arduino Uno
In this section, we will cover the essentials of getting started with Arduino Uno. If you are new to Arduino or need a refresher, this is the perfect place to begin your journey.
Arduino Uno is a user-friendly microcontroller board that offers a wide range of possibilities for controlling electronic devices and projects. To begin, you will need to gather the necessary materials, including an Arduino Uno board, a USB cable, and a computer with the Arduino IDE (Integrated Development Environment) installed.
The Arduino IDE is a software tool that allows you to write and upload code to your Arduino board. It provides an intuitive interface for writing sketches (programs) and offers a vast library of pre-built functions that can be easily incorporated into your projects.
To get started, connect your Arduino Uno board to your computer using the USB cable. The board should be powered on and ready to go. Launch the Arduino IDE and select the appropriate board and port from the Tools menu. This will establish communication between your computer and the Arduino Uno board.
Once the board is connected and your settings are configured, it’s time to write your first Arduino sketch. A sketch is a program written in the Arduino programming language, which is based on C/C++. It consists of two essential functions – setup() and loop().
The setup() function is called once when the Arduino board powers up or is reset. It is used to initialize variables, configure pins, and perform any necessary setup tasks.
The loop() function, as the name suggests, runs continuously after the setup() function has completed. It is the heart of your program and contains the code that will be executed repeatedly until the Arduino board is powered off or reset.
Start by writing a simple sketch that blinks an LED connected to one of the digital pins on the Arduino Uno board. This is a classic “Hello World” equivalent for Arduino and will help you understand the basic structure of a sketch and how to control digital outputs.
Once you have written your sketch, click on the Upload button in the Arduino IDE to transfer the code to your Arduino Uno board. You will see the onboard LED blink according to the instructions in your sketch. Congratulations, you have successfully uploaded your first Arduino sketch!
This concludes Part 1 of our guide on using Arduino Uno with a 3D printer. In the next section, we will delve into the fundamentals of 3D printing and explore how it can be integrated with Arduino Uno to create amazing projects.
Part 2: Understanding the Basics of 3D Printing
In this section, we will provide an overview of the fundamental concepts and components involved in 3D printing. Understanding these basics is essential before diving into the integration of Arduino Uno with a 3D printer.
3D printing, also known as additive manufacturing, is a revolutionary process that allows for the creation of three-dimensional objects from digital models. Unlike traditional subtractive manufacturing methods, which involve cutting, drilling, or carving away material, 3D printing builds objects layer by layer using various materials such as plastic, metal, or resin.
The first step in the 3D printing process is to create a digital model of the object you want to print. This can be done using computer-aided design (CAD) software, which allows you to design and manipulate 3D models with precision. Alternatively, you can download existing 3D models from online repositories.
Once you have a digital model, it needs to be converted into a format that the 3D printer can understand. The most common format is the STL (Standard Tessellation Language) file format, which represents the geometry of the object as a collection of small triangles.
With the digital model prepared, it’s time to move on to the actual printing process. 3D printers work by depositing layer upon layer of material to build up the object. The printer extrudes the material through a small nozzle and moves it in precise paths dictated by the digital model.
There are different types of 3D printers available, such as Fused Deposition Modeling (FDM), Stereolithography (SLA), and Selective Laser Sintering (SLS). Each type has its own unique characteristics and advantages, but they all follow the same basic principle of building up layers to form the final object.
During the printing process, the 3D printer needs to be accurately controlled to ensure that each layer is deposited correctly. This is where Arduino Uno comes into play. By connecting Arduino Uno to the 3D printer, you can send commands and control signals to accurately position the print head, regulate the flow of material, and control other critical parameters.
By understanding the basics of 3D printing, you can see the potential for integrating Arduino Uno to enhance the control and functionality of your 3D printer. In the next section, we will explore how to wire Arduino Uno to your 3D printer and establish the necessary communication.
Part 3: Wiring Arduino Uno to the 3D Printer
In this section, we will guide you through the process of wiring Arduino Uno to your 3D printer. This step is crucial to establish the communication and control between the two devices.
Before proceeding, it’s important to note that the exact wiring configuration may vary depending on the specific 3D printer model you are using. Therefore, we recommend referring to the manufacturer’s documentation or the user manual to ensure accurate wiring.
First, ensure that both your Arduino Uno board and the 3D printer are powered off. This will prevent any accidental short circuits or damage during the wiring process.
Next, locate the appropriate connectors on your 3D printer. Typically, you will find connectors for power, stepper motors, endstops, and the extruder. These connectors may vary in design and labeling, so it’s essential to identify them correctly.
Start by connecting the power supply of your 3D printer to the appropriate power connectors on the Arduino Uno board. This will typically involve connecting the positive (+) and negative (-) wires to the VIN (voltage input) and GND (ground) pins, respectively.
Next, you will need to connect the stepper motors of your 3D printer to the Arduino Uno board. Stepper motors are used to control the movement of the print head and the positioning of the build plate.
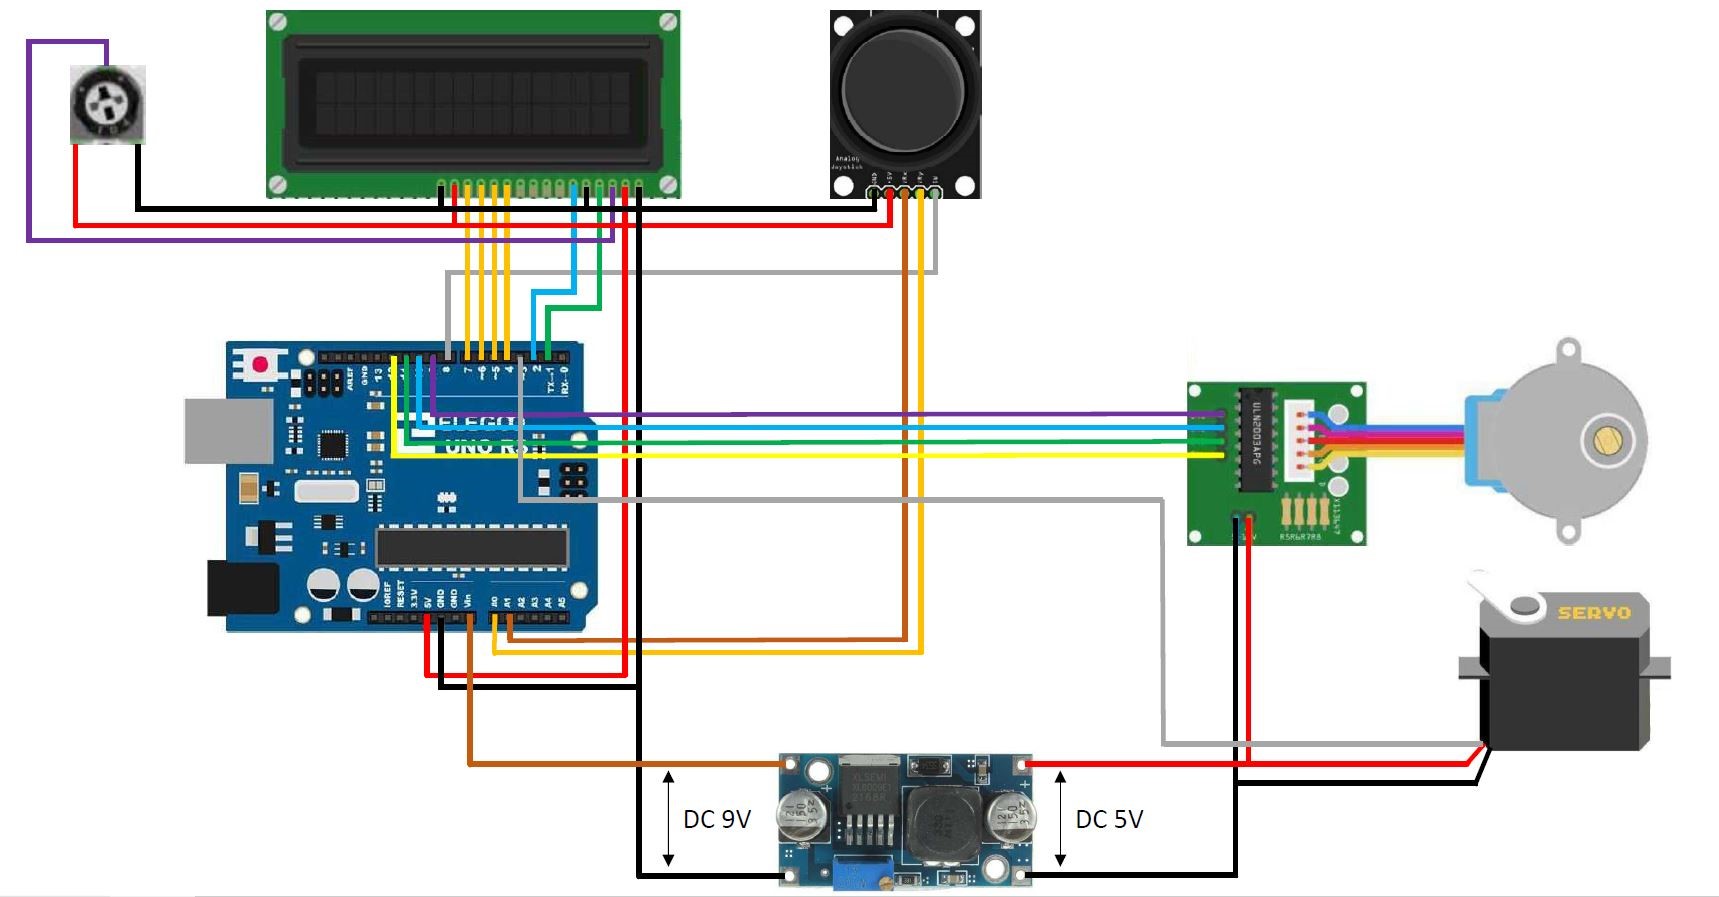
Identify the stepper motor connectors on your 3D printer, usually labeled as X, Y, and Z. Connect the corresponding stepper motor wires to the appropriate pins on the Arduino Uno board. Each stepper motor will have four wires, usually color-coded. Connect one coil of the stepper motor to pins 1 and 2, and the other coil to pins 3 and 4.
Additionally, if your 3D printer has an extruder for filament feeding, you will need to connect it as well. Locate the extruder connector on your printer and connect it to the appropriate pins on the Arduino Uno board.
Finally, you may need to connect endstops, which are switches that help the printer detect the limits of its movement. Connect the endstop wires to the appropriate pins on the Arduino Uno board, keeping track of the corresponding labels on the printer’s connectors.
Once all the necessary connections are made, double-check the wiring to ensure everything is properly connected and secure. Ensure that there are no loose wires that could cause a short circuit or interfere with the printer’s operation.
With the Arduino Uno board properly wired to your 3D printer, you are now ready to move on to the next step: configuring Arduino Uno for 3D printing. This will involve modifying the firmware to enable communication and control between the board and the printer.
Part 4: Configuring Arduino Uno for 3D Printing
In this section, we will walk you through the process of configuring Arduino Uno for 3D printing. This step involves modifying the firmware on the Arduino board to enable seamless communication and control with your 3D printer.
The firmware is the software that runs on the Arduino Uno board and controls its functionality. It is responsible for interpreting commands from the computer and translating them into actions performed by the 3D printer.
Before you begin the configuration process, you will need to choose the appropriate firmware for your 3D printer. The most popular firmware for 3D printers is Marlin, which is open-source and highly customizable. You can find the firmware files on the Marlin website or through the manufacturer of your 3D printer.
Once you have downloaded the Marlin firmware, you will need to open it in the Arduino IDE. This will allow you to make the necessary modifications and upload the firmware to your Arduino Uno board.
Inside the Marlin firmware, there are numerous configurations that you can modify to suit your specific requirements. These configurations include settings related to the type of printer, motor steps, temperature control, and much more.
First, locate the configuration file named “Configuration.h” and open it in the Arduino IDE. This file contains the majority of the settings that need to be configured for your specific 3D printer.
Take your time to go through each section of the configuration file and modify the settings according to your printer’s specifications. Pay particular attention to parameters such as the number of extruders, thermistor types, motor steps, and endstop settings. Make sure to save the changes once you have finished.
Once the configurations are set, you can proceed to upload the firmware to your Arduino Uno board. Connect your board to your computer using the USB cable and select the appropriate board and port from the Tools menu in the Arduino IDE. Then, simply click on the Upload button to transfer the modified firmware to the board.
After the firmware has been successfully uploaded, disconnect the USB cable from the Arduino Uno board and power it off. Reconnect the power supply of your 3D printer and power it on.
You have now successfully configured your Arduino Uno board for 3D printing. The firmware modifications you made will enable the Arduino board to communicate effectively with your 3D printer and provide accurate control over its various functions.
In the next section, we will explore how to control the 3D printer using Arduino Uno by sending commands and instructions from a computer.
Part 5: Controlling the 3D Printer with Arduino Uno
In this section, we will discuss how to control the 3D printer using Arduino Uno. Now that your Arduino board is properly configured and connected to the printer, you can send commands and instructions to control various aspects of the printing process.
The control of the 3D printer is achieved through a host software, such as Pronterface, OctoPrint, or Repetier-Host, running on a computer. These software applications provide a user-friendly interface to interact with the printer and send commands to the Arduino board.
First, you will need to establish a connection between your computer and the Arduino Uno board. If you are using Pronterface or Repetier-Host, you can select the appropriate serial port and baud rate from the software’s interface and establish the connection.
Once the connection is established, you can send commands to control various aspects of the 3D printing process. For example, you can instruct the printer to heat up the extruder and build plate to the desired temperatures, home the axes, or initiate the printing process.
To control the temperature, you can use G-code commands. G-code is a standardized programming language widely used in the 3D printing world. By sending specific G-code commands, you can set the extruder and bed temperatures to the desired values.
For example, to set the extruder temperature to 200°C, you can send a command like M104 S200. Likewise, to set the bed temperature to 60°C, you can send a command like M140 S60.
In addition to temperature control, you can also control the movements of the 3D printer using G-code commands. By specifying the desired positions and speeds, you can instruct the printer to move the print head along the X, Y, and Z axes with precision.
Once the printer is properly configured and connected, you can start the printing process by sending the appropriate G-code command to initiate the print. The printer will then follow the instructions and start building the object layer by layer.
Throughout the printing process, you can monitor the progress, adjust settings, and even pause or cancel the print if needed. The control software, in combination with the Arduino Uno board, provides a seamless and efficient way to interact with your 3D printer.
Remember to always follow safety precautions when operating your 3D printer, such as keeping a close eye on the printing process and ensuring a well-ventilated area.
In the next section, we will address some common issues that you may encounter while using Arduino Uno with a 3D printer and provide troubleshooting tips to help you overcome these challenges.
Part 6: Troubleshooting Common Issues
In this section, we will discuss some common issues that you may encounter while using Arduino Uno with a 3D printer and provide troubleshooting tips to help you overcome these challenges.
1. Connection Issues: If you are having trouble establishing a connection between the computer and the Arduino Uno board, make sure that you have selected the correct serial port and baud rate in the control software. Double-check the USB cable and ensure it is securely connected to both the computer and the board.
2. Firmware Errors: If you experience unexpected behavior or errors, such as motors not moving correctly or incorrect temperature readings, it may be due to firmware configuration issues. Review your firmware configurations to ensure they are accurate, paying close attention to motor steps, thermistor types, and endstop settings.
3. Extrusion Problems: If your 3D printer is not extruding material properly, check the nozzle for any clogs or debris. Ensure that the filament is loaded correctly and that the extruder motor is functioning correctly. Adjust the extruder steps per mm in the firmware if necessary.
4. Bed Leveling Issues: If you are experiencing issues with bed adhesion or uneven prints, check the bed leveling. Make sure the bed is properly leveled by adjusting the leveling screws or using a tool to measure the distance between the nozzle and the bed at different points. Adjust the bed leveling settings in the firmware if needed.
5. Print Quality Problems: If your prints have issues like stringing, warping, or poor layer adhesion, review your slicer settings. Adjust the temperature settings, speed, and cooling to improve print quality. Additionally, check the alignment and tension of belts and ensure that the printer is properly calibrated.
6. Error Messages and Diagnostics: If you encounter error messages or diagnostic information from the control software, refer to the documentation or online forums for troubleshooting guidance. These resources may provide specific solutions for common error codes or messages you encounter.
7. Power-related Issues: If your Arduino board or 3D printer is experiencing intermittent power loss or resets, check the power supply connections. Ensure that the power supply can provide sufficient current for both the Arduino board and the printer. Consider using a separate power supply for the printer if necessary.
Remember to consult the manufacturer’s documentation and user manual for your specific 3D printer model. They often provide troubleshooting steps and solutions tailored to that particular printer.
By understanding and addressing these common issues, you can ensure smooth operation and optimal performance of your 3D printer when connected to Arduino Uno.
Congratulations! You have now completed all the sections of our guide on using Arduino Uno with a 3D printer. With this knowledge, you are well-equipped to embark on exciting projects and unlock the full potential of 3D printing technology.
Conclusion
Throughout this guide, we have explored the integration of Arduino Uno with a 3D printer, from the basics of Arduino Uno and 3D printing to wiring, configuration, and control. Arduino Uno provides a versatile platform for enhancing the functionality and control of your 3D printer, allowing you to unleash your creativity and bring your ideas to life.
By understanding the fundamentals of Arduino Uno and its connection to a 3D printer, you can take advantage of the precise control it offers. Wiring the Arduino Uno to your printer establishes the necessary communication, while configuring the firmware provides the ability to customize the printer’s behavior to suit your specific needs.
Using the appropriate control software, you can send command instructions to control temperature, movements, and other aspects of the 3D printing process. Troubleshooting common issues ensures smooth operation and accurate prints, overcoming any obstacles that may arise along the way.
By combining Arduino Uno and 3D printing, you open up a world of possibilities for creating customized objects, prototypes, and functional components. From intricate designs to functional parts, the synergy between these technologies enables the realization of your innovative ideas.
As you embark on your journey with Arduino Uno and 3D printing, remember to experiment, learn, and explore. The more you engage with these technologies, the more expertise and creativity you will develop.
We hope that this guide has provided you with valuable insights and practical knowledge on using Arduino Uno with a 3D printer. Now it’s time for you to apply what you have learned and create something extraordinary.
So, get ready to unleash your creativity and dive into the thrilling world of Arduino Uno and 3D printing. Whether you are a beginner or an experienced maker, the combination of these technologies will undoubtedly unlock new possibilities and take your projects to the next level.
Enjoy your journey filled with innovation, inspiration, and endless possibilities! Happy printing!


