Introduction
Welcome to the fascinating world of 3D printing! If you’ve ever wondered how these incredible machines work and wanted to try your hand at building one yourself, you’ve come to the right place. In this article, we’ll show you how to create your very own 3D printer using the popular building blocks, Legos.
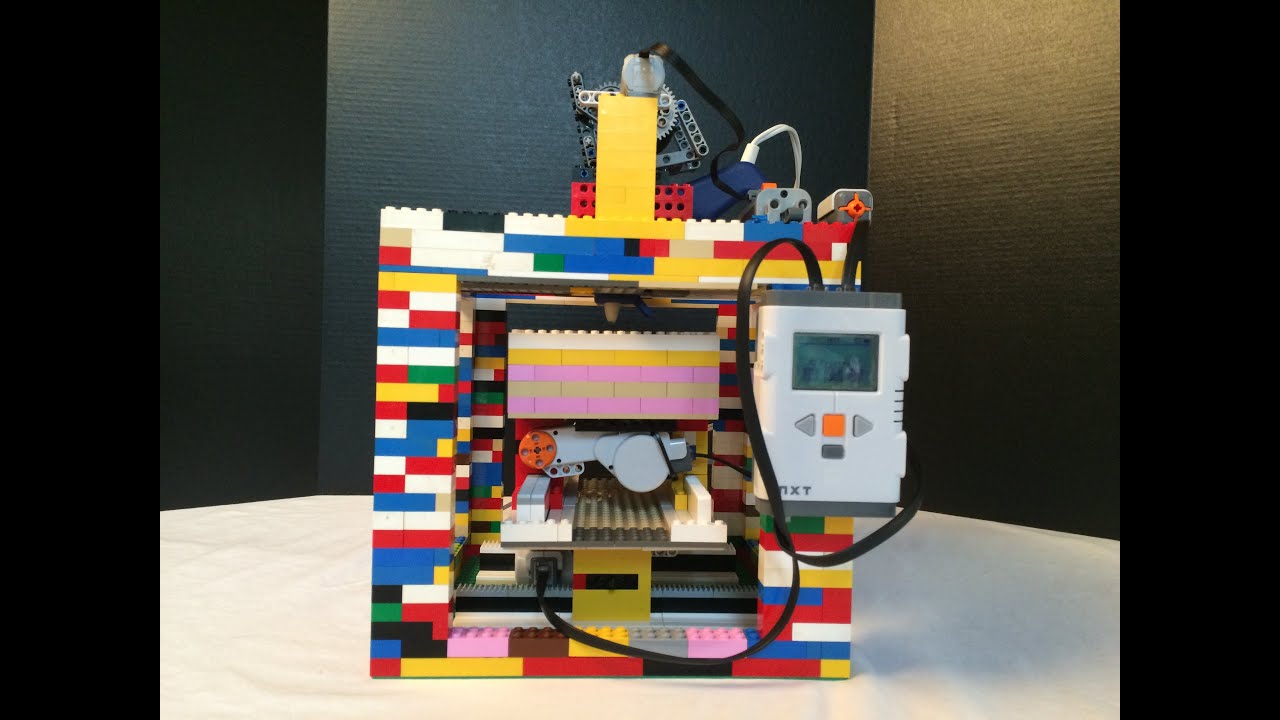
Legos, with their versatility and modular design, make an excellent choice for constructing a 3D printer. Not only are they readily available and affordable, but they also offer endless possibilities for customization.
Building your own 3D printer can be an incredibly rewarding experience. Not only will you gain a deeper understanding of how these machines operate, but you’ll also have the satisfaction of creating something unique with your own hands.
Before we dive into the building process, it’s important to note that this DIY Lego 3D printer is best suited for beginners or as a fun project for educational purposes. While it may not produce professional-grade prints like commercial 3D printers, it will certainly give you a taste of the technology and the joy of bringing your own creations to life.
Now, let’s gather our materials and get started on this exciting journey of building a 3D printer with Legos!
Required Materials
Before we begin building our Lego 3D printer, let’s make sure we have all the necessary materials. Here’s a list of what you’ll need:
- Lego bricks: You’ll need a variety of Lego bricks, including standard bricks, plates, beams, and Technic pieces. Make sure you have enough to build the printer structure and various components.
- Extruder parts: To melt and extrude the filament, you’ll need an extruder assembly. This typically includes a hot end, nozzle, heating element, and a cooling fan.
- Electronics: You’ll need an Arduino board, stepper motors, a motor driver, an LCD screen, and various electronics components like resistors, capacitors, and wires. These will control the movement and heating of the printer.
- Firmware: You’ll need to install firmware on the Arduino board, such as Marlin, which is a popular firmware choice for 3D printers. This software will interpret the commands and control the printer’s functionality.
- Filament: To start printing, you’ll need filament. PLA filament is a good choice for beginners, as it’s easy to work with and produces quality prints. Make sure you have enough filament of the desired color.
- Power supply: You’ll need a suitable power supply to provide the necessary voltage and current for the electronics and motors. Make sure it’s compatible with your setup.
- Tools: To assemble the Lego 3D printer, you’ll need some basic tools like a screwdriver, pliers, and possibly a soldering iron for the electronics assembly. Make sure you have these tools handy.
It’s worth noting that this list is not exhaustive and may vary based on the specific design and components you choose for your Lego 3D printer. Always refer to the instructions provided by the manufacturer or online resources for the most accurate and up-to-date information.
Now that we have all the necessary materials, let’s move on to the exciting part – building the Lego 3D printer!
Step 1: Gather the Legos
The first step in building your Lego 3D printer is to gather all the Lego pieces you’ll need for the construction. This includes a variety of Lego bricks, plates, beams, and Technic pieces. The exact quantity and selection of Lego pieces will depend on the specific design you’re following, so make sure to refer to the instructions provided or create your own design based on the printer size and features you desire.
Start by organizing your Lego pieces according to their size and type. This will make it easier to locate the pieces you need during the assembly process. Lay out the different components side by side so you can easily identify and access them when required. Sorting the Legos in this way will streamline the building process and prevent any unnecessary delays or frustrations.
As you gather the Legos, make sure to check for any missing or damaged pieces. If you find any, you may need to substitute them with similar pieces or purchase replacements if necessary. It’s essential to have all the required Legos in good condition to ensure a smooth and stable construction.
Additionally, it’s a good idea to have a clean and well-lit workspace to build your Lego 3D printer. This will make it easier to locate and assemble the Lego pieces accurately. Clear any clutter or distractions from your work area, allowing you to focus on the construction process.
Once you have all the necessary Lego pieces organized and your workspace ready, you’re now prepared to move on to the next exciting step – building the structure of your Lego 3D printer!
Step 2: Build the Structure
Now that you have gathered all the Lego pieces you need, it’s time to start building the structure of your Lego 3D printer. The structure serves as the foundation and support for the various components that will be added later, so it’s important to build it carefully and securely.
Begin by referring to the design or instructions you have chosen for your Lego 3D printer. This will provide you with a step-by-step guide on how to assemble the structure. If you are designing your own printer, start by visualizing the overall layout and design of the printer, and plan the placement of various components accordingly.
Start with the base of the printer and build upwards, adding layers and walls. Use a combination of larger Lego bricks and plates to create a sturdy and rigid structure. Reinforce critical areas such as corners and joints to ensure stability and prevent any wobbling or flexing during the printing process.
Make sure to align the Lego pieces correctly and firmly connect them together. Pay attention to the orientation of the bricks and follow the design or instructions closely to ensure accurate assembly. One helpful tip is to periodically check if the structure is level and square as you build, making adjustments if necessary.
As you progress in building the structure, consider leaving specific areas open or adding slots and holes for cable management and component placement. This will help to keep the wiring organized and prevent any tangled cables or interference with the moving parts.
Remember to take your time and be patient during the building process. It is essential to build a sturdy and stable structure, as it will directly impact the print quality and overall performance of your Lego 3D printer.
Once you have completed building the structure, double-check that everything is securely attached and aligned. Congratulations! You have successfully completed step 2 and have a solid foundation for your Lego 3D printer. Now, let’s move on to the next step and add the extruder component to bring your printer to life!
Step 3: Add the Extruder
With the structure of your Lego 3D printer in place, it’s time to move on to the next step: adding the extruder. The extruder is a crucial component that melts the filament and deposits it layer by layer to create your 3D prints. Adding the extruder correctly will ensure smooth filament feeding and precise printing.
Begin by gathering all the necessary extruder parts, including the hot end, nozzle, heating element, and cooling fan. These components can be purchased as a kit or individually, depending on your preference and budget. Carefully follow the manufacturer’s instructions or design specifications for assembling the extruder.
Start by attaching the heating element to the hot end, ensuring a secure and tight connection. Next, attach the nozzle to the hot end, making sure it is properly aligned. The nozzle size will affect the print quality and layer resolution, so choose the appropriate size based on your requirements.
Once the nozzle is attached, connect the cooling fan to prevent the hot end from overheating during operation. The cooling fan plays a vital role in maintaining the optimal temperature for extrusion and preventing filament jams.
Now it’s time to mount the extruder onto the structure of your Lego printer. Find the appropriate location on the printer’s frame to attach the extruder assembly securely. Use Lego bricks or mounting brackets to create a stable and adjustable mechanism for the extruder. Ensure that the extruder is positioned correctly and aligned with the print bed for accurate printing.
Next, connect the extruder to the electronics of your Lego 3D printer. This typically involves wiring the extruder to the motor driver, which controls the movement and rotation of the extruder stepper motor. Follow the wiring diagram provided by the manufacturer or refer to your design specifications to make the proper connections.
Lastly, verify that the extruder is properly calibrated and aligned. This includes adjusting the distance between the nozzle and the print bed, known as the “bed leveling.” Proper bed leveling ensures that the first layer adheres to the bed evenly and accurately, resulting in successful prints.
Congratulations! You have successfully added the extruder to your Lego 3D printer. Now you’re ready to move on to the next step and connect the electronics to bring your printer to life.
Step 4: Connect the Electronics
Now that you have added the extruder to your Lego 3D printer, it’s time to connect the electronics that will control its functionality. This step involves wiring and connecting various components, such as the Arduino board, stepper motors, motor driver, LCD screen, and other electronic modules.
Start by referring to the wiring diagram provided by the manufacturer or your design specifications. This will guide you in making the proper connections between the components. If you are designing your own printer, plan the wiring layout based on the placement of the components and accessibility.
Begin by connecting the stepper motors to the motor driver. Stepper motors are responsible for moving the extruder and the print bed in precise increments. Follow the pinout diagram or color-coding on the motor wires to connect them correctly to the motor driver.
Next, connect the motor driver to the Arduino board. The motor driver’s purpose is to control the movement and rotation of the stepper motors based on the commands it receives from the firmware. Refer to the pinout diagram provided by the manufacturer or your design specifications to connect the motor driver to the appropriate pins on the Arduino board.
Once the motors are connected, it’s time to connect the LCD screen and other electronic modules, such as temperature sensors or end-stop switches based on your printer’s design. These components provide information and control options during the printing process. Again, refer to the pinout diagrams and instructions provided to make the correct connections.
Don’t forget to connect the power supply to the Arduino board. The power supply provides the necessary voltage and current to operate the electronics and motors. Make sure to double-check the polarity and voltage compatibility to avoid any electrical mishaps.
After connecting all the electronics, carefully inspect your wiring to ensure that there are no loose connections or exposed wires that could cause short circuits or malfunctions. Secure any loose cables with cable ties or clips to keep them organized and prevent interference with moving parts.
Finally, it’s time to power up your Lego 3D printer and test the functionality of the electronics. Check if the LCD screen displays the expected information and if the stepper motors move smoothly and accurately. Make any necessary adjustments or troubleshoot any issues that may arise during this step.
Congratulations! You have successfully connected the electronics of your Lego 3D printer. It’s now time to move on to the next step and install the firmware to bring your printer to life.
Step 5: Install the Firmware
Now that the electronics are connected, it’s time to install the firmware that will control the operation of your Lego 3D printer. The firmware is the software that resides on the Arduino board and interprets the commands sent from your computer to control the motors, heating elements, and other functionalities.
Start by downloading the appropriate firmware for your Lego 3D printer. Marlin is a popular and widely supported firmware choice for 3D printers, so you may consider using it. Visit the Marlin website or the manufacturer’s website for your specific board to find the latest version of the firmware.
Next, open the Arduino Integrated Development Environment (IDE) on your computer. This software allows you to edit and upload the firmware to the Arduino board. Make sure you have the correct board and port selected in the Arduino IDE settings.
Before uploading the firmware, it’s essential to configure it to match your printer’s specifications. Open the firmware configuration file (usually named Configuration.h or Configuration_adv.h) in the Arduino IDE. Here, you can modify settings such as the type of Arduino board, stepper motor settings, bed dimensions, and temperature control parameters.
Review the firmware documentation or manufacturer’s instructions to understand the options available and make the appropriate changes for your printer. Pay special attention to settings like steps per millimeter, acceleration, and maximum feed rates to ensure accurate movements and optimal performance.
Once you have made the necessary configurations, save the changes and proceed to upload the firmware to the Arduino board. Click on the “Upload” button in the Arduino IDE to compile and transfer the firmware to the board. Depending on the size of the firmware and the speed of your connection, this process may take a few moments.
After the firmware is successfully uploaded, disconnect the Arduino board from your computer and power off the printer. Reconnect the Arduino board and power on the printer to initiate the new firmware.
Now that the firmware is installed, you can test the functionality of your Lego 3D printer using a computer and slicing software, such as Ultimaker Cura or PrusaSlicer. Connect your computer to the printer via USB, open the slicing software, and follow the instructions to connect and communicate with your printer.
Ensure that all the axes move correctly, the extruder heats up, and the temperature readings are accurate. Fix any issues that may arise during the test, such as reversed motor movement or incorrect temperature readings, by adjusting the firmware settings.
Congratulations! You have successfully installed the firmware on your Lego 3D printer. Now, let’s move on to the next step and calibrate the printer for optimal performance.
Step 6: Calibrate the Printer
Now that the firmware is installed, it’s important to calibrate your Lego 3D printer to ensure optimal performance and accurate prints. Calibration involves adjusting various settings and parameters to achieve precise movements, proper filament feeding, and consistent layer adhesion.
Start by calibrating the bed leveling. This ensures that the distance between the nozzle and the print bed is consistent across the entire surface. Depending on your printer design, you may need to manually adjust the bed height or use an auto-leveling system. Follow the manufacturer’s instructions or refer to your design specifications to perform this calibration step.
Next, calibrate the extruder steps per millimeter (also known as E-steps). This determines the amount of filament that is extruded for a given command. Print a test cube or use a calibration procedure specific to your printer to fine-tune the extruder steps. Make adjustments in the firmware configuration file or through the LCD screen, following the instructions provided.
Once the E-steps are calibrated, it’s time to set the nozzle temperature and bed temperature. Use a reliable digital thermometer or temperature gauge to measure the actual temperature of the nozzle and bed. Compare the measured temperature to the readings on your printer’s display or through the slicing software. Make adjustments in the firmware settings if necessary to ensure accuracy.
Additionally, calibrate the flow rate or extrusion multiplier. This setting adjusts the amount of filament that is actually extruded during printing. Print a calibration object, such as a single-walled cube, and measure the wall thickness with digital calipers. Adjust the flow rate in the firmware or slicing software until the measured wall thickness matches the desired thickness.
Don’t forget to perform a test print and examine the results for any issues. Look for issues such as over or under extrusion, uneven layers, or any other print defects. If necessary, make further adjustments in the firmware or printer settings to address these issues.
Calibration is an iterative process, and it may take several attempts to achieve optimal results. Remember to document the changes you make and their effects to help you troubleshoot in the future.
By taking the time to calibrate your Lego 3D printer, you can ensure that it is operating at its best and producing high-quality prints. Once you are satisfied with the calibration, you’re ready to move on to the next step and load the filament for printing.
Step 7: Load the Filament
With your Lego 3D printer calibrated and ready, it’s time to load the filament and prepare for your first print. Loading the filament correctly ensures a smooth and uninterrupted flow, allowing you to create accurate and well-formed 3D models.
Start by preparing your filament. Trim the end of the filament at a slight angle to create a clean and pointed tip. This will make it easier to feed the filament into the extruder.
Using the control interface on your printer or through your slicing software, preheat the extruder to the recommended temperature for the specific filament you’re using. This information can usually be found on the filament packaging or manufacturer’s website.
Once the extruder reaches the desired temperature, locate the filament inlet on the extruder assembly. It is usually near the top where the filament will feed into the hot end.
Gently insert the trimmed end of the filament into the filament inlet. Slowly push the filament until you feel resistance or until it reaches the hot end. Keep a firm grip on the filament and continue to feed it until a steady flow of melted filament is extruded from the nozzle.
Make sure to clean any oozing or excess filament from the nozzle and wipe it off with a cloth or tissue. This will prevent any unwanted filament residue from interfering with the print quality.
If your printer has an option for retracting or purging the filament, perform the necessary steps to clear any initial impurities or old filament from the nozzle. This will help ensure that only clean and properly melted filament is used for printing.
Once the filament is loaded and extruding smoothly, you’re ready to start your first print! Use your preferred slicing software to prepare a 3D model file, set the print parameters, and send the print command to your Lego 3D printer.
As the printer begins the printing process, keep an eye on the initial layers to ensure proper adhesion to the print bed. Monitor the progress of the print and make any necessary adjustments to the settings or calibration if issues arise.
Congratulations! You have successfully loaded the filament into your Lego 3D printer and are ready to bring your creative ideas to life. Now, sit back and watch as your printer transforms the digital design into a physical object.
Step 8: Start Printing
Now that you have successfully loaded the filament into your Lego 3D printer, it’s time to start your first print! This step is where all your hard work and preparation come to fruition as your printer brings your digital designs to life.
Begin by selecting the 3D model file you want to print. This can be a file you designed yourself or one obtained from online repositories or other sources. If needed, use slicing software like Ultimaker Cura or PrusaSlicer to prepare the model for printing. Adjust the print settings based on your desired level of detail, layer height, and print speed.
Generate the G-code file, which contains the instructions for the printer to follow during the print. Save the G-code file to an SD card or transfer it directly to your printer using a USB connection.
Insert the SD card or connect your computer to the printer, ensuring that the necessary communication is established. Use the printer interface or LCD screen to access the file and select the desired model for printing.
Before starting the print, double-check that all components are securely in place, the filament is flowing smoothly, and the print bed is clean and properly leveled. This will help ensure a successful print and minimize any potential issues or failures.
Once you have confirmed everything, initiate the print. Observe the printer as it begins the first layer and ensure proper adhesion to the print bed. Monitor the progress periodically to ensure that the print is proceeding as expected.
During the print, it’s important to maintain an appropriate environment for successful printing. Keep the printer in a well-ventilated area to prevent heat buildup and minimize the chances of filament warping or print distortions.
While the printer is in operation, avoid unnecessary vibrations or movements around the printer to ensure stable and accurate printing. If any issues arise, such as filament jams or adhesion problems, familiarize yourself with the troubleshooting techniques specific to your printer to address these challenges effectively.
Allow the printer to complete the entire print job without interruption. Depending on the complexity and size of the model, printing times can vary significantly. Be patient and resist the temptation to interfere with the print unless absolutely necessary.
Once the print is finished, carefully remove the completed object from the print bed. Take note of the quality and details of the print and compare it to your expectations. Admire your creation and assess any areas for improvement or adjustments in future prints.
Congratulations! You have successfully completed the final step and brought your Lego 3D printer to life, producing your first 3D printed object. Now you can explore the world of 3D printing further, experimenting with different designs, materials, and settings to unlock endless possibilities.
Conclusion
Building your own Lego 3D printer is a rewarding experience that allows you to delve into the world of 3D printing and unleash your creativity. Throughout the journey of gathering Legos, constructing the structure, adding the extruder, connecting the electronics, installing the firmware, calibrating the printer, loading the filament, and finally starting your first print, you have gained valuable knowledge and practical skills.
By using Legos as the building blocks for your 3D printer, you have demonstrated the versatility and adaptability of these iconic toys. Legos not only provided a solid foundation for your printer but also allowed for customization and innovation, making each printer unique to its creator.
Through the process of calibration, you fine-tuned the printer’s settings to achieve accurate prints and optimal performance. With each adjustment, you gained a deeper understanding of how different factors affect the print quality and learned how to troubleshoot and improve the printer’s functionality.
Now that you have your Lego 3D printer up and running, the possibilities are endless. You can explore a wide range of design ideas and material options, bringing your imagination to life layer by layer. Whether you’re creating functional prototypes, artistic sculptures, or practical objects, the power to make is now in your hands.
Remember, the journey does not end here. As you gain more experience and dive deeper into the world of 3D printing, there are endless opportunities for further customization, upgrades, and experimentation. Continuously learn, explore, and connect with the vibrant 3D printing community to expand your skills and knowledge.
Building a Lego 3D printer is just the beginning of your DIY 3D printing adventure. Embrace the possibilities, push the boundaries, and enjoy the incredible world of creativity and innovation that 3D printing offers. Happy printing!