Introduction
Updating the BIOS on your Gigabyte motherboard is an essential step to ensure optimal performance and compatibility with the latest hardware and software. The BIOS, or Basic Input/Output System, is responsible for initializing and configuring the hardware components of your computer before the operating system starts. By updating the BIOS, you can fix bugs, add new features, and improve the overall stability and performance of your system.
While the process of updating the BIOS may seem daunting, it can be relatively straightforward if you follow the right steps. In this guide, we will walk you through the process of updating the BIOS on your Gigabyte motherboard.
Before we begin, it’s important to note that updating the BIOS carries some risks if not done correctly. It’s crucial to carefully follow the instructions provided by Gigabyte and ensure that your computer is connected to a reliable power source throughout the process. It’s also recommended to back up your important files before proceeding.
In the following steps, we will guide you through identifying your motherboard model, downloading the latest BIOS update, preparing a USB flash drive, entering BIOS settings, and finally updating the BIOS. By the end of this guide, you will have the necessary knowledge and confidence to successfully update the BIOS on your Gigabyte motherboard.
Step 1: Identify your motherboard model
Before you can proceed with updating the BIOS on your Gigabyte motherboard, you need to identify the specific model of your motherboard. The motherboard model is essential to ensure that you download the correct BIOS update for your system. There are a few ways you can determine your motherboard model:
- Check the motherboard itself: Open your computer case and locate the motherboard. Look for any visible markings or labels on the PCB (printed circuit board) that indicate the model name or number. Gigabyte motherboards usually have the model name printed near the CPU socket or along the edges of the motherboard.
- Check the user manual: If you still have the manual that came with your motherboard, it should contain detailed information about the model. Look for the section that describes the motherboard specifications or check the index for the specific page that lists the model name.
- Check the system information: If you are using a Windows operating system, you can use the built-in system information tool to retrieve the motherboard model. Press the Windows key + R to open the Run dialog box, then type “msinfo32” and press Enter. In the System Information window that appears, look for the “BaseBoard Product” or “System Manufacturer” entry to find the motherboard model.
- Check the BIOS menu: Restart your computer and enter the BIOS menu by pressing the appropriate key (usually displayed on the screen during startup). In the BIOS menu, look for a section or tab that displays system information. The motherboard model may be listed here.
Once you have identified your motherboard model, make sure to write it down or take a picture for reference. This information will be crucial when downloading the correct BIOS update in the next step.
Step 2: Download the latest BIOS update
After identifying your Gigabyte motherboard model, the next step is to download the latest BIOS update from the Gigabyte website. Gigabyte regularly releases BIOS updates to ensure compatibility with new hardware, improve system stability, and address any reported issues. Follow these steps to download the latest BIOS update:
- Visit the Gigabyte website: Open your web browser and navigate to the official Gigabyte website at www.gigabyte.com.
- Navigate to the Support section: Once on the Gigabyte website, locate the “Support” or “Service” section. This section may be located in the main menu or at the bottom of the page.
- Search for your motherboard model: Use the search function or browse the available options to find your specific motherboard model. You can enter the model name or select the appropriate series or chipset.
- Access the downloads page: Once you have found your motherboard model, navigate to its product page. Look for a tab or link that says “Downloads,” “Support,” or “BIOS.” Click on this tab to access the downloads page for your motherboard.
- Select the BIOS category: On the downloads page, locate the BIOS category or section. This is where you will find the available BIOS updates for your motherboard.
- Check for the latest BIOS version: Look for the latest BIOS version listed on the downloads page. Gigabyte usually displays the version number, release date, and a brief description of the changes or improvements in each BIOS update.
- Download the BIOS update: Select the latest BIOS version and click on the download link or button. Choose a location on your computer to save the downloaded file. Make sure to verify that you are downloading the correct BIOS update for your motherboard model.
Once the download is complete, you are ready to proceed to the next step of preparing a USB flash drive for the BIOS update. Ensure that you have a reliable internet connection during the download process to avoid any interruptions.
Step 3: Prepare a USB flash drive
In order to update the BIOS on your Gigabyte motherboard, you will need to have a USB flash drive ready to transfer the BIOS update file. Here are the steps to prepare a USB flash drive:
- Check the USB flash drive compatibility: Ensure that the USB flash drive you are using is compatible with your computer and can be recognized by the BIOS. It’s recommended to use a USB 2.0 or USB 3.0 flash drive for better compatibility.
- Backup any important data: Before proceeding, make sure to backup any important files or data on the USB flash drive. This will prevent any accidental data loss during the preparation process.
- Format the USB flash drive: Insert the USB flash drive into an available USB port on your computer. Open the File Explorer or Finder on your operating system and locate the USB flash drive. Right-click on the drive and select “Format” from the context menu. Choose the appropriate file system (usually FAT32) and perform the formatting process.
- Label the USB flash drive: Once the USB flash drive is formatted, it’s a good practice to label it with a recognizable name or tag. This will help you distinguish it from other storage devices and easily identify it in the BIOS settings.
- Eject the USB flash drive: After formatting and labeling the USB flash drive, safely eject it from your computer. This ensures that any pending write processes are completed and prevents data corruption.
Now that you have prepared the USB flash drive, it’s time to move on to the next step of formatting the USB flash drive before copying the BIOS update file onto it. Remember to keep the USB flash drive in a safe place until you are ready to proceed with the BIOS update.
Step 4: Format the USB flash drive
Before you can copy the BIOS update file onto the USB flash drive, you need to ensure that the drive is properly formatted. This step is essential to ensure compatibility and a smooth update process. Follow the steps below to format the USB flash drive:
- Connect the USB flash drive: Insert the USB flash drive into an available USB port on your computer. Make sure it is securely connected.
- Open File Explorer (Windows) or Finder (macOS): Navigate to the file management program on your operating system. In Windows, you can open File Explorer by pressing the Windows key + E. On macOS, go to the Finder located in the dock, or press Command + Space and search for “Finder.”
- Locate the USB flash drive: In File Explorer or Finder, look for the USB flash drive in the list of available drives and devices. It will usually be labeled with the drive letter or name you assigned to it.
- Right-click on the USB flash drive: Once you have located the USB flash drive, right-click on its icon or name. This will open a context menu with various options.
- Select “Format”: From the context menu, select the “Format” option. This will open the formatting settings for the USB flash drive.
- Choose the file system: In the formatting settings, choose the appropriate file system for the USB flash drive. For better compatibility, it’s recommended to select FAT32 as the file system. However, if the file size of the BIOS update exceeds 4GB, you may need to select exFAT or NTFS instead.
- Start the formatting process: Once you have selected the file system, click on the “Start” or “Format” button to begin the formatting process. Note that this will erase all data on the USB flash drive, so make sure you have backed up any important files.
- Wait for the formatting to complete: The formatting process may take a few moments to complete. The progress will be displayed on the screen. Once formatting is finished, you will receive a notification or see a confirmation message.
- Eject the USB flash drive: After the formatting is complete, safely eject the USB flash drive from your computer to ensure that any pending write processes are completed and to prevent data corruption.
Now that the USB flash drive is properly formatted, you can move on to the next step of copying the BIOS update file onto it. Keep the USB flash drive in a safe place until you are ready to proceed with the BIOS update.
Step 5: Copy the BIOS update to the USB flash drive
Now that you have formatted your USB flash drive, it’s time to copy the BIOS update file onto it. The BIOS update file is typically provided as a downloadable file from the Gigabyte website. Follow these steps to copy the BIOS update onto the USB flash drive:
- Locate the downloaded BIOS update file: Open the location on your computer where you downloaded the BIOS update file. This is usually the “Downloads” folder or a location specified by your web browser.
- Connect the USB flash drive: Insert the formatted USB flash drive into an available USB port on your computer. Ensure that it is properly connected.
- Open File Explorer (Windows) or Finder (macOS): Navigate to the file management program on your operating system. In Windows, you can open File Explorer by pressing the Windows key + E. On macOS, go to the Finder located in the dock, or press Command + Space and search for “Finder.”
- Locate the USB flash drive: In File Explorer or Finder, find the USB flash drive in the list of available drives and devices. It will usually be labeled with the drive letter or name you assigned to it during the formatting process.
- Open the USB flash drive: Double-click on the USB flash drive icon to open it and display its contents.
- Copy the BIOS update file: Navigate to the location on your computer where the BIOS update file is stored. Select the BIOS update file, then right-click on it and choose the “Copy” option from the context menu.
- Paste the BIOS update file onto the USB flash drive: Switch back to the USB flash drive window in File Explorer or Finder. Right-click on an empty space within the window and select the “Paste” option. Alternatively, you can use the keyboard shortcut Ctrl + V (Windows) or Command + V (macOS) to paste the file.
- Wait for the file transfer to complete: The BIOS update file will be copied from your computer to the USB flash drive. The duration of the transfer will depend on the size of the file and the speed of your USB connection. Ensure that the transfer is completed before proceeding to the next step.
- Eject the USB flash drive: Once the file transfer is finished, safely eject the USB flash drive from your computer. This will ensure that any pending write processes are completed and prevent data corruption.
With the BIOS update file successfully copied to the USB flash drive, you are now ready to proceed to the next step of entering the BIOS settings to update the BIOS on your Gigabyte motherboard.
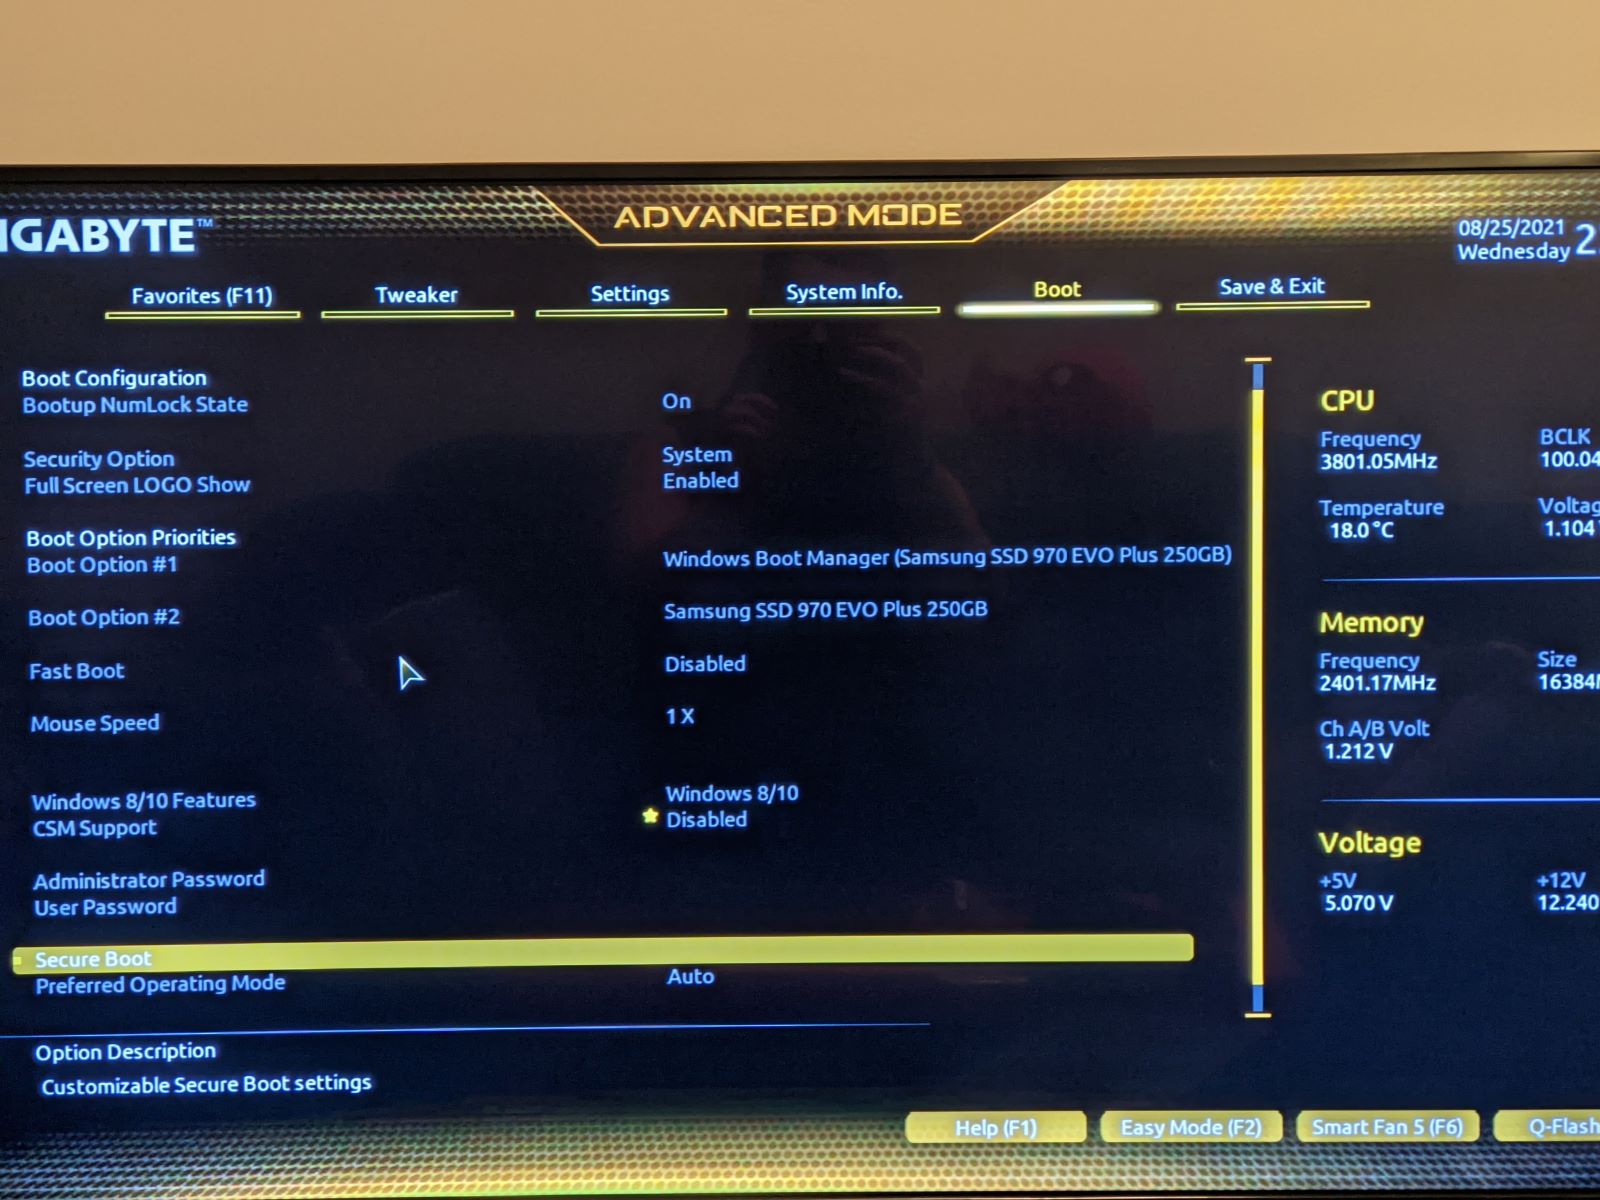
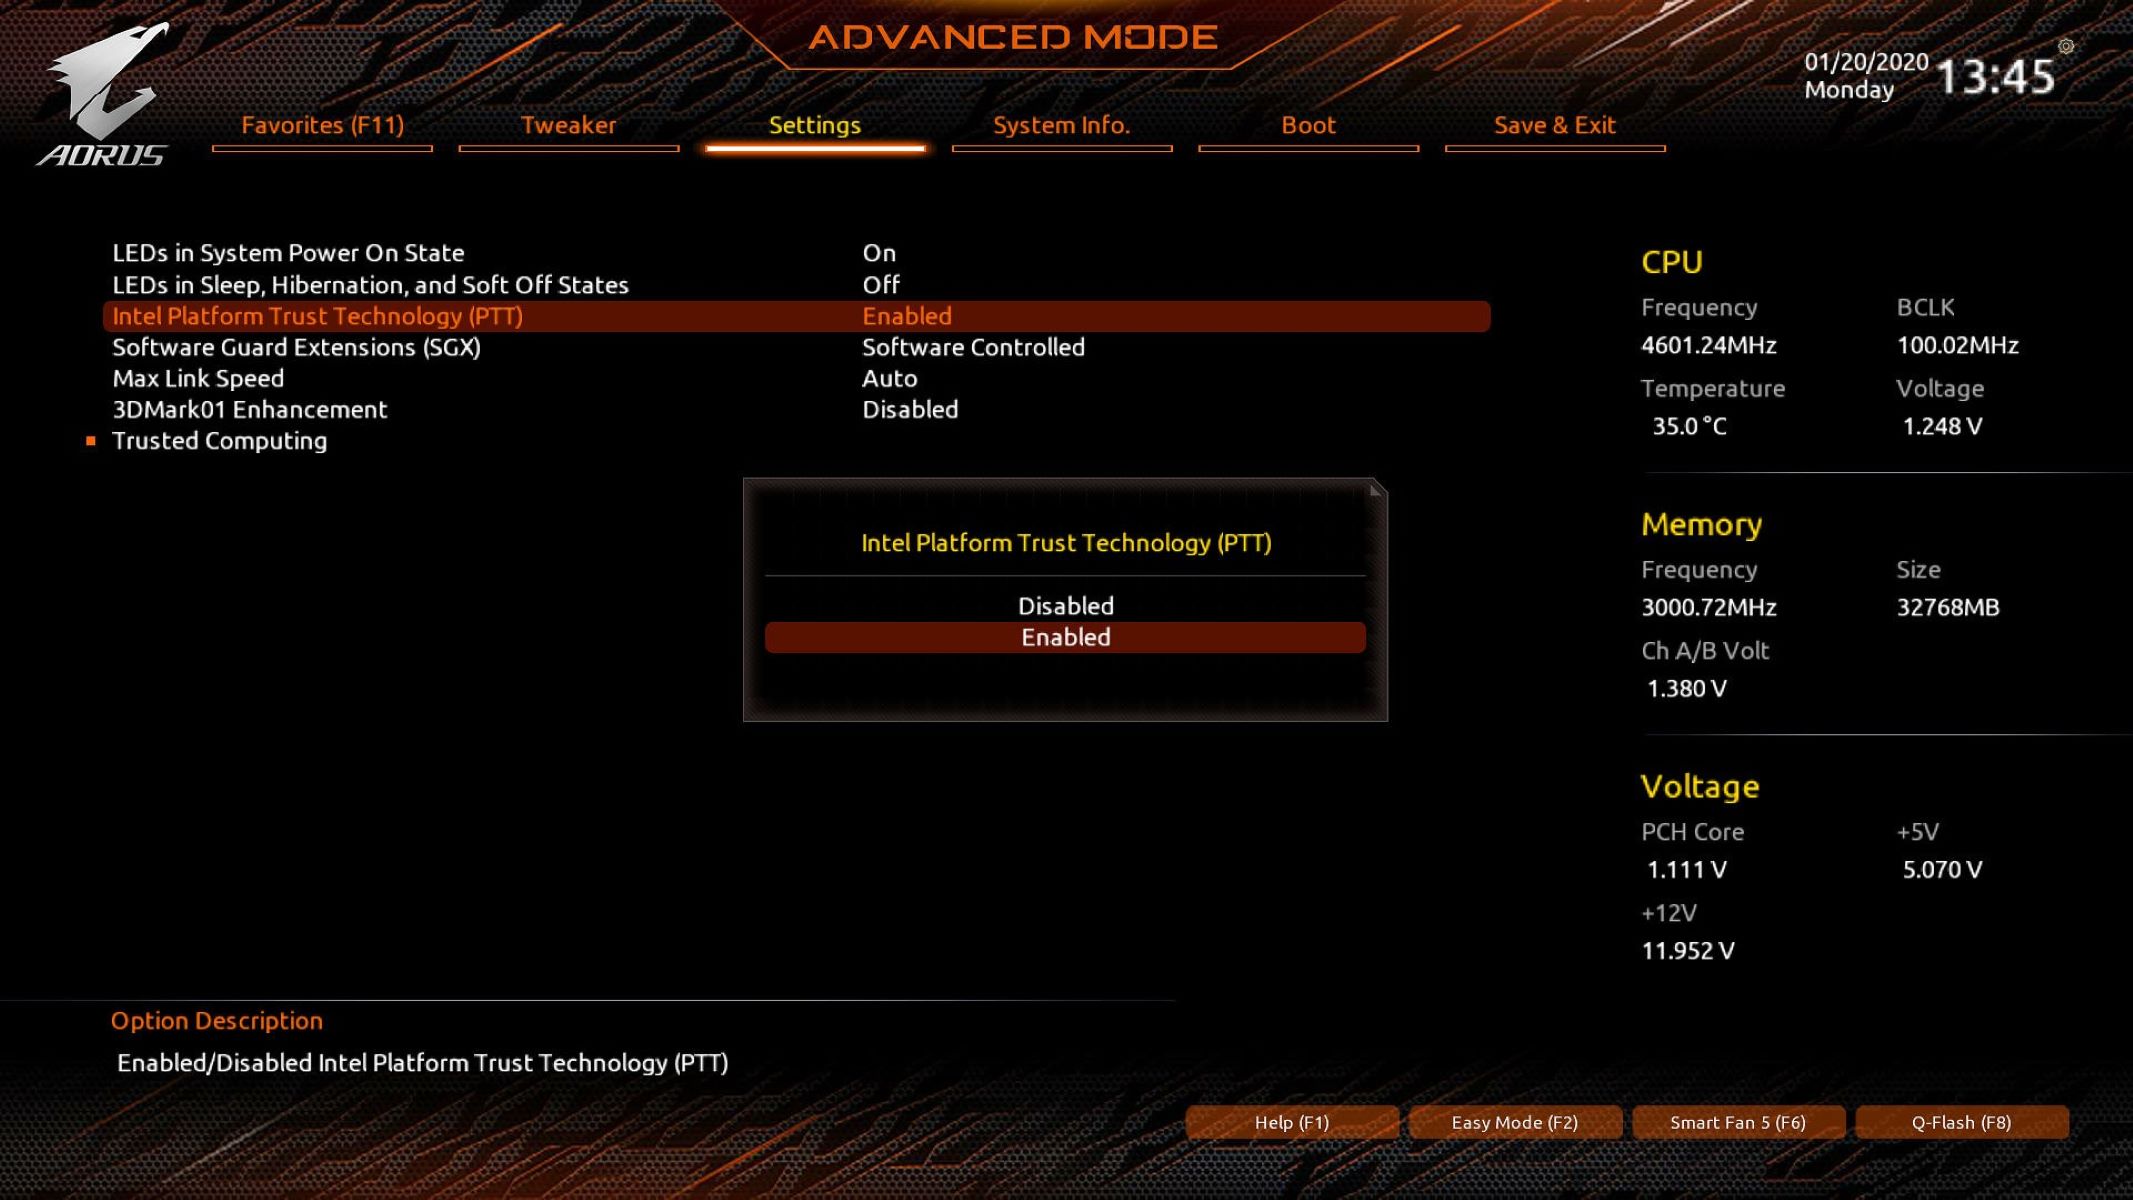
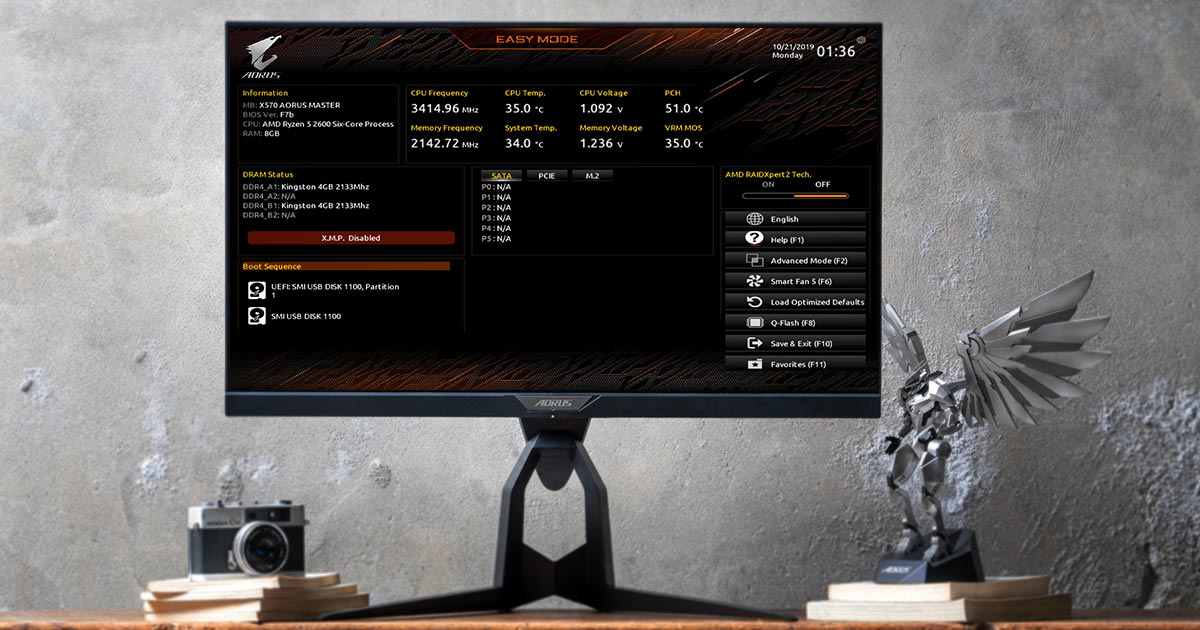
Step 6: Enter BIOS settings
Before updating the BIOS on your Gigabyte motherboard, you need to access the BIOS settings. The BIOS settings allow you to make changes to various hardware configurations and provide access to perform the BIOS update. Follow these steps to enter the BIOS settings:
- Restart your computer: Save any open files and restart your computer. You may either click on the Start menu/button and select “Restart” or use the keyboard shortcut Ctrl + Alt + Del and choose the “Restart” option.
- Enter the BIOS setup key: As your computer restarts, pay close attention to the screen. Look for a message that indicates the key or keys you need to press to enter the BIOS setup. This key may vary depending on your motherboard model, but common keys include Del, F2, F12, or Esc. Quickly press and hold the specified key(s) to enter the BIOS setup.
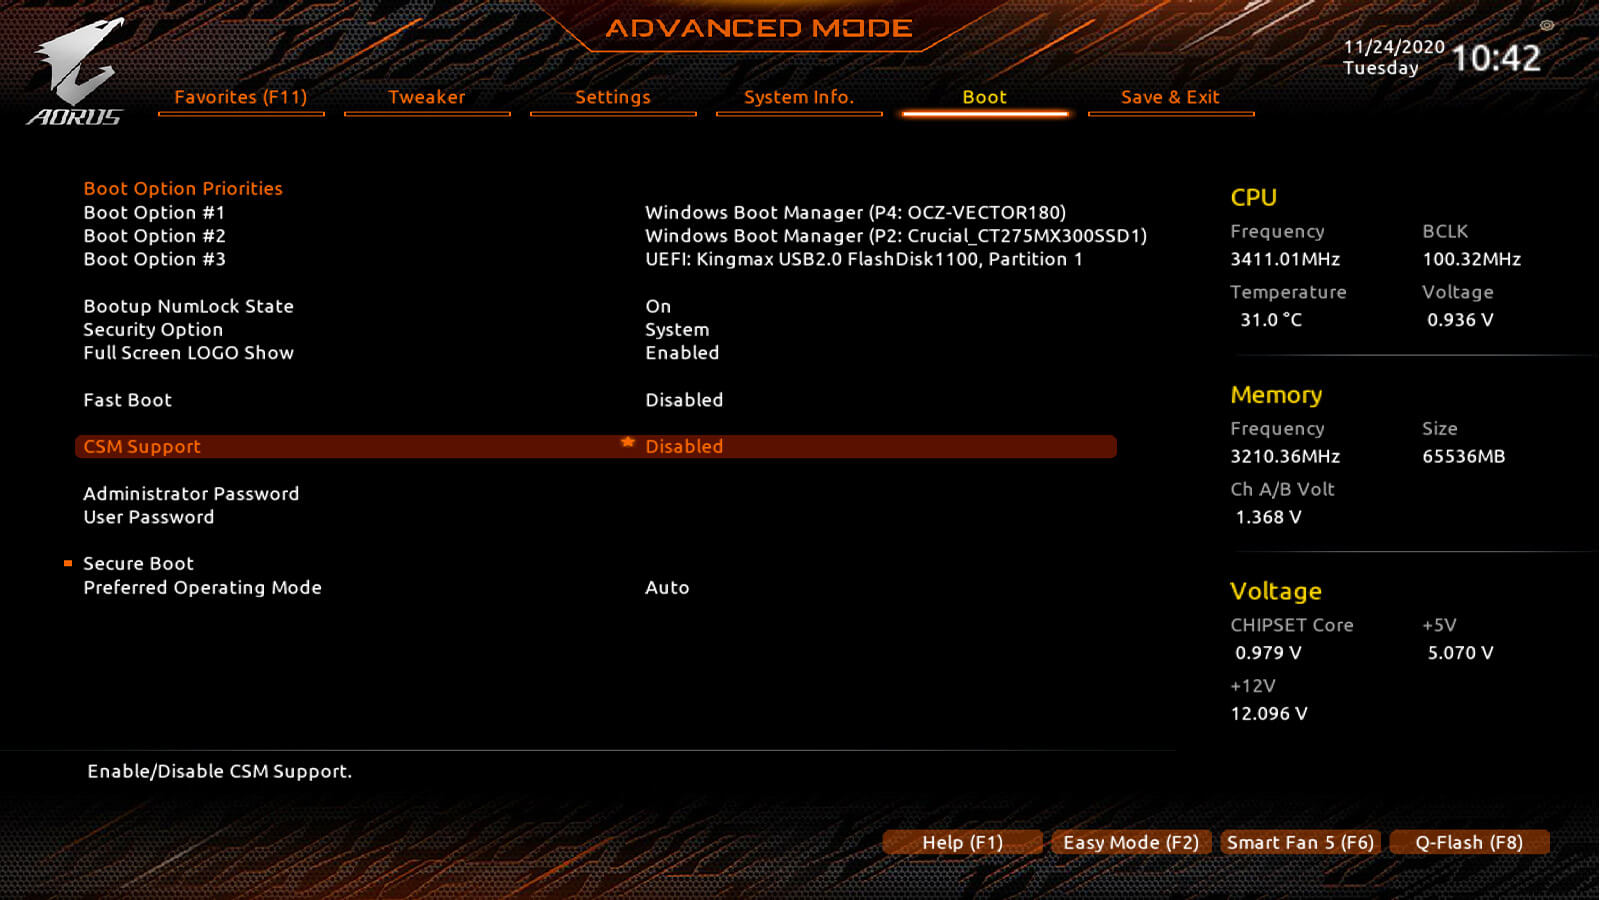
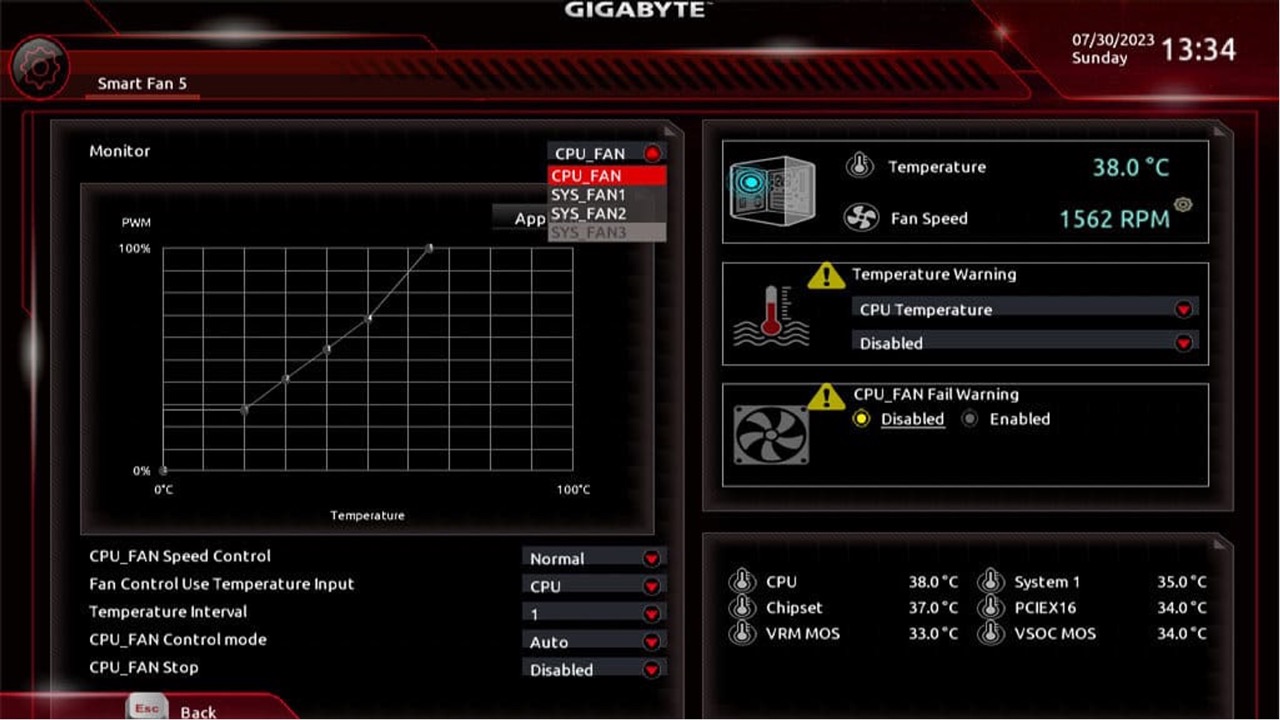
- Navigate to the BIOS update section: Once you have successfully entered the BIOS settings, use the arrow keys on your keyboard to navigate through the different sections and options. Look for a section or menu entry related to “BIOS Update” or “Update BIOS.” The exact location and labeling may vary depending on the BIOS version and motherboard model you have.
- Ensure proper settings for BIOS update: Before proceeding with the BIOS update, ensure that the necessary settings are in place. Some motherboards require specific settings to enable updating the BIOS, such as disabling “Secure Boot” or enabling “USB Boot Support.” Consult the motherboard manual or Gigabyte’s support documentation for any specific instructions related to updating the BIOS on your motherboard.
- Save any changes: Once you have made the necessary adjustments for the BIOS update, navigate to the “Save and Exit” section or a similar option. Select the option to save any changes you made and exit the BIOS settings. Your computer will restart.
After performing these steps, your computer will restart and you will be ready to proceed with updating the BIOS. It’s essential to follow the instructions provided by Gigabyte and exercise caution while updating the BIOS to avoid any potential issues or errors.
Step 7: Update the BIOS
With everything prepared, it’s time to update the BIOS on your Gigabyte motherboard. Follow these steps carefully to ensure a successful BIOS update:
- Connect the USB flash drive: Insert the USB flash drive that contains the BIOS update file into a USB port on your computer.
- Restart your computer: Save any open files and restart your computer. It’s important to boot directly into the BIOS update utility instead of starting the operating system.
- Enter the BIOS settings: During the restart process, quickly press the key or keys specified to enter the BIOS setup. Refer to the Step 6 section if you need assistance entering the BIOS settings.
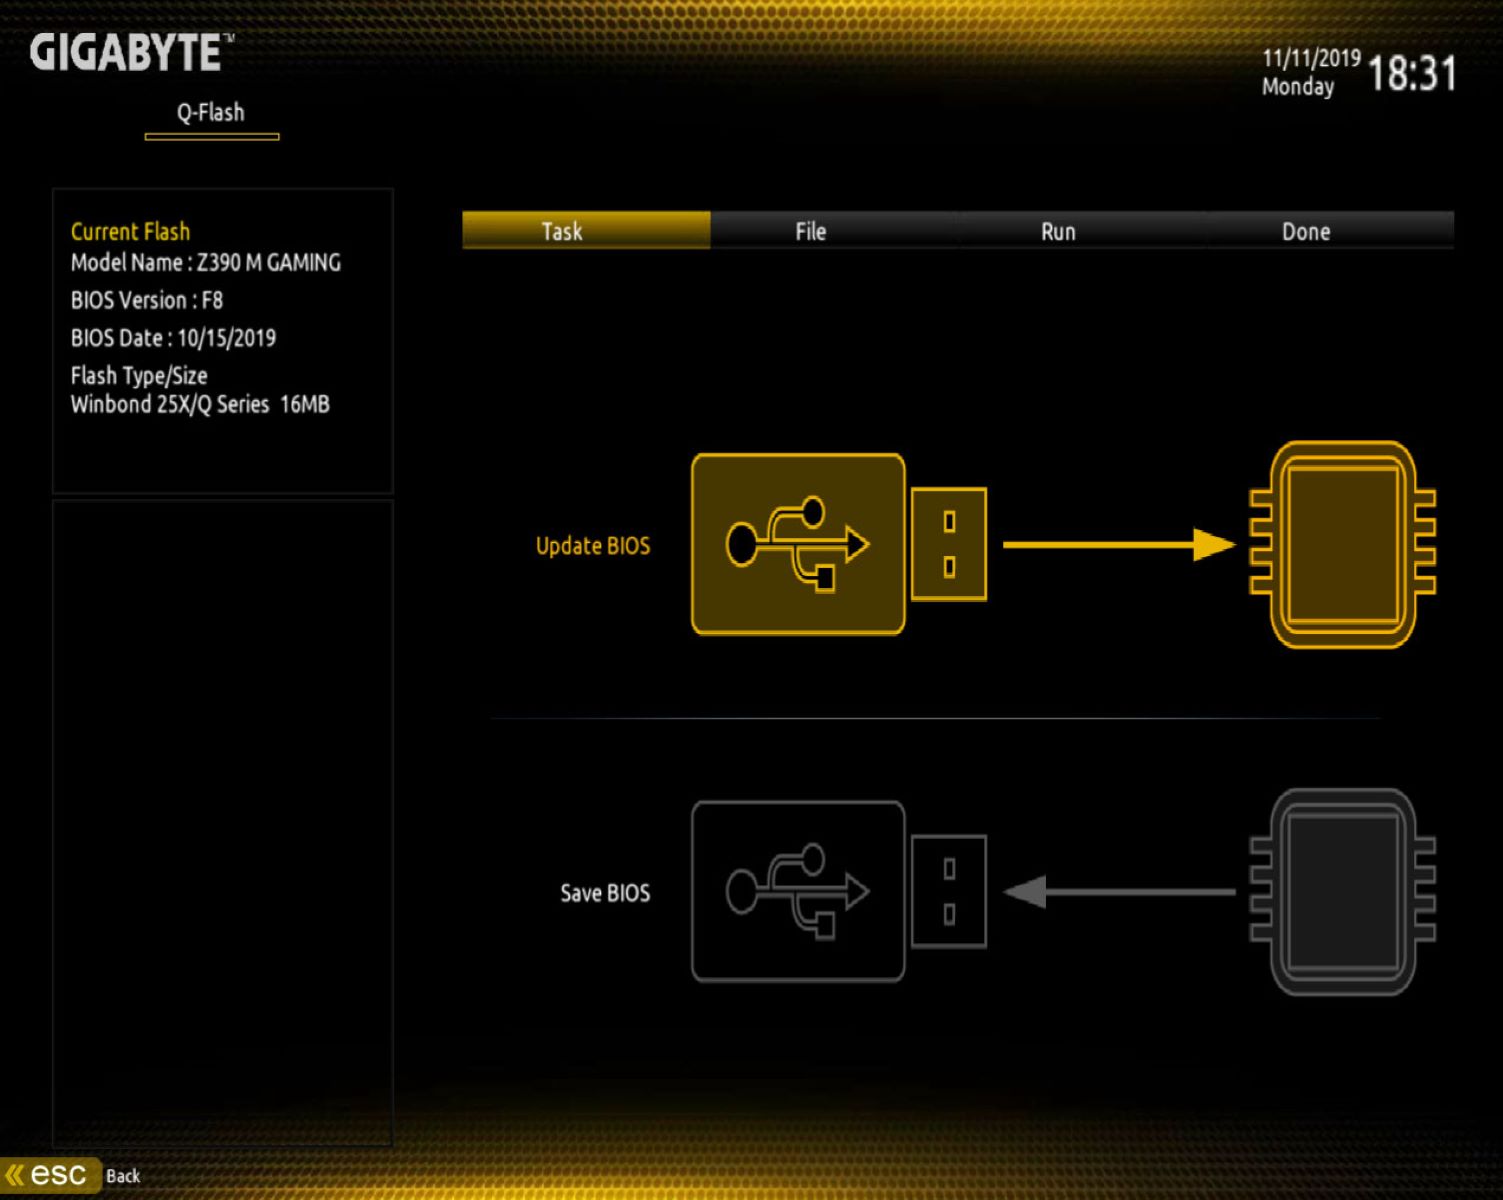
- Navigate to the BIOS update section: Once you are in the BIOS settings, navigate to the section or menu entry that is related to updating the BIOS. This may differ depending on your motherboard model and BIOS version.
- Select the BIOS update file: In the BIOS update section, locate the option to select the BIOS update file. It may be labeled as “Select File” or similar. Use the arrow keys to navigate and press Enter to select the BIOS update file from the USB flash drive.
- Initiate the BIOS update process: Once you have selected the BIOS update file, follow the on-screen instructions provided by the BIOS update utility. This may include confirming the update, entering a password, or agreeing to any terms and conditions. Be patient as the update process may take a few minutes to complete.
- Do not interrupt the update: It is crucial that you do not interrupt the BIOS update process in any way. Avoid turning off your computer, unplugging the power source, or removing the USB flash drive until the BIOS update is fully completed.
- Wait for the update to complete: The BIOS update utility will display a progress bar or status indicator to show the update’s progress. Once the update is finished, you will usually receive a notification or see a message indicating that the BIOS update was successful.
- Restart your computer: After the BIOS update is complete, you can restart your computer. The updated BIOS will now be in effect.
Congratulations! You have successfully updated the BIOS on your Gigabyte motherboard. It’s important to double-check your system after the update to ensure everything is functioning properly. In case you encounter any issues, refer to Gigabyte’s support documentation or contact their customer support for further assistance.
Step 8: Restart your computer
After updating the BIOS on your Gigabyte motherboard, it is important to restart your computer to ensure that the changes take effect. Follow these steps to properly restart your computer:
- Close any open applications: Before restarting, make sure to save any unsaved work and close all open applications. This will prevent any data loss or conflicts during the restart process.
- Safely eject the USB flash drive: If you have not already done so, safely eject the USB flash drive containing the BIOS update file. This will ensure that any pending write processes are completed and prevent data corruption.
- Click on the Start menu (Windows) or Apple menu (macOS): Go to the Start menu in Windows by clicking on the Windows icon located on the taskbar. On macOS, click on the Apple logo located on the top left corner of the screen.
- Choose the “Restart” option: In the Start menu (Windows) or Apple menu (macOS), select the “Restart” option. This will initiate the restart process.
- Wait for the computer to restart: Allow your computer some time to shut down and restart. This process may take a few moments, depending on your computer’s hardware and settings.
- Check for successful BIOS update: As your computer restarts, pay attention to any messages or prompts that appear on the screen. Look for indications that the BIOS update was successful, such as a confirmation message or the Gigabyte logo.
- Verify system stability: After the restart, it is important to verify that your system is stable and functioning as expected. Test various components, such as the display, audio, and peripherals, to ensure that everything is working properly. If you encounter any issues, refer to Gigabyte’s support documentation or contact their customer support for assistance.
- Enjoy the benefits of the BIOS update: With the BIOS successfully updated and your computer restarted, you can now enjoy the benefits of the updated BIOS. These may include improved performance, increased stability, bug fixes, new features, and enhanced compatibility with hardware and software.
By following these steps and restarting your computer, you have completed the BIOS update process for your Gigabyte motherboard. Remember to keep your BIOS up to date by regularly checking for new updates on the Gigabyte website. This ensures that your system remains optimized, secure, and compatible with the latest technology advancements.
Conclusion
Updating the BIOS on your Gigabyte motherboard is a crucial task to ensure optimal performance, compatibility, and stability. Although the process may seem intimidating, following the steps outlined in this guide will help you successfully update your BIOS and enjoy the benefits it brings.
We began by emphasizing the importance of identifying your motherboard model accurately, as downloading and applying the incorrect BIOS update can lead to system issues. Then, we walked through the process of downloading the latest BIOS update from the official Gigabyte website, ensuring that you have the most up-to-date version for your motherboard.
Next, we discussed the significance of preparing a USB flash drive and formatting it correctly to create a suitable medium for the BIOS update. We highlighted the importance of backing up your important data before starting the format to prevent any accidental data loss.
After preparing the USB flash drive, we moved on to the essential step of copying the downloaded BIOS update file onto the drive. We provided a step-by-step guide on how to locate the file, connect the flash drive, copy the update, and ensure a successful transfer.
Entering the BIOS settings was the subsequent step, where we outlined the process of restarting the computer, entering the BIOS setup using the appropriate key(s), and navigating to the BIOS update section or menu. We also emphasized the importance of ensuring the necessary settings for a successful BIOS update.
Updating the BIOS itself was covered in detail, whereby we advised users to carefully follow the prompts and instructions provided by the BIOS update utility. We stressed the importance of not interrupting the update process, as doing so can lead to irreversible damage to the system.
Lastly, we concluded by highlighting the significance of restarting the computer after updating the BIOS. We reminded users to safely eject the USB flash drive, restart the computer, verify the success of the BIOS update, and test the system’s stability.
By following these steps, you can ensure that your Gigabyte motherboard is running the latest BIOS version, benefiting from enhanced performance, stability, compatibility, and the latest features. Remember to perform regular checks for BIOS updates to keep your system up-to-date and optimized.