Introduction
When it comes to optimizing the performance of your Gigabyte motherboard, one key factor to consider is the RAM speed. The RAM, or Random Access Memory, plays a crucial role in the overall speed and efficiency of your computer. Setting the RAM to the appropriate speed can greatly enhance system responsiveness and ensure smooth multitasking.
In this guide, we will take you through the process of adjusting the RAM speed in the Gigabyte BIOS. The BIOS, or Basic Input/Output System, is the firmware that controls the hardware and allows you to make changes to its settings.
Before we begin, it’s important to note that modifying BIOS settings can have a significant impact on the stability and performance of your system. Therefore, it is recommended to proceed with caution and only make changes if you have a good understanding of the consequences.
Now, let’s dive into the steps required to set the RAM speed in the Gigabyte BIOS, so you can unleash the full potential of your computer.
Step 1: Accessing the BIOS
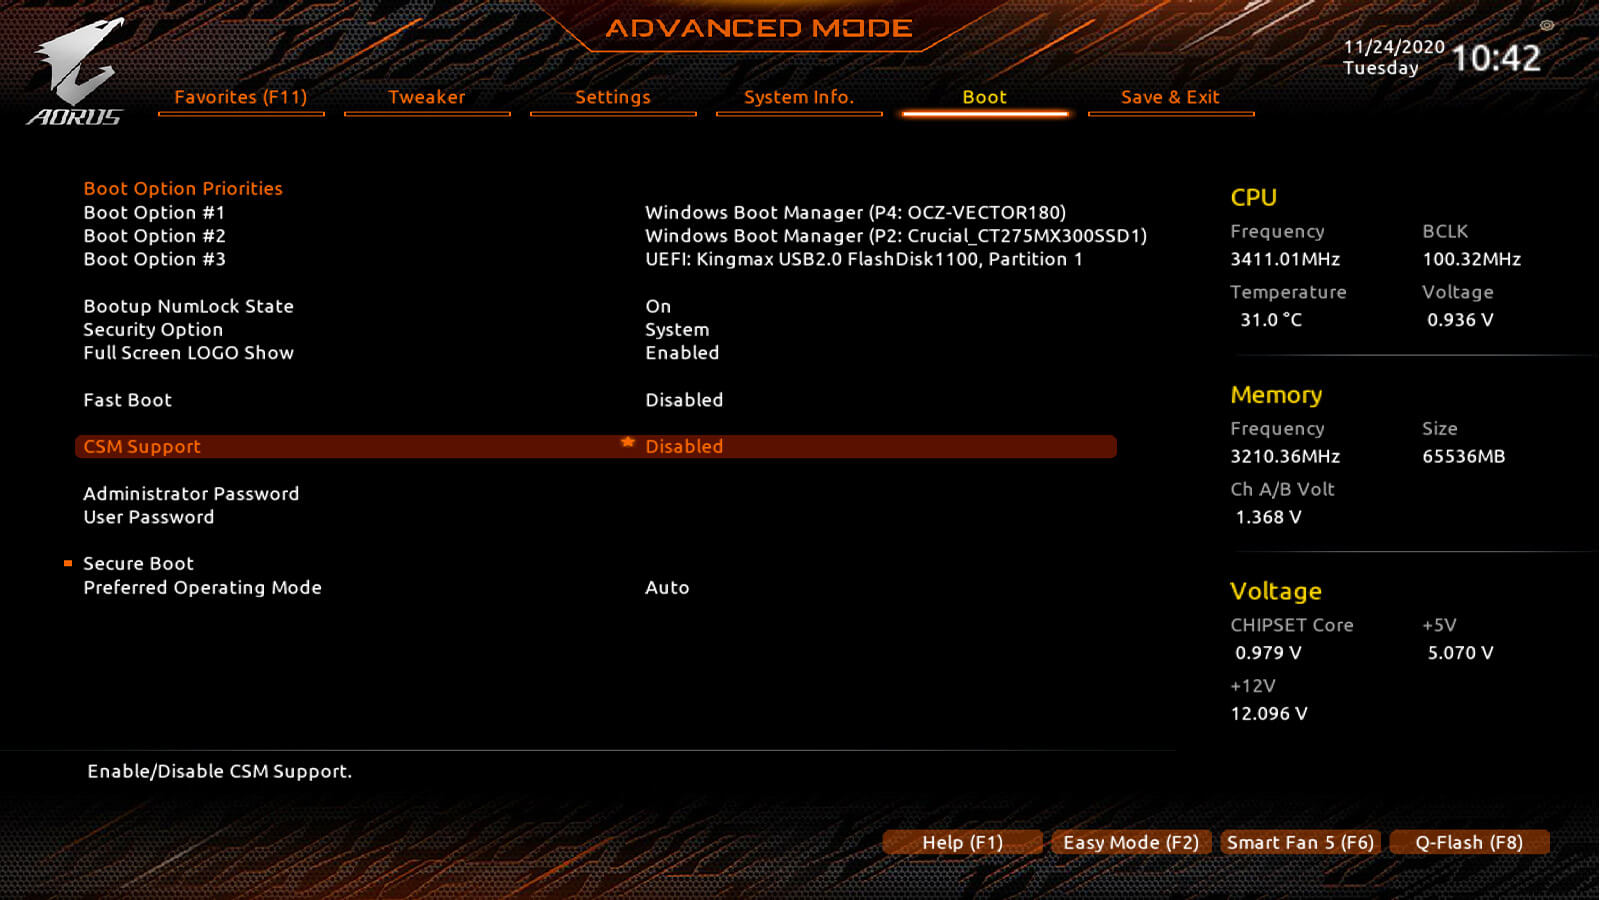
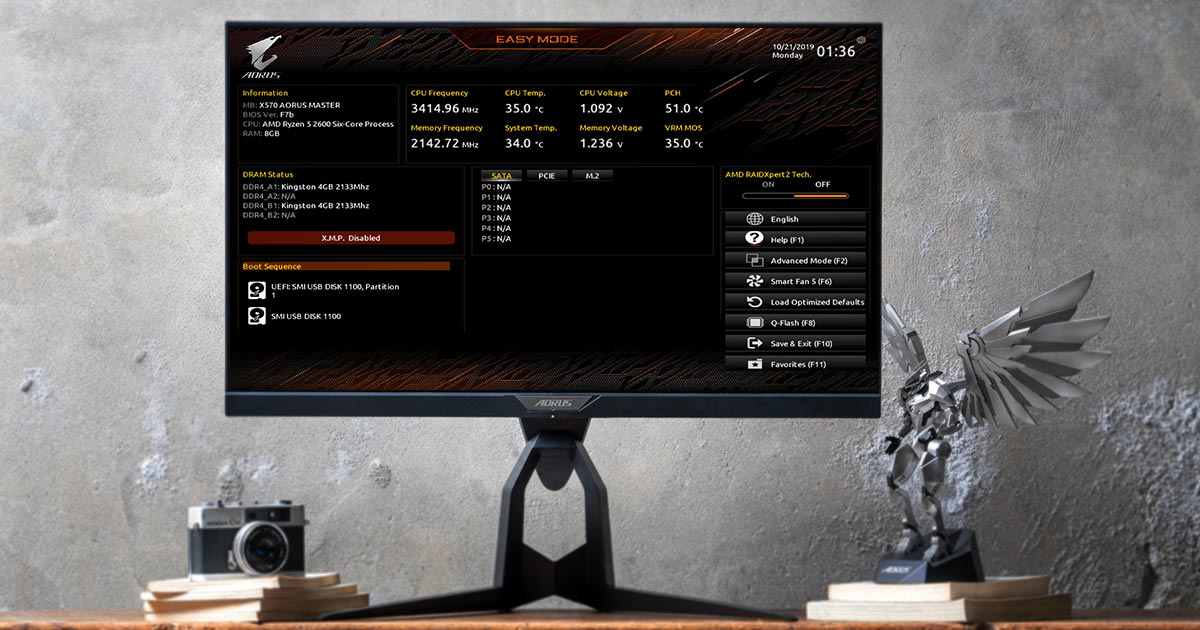
The first step to adjusting the RAM speed in the Gigabyte BIOS is to access the BIOS menu. To do this, you need to restart your computer and press a specific key during the boot process. The key you need to press may vary depending on your Gigabyte motherboard model, but it’s typically the “Delete” key or the “F2” key.
As soon as you see the manufacturer’s logo or a black screen with text, start tapping the designated key repeatedly. This will bring up the BIOS menu, where you can make changes to various hardware settings.
Once you successfully access the BIOS menu, you will be greeted with a user-friendly interface. From here, you can navigate through the different settings using your keyboard. Use the arrow keys to move up, down, left, and right, and the Enter key to select or enter submenus.
Note: If you are unsure about the key to access the BIOS on your specific Gigabyte motherboard, you can refer to the user manual or visit the manufacturer’s website for assistance.
Once inside the BIOS menu, you are ready to proceed to the next step, where we will explore the advanced memory settings.
Step 2: Navigating to the Advanced Memory Settings
After successfully accessing the Gigabyte BIOS menu, the next step is to navigate to the advanced memory settings. These settings allow you to make adjustments to the RAM speed and other related parameters.
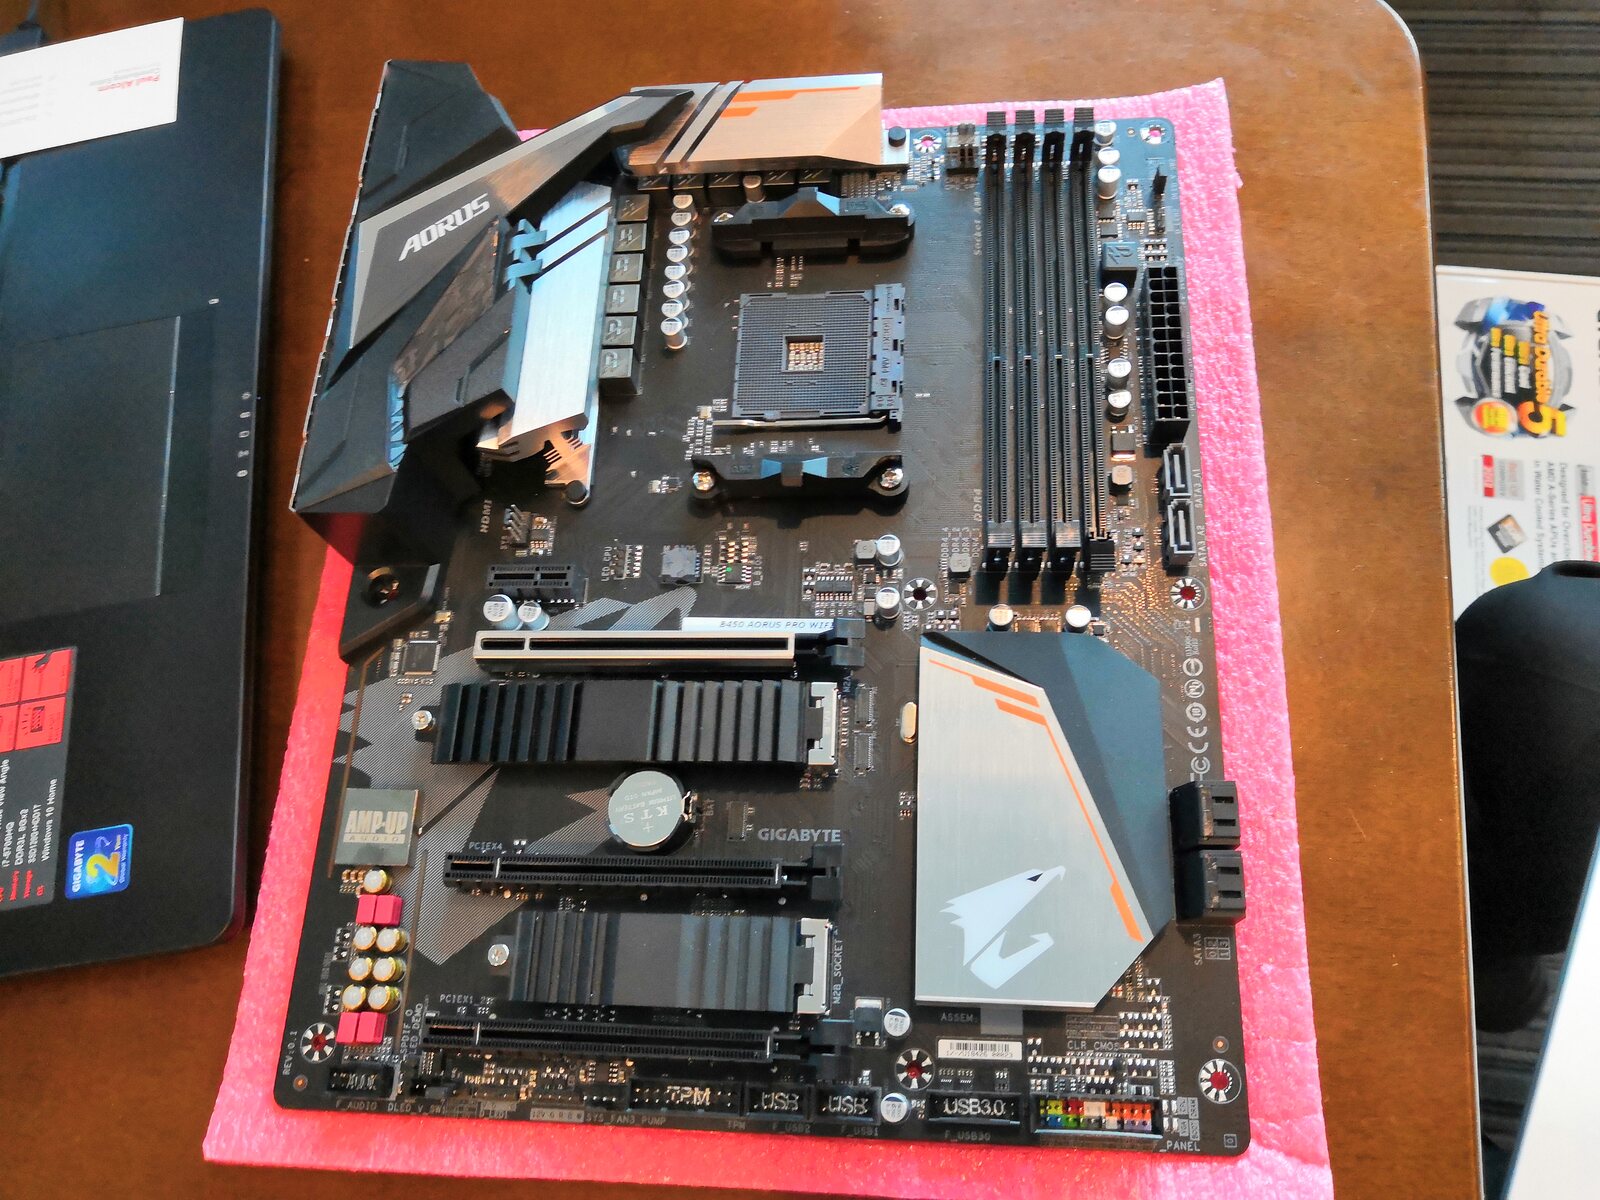
In most Gigabyte BIOS versions, you can find the advanced memory settings under the “M.I.T.” (Motherboard Intelligent Tweaker) tab or a similar name. Use the arrow keys on your keyboard to highlight the “M.I.T.” tab and press Enter to enter the sub-menu.
Within the “M.I.T.” sub-menu, you will see a list of different options related to memory settings. Look for an option such as “Advanced Memory Settings,” “DRAM Configuration,” or something similar. Again, the specific wording may vary based on your Gigabyte motherboard model.
Once you locate the advanced memory settings, press Enter to access the sub-menu. Here, you will find a range of options that allow you to modify the RAM speed and timings.
It’s important to proceed with caution when making changes in this section, as incorrect settings can lead to system instability or even failure to boot. If you are not familiar with these settings, it’s advisable to consult your motherboard’s manual or seek guidance from experienced users. Remember to take note of the default settings or make a backup before making any changes.
Once you are comfortable with navigating to the advanced memory settings, we can move on to the next step, where we will adjust the RAM speed.
Step 3: Adjusting the RAM Speed
Now that you have successfully accessed the advanced memory settings in the Gigabyte BIOS, it’s time to adjust the RAM speed to your desired configuration. The RAM speed is typically measured in MHz (megahertz) and can range from the default speed set by the motherboard to higher frequencies.
In the advanced memory settings sub-menu, look for an option that allows you to change the RAM speed. It may be labeled as “Memory Frequency,” “DRAM Frequency,” or something similar. Select the option and press Enter.
Once you are in the RAM speed adjustment section, you will see a list of available frequencies or a drop-down menu with various options. Choose the desired RAM speed based on the compatibility of your motherboard and RAM modules.
It’s important to note that not all RAM modules are capable of running at higher speeds, and setting the speed too high for your specific modules can lead to instability. Refer to the specifications of your RAM modules to determine their maximum supported speed.
Once you have selected the desired RAM speed, save the changes by either pressing the F10 key or navigating to the “Save & Exit” option and pressing Enter. This will prompt the BIOS to apply the new RAM speed and restart your computer.
After the restart, your computer will boot with the adjusted RAM speed, and you should notice a difference in system performance, particularly with memory-intensive tasks.
Remember, finding the optimal RAM speed may require some trial and error. It’s advisable to test the stability of your system after each adjustment by running stress tests or benchmarking software. If you experience any issues or instability, you can always revert to the default settings or adjust the RAM speed to a lower frequency.
With the RAM speed successfully adjusted, we can move on to the final step, where we will save the BIOS changes and exit the menu.
Step 4: Saving and Exiting the BIOS
After adjusting the RAM speed in the Gigabyte BIOS, the final step is to save the changes and exit the BIOS menu. This ensures that the modified settings are implemented and applied to your system.
To save the changes, navigate to the “Save & Exit” tab in the BIOS menu using the arrow keys. Once you have selected this option, press Enter.
Within the “Save & Exit” tab, you will typically find a selection of options including “Save Changes and Reset,” “Save Changes and Exit,” or something similar. Choose the appropriate option to save the modifications made to the RAM speed and exit the BIOS menu.
Upon selecting the save and exit option, the BIOS will prompt you to confirm the changes. Ensure that you have reviewed and verified all the modified settings before proceeding with the save and exit process.
After confirming the changes, the BIOS will save the updated configuration and restart your computer. The new RAM speed settings will be applied, and your system will use the adjusted frequency moving forward.
Once your computer finishes rebooting, it’s a good idea to check whether the changes were successfully applied. You can do this by either accessing the BIOS menu again and verifying the RAM speed settings or using system monitoring software to check the current RAM speed.
It’s worth mentioning that if you encounter any issues after adjusting the RAM speed, such as system instability or boot failures, you can try reverting to the default settings or lowering the RAM frequency to a more stable value. Each motherboard and RAM combination may have its own limits, so experimentation is sometimes required to find the optimal configuration.
With the changes saved and the BIOS menu exited, you have successfully adjusted the RAM speed in the Gigabyte BIOS. Enjoy the improved performance and responsiveness of your system!
Conclusion
Adjusting the RAM speed in the Gigabyte BIOS is a powerful method to optimize the performance of your computer. By setting the RAM to the appropriate frequency, you can improve system responsiveness, enhance multitasking capabilities, and ensure smoother overall operation.
In this guide, we explored the step-by-step process of adjusting the RAM speed in the Gigabyte BIOS. We learned how to access the BIOS menu, navigate to the advanced memory settings, adjust the RAM speed, and save the changes. It’s crucial to approach these adjustments with caution, as incorrect settings can lead to system instability or failure to boot.
Remember to consult your motherboard’s manual or seek guidance from experienced users if you are unsure about the specific settings or their impacts on your system. Additionally, it’s recommended to test the stability of your system after adjusting the RAM speed by running stress tests or benchmarking software.
With the RAM speed adjusted, you can now experience the benefits of a more efficient and responsive computer. Whether you’re a gamer, professional, or casual user, optimizing your system’s performance enhances your experience and productivity.
Keep in mind that the optimal RAM speed may vary depending on your specific motherboard and RAM modules. Experimentation may be necessary to find the best balance between performance and stability. If you encounter any issues, you can always revert to the default settings or adjust the RAM speed to a lower frequency.
Now that you have the knowledge and understanding of adjusting RAM speed in the Gigabyte BIOS, you can unleash the full potential of your computer and enjoy a smoother, more efficient computing experience.