Introduction
Transferring files between external hard drives is a common task for individuals and businesses alike. Whether you’re upgrading to a new external drive, need to duplicate files for backup purposes, or simply want to rearrange your data, knowing how to transfer files efficiently can save you time and effort. In this article, we will explore various methods that you can use to transfer files from one external hard drive to another.
Choosing the right method depends on factors such as the size and number of files you want to transfer, the available technology and devices at your disposal, and your preferred level of convenience. By understanding the different options available, you can select the most suitable method that meets your specific needs.
Among the methods we will discuss are transferring files using a computer, utilizing file transfer utilities, leveraging cloud storage services, and employing a NAS (Network Attached Storage) system. Each method has its own advantages and considerations which we will delve into. So, let’s dive in and explore these transfer methods to help you find the best solution for your file transfer needs.
Choosing the Right Method
When it comes to transferring files from one external hard drive to another, it’s important to consider various factors in order to select the most suitable method. Here are a few key aspects to keep in mind:
1. File Size and Quantity: If you have a large number of files or files with large sizes, it’s crucial to choose a method that can handle the transfer efficiently. Some methods may have limitations in terms of file size or may take longer to transfer larger files.
2. Available Devices and Technology: Take into account the devices and technology at your disposal. For example, if you have access to multiple computers or a NAS system, you can utilize them to streamline the transfer process.
3. Transfer Speed: Consider the speed at which you need the transfer to be completed. Some methods may offer faster speeds compared to others, which can be crucial when dealing with time-sensitive transfers.
4. Convenience: Evaluate the level of convenience you require. Some methods may be more user-friendly and require less technical knowledge, while others may offer advanced features for more control over the transfer process.
By considering these factors, you can narrow down the available options and choose the most appropriate method for your specific needs. Now, let’s explore some of the methods you can use to transfer files from one external hard drive to another.
Method 1: Using a Computer
One of the simplest and widely used methods to transfer files between external hard drives is by using a computer. Here’s how:
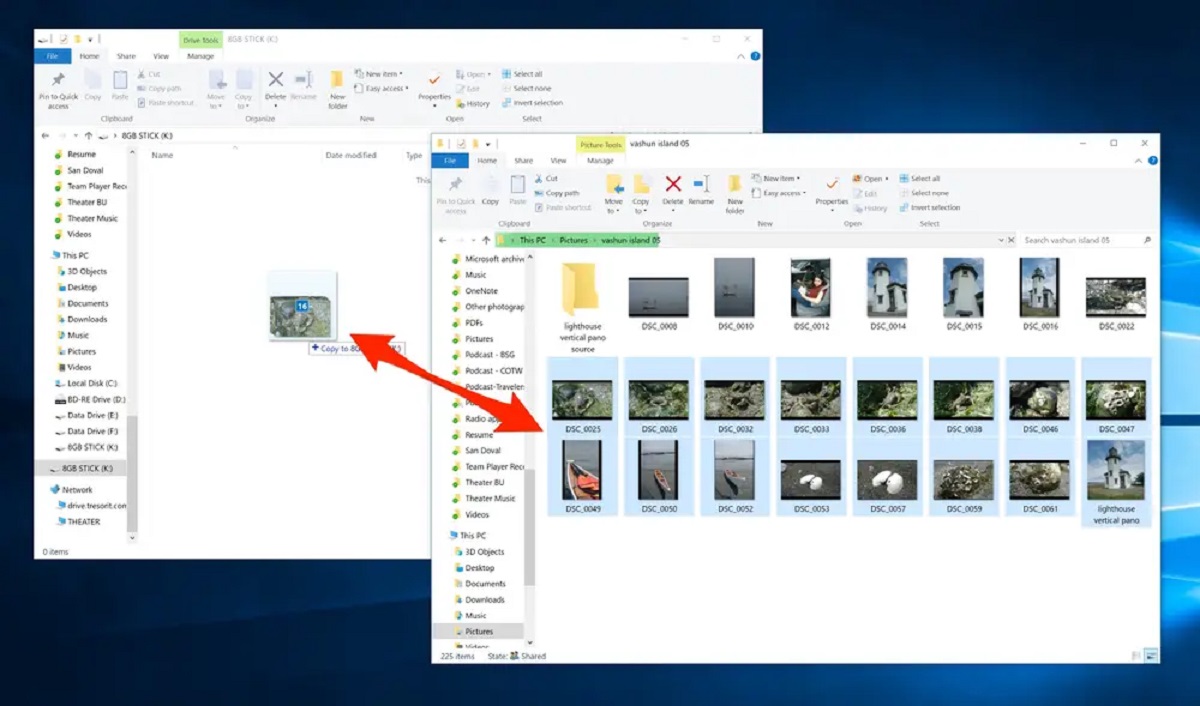
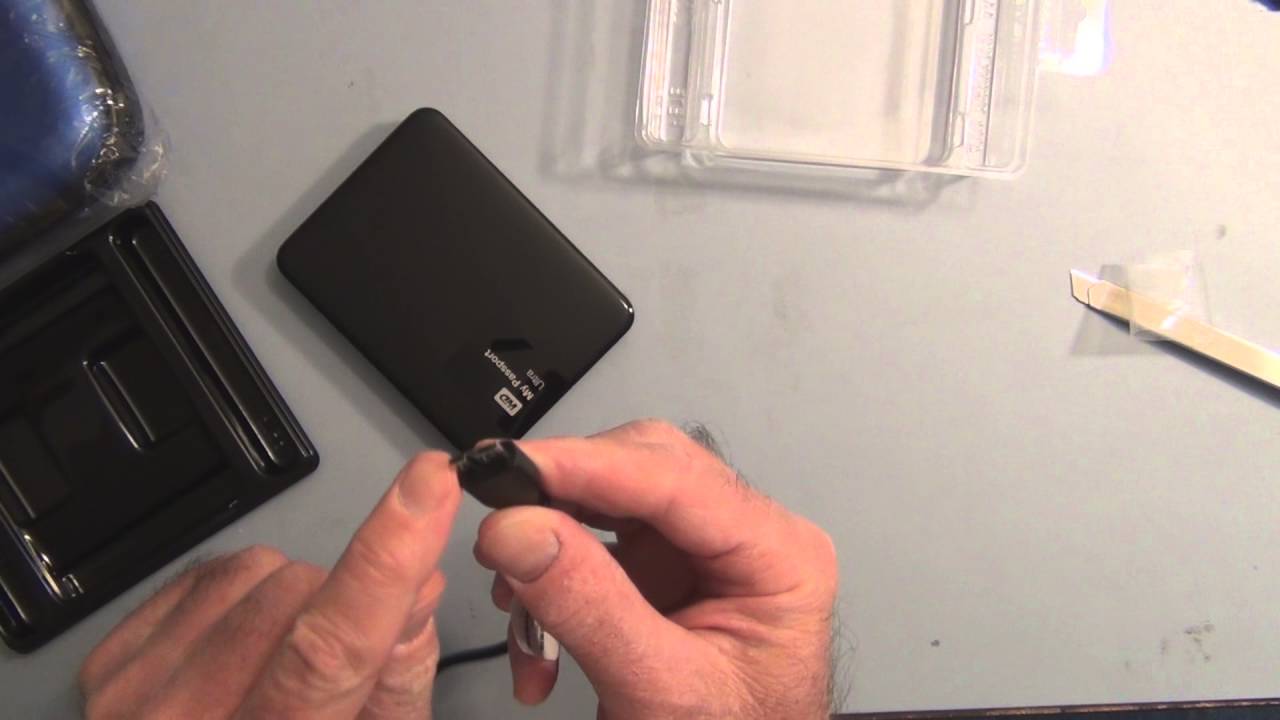
Step 1: Connect both external hard drives to your computer: Plug in both external hard drives to available USB ports on your computer. Ensure that they are recognized and accessible.
Step 2: Open File Explorer or Finder: Depending on whether you’re using Windows or Mac, open File Explorer (Windows) or Finder (Mac) to navigate through your files.
Step 3: Copy and Paste or Drag and Drop: Locate the files or folders you want to transfer from the source external hard drive. With the source drive selected, either right-click and choose “Copy” and then right-click on the destination drive and select “Paste,” or simply drag and drop the files or folders from the source drive to the destination drive.
Step 4: Monitor the transfer progress: You can monitor the transfer progress either through a progress bar or by checking the file transfer status in the respective file explorer.
Step 5: Safely eject the drives: Once the transfer is completed, safely eject both external hard drives from your computer. This will ensure that no data is corrupted during the removal process.
Using a computer is a straightforward method for transferring files between external hard drives. It allows you to have control over which files and folders to transfer and provides a convenient way to manage the transfer process. However, keep in mind that the speed of the transfer may vary depending on factors such as the file sizes and the USB port speeds.
Note: If you’re transferring a large number of files or files with large sizes, it’s recommended to compress them into a single archive file (such as a ZIP file) before transferring. This can help save time and reduce the risk of errors during the transfer process.
Method 2: Using a File Transfer Utility
Another efficient method for transferring files between external hard drives is to use a file transfer utility. These utilities are specifically designed to streamline the transfer process and offer additional features. Here’s how you can use a file transfer utility:
Step 1: Install a file transfer utility: Search for and download a reputable file transfer utility software that suits your needs. There are various options available, both free and paid. Install the software on your computer.
Step 2: Launch the file transfer utility: Open the file transfer utility software once it’s installed. Familiarize yourself with the user interface and options provided.
Step 3: Connect the external hard drives: Connect both the source and destination external hard drives to your computer. Ensure that they are recognized and accessible by the file transfer utility.
Step 4: Select the files or folders: Use the file transfer utility to navigate through the files and folders on the source external hard drive. Select the files or folders you want to transfer to the destination drive.
Step 5: Choose the destination drive: Using the file transfer utility, specify the destination external hard drive where you want the selected files or folders to be transferred.
Step 6: Initiate the transfer: Trigger the transfer process by clicking on the appropriate button or option provided in the file transfer utility. Monitor the progress of the transfer through the utility’s interface.
Step 7: Verify successful transfer: After the transfer completes, double-check that the files or folders have been successfully transferred to the destination external hard drive. You can do this by navigating to the destination drive using the file transfer utility or through your computer’s file explorer.
A file transfer utility offers advantages such as the ability to pause and resume transfers, transfer verification, scheduling transfers, and more. These features can be especially helpful when dealing with large-scale file transfers or when you need better control over the transfer process. Make sure to choose a reliable and reputable file transfer utility that suits your specific requirements.
Method 3: Using Cloud Storage Services
Cloud storage services have become increasingly popular for file management and sharing. They offer a convenient and accessible way to transfer files between external hard drives. Here’s how you can utilize cloud storage services for file transfer:
Step 1: Sign up for a cloud storage service: Choose a reputable cloud storage service provider that suits your needs. Sign up for an account by providing the necessary information and following the provided instructions.
Step 2: Upload files to the cloud: Once you have an account, use the service’s web interface or dedicated app to upload the files from your source external hard drive to the cloud storage. Most services allow you to simply drag and drop files from your computer to the cloud storage interface.
Step 3: Access the cloud storage on another device: On the device where you have the destination external hard drive connected, access the cloud storage service using the same account credentials. This can be done through a web browser or the service’s app.
Step 4: Download files to the destination drive: Navigate to the files you uploaded to the cloud storage and select the ones you want to transfer. Use the download option provided by the cloud storage service to download the files directly to the destination external hard drive.
Step 5: Verify successful transfer: After the downloads complete, ensure that the transferred files are available on the destination external hard drive. You can double-check by navigating to the destination drive using your computer’s file explorer or through the file management features of your cloud storage service.
Using cloud storage services for file transfer offers several benefits. It eliminates the need for physical connections and allows for seamless access to files from various devices. Additionally, cloud storage services often provide features such as file synchronization, versioning, and sharing options, which can further facilitate file management and collaboration.
When using cloud storage services for file transfers, keep in mind that it may be influenced by factors such as internet connection speed and storage limitations imposed by the service provider. Make sure to choose a service that aligns with your storage needs and offers adequate security features to protect your files.
Method 4: Using a NAS (Network Attached Storage)
A NAS (Network Attached Storage) system is a dedicated device that connects to your network and provides centralized storage and access to files. Utilizing a NAS can simplify and streamline the process of transferring files between external hard drives. Here’s how you can use a NAS for file transfer:
Step 1: Set up your NAS: Connect your NAS device to your network and follow the manufacturer’s instructions to set it up. This typically involves connecting the device to your router and configuring the necessary settings.
Step 2: Access the NAS interface: Use your computer or a device connected to the same network to access the NAS interface. This can typically be done by entering the NAS’s IP address in a web browser.
Step 3: Configure file sharing: In the NAS interface, configure file sharing settings to allow access to the external hard drives. This may involve creating shared folders and assigning appropriate permissions.
Step 4: Connect the external hard drives: Connect both the source and destination external hard drives to available USB or eSATA ports on the NAS device. Ensure that they are recognized and accessible through the NAS interface.
Step 5: Transfer files within the NAS: Using the NAS interface, navigate to the files or folders on the source external hard drive. Use the provided options to copy or move the files to the destination external hard drive within the NAS system.
Step 6: Monitor the transfer progress: The NAS interface should provide information about the transfer progress, including transfer speeds and estimated time remaining. Monitor this information to ensure the transfer is proceeding smoothly.
Step 7: Verify successful transfer: After the transfer is complete, verify that the files from the source external hard drive have been successfully transferred to the destination external hard drive within the NAS. You can do this by browsing through the shared folders in the NAS interface.
Using a NAS for file transfer offers advantages such as centralized storage, easy sharing and collaboration, and the ability to access files remotely. NAS systems are designed to handle large amounts of data and provide reliable performance for file transfers. However, setting up a NAS may require more technical knowledge compared to other methods.
It’s important to choose a NAS device that suits your storage needs and offers the necessary features for file transfer. Consider factors such as storage capacity, data redundancy options (such as RAID), and compatibility with external hard drives.
Conclusion
Transferring files from one external hard drive to another is a task that many individuals and businesses encounter. Thankfully, there are several methods available to accomplish this effectively. By considering factors such as file size, available devices, transfer speed, and convenience, you can choose the most suitable method for your specific needs.
Using a computer is a straightforward method that allows you to copy and paste or drag and drop files between external hard drives. It offers control and flexibility but may be limited by USB port speeds. Alternatively, using a file transfer utility can provide additional features like pause and resume functionality and transfer verification.
Cloud storage services provide a convenient and accessible way to transfer files between external hard drives. They eliminate the need for physical connections and offer features such as file synchronization and sharing options. However, the transfer speed can be influenced by internet connection speed and storage limitations imposed by the service provider.
For those looking for centralized storage and advanced file management features, a NAS system is an excellent option. Utilizing a NAS can simplify the transfer process and provide easy access to files across your network. However, setting up a NAS may require more technical knowledge compared to other methods.
When choosing a method, be sure to consider the specific requirements of your file transfer, such as file size, quantity, and speed. By selecting the appropriate method and following the outlined steps, you can efficiently transfer files between external hard drives and ensure that your data remains safe and accessible.