Introduction
Welcome to the world of power supply units (PSU). As an essential component of your computer, the PSU is responsible for providing a steady and reliable flow of power to all the other components. Without a functioning PSU, your computer simply won’t work.
However, like any other electronic component, a PSU can fail over time. It’s important to periodically test your PSU to ensure its proper functioning and detect any potential issues before they cause serious problems. In this guide, we will walk you through the step-by-step process of testing your PSU.
Testing your PSU might seem like a daunting task, reserved only for computer experts. But fear not! With the right tools and a little bit of knowledge, anyone can successfully test their PSU.
In this article, we will explain why testing your PSU is important, the tools you’ll need, and the step-by-step procedure to safely and effectively test your PSU. So, let’s dive in!
Why Test Your Power Supply Unit
Testing your power supply unit (PSU) may not be on the top of your to-do list, but it is an important task that should not be overlooked. Here are several reasons why you should regularly test your PSU:
- Preventing System Failure: A faulty PSU can lead to system instability, crashes, and even permanent damage to your computer components. By testing your PSU, you can identify any issues early on and prevent potential system failures.
- Ensuring Proper Power Delivery: The PSU is responsible for providing the correct amount of power to all the components in your computer. If the PSU is not working properly, it may not be delivering enough power, causing your computer to underperform or not function at all.
- Diagnosing Hardware Problems: Sometimes, hardware issues can be mistaken for software problems. By testing your PSU, you can rule out any power-related problems and focus on other potential causes of system issues.
- Extending Component Lifespan: A failing PSU can cause voltage spikes or drops, which can damage other components in your computer. Regular PSU testing can help identify any voltage irregularities and protect your valuable hardware from unnecessary wear and tear.
- Saving Money and Time: If your computer is experiencing frequent crashes or malfunctions, it can be tempting to replace expensive components or even buy a new computer. However, by testing your PSU and correctly identifying the problem, you can save money by only replacing the faulty component.
As you can see, testing your PSU is crucial for the overall health and performance of your computer system. It allows you to catch potential issues before they escalate, ensuring a smooth and reliable computing experience. So, let’s move on to the next section to learn about the tools you’ll need to test your PSU.
Tools Needed for Testing
Before you begin testing your power supply unit (PSU), it’s important to gather the necessary tools. Here are the essential tools you’ll need:
- Multimeter: A multimeter is a versatile tool used to measure voltage, current, and resistance. It’s an indispensable tool for testing the output of your PSU. Make sure you have a digital multimeter that can measure DC voltage.
- Power Supply Tester: A power supply tester is a dedicated device designed specifically for testing PSUs. It provides a quick and easy way to check the voltage outputs without the need for manual measurements. Although not essential, it can be a convenient tool to have.
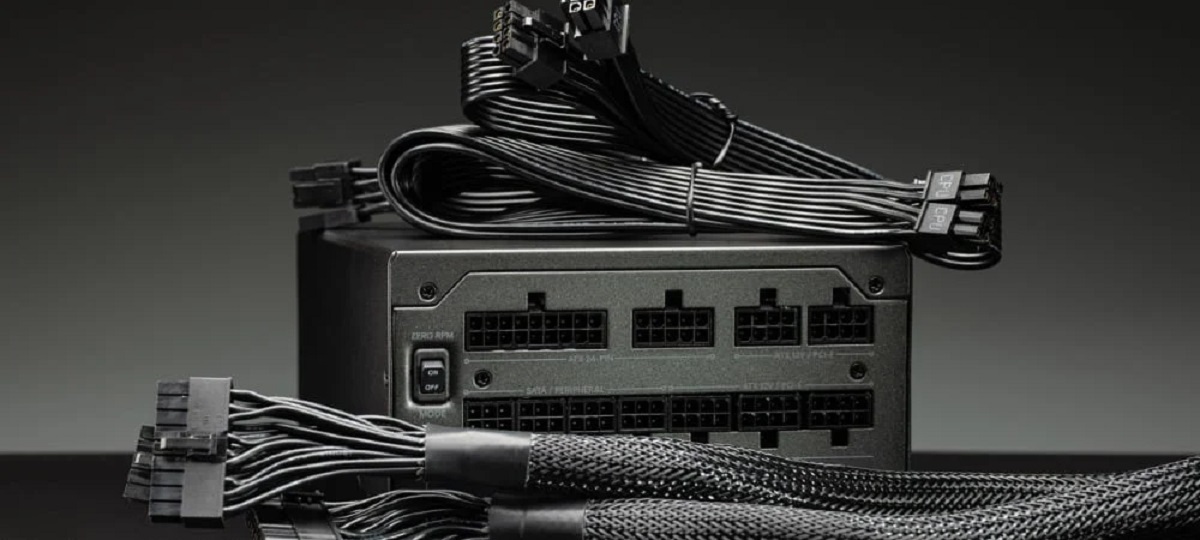
- Spare Cables: Some PSUs come with modular cables that can be disconnected. If you have a modular PSU, it’s a good idea to have spare cables on hand. This allows you to swap out cables and eliminate any cable-related issues during testing.
- Power Supply Jumper: A power supply jumper is a small piece of wire or a jumper cap that allows you to manually turn on the PSU without connecting it to a motherboard. It’s useful for testing the functionality of the PSU outside of the computer case.
- Grounding Strap: While not strictly a tool, a grounding strap is essential for ensuring your safety during PSU testing. It helps prevent electrostatic discharge (ESD) that can damage sensitive components. Make sure to wear a grounding strap while handling the PSU.
These tools will provide you with everything you need to effectively test your PSU. If you don’t have a multimeter or power supply tester, you can borrow or purchase them from a local electronics store or online retailer.
Now that we have our tools ready, it’s time to move on to the next section and learn about the safety precautions you should take before testing your PSU.
Warning: Safety First
Before you start testing your power supply unit (PSU), it’s crucial to prioritize safety to avoid any potential hazards. Here are some important safety precautions to keep in mind:
- Disconnect the Power: Always make sure to disconnect the PSU from the power source before performing any tests. This reduces the risk of electric shock and protects both you and your components.
- Use a Grounding Strap: When working inside your computer case, wear a grounding strap to dissipate any static electricity that may build up. This prevents ESD, which can damage sensitive electronic components.
- Avoid Moisture: Keep your testing area dry and away from any liquids. Moisture can cause electrical shorts and present a serious safety risk.
- Handle Cables with Care: Be gentle when handling cables and connectors to avoid damaging them. Excessive force or rough handling can lead to bent pins or broken connections.
- Inspect for Physical Damage: Before testing, visually inspect the PSU and its cables for any signs of physical damage, such as frayed wires or melted connectors. If you notice any damage, do not proceed with testing and replace the PSU instead.
- Keep Children and Pets Away: Ensure that children and pets are not present in your testing area. This eliminates the risk of accidents and helps maintain a safe environment for everyone.
- Follow Manufacturer Instructions: Different PSUs may have specific instructions or precautions that need to be followed. Always refer to the manufacturer’s documentation for any specific safety guidelines.
By adhering to these safety precautions, you can significantly reduce the risk of accidents and protect yourself and your computer components. Remember, safety should always be your top priority when working with electronics.
Now that you are aware of the safety measures, let’s proceed to the next section, where we will guide you through the visual inspection of your PSU.
Step 1: Visual Inspection
Before you begin testing your power supply unit (PSU), it’s essential to perform a visual inspection to check for any obvious signs of damage or abnormalities. Here’s how to conduct a visual inspection:
- Power Off and Unplug: Ensure that your computer is powered off and unplugged from the electrical outlet. This eliminates any risk of electric shock during the inspection.
- Open the Computer Case: Depending on your computer case, you may need to remove a side panel to gain access to the internal components. Refer to your computer’s manual for instructions on how to safely open the case.
- Locate the Power Supply Unit: The PSU is typically located at the back of the computer case, mounted either at the top or bottom. Identify the PSU and take note of any model numbers or labels for reference.
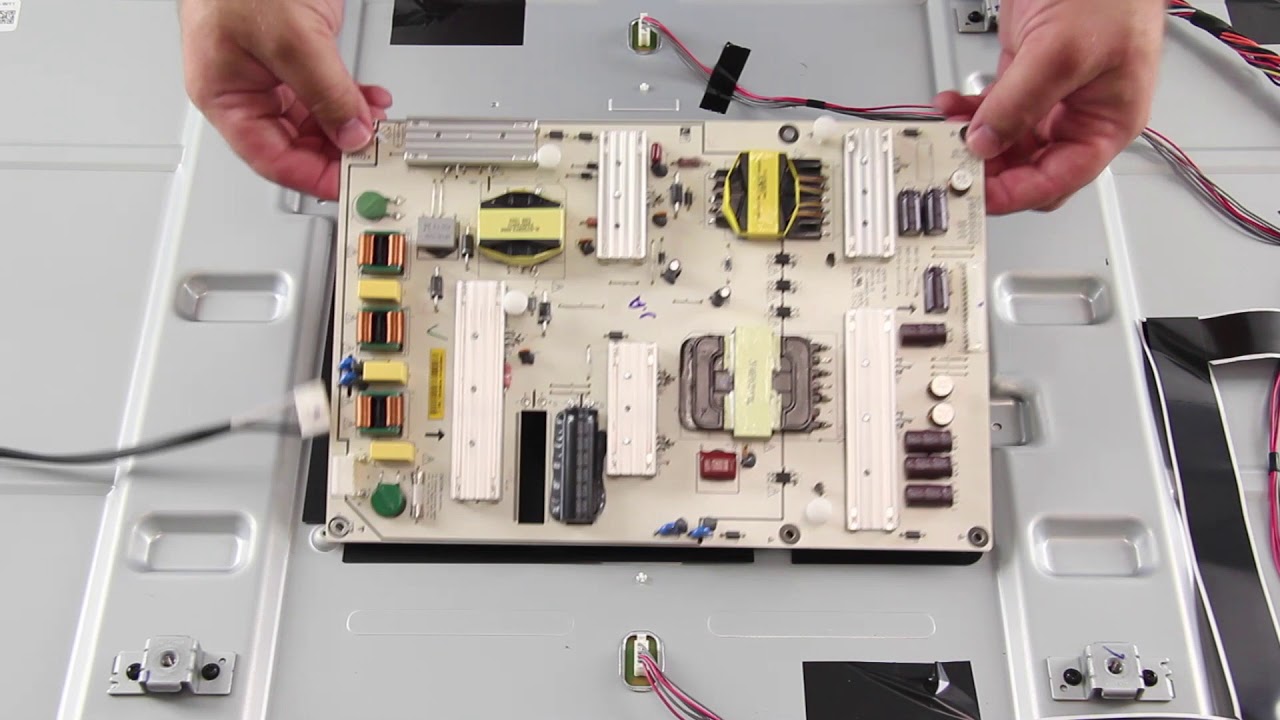
- Inspect the Exterior: Take a close look at the exterior of the PSU. Look for any physical damage or abnormalities such as dents, cracks, or bent connectors. Additionally, check for any signs of overheating, such as burnt areas or discoloration.
- Inspect the Cables: Examine the cables connected to the PSU. Ensure they are securely plugged in and not frayed or damaged. Pay attention to the main power cable (24-pin or 20+4-pin) and any additional cables connected to the components.
- Check for Dust Accumulation: Dust can accumulate on the PSU, hindering proper airflow and potentially causing overheating. Use a compressed air can or a soft brush to gently remove any dust build-up from the PSU and its surrounding area.
If you notice any significant damage, such as a cracked casing or burnt connectors, it’s advisable to replace the PSU before proceeding with further testing. Damaged PSUs can pose serious risks to both your computer and your personal safety.
Once you have completed the visual inspection and ensured that everything appears to be in good condition, you can move on to the next step: disconnecting the power supply unit.
Step 2: Disconnecting Power Supply Unit
Now that you have completed the visual inspection of your power supply unit (PSU), it’s time to disconnect it from your computer before proceeding with the testing. Follow these steps to safely disconnect the PSU:
- Power Off and Unplug: Ensure that your computer is powered off and unplugged from the electrical outlet. This is crucial to avoid any electrical shock while working with the PSU.
- Identify Power Connections: Take note of the various power connections from the PSU to the motherboard and other components. These include the main 24-pin or 20+4-pin power connector, 4-pin or 8-pin CPU power connector, and any additional peripheral power connectors.
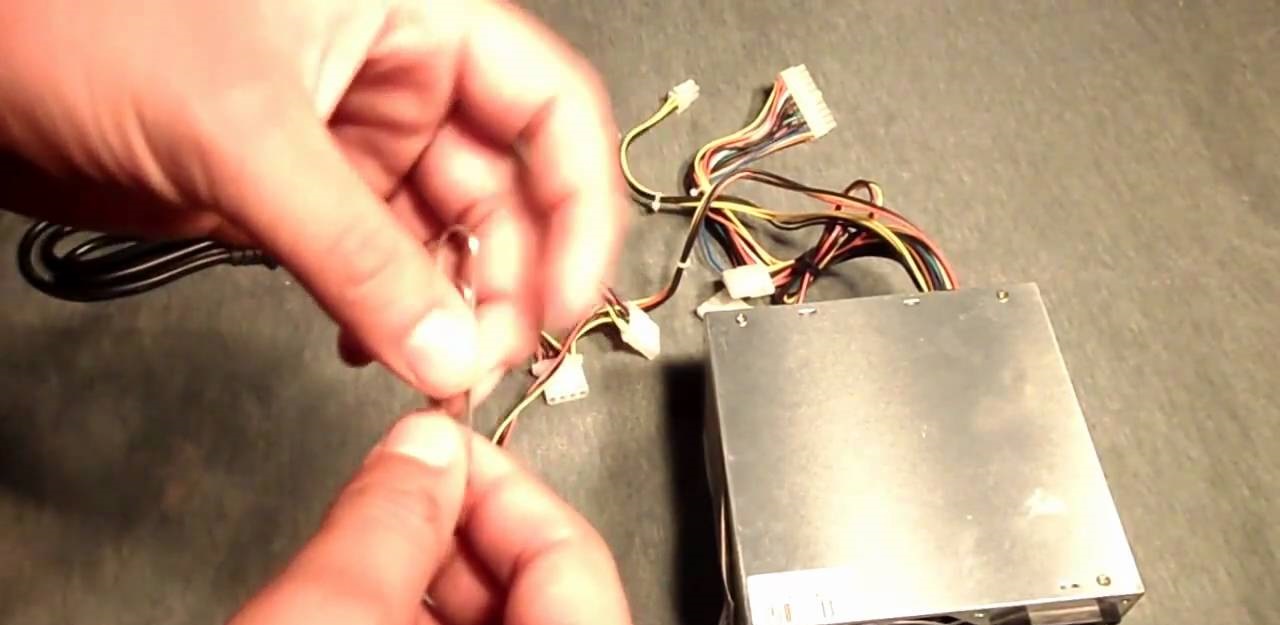
- Disconnect Peripheral Cables: Start by disconnecting the peripheral cables attached to the PSU. These cables provide power to devices such as hard drives, optical drives, and fans. Gently unplug them from their respective connectors.
- Disconnect Main Power Connector: Locate the main power connector that is connected to the motherboard. It is usually a large 24-pin or 20+4-pin connector. Release any locking mechanism and carefully unplug the connector from the motherboard.
- Disconnect CPU Power Connector: If your motherboard requires additional power from a CPU power connector (usually a 4-pin or 8-pin connector located near the CPU socket), disconnect it by releasing any locking mechanism and gently unplugging the connector.
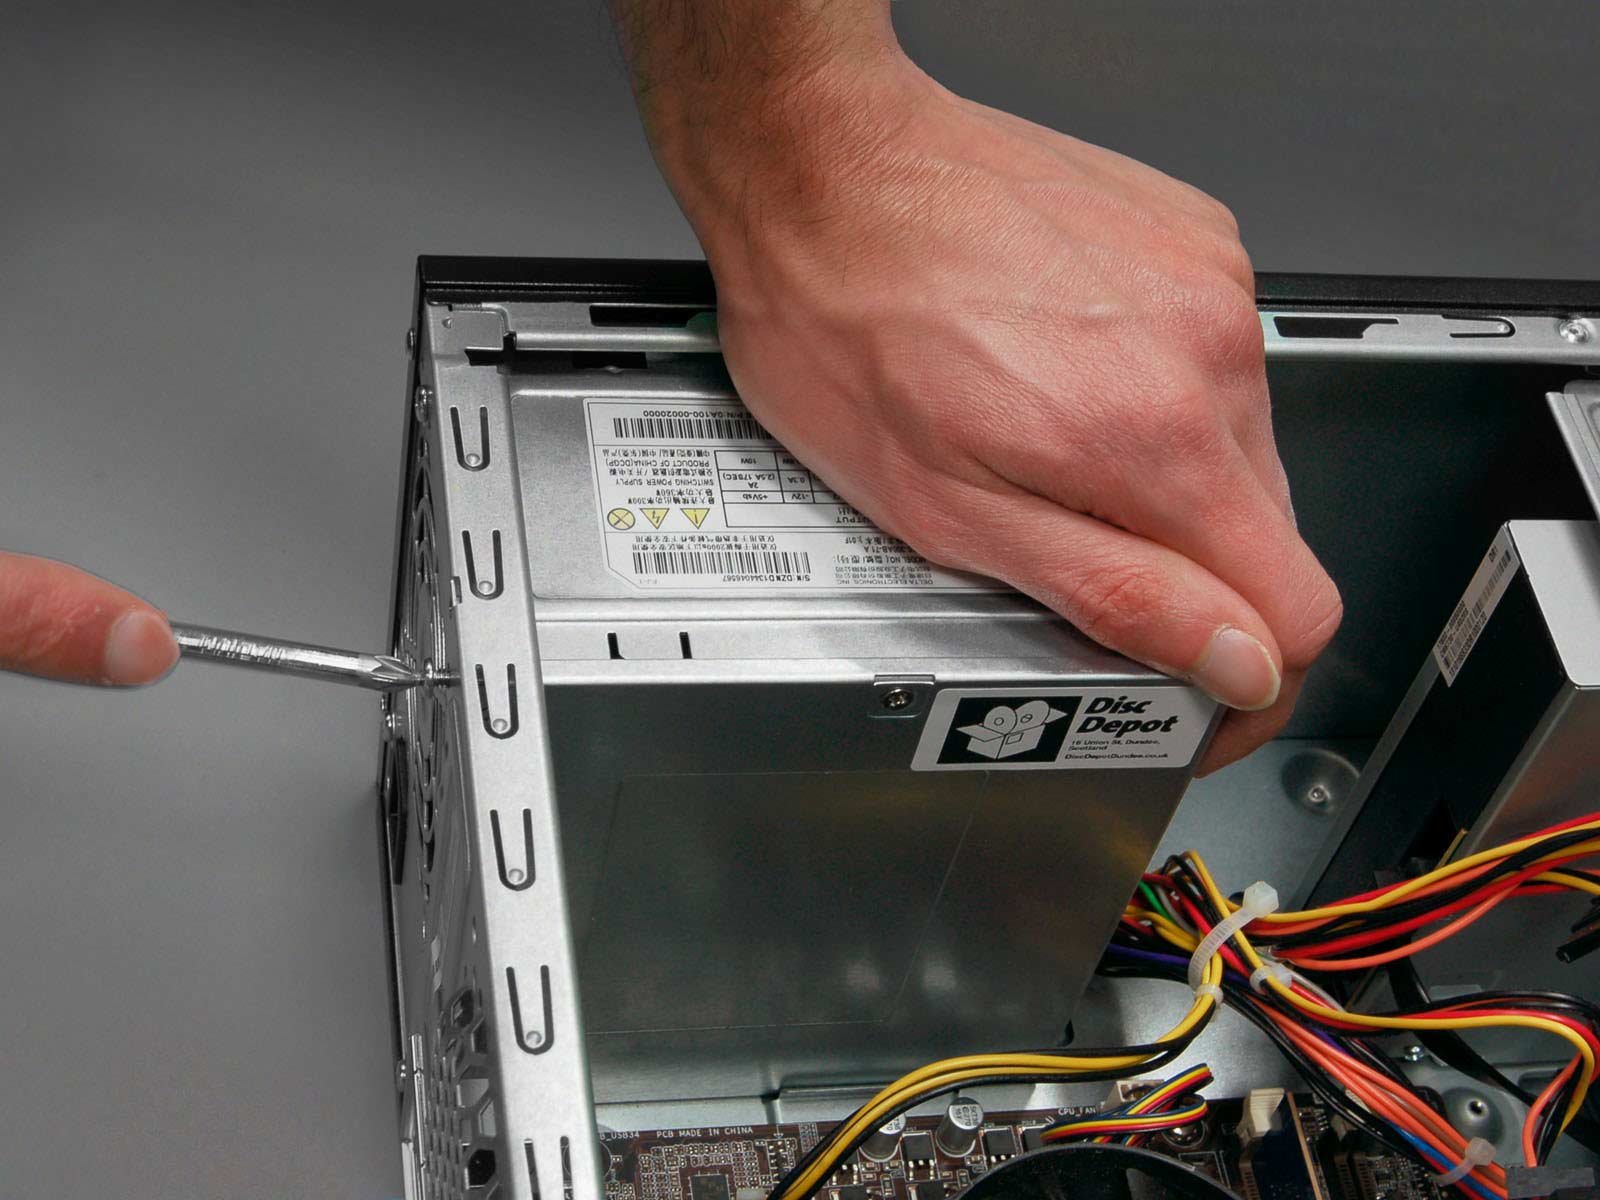
- Remove PSU Screws: Locate the screws or fasteners securing the PSU to the computer case. Use a screwdriver to carefully remove these screws while supporting the weight of the PSU to prevent any accidental drops.
- Detach the PSU: With the screws removed, carefully slide the PSU out of its mounting bracket or cage. Pay attention to any cables or obstructions that may prevent the PSU from being completely detached.
Once the PSU is completely disconnected and removed from your computer case, place it on a safe and static-free surface for testing. Do not place the PSU on any conductive surface, such as metal, as it can pose a risk of short-circuiting.
Now that the PSU is disconnected, we can proceed to the next step: testing the power supply unit itself.
Step 3: Testing the Power Supply Unit
Now that your power supply unit (PSU) is disconnected and ready for testing, it’s time to evaluate its performance. There are two primary methods for testing a PSU: using a multimeter or using a dedicated power supply tester. Here’s how you can perform the tests:
Method 1: Testing with a Multimeter
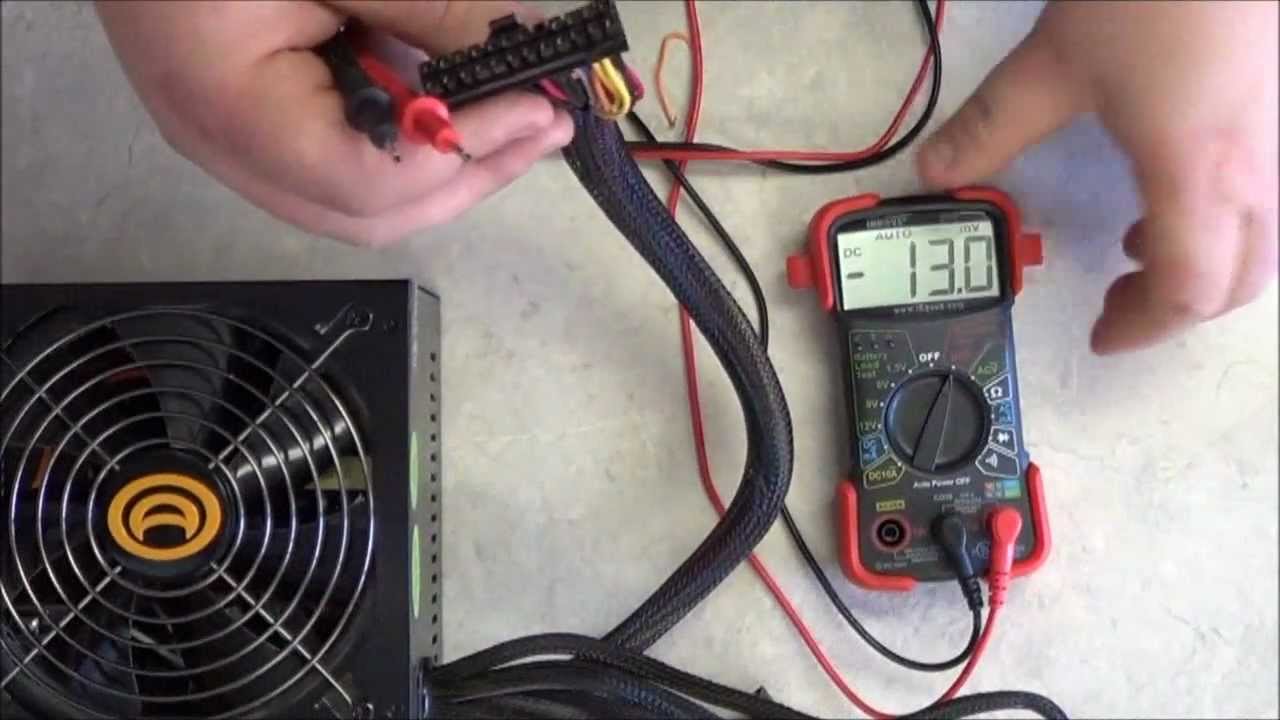
- Set Up Your Multimeter: Set your multimeter to measure DC voltage (V) in the appropriate range. Typically, you will select a range that covers at least 12 volts.
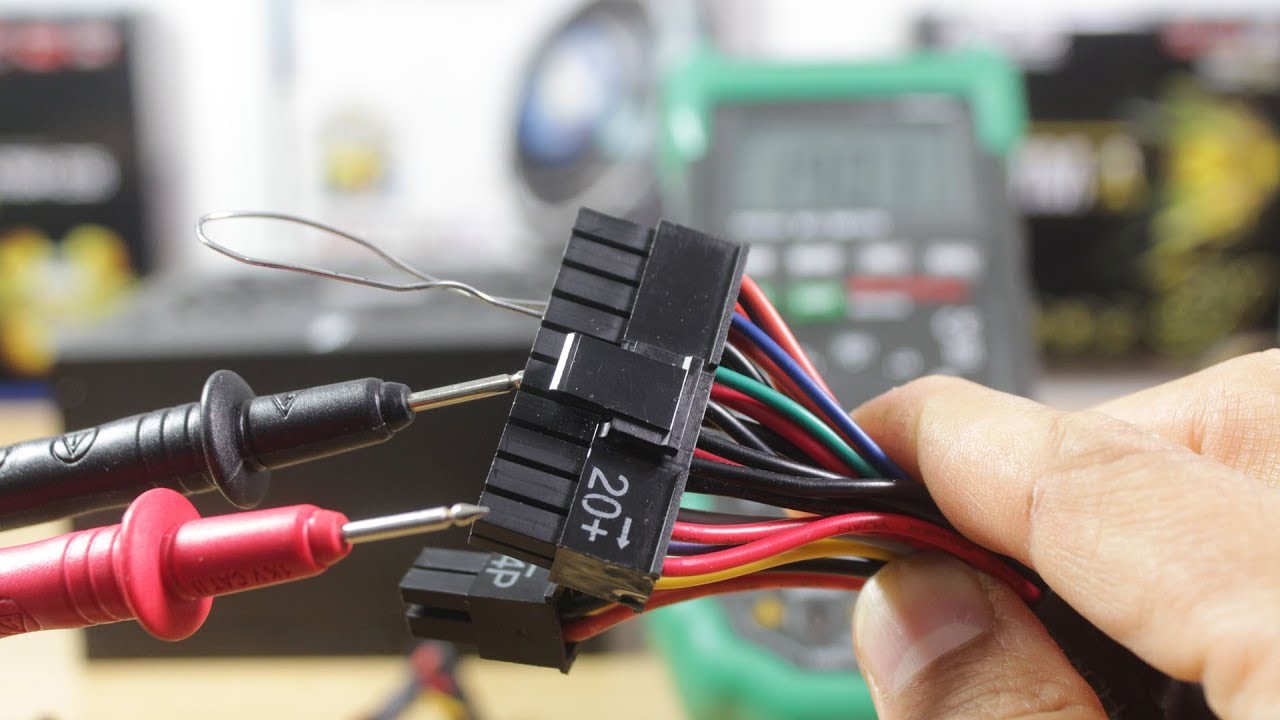
- Connect the Multimeter: Attach the black lead (negative) of your multimeter to a ground point, such as a metal part of your computer case. Connect the red lead (positive) to the first pin of the main power connector (usually the 12V line).
- Turn on the PSU: Using a power supply jumper or by connecting a wire between the green wire (PS_ON) and any black wire (GND) in the 24-pin or 20+4-pin connector, turn on the PSU.
- Read the Voltage: Observe the multimeter display and compare the measured voltage to the expected voltage values. Standard voltage values are +12V, +5V, and +3.3V. If the measured voltage significantly deviates from the expected values, it may indicate a problem with the PSU.
- Test Other Connectors: Repeat the voltage measurement process for other connectors, such as the CPU power connector and peripheral power connectors. Compare the measured voltage to the expected values specific to each connector, as specified by the PSU manufacturer or motherboard manual.
Method 2: Testing with a Power Supply Tester
- Connect the Power Supply Tester: Plug the 24-pin or 20+4-pin connector from the PSU into the corresponding socket on the power supply tester. Make sure it is securely connected.
- Read the Test Results: The power supply tester will display the voltage readings and indicate whether they are within the acceptable range. Follow the instructions provided with the power supply tester to interpret the results correctly.
- Check LED Indicators: Some power supply testers have built-in LED indicators that show the status of different power rails. Compare the LED indications to the reference guide provided with the power supply tester to determine if there are any abnormalities.
Whether using a multimeter or a power supply tester, always refer to the PSU manufacturer’s specifications or consult the documentation of your motherboard to ensure you are testing for the correct voltage values and interpreting the results accurately.
Note: Testing the PSU using a multimeter requires advanced knowledge of electronics and can present a risk if not performed correctly. If you are unsure about how to use a multimeter or interpret the readings, it is recommended to consult with a professional.
Now that you have completed testing the PSU, it’s time to move on to the next step: analyzing the test results.
Step 4: Analyzing Test Results
After testing your power supply unit (PSU) using either a multimeter or a power supply tester, it’s time to analyze the test results. Here’s how to interpret the readings and determine if there are any issues with the PSU:
- Voltage Values: Compare the measured voltage values to the expected values specified by the PSU manufacturer or motherboard documentation. Each voltage rail (+12V, +5V, +3.3V, etc.) should be within a certain tolerance range. If any voltage reading deviates significantly from the expected value, it may indicate a problem with the PSU.
- Steady Voltage: Ensure that the voltage readings remain steady and do not fluctuate excessively. Fluctuations or unstable voltage levels may indicate a PSU issue that needs to be addressed.
- Voltage Ripple: In addition to the steady voltage, check for voltage ripple, which refers to the fluctuations in the voltage waveform. Excessive voltage ripple can cause instability and affect the performance of your components. Refer to the PSU manufacturer’s specifications for acceptable ripple values.
- LED Indicators: If you used a power supply tester with LED indicators, compare the LED indications to the reference guide provided with the tester. Pay attention to any warning or error indicators that may suggest a problem with the PSU.
If the test results indicate that the PSU is not functioning correctly, it may be necessary to replace it. However, before concluding that the PSU is faulty, it’s recommended to repeat the testing process and verify the results. In some cases, an inaccurate reading may be due to a measurement error or other factors.
Furthermore, if you are uncertain about the interpretation of the test results or need assistance in diagnosing the issue, it is advisable to consult a professional technician or seek guidance from the PSU manufacturer’s support team. They can provide further insight and help troubleshoot any PSU-related problems.
Now that you have analyzed the test results, it’s time to move on to the next step: reconnecting the power supply unit to your computer.
Step 5: Reconnecting Power Supply Unit
Now that you have completed testing and analyzing your power supply unit (PSU), and if the PSU has passed the tests, it’s time to reconnect it to your computer. Follow these steps to safely reconnect and secure the PSU:
- Place the PSU: Carefully slide the PSU back into its mounting bracket or cage in your computer case. Ensure that it is properly aligned and positioned.
- Secure the PSU: Align the screw holes of the PSU with the corresponding holes in the computer case. Use screws or fasteners that were removed earlier to secure the PSU firmly in place. Ensure that the PSU is snugly fitted and not loose.
- Connect Main Power Cable: Locate the main power connector (24-pin or 20+4-pin) on the PSU and connect it to the corresponding socket on the motherboard. Make sure it is inserted firmly and locked in place. Double-check the connection to ensure it is secure.
- Connect Additional Power Cables: Depending on your computer’s configuration, connect the necessary power cables to other components. This includes the CPU power connector, graphics card power connectors, and any other peripheral power connectors required by your hardware.
- Secure Cables: Route the cables neatly to avoid blocking airflow and tangling. Use cable ties or Velcro straps to secure the cables and prevent them from interfering with other components or fans.
- Close Computer Case: Once all connections are secure and cables are properly managed, close the computer case by reattaching the side panel. Ensure that all screws or fasteners are tightened but not over-tightened.
After reconnecting the PSU, double-check all connections to ensure they are properly seated. Now, you can plug in your computer, switch it on, and test if the PSU functions correctly. Observe the system’s behavior and stability to ensure that the PSU is delivering the required power to all components.
If you encounter any issues, such as your computer not powering on or experiencing instability, it’s advisable to recheck the connections, consult your motherboard’s manual, or seek assistance from a professional technician for further troubleshooting.
Congratulations! You have successfully tested your power supply unit and reconnected it to your computer. Regularly monitoring and testing your PSU will help ensure the smooth operation and longevity of your computer system.
Conclusion
Testing your power supply unit (PSU) is an essential maintenance task to ensure the reliable and efficient operation of your computer system. By following the step-by-step process outlined in this guide, you can identify any potential issues with your PSU before they cause system failure or damage to other components.
We began with the importance of testing your PSU, emphasizing its role in preventing system failure, ensuring proper power delivery, diagnosing hardware problems, extending component lifespan, and saving money and time. These reasons underscore why PSU testing should be an integral part of your computer maintenance routine.
We then discussed the tools needed for PSU testing, including a multimeter, power supply tester, spare cables, power supply jumper, and grounding strap. Equipping yourself with these tools ensures that you are well-prepared to perform accurate and safe tests on your PSU.
The guide also highlighted the importance of safety during PSU testing, including disconnecting power, using a grounding strap, avoiding moisture, handling cables with care, inspecting for physical damage, and keeping children and pets away. These safety precautions are vital to protect both yourself and your computer system.
Next, we walked through the step-by-step process, which included a visual inspection, disconnecting the PSU, testing the PSU using a multimeter or power supply tester, analyzing the test results, and finally, reconnecting the PSU to your computer. Each step provided detailed instructions to ensure a thorough and successful PSU testing experience.
With your PSU successfully tested and reconnected, you can now enjoy a reliable and stable computer system. Remember to periodically test your PSU to catch any issues early and maintain optimal performance. If you encounter any problems or have concerns about the test results, consulting a professional technician can provide additional guidance and support.
By performing regular PSU testing, you are taking proactive measures to safeguard your computer system and extend its lifespan. So, take the time to test your PSU and enjoy the uninterrupted and efficient performance of your computer!