Introduction
Webcams have become an essential tool for communication, whether you’re attending virtual meetings, video conferencing with friends and family, or live streaming on social media. However, like any device, webcams can sometimes encounter issues that need to be addressed.
Fortunately, if you’re using the Windows 10 operating system, there are several simple and effective ways to test and troubleshoot your webcam. In this article, we will guide you through the step-by-step process of testing your webcam in Windows 10, ensuring it functions properly for all your video communication needs.
By following the methods outlined in this guide, you can ensure that your webcam is correctly connected, functioning, and providing excellent video quality. Whether you’re a beginner or an experienced Windows user, these tips will help you diagnose and resolve webcam-related issues.
In the next sections, we’ll cover various methods to test and troubleshoot your webcam. We’ll start by preparing the webcam, ensuring that it is properly connected and ready for use. Then, we’ll move on to testing the webcam through the Camera app, which is a built-in application available in Windows 10.
If you encounter any issues during the testing process, we’ll provide guidance on checking the webcam in Device Manager and updating the webcam driver. We’ll also address common webcam issues such as blurry images, freezing video, or webcam not detected. Finally, we’ll conclude with some additional tips and resources to help you address any further concerns you may have.
So, without further ado, let’s dive into the instructions and get your webcam up and running smoothly on your Windows 10 computer.
Prepare the Webcam
Before testing your webcam, it’s important to ensure that it is properly prepared and connected to your Windows 10 computer. Here are some steps you can follow:
- Check physical connections: Start by inspecting the physical connections of your webcam. Ensure that the USB cable is securely plugged into both the webcam and the USB port on your computer. If you’re using an external webcam, make sure it is correctly attached to your computer’s monitor or placed in a stable position.
- Inspect power source (if applicable): If your webcam requires a separate power source, such as an AC adapter or batteries, make sure it is properly connected or powered on.
- Ensure webcam is enabled: Open the settings of your webcam software or app and verify that the webcam is enabled. Some webcams have a physical switch or button that needs to be turned on to activate the camera.
- Update webcam software (if necessary): Visit the manufacturer’s website to check for any available software updates for your webcam. Download and install them if needed, as updated software often includes bug fixes and improvements that can enhance the performance of your webcam.
- Adjust webcam settings: Depending on your webcam software or app, you may have control over various settings such as brightness, contrast, and resolution. Take a moment to adjust these settings according to your preferences or the requirements of your specific usage.
By following these steps, you can ensure that your webcam is properly connected and prepared for testing. Once you have completed these preparations, you’re ready to move on to the next step – testing your webcam using the Camera app in Windows 10.
Test the Webcam in the Camera App
The Camera app in Windows 10 provides a convenient way to test your webcam and ensure that it is functioning properly. Follow these steps to test your webcam using the Camera app:
- Open the Camera app: Click on the Start Menu, and search for “Camera”. Click on the Camera app from the search results to open it.
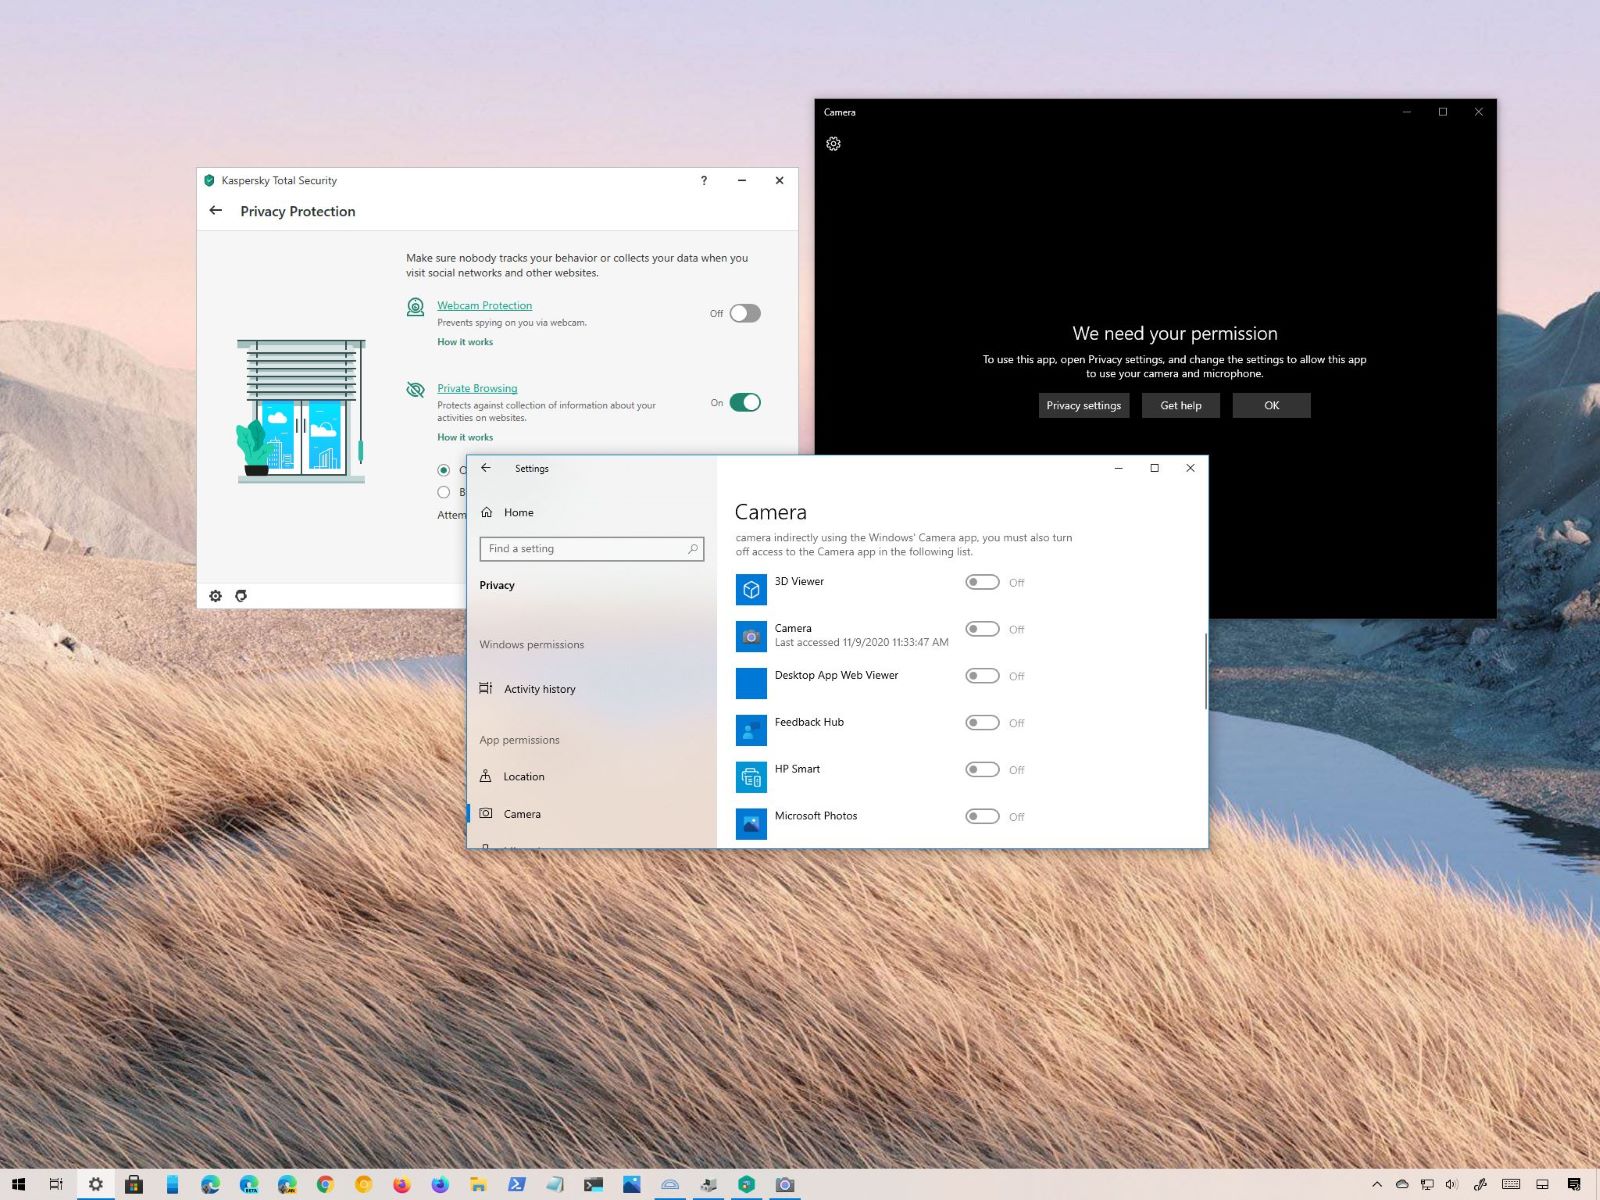
- Grant camera access: When you open the Camera app for the first time, you may be asked to grant the app permission to access your camera. Click on “Yes” or “Allow” to provide the necessary permission.
- Check video preview: The Camera app will display a live video preview from your webcam. Verify that the video preview is clear and displays the image correctly. If the video preview is blank or distorted, ensure that the physical connections of your webcam are secure and follow the steps mentioned in the previous section to prepare the webcam.
- Switch between front and rear cameras: If your device has multiple cameras, you can switch between them by clicking on the “Change camera” button within the Camera app. This allows you to test both the front and rear cameras (if available).
- Record a test video: To further test your webcam, you can use the Camera app to record a short video. Click on the “Video” button within the Camera app to start recording. Speak or move in front of the webcam to ensure that both the audio and video are captured correctly. Once the recording is complete, click on the “Stop” button.
- Review the test video: After stopping the recording, the Camera app will display the recorded video. Check if the video playback is smooth and the audio is in sync with the visuals. If you encounter any issues during the playback, it’s recommended to follow the troubleshooting steps mentioned in the later sections of this article.
By following these steps, you can easily test your webcam using the built-in Camera app in Windows 10. If your webcam functions properly and displays a clear video preview, congratulations! Your webcam is ready for use. However, if you encounter any issues during the testing process, don’t worry. The next sections will guide you through troubleshooting steps to address common webcam-related problems.
Check the Webcam in Device Manager
If your webcam is not functioning properly or is not being recognized by your Windows 10 computer, checking the Device Manager can help identify the issue. The Device Manager provides a comprehensive list of all the hardware devices connected to your computer, including webcams. Follow the steps below to check the webcam in Device Manager:
- Open Device Manager: Right-click on the Start Menu and select “Device Manager” from the context menu. Alternatively, you can press the Windows key + X and choose “Device Manager” from the Power User Menu.
- Expand the Imaging Devices section: In Device Manager, locate and click on the “Imaging Devices” category to expand it. This category lists all the imaging devices connected to your computer, including webcams.
- Check for webcam entry: Look for the webcam entry in the expanded Imaging Devices section. The webcam may be listed with its specific name or as a generic “USB Video Device” or “Integrated Camera”. If you see a yellow exclamation mark next to the webcam entry, it indicates an issue with the webcam driver.
- Update webcam driver: To update the webcam driver, right-click on the webcam entry and choose “Update driver” from the context menu. Follow the on-screen instructions to search automatically for updated driver software. If an updated driver is found, download and install it. Alternatively, you can visit the manufacturer’s website to manually download and install the latest driver for your webcam.
- Restart your computer: After updating the webcam driver, it’s recommended to restart your computer to apply the changes. Once restarted, check if the webcam is functioning properly.
Checking the webcam in Device Manager can provide insights into any driver-related issues that may be causing your webcam to malfunction. By updating the webcam driver to the latest version, you can often resolve compatibility or performance problems and restore the functionality of your webcam.
If updating the webcam driver does not solve the issue or if you encounter any other problems during the webcam check in Device Manager, don’t worry. The next sections will provide troubleshooting steps to help you address common webcam issues.
Update Webcam Driver
If your webcam is not functioning properly or is experiencing issues, updating the webcam driver can often help resolve the problem. Webcam drivers are software programs that allow your computer to communicate with and utilize the functions of your webcam. Keeping the webcam driver up to date ensures compatibility and enhances performance. Follow the steps below to update your webcam driver:
- Identify the webcam: Before updating the driver, it is essential to know the make and model of your webcam. This information can usually be found on the webcam itself or in the user manual. Alternatively, you can check the webcam manufacturer’s website for the specific model.
- Visit the manufacturer’s website: Once you have identified the make and model of your webcam, visit the manufacturer’s website. Look for the “Support” or “Drivers” section, where you can find software and driver downloads.
- Search for the webcam driver: Use the make and model information to search for the appropriate webcam driver on the manufacturer’s website. Ensure that the driver is compatible with your version of Windows 10 (32-bit or 64-bit).
- Download and install the driver: Once you have located the correct driver, download it to your computer. Most manufacturers provide an executable file (.exe) or a zip file that you can extract. Follow the on-screen instructions to install the driver. It is recommended to close any other applications before installing the driver.
- Restart your computer: After installing the updated driver, restart your computer to ensure that the changes take effect. Once your computer has restarted, test the webcam to see if the issues have been resolved.
Updating the webcam driver can fix compatibility issues, improve performance, and address any software conflicts that may be causing problems. It is important to regularly check for driver updates, as new versions may provide bug fixes and additional features.
If you are still experiencing issues with your webcam after updating the driver, don’t worry. The next section will provide troubleshooting steps to help you resolve common webcam problems.
Troubleshoot Common Webcam Issues
Webcams can encounter various issues that may affect their performance. If you are experiencing problems with your webcam even after following the previous steps, here are some common issues and troubleshooting steps to help resolve them:
- Blurry or low-quality image: If your webcam’s video appears blurry or of low quality, adjust the focus, if possible, by rotating the lens. Additionally, make sure the camera lens is clean and free from any dust or fingerprints that may be obstructing the image.
- Freezing or lagging video: If your webcam video freezes or lags during use, ensure that you have a stable internet connection. If the issue persists, close any other applications that may be using a lot of system resources. Updating your computer’s graphics driver may also help resolve this problem.
- No audio in video recordings: If your webcam records video but does not capture audio, check the audio settings in the recording application. Ensure that the correct audio input source is selected, and the microphone is not muted or disabled. Additionally, make sure your computer’s audio driver is up to date.
- Webcam not detected: If your Windows 10 computer does not recognize the webcam, try the following:
- Disconnect and reconnect the webcam to a different USB port on your computer.
- Ensure that the webcam is properly powered if it requires an external power source.
- Check the connections and cables for any damage or loose connections.
- Restart your computer and check Device Manager for any warnings or errors related to the webcam.
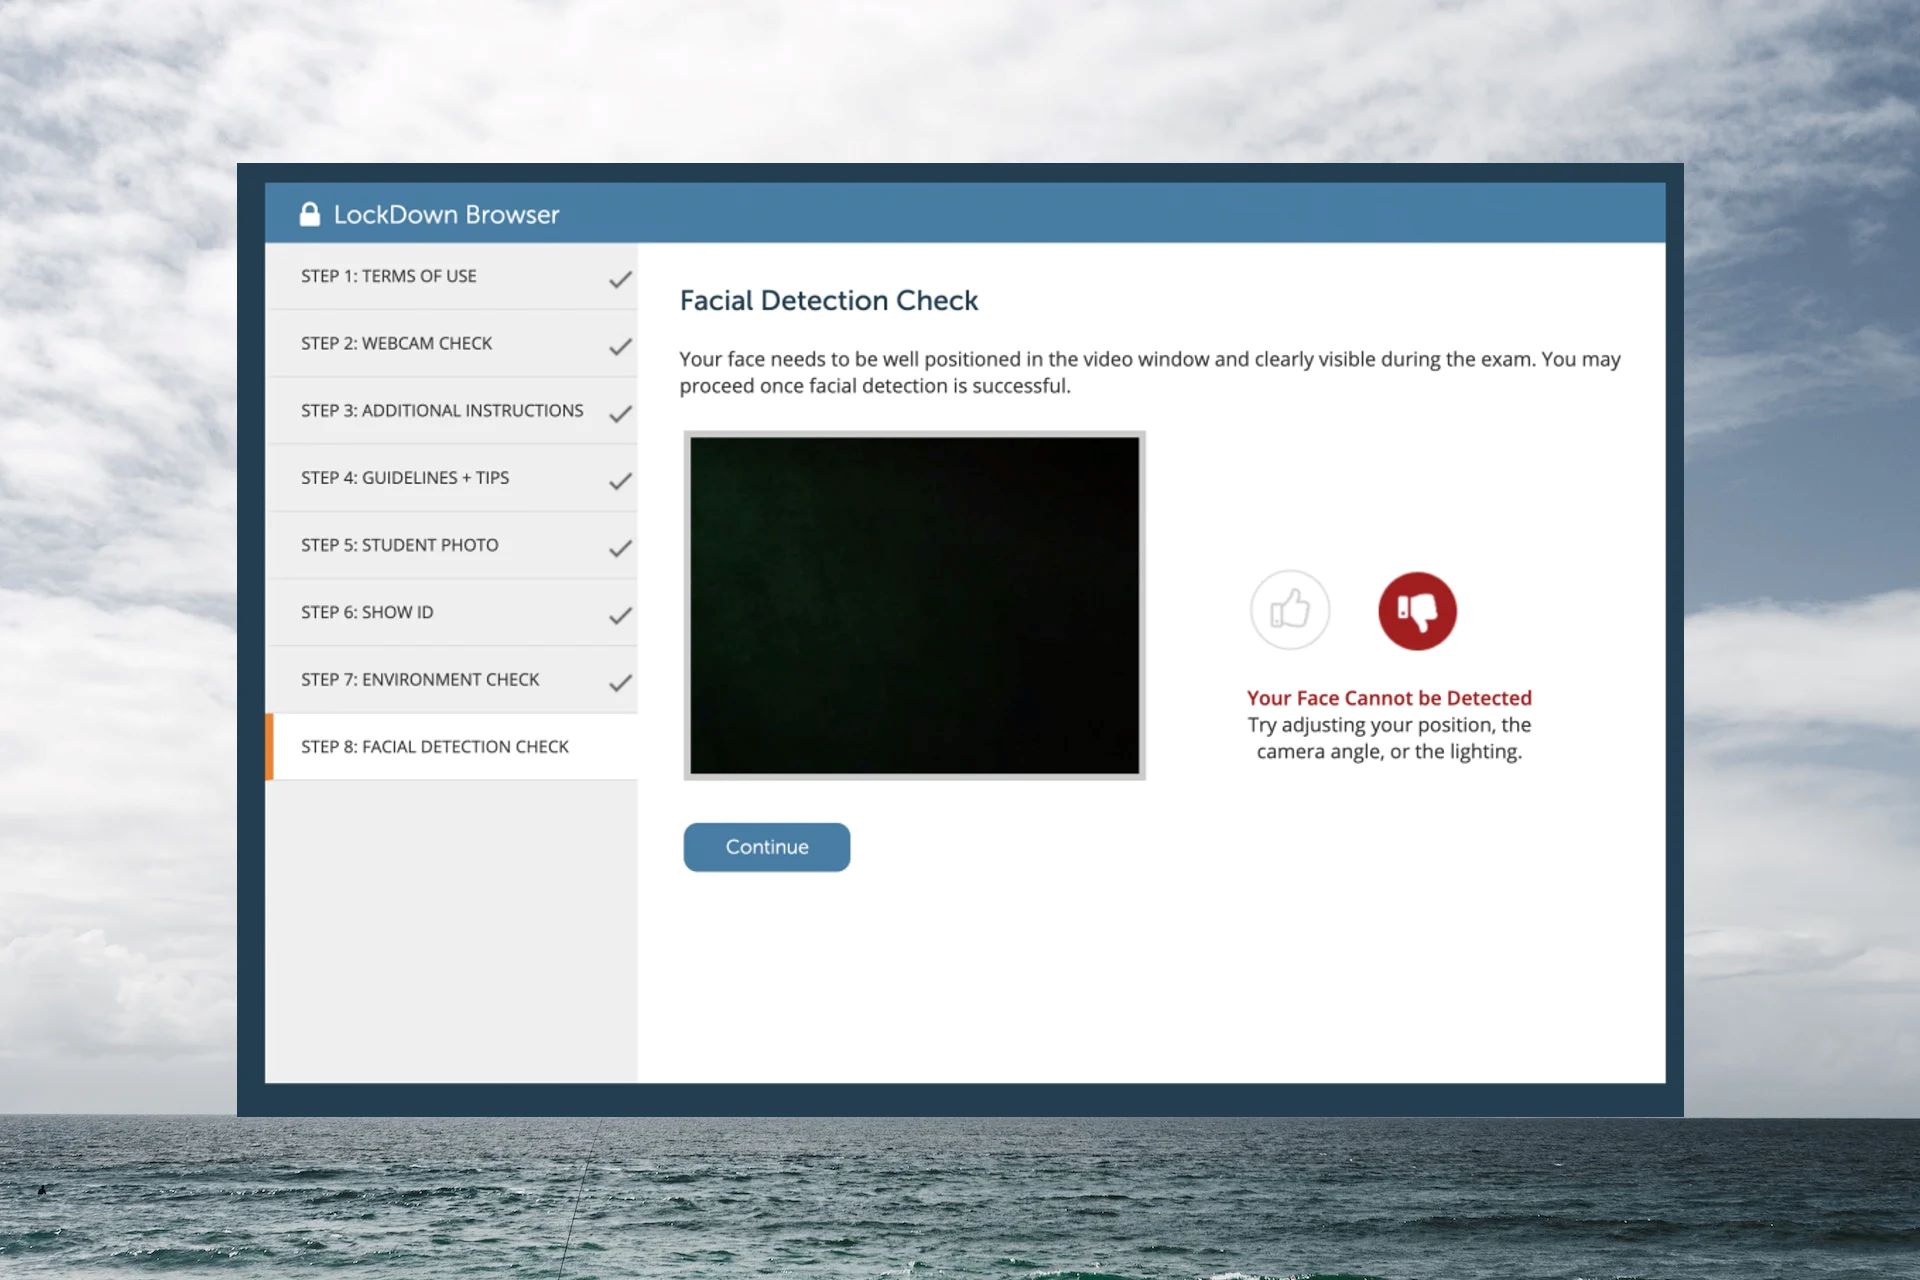
- Green or black screen: If your webcam displays a green or black screen, ensure that you are using the latest version of your webcam software. Try closing and reopening the software. If the issue persists, update your graphics driver and check if any other applications are using the webcam simultaneously.
If none of the troubleshooting steps above resolve your webcam issues, consider consulting the manufacturer’s support website or contacting their customer support for further assistance. They may be able to provide specific solutions tailored to your webcam model.
Remember that maintaining a clean and updated system, along with regular software and driver updates, can prevent many webcam-related problems. By following the troubleshooting steps mentioned above, you will increase the chances of resolving webcam issues and enjoying a smooth and seamless video communication experience.
Conclusion
Testing and troubleshooting your webcam in Windows 10 is crucial for ensuring that it functions properly and provides a seamless video communication experience. By following the steps outlined in this article, you can easily prepare, test, and troubleshoot your webcam, even if you encounter common issues.
Remember to start by properly preparing your webcam, ensuring it is securely connected and powered on. Use the built-in Camera app to test your webcam, checking the video preview and recording a test video to verify its functionality. If any issues arise, checking the webcam in Device Manager and updating the webcam driver can help resolve most problems.
If you continue to experience difficulties, troubleshooting common webcam issues can help address specific problems, such as blurry images, freezing video, or audio recording problems. By following the tips and suggestions provided, you can often find solutions to these issues and restore your webcam’s optimal performance.
Remember to regularly update your webcam driver and keep your system clean and up to date to prevent future problems. It’s also a good idea to consult the manufacturer’s support website or contact their customer support if you encounter persistent issues or need further assistance.
With a properly functioning webcam, you can enjoy smooth and high-quality video communication, whether it’s for work, social connections, or online content creation. By utilizing the information and techniques in this guide, you can troubleshoot and resolve most webcam-related problems, ensuring a positive and frustration-free video communication experience on your Windows 10 computer.