Introduction
Taking a screenshot on your Apple tablet can be a useful way to capture important information, save memorable moments, or share something interesting with others. Whether you’re using an iPad or an iPad Pro, there are several methods you can use to take a screenshot. In this article, we’ll explore four different methods that will help you capture screenshots effortlessly and conveniently.
Screenshots can be taken on Apple tablets using physical buttons, such as the Side button and the Volume Up button or the Side button and the Home button. There’s also a method that involves using the Apple Pencil, as well as an option using AssistiveTouch. These methods offer flexibility to accommodate different preferences and device models. So, no matter which Apple tablet you have, we’ve got you covered! Let’s dive into the step-by-step process of each method.
Please note that the specific steps may vary slightly depending on the model and operating system of your Apple tablet. However, the general principles outlined here should be applicable to most devices. Now, let’s get started and learn how to take a screenshot on your Apple tablet.
Method 1: Using the Side Button and Volume Up Button
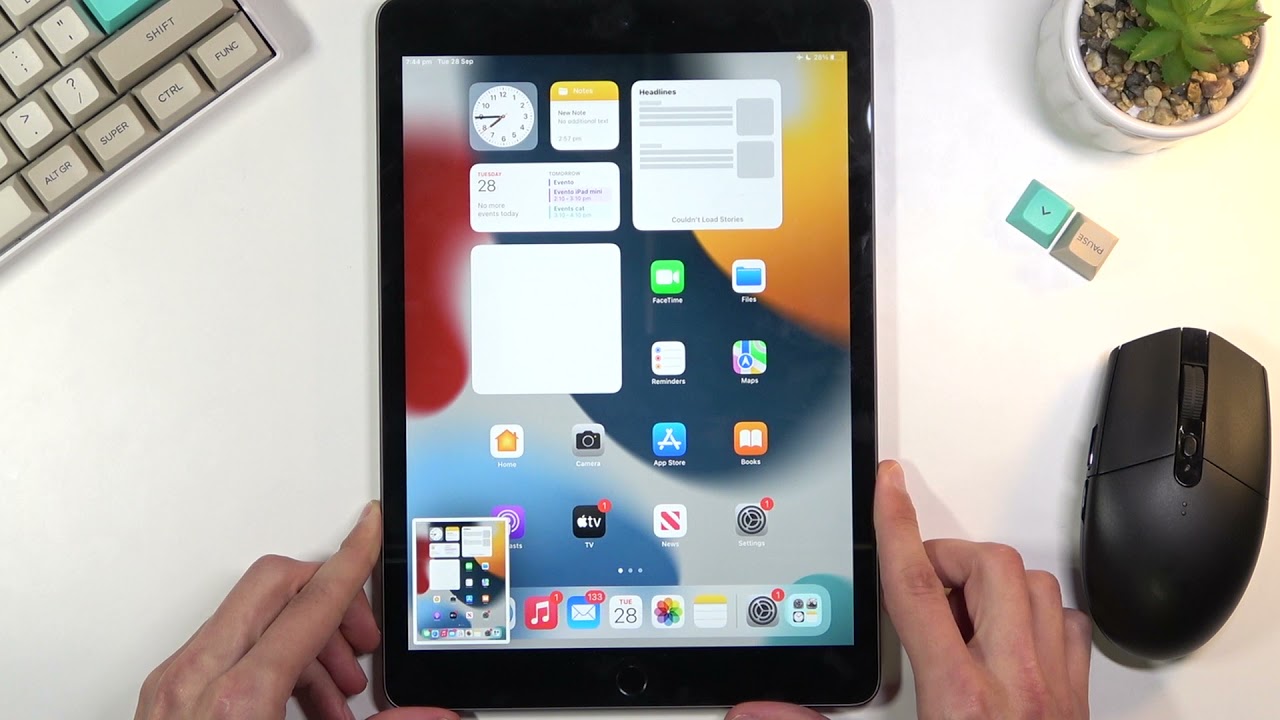
One of the simplest and most common methods to take a screenshot on your Apple tablet is by using the Side button and the Volume Up button. This method applies to most modern iPad models, including iPad Pro. Here’s how to do it:
- Open the screen that you want to capture, ensuring that everything you want to include in the screenshot is visible.
- Locate the Side button, which is usually located on the top right or top left edge of the device (depending on the model).
- Locate the Volume Up button, which is typically found on the right side of the device when held in a portrait orientation.
- Press and hold the Side button and the Volume Up button simultaneously. You’ll hear a click sound, and the screen will quickly flash white, indicating that the screenshot has been taken.
- Release the buttons after capturing the screenshot. A thumbnail of the screenshot will appear temporarily in the bottom left corner of the screen.
- You can tap the thumbnail to instantly access editing options, such as cropping or marking up the screenshot using the built-in Markup tools.
- If you don’t want to edit the screenshot immediately, simply let the thumbnail disappear on its own. The screenshot will be saved in the Photos app under the Screenshots album.
Using the Side button and the Volume Up button is a quick and convenient method to capture screenshots on your Apple tablet. It’s especially handy when you need to capture dynamic content, such as a webpage, a game level, or a video frame. Now that you know how to use this method, let’s move on to the next one.
Method 2: Using the Side Button and Home Button
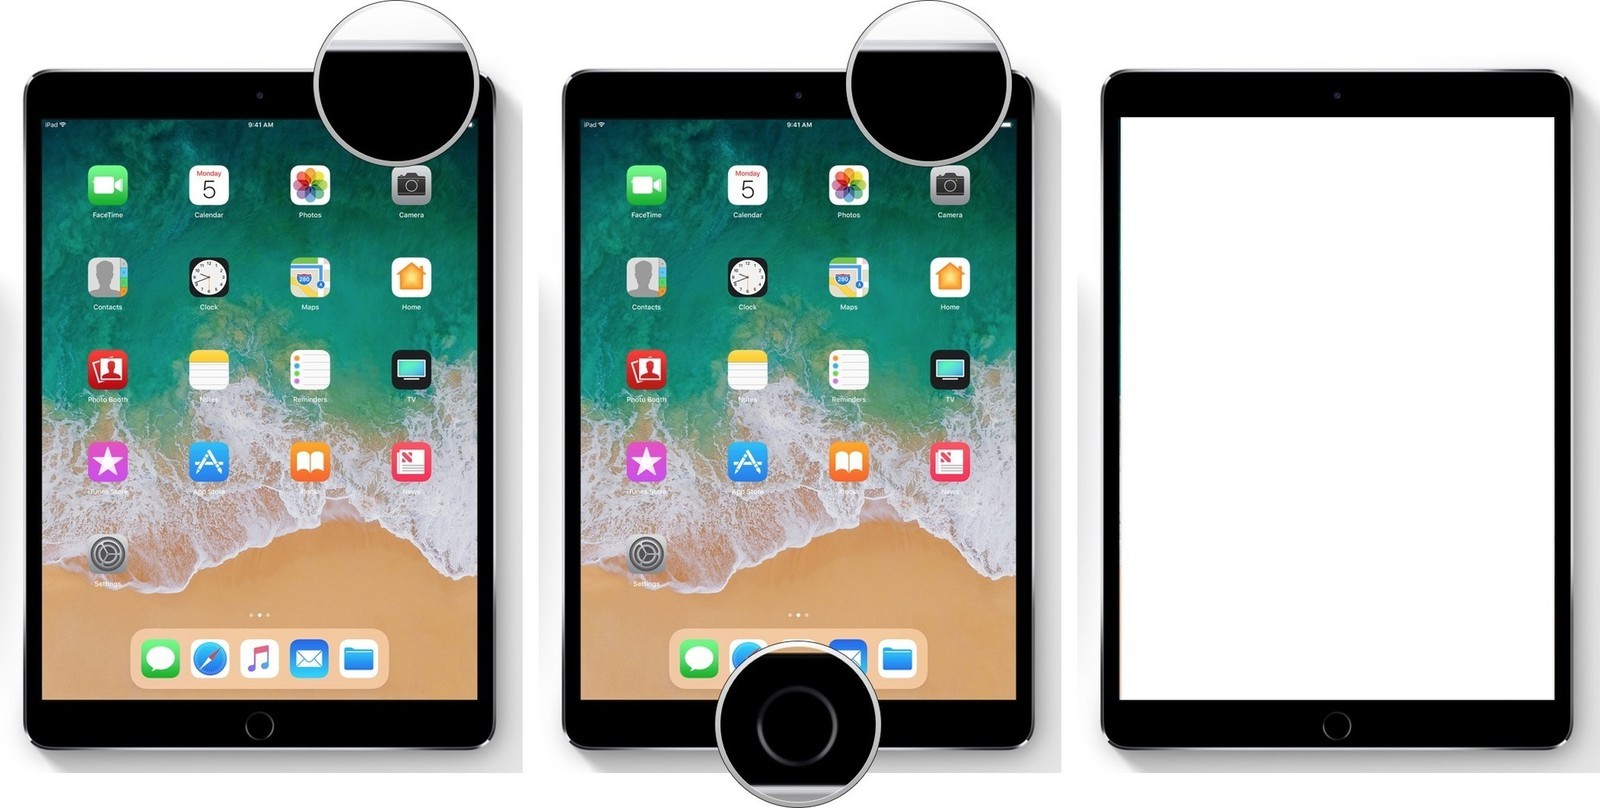
If you’re using an older model of an Apple tablet, such as an iPad mini or an iPad Air, the method to take a screenshot is slightly different. These devices feature a physical Home button instead of the newer gesture-based controls. Here’s how to take a screenshot using the Side button and Home button:
- Make sure the screen you want to capture is displayed on your Apple tablet.
- Locate the Side button, which is typically positioned on the top right or top left edge of the device (depending on the model).
- Also, find the Home button, which is usually located at the bottom of the device’s front bezel.
- Simultaneously, press and hold both the Side button and the Home button. You will hear a click sound, and the screen will briefly flash white, indicating that the screenshot has been successfully taken.
- Release the buttons after capturing the screenshot. A thumbnail of the screenshot will appear temporarily in the bottom left corner of the screen.
- If you wish to make edits to the screenshot immediately, tap on the thumbnail to access the Markup tools. You can crop, annotate, or highlight areas as needed.
- If you prefer not to edit the screenshot right away, you can allow the thumbnail to disappear on its own. The screenshot will be automatically saved in the Screenshots album in the Photos app.
Using the Side button and Home button method ensures that you can take screenshots effortlessly, even on older models of Apple tablets. Whether you need to capture a conversation, save a recipe, or capture an important document, this method has got you covered. Now, let’s explore another method using the Apple Pencil.
Method 3: Using the Apple Pencil
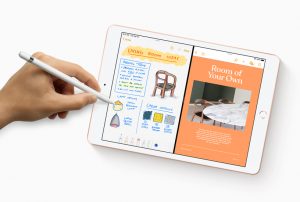
If you own an Apple tablet that supports the Apple Pencil, you have the option to take screenshots using this handy accessory. The Apple Pencil provides precision and control, making it a great tool for capturing screenshots. Here’s how to do it:
- Ensure that the screen you want to capture is visible on your Apple tablet.
- Hold the Apple Pencil in your hand, ready to use.
- Place the tip of the Apple Pencil on the screen where you want the screenshot to begin.
- Drag the Apple Pencil across the screen to capture the desired area. You’ll notice that the captured area is highlighted as you draw.
- As you finish dragging, lift the Apple Pencil off the screen. The screenshot will be automatically taken.
- A thumbnail of the captured screenshot will appear momentarily in the bottom left corner of the screen.
- If you want to edit the screenshot immediately, tap on the thumbnail to access the Markup tools. You can annotate, draw, or add text to the screenshot using the Apple Pencil.
- If you prefer not to edit the screenshot right away, you can let the thumbnail disappear on its own. The captured screenshot will be saved in the Screenshots album in the Photos app.
Using the Apple Pencil to take screenshots on your Apple tablet offers precise control and allows you to capture specific areas or details with ease. Whether you need to capture a complex image, highlight a specific portion of a document, or create artistic sketches, the Apple Pencil method gives you the flexibility to do so. Now, let’s explore one more method to capture screenshots using AssistiveTouch.
Method 4: Using AssistiveTouch
AssistiveTouch is a useful accessibility feature on Apple tablets that not only provides convenient shortcuts but can also be used to take screenshots. This method is particularly helpful for those who may have difficulty using physical buttons or prefer an alternative approach. Here’s how you can take a screenshot using AssistiveTouch:
- Open the Settings app on your Apple tablet and go to “Accessibility.”
- Select “Touch” and then choose “AssistiveTouch.”
- Toggle on the “AssistiveTouch” option to enable it.
- A floating button will appear on the screen, which represents the AssistiveTouch feature.
- Tap on the AssistiveTouch button to open the menu.
- In the AssistiveTouch menu, select “Device.”
- Tap on “More…” and then choose “Screenshot.”
- A screenshot will be captured, and a thumbnail will appear momentarily in the bottom left corner of the screen.
- If you want to edit the screenshot immediately, tap on the thumbnail to access the Markup tools.
- If you prefer not to edit the screenshot right away, you can let the thumbnail disappear on its own. The screenshot will be saved in the Screenshots album in the Photos app.
Using AssistiveTouch to take screenshots on your Apple tablet provides an alternative method for capturing screenshots, especially if using physical buttons is challenging or impractical. This feature enhances accessibility and ensures that everyone can easily take screenshots with just a few taps. With AssistiveTouch, you have more control and flexibility in capturing screenshots on your Apple tablet.
Conclusion
Taking screenshots on your Apple tablet is a straightforward process that can come in handy for various purposes, such as capturing important information, sharing interesting content, or saving memorable moments. In this article, we explored four different methods to take screenshots on your Apple tablet: using the Side button and Volume Up button, the Side button and Home button, the Apple Pencil, and AssistiveTouch.
The method you choose depends on the model and features of your Apple tablet. The Side button and Volume Up button method is widely applicable to modern iPad models, while the Side button and Home button method is suited for older models with a physical Home button. If you own an Apple Pencil, it provides a precise and efficient way to capture screenshots. And, for those who prefer alternative methods, AssistiveTouch offers a convenient solution.
Regardless of the method you use, capturing a screenshot is just the first step. After taking the screenshot, you have the option to edit it using built-in tools, such as cropping, marking up, or adding text. These editing options allow you to highlight specific areas, annotate important details, or personalize your screenshots before sharing them with others.
Remember to refer to the specific instructions for your Apple tablet model and operating system version, as slight variations may exist. Taking screenshots on your Apple tablet is a valuable skill that allows you to easily capture and share information, memories, and experiences. So, explore the different methods and start flexing your screenshot-taking prowess on your Apple tablet today!