Introduction
Apple Watch is a powerful and versatile device, offering an array of features and functionalities to enhance your daily activities. One of the most useful features is the ability to take screenshots, which enables you to capture and share important information, memorable moments, or helpful instructions. In this article, we will explore three simple methods to take a screenshot on your Apple Watch.
Whether you’re a seasoned Apple Watch user or just starting out, knowing how to capture screenshots can be incredibly beneficial. You can capture screenshots of various screens on your Apple Watch, including watch faces, apps, messages, and more. This allows you to preserve important information, share your achievements or progress, or troubleshoot any issues you may encounter.
With the release of watchOS 7, Apple has introduced new ways to take screenshots on your Apple Watch, making it easier than ever before. So, whether you own the latest Apple Watch Series 6 or an earlier model, these methods will work for you.
In the following sections, we will guide you through each method step-by-step, ensuring that you can easily capture screenshots on your Apple Watch, regardless of your technical expertise. Let’s get started!
Method 1: Using the Side Button
The side button on your Apple Watch serves multiple purposes, including taking screenshots. This method is quick and straightforward, allowing you to capture screenshots with just a few simple steps:
- Open the screen or app that you want to capture a screenshot of on your Apple Watch.
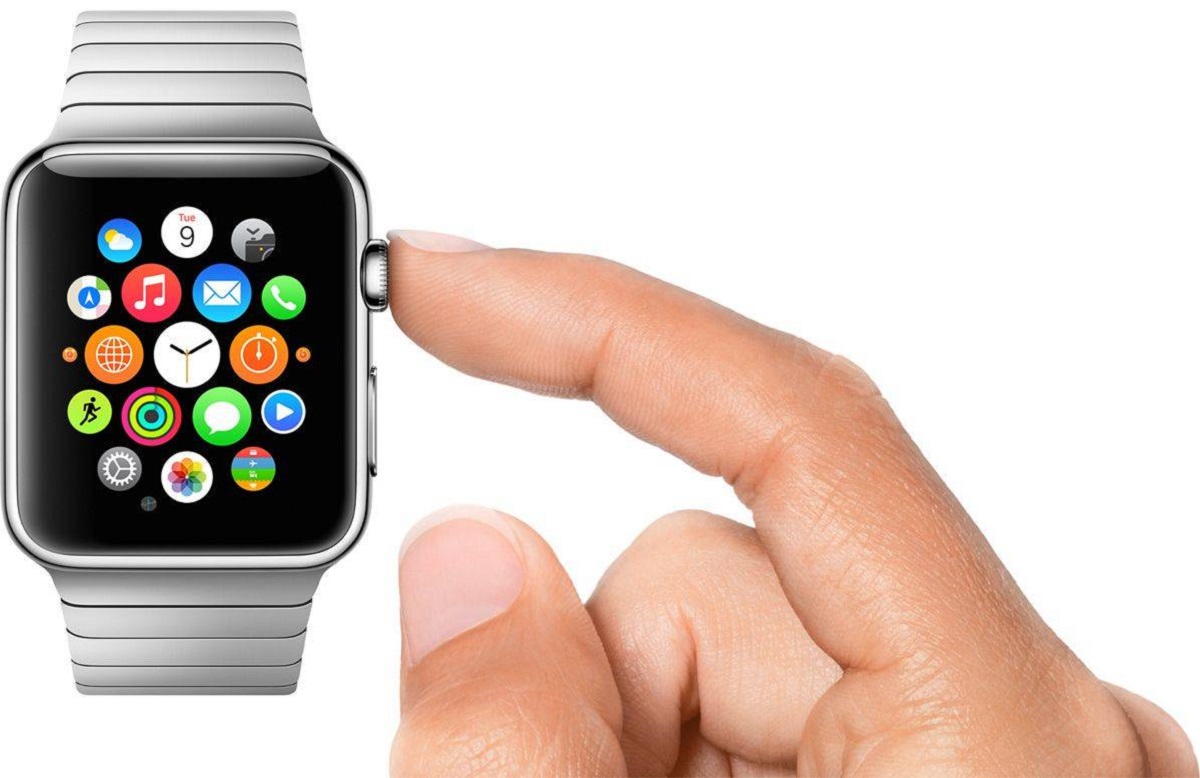
- Position your finger on the side button (located below the Digital Crown) and the Digital Crown simultaneously.
- Press both buttons at the same time and then release them.
- You will see a flash on the screen, accompanied by a small thumbnail of the captured screenshot. You can tap on the thumbnail to preview and edit the screenshot as desired.
- If you decide to dismiss the thumbnail, it will automatically be saved to the Photos app on your paired iPhone.
That’s it! You have successfully captured a screenshot using the side button on your Apple Watch. From here, you can choose to edit, share, or delete the screenshot directly from your iPhone’s Photos app.
It’s worth noting that when using this method, you need to press the side button and the Digital Crown simultaneously and release them quickly. If you hold the buttons for too long, you may activate other functions like Siri or the Power Off screen.
Additionally, the size of the Apple Watch screen and the number of complications or widgets on your watch face may affect the appearance of the screenshot. For optimal results, ensure that the content you want to capture is clearly visible on your Apple Watch before taking the screenshot.
Method 2: Using the Watch App on iPhone
Another convenient way to take screenshots on your Apple Watch is by utilizing the Watch app on your paired iPhone. This method allows for greater control and flexibility when capturing screenshots. Follow the simple steps below to take a screenshot using the Watch app:
- Ensure that your Apple Watch is connected to your iPhone and both are in proximity to each other.
- Open the Watch app on your iPhone.
- Navigate to the specific screen or app that you wish to capture a screenshot of on your Apple Watch.
- Tap on the “My Watch” tab at the bottom of the screen.
- Scroll down and find the “Screenshots” option.
- Toggle the switch next to “Screenshots” to enable it.
- Now, go to your Apple Watch and position it on the desired screen or app.
- Return to the Watch app on your iPhone and tap on the “Take Screenshot” button.
- The Apple Watch screen will flash, indicating that the screenshot has been captured.
- The screenshot will automatically appear as a thumbnail in the Photos app on your iPhone, where you can view and edit it if desired.
By using the Watch app on your iPhone, you have more control over the timing and placement of the screenshot. This method is especially useful when you want to ensure the precise content is captured, such as when taking screenshots of specific app features or watch faces with intricate complications.
Remember to disable the “Screenshots” option in the Watch app after taking your desired screenshots to prevent accidentally capturing unwanted screenshots in the future.
Method 3: Using AssistiveTouch Feature
If you’re looking for a more accessible way to take screenshots on your Apple Watch, the AssistiveTouch feature provides a convenient solution. AssistiveTouch is a built-in accessibility feature that allows you to perform various actions using customizable virtual buttons. Here’s how you can use AssistiveTouch to capture screenshots on your Apple Watch:
- Open the “Settings” app on your Apple Watch.
- Navigate to “Accessibility” and tap on it.
- Scroll down and select “AssistiveTouch.”
- Toggle the switch to enable AssistiveTouch.
- Tap on “Create New Gesture.”
- Follow the on-screen instructions to create a new gesture by tapping or drawing on the screen with your finger.
- Once you’re satisfied with the gesture, tap “Save” to save it.
- Now, return to the home screen or the specific app you want to capture a screenshot of.
- Activate the AssistiveTouch menu by tapping on the virtual AssistiveTouch button, which is displayed as a small white dot on the screen.
- Tap on “Custom” and then select the gesture you created.
- Your Apple Watch will capture a screenshot immediately.
- The screenshot will be saved as a thumbnail in the Photos app on your paired iPhone for easy access and editing.
The AssistiveTouch feature provides a great alternative for those who may have difficulty using the physical buttons on the Apple Watch. By creating a personalized gesture, you can take screenshots with ease and convenience.
Remember to disable AssistiveTouch after you have captured your screenshots to prevent unintended actions or gestures.
With these three methods at your disposal, you can now confidently capture screenshots on your Apple Watch. Whether you prefer using the side button, the Watch app on your iPhone, or the AssistiveTouch feature, you have the flexibility to choose the method that suits your needs and preferences. So go ahead and capture and share those memorable moments, important information, or troubleshooting steps effortlessly!
Conclusion
Taking screenshots on your Apple Watch is an essential feature that allows you to capture and share important information, memorable moments, or even troubleshoot issues. In this article, we explored three simple and convenient methods to take screenshots on your Apple Watch.
Method 1 involves using the side button on your Apple Watch to capture screenshots quickly and easily. Simply press the side button and the Digital Crown simultaneously, and you’ll have a screenshot ready to be viewed, edited, or shared.
Method 2 utilizes the Watch app on your paired iPhone to give you greater control and flexibility in capturing screenshots. By enabling the “Screenshots” option in the Watch app, you can take screenshots directly from your iPhone, ensuring precise content capture.
Method 3 introduces the AssistiveTouch feature, which provides an accessible approach to taking screenshots. By utilizing a customized gesture, you can activate AssistiveTouch and effortlessly capture screenshots on your Apple Watch, ideal for those with physical button limitations.
Now armed with these three methods, you can confidently capture screenshots on your Apple Watch and enjoy the benefits they offer. Whether you want to preserve important information, share your achievements, or seek troubleshooting assistance, taking screenshots on your Apple Watch has never been easier.
Remember to explore the various ways you can edit, share, or delete your screenshots using the Photos app on your paired iPhone. With just a few taps, you can enhance the captured screenshots and share them with your friends, family, or colleagues.
So, go ahead and start capturing those priceless moments or saving those crucial pieces of information on your Apple Watch. Embrace the power and versatility of your Apple Watch’s screenshot feature and elevate your experience with this remarkable wearable device.