Why Take a Screenshot on a Tablet
A tablet is a versatile device that can be used for various purposes. One of the key features that tablet users often find useful is the ability to take screenshots. But why would someone want to capture what’s on their tablet screen?
There are several reasons why taking a screenshot on a tablet can be beneficial. Let’s explore some of the common use cases:
- Sharing Information: Taking a screenshot allows you to quickly capture and share information with others. Whether it’s a funny conversation from a messaging app, an interesting article you want to share, or a screenshot of a map with directions, capturing and sharing information becomes effortless.
- Troubleshooting: If you encounter an issue with an app or the tablet itself, taking a screenshot can be helpful when seeking technical support. By capturing and sharing the screenshot, you can provide visual evidence of the problem you’re facing, making it easier for the support team to assist you.
- Recording Achievements: Tablets are widely used for gaming, and taking a screenshot allows you to capture and share achievements or high scores with friends. It’s a great way to show off your gaming skills and create a sense of competition among your peers.
- Archiving Information: When browsing the web or using apps, you might come across valuable information that you want to save for future reference. Taking a screenshot allows you to create a digital archive of important data, such as receipts, online confirmation pages, or important notes.
- Design and Inspiration: If you’re a designer or artist, taking a screenshot can be a handy tool for gathering design inspiration. You can quickly capture images, color schemes, or layouts that catch your eye and refer back to them later when working on your own projects.
As you can see, taking screenshots on a tablet has a wide range of practical uses. Whether it’s for sharing information, troubleshooting technical issues, recording achievements, archiving important data, or gathering design inspiration, having the ability to capture what’s on your tablet screen can greatly enhance your overall tablet experience.
Now that we understand the reasons behind taking a screenshot, let’s explore the different methods for capturing your tablet screen.
Different Methods for Taking Screenshots on a Tablet
There are multiple methods you can use to capture screenshots on a tablet, depending on the make and model of your device and the operating system it runs on. Let’s explore some of the most common methods:
- Method #1: Using the Power and Volume Down Buttons
- Method #2: Using Gestures or Buttons on the Screen
- Method #3: Using a Screenshot App from the App Store
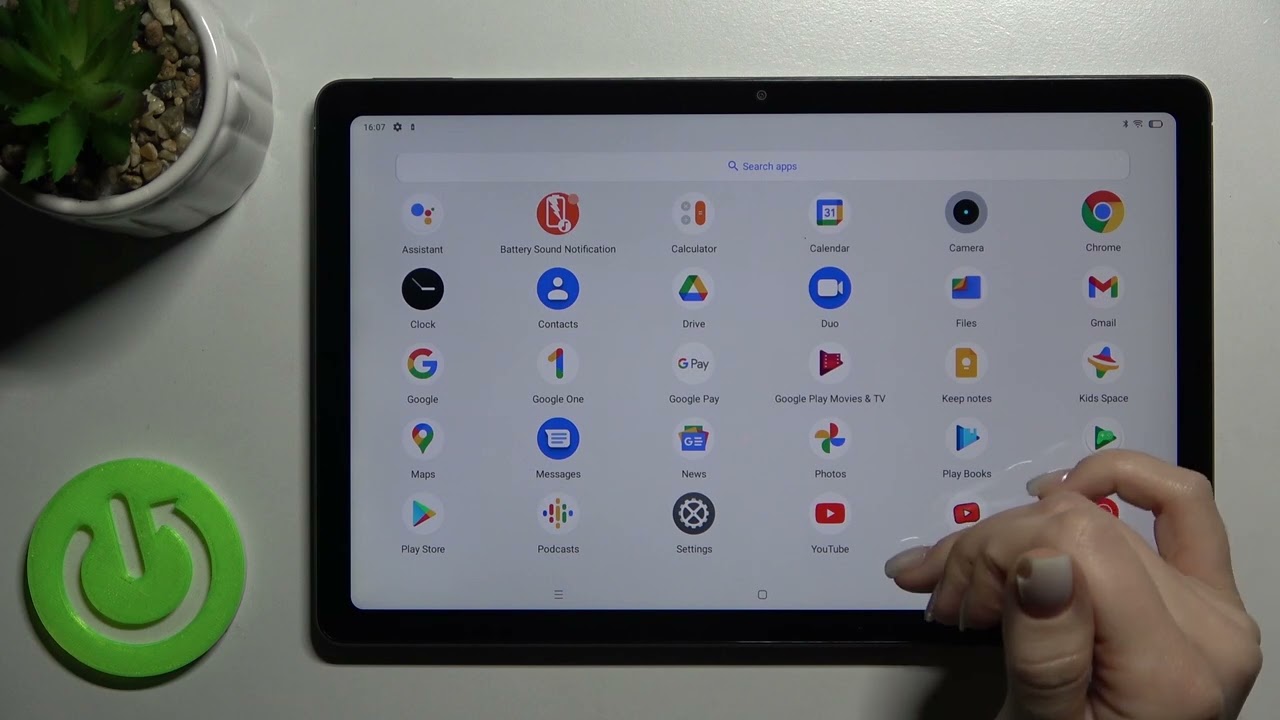
This method is widely used among Android tablet users. To take a screenshot, simply press and hold the Power button and the Volume Down button simultaneously for a few seconds. You’ll see a brief animation or hear a camera shutter sound to indicate that the screenshot has been captured. The screenshot will then be saved to your tablet’s photo gallery.
Some tablets offer built-in screenshot functionalities accessed through on-screen gestures or buttons. For example, on certain Android-based tablets, you can swipe down from the top of the screen to access the quick settings panel and look for a “Screenshot” option. Tapping on it instantly captures a screenshot.
If the above methods don’t work on your tablet or you prefer more advanced screenshot features, you can explore dedicated screenshot apps available on the app store. These apps provide additional functionalities like editing, annotating, and sharing screenshots directly from the app. Simply search for “screenshot” in your tablet’s app store and explore the available options.
It’s important to note that the specific method for taking a screenshot may vary depending on your tablet’s brand, model, and operating system version. If you’re unsure about the exact steps, referring to the device’s user manual or doing a quick internet search for “how to take a screenshot on [tablet brand and model]” should provide you with the necessary instructions.
Now that you’re familiar with the different methods for capturing a screenshot on your tablet, let’s move on to the next section where we will address some common issues you may encounter while taking screenshots and how to troubleshoot them.
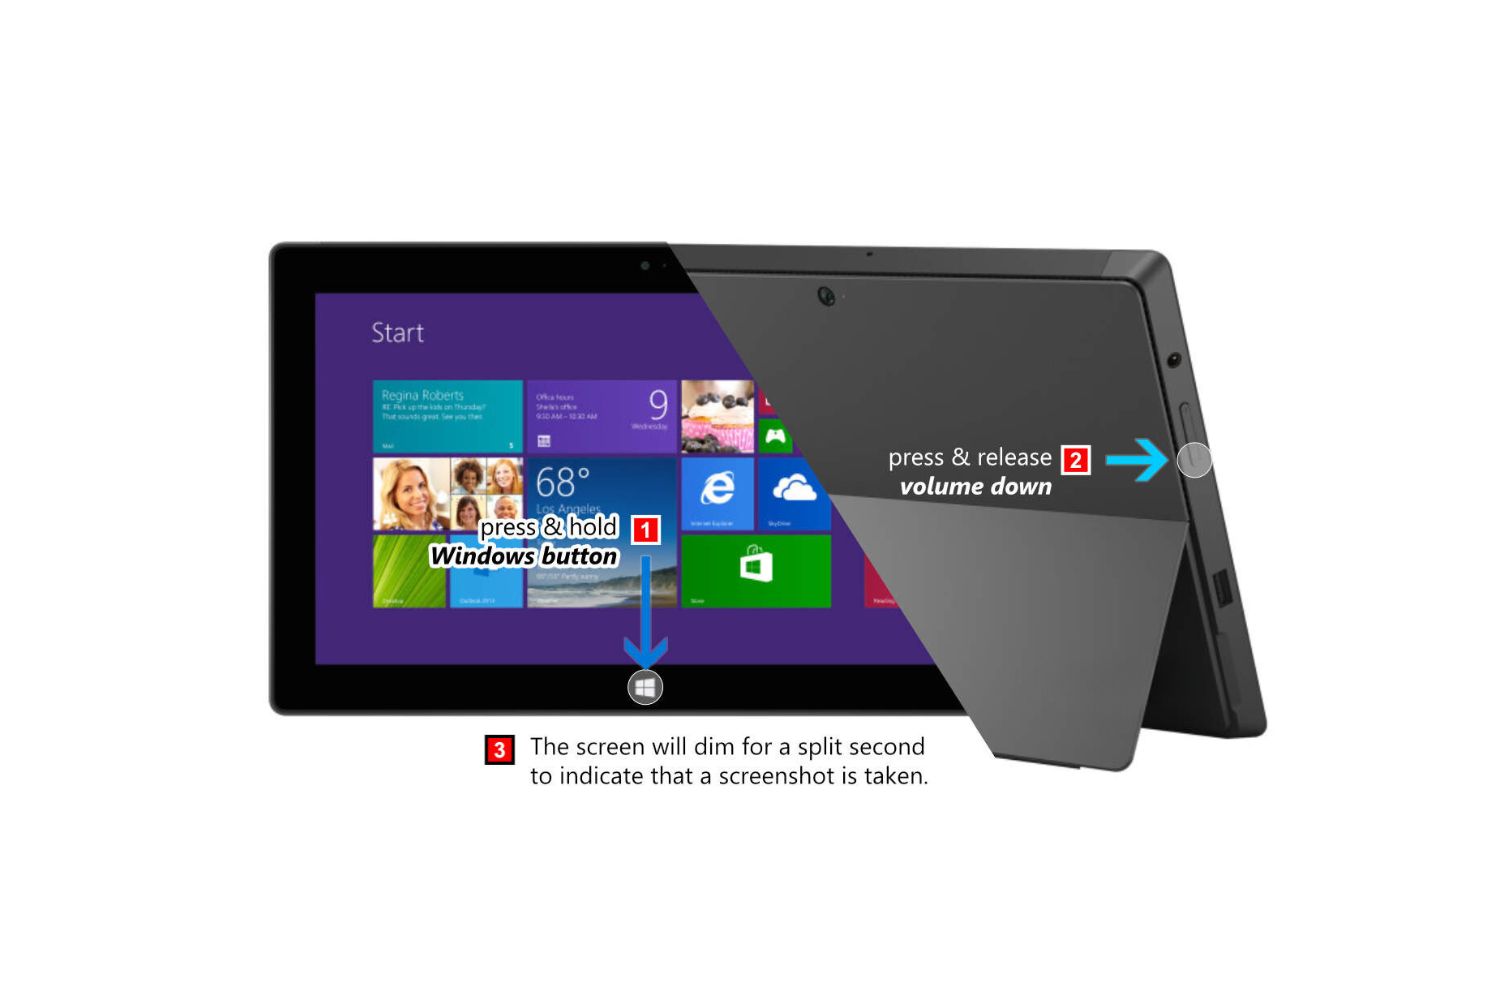
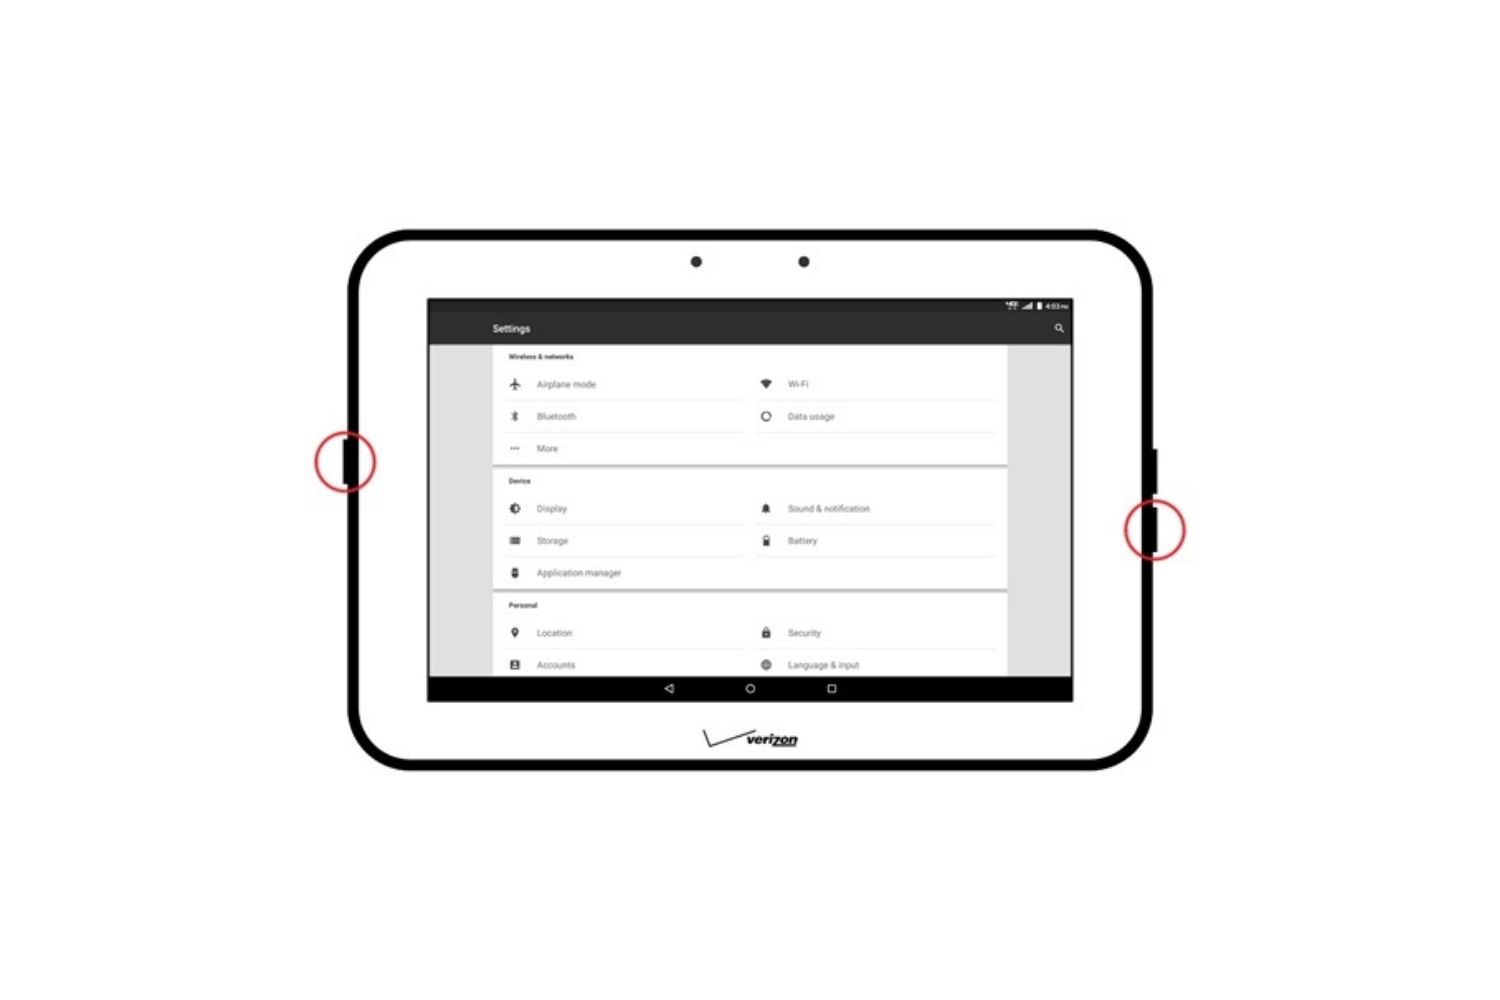
Method #1: Using the Power and Volume Down Buttons
One of the most commonly used methods for taking screenshots on an Android tablet is by using the Power and Volume Down buttons. This method is straightforward and works on many Android-based tablets. Here’s how you can take a screenshot using this method:
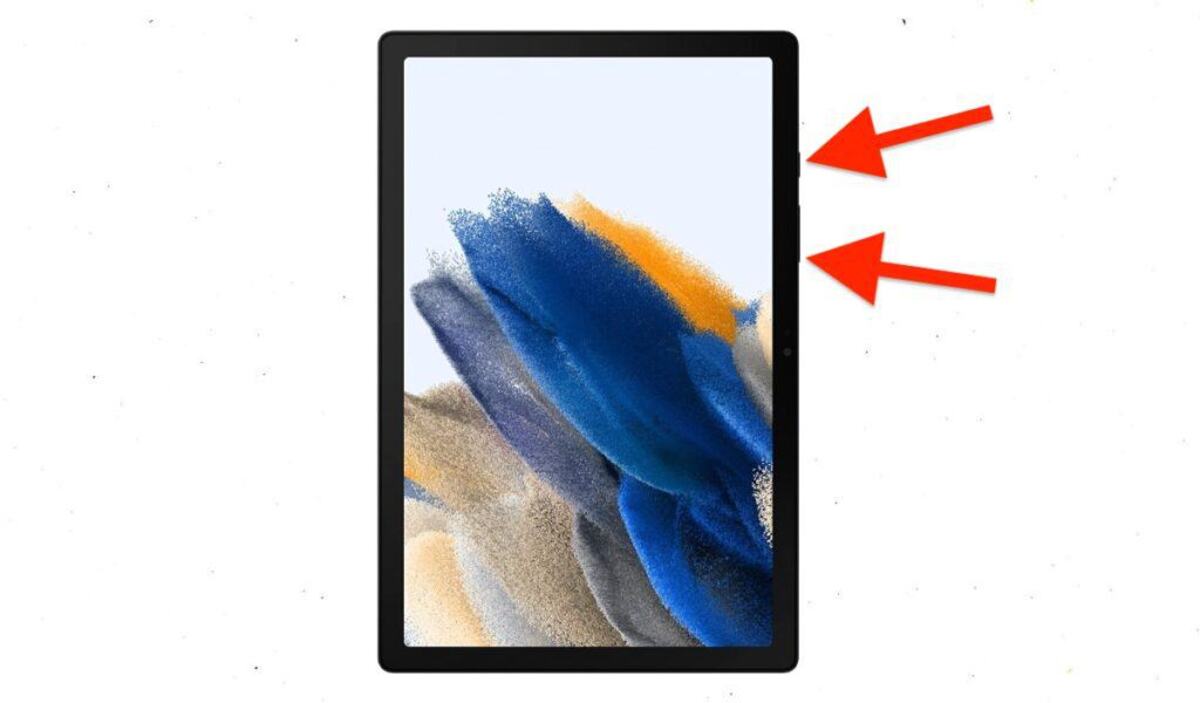
- First, locate the Power button and the Volume Down button on your tablet. The Power button is usually located on the side or at the top of the device, while the Volume Down button is typically found on the same side as the Power button.
- Once you have identified the buttons, ensure that you have the screen you want to capture displayed on your tablet.
- Press and hold both the Power button and the Volume Down button simultaneously. Make sure to press them at the same time and hold them for a few seconds.
- You will typically see a brief animation or hear a camera shutter sound, indicating that the screenshot has been taken and saved.
- To access your captured screenshot, navigate to your tablet’s photo gallery or screenshot folder. Most Android devices automatically save screenshots in a designated folder for easy access.
It’s important to note that the button combination for taking a screenshot may vary slightly depending on the tablet model or Android version you’re using. However, the Power and Volume Down buttons are commonly used across different devices.
Additionally, some tablets may provide alternative button combinations to capture a screenshot, such as using the Home button instead of the Power button. Refer to your tablet’s user manual or do a quick internet search with the specific tablet model to confirm the exact button combination for taking screenshots.
Using the Power and Volume Down buttons to capture screenshots is a quick and convenient method, allowing you to capture what’s on your tablet screen with ease. Whether you’re sharing information, troubleshooting technical issues, or simply documenting something important, this method is a reliable way to capture and save screenshots on your Android tablet.
Next, we will explore another method for taking screenshots on a tablet, focusing on using gestures or buttons on the screen.
Method #2: Using Gestures or Buttons on the Screen
Another method for taking screenshots on a tablet involves utilizing gestures or buttons directly on the screen. This method is often available on tablets that have custom user interfaces or specific features built into their operating systems. Here’s how you can use gestures or buttons on the screen to take a screenshot:
- Start by ensuring that the screen content you want to capture is displayed on your tablet.
- Next, locate the designated gesture or button for taking a screenshot on your tablet. The location of this option may vary depending on the device and its operating system.
- For example, on some Android tablets, you may need to swipe down from the top of the screen to access the quick settings panel. Look for an option labeled “Screenshot” and tap on it to capture the screenshot instantly.
- In other cases, you may need to tap a specific button on the screen, such as an icon shaped like a camera or a scissors, to initiate the screenshot capture process.
- After performing the required gesture or tapping the button, you should see a visual indication that the screenshot has been successfully captured, such as a flashing screen or a notification.
- To view your captured screenshot, navigate to your tablet’s photo gallery, or check a dedicated screenshot folder if your device automatically saves screenshots in a separate directory.
It’s important to note that the exact method for taking a screenshot using gestures or buttons on the screen may differ depending on the tablet’s brand, model, and software version. Refer to your tablet’s user manual or search online for the specific instructions tailored to your device.
This method offers a convenient alternative to physical buttons, allowing you to capture screenshots with a simple swipe or tap on the screen. It can be particularly useful if your tablet doesn’t have easily accessible physical buttons for capturing screenshots.
Now that we’ve covered the gestures and buttons method, let’s move on to exploring another option for capturing screenshots on a tablet: using dedicated screenshot apps from the app store.
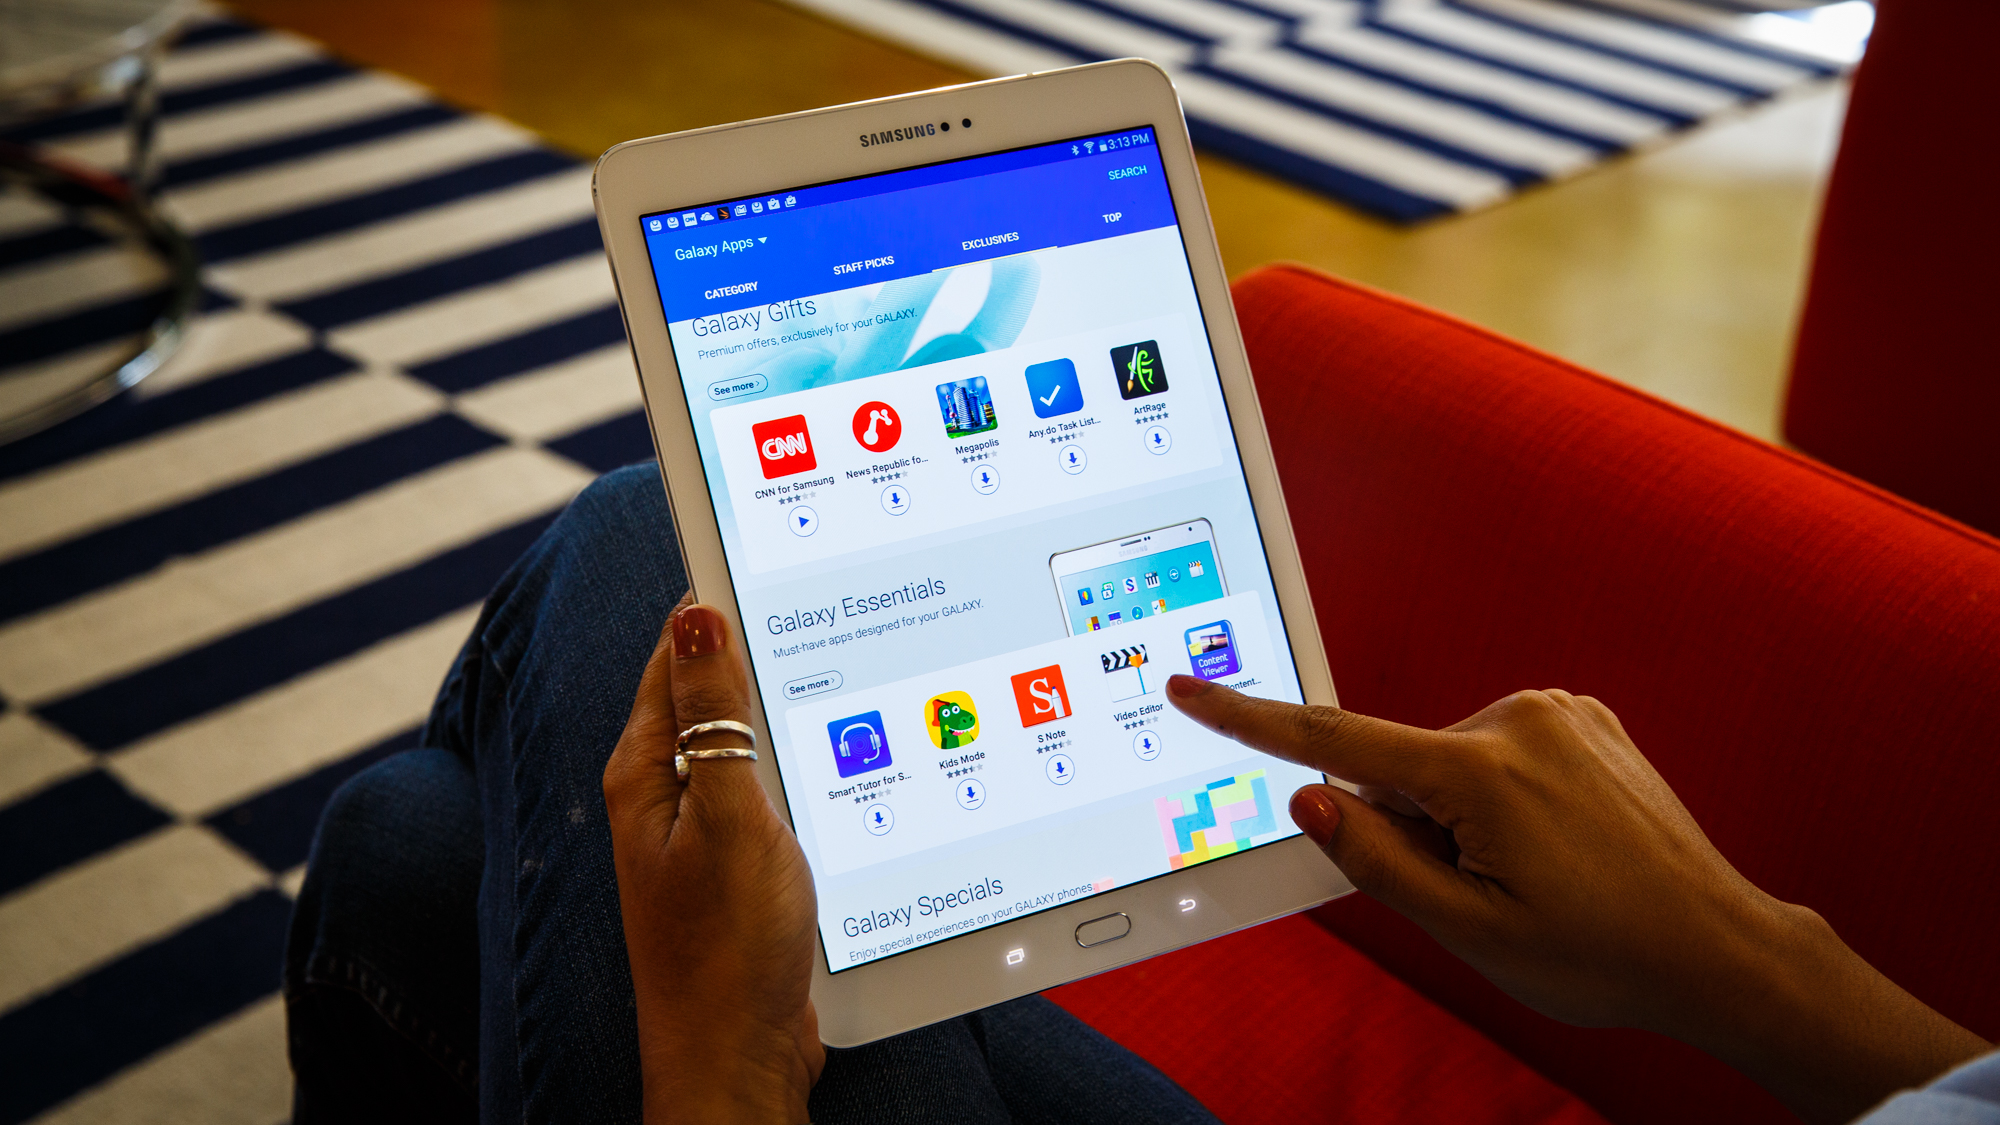
Method #3: Using a Screenshot App from the App Store
If the built-in methods for taking screenshots on your tablet do not meet your requirements or if you want additional features, you can explore dedicated screenshot apps available on the app store. These apps provide a range of functionalities beyond basic screenshot capture, such as editing, annotating, and sharing options. Here’s how you can use a screenshot app to capture screenshots on your tablet:
- Start by opening your tablet’s app store, such as the Google Play Store or Apple App Store.
- Search for “screenshot app” or similar keywords in the app store’s search bar.
- Browse through the available apps and read user reviews and ratings to find an app that suits your needs.
- Select the desired screenshot app and tap on the “Install” button to download and install it on your tablet.
- Once the app is installed, open it and familiarize yourself with its user interface and features.
- Follow the app’s instructions to capture screenshots using its specific method. Some apps may require you to activate a floating button or configure certain settings to enable screenshot capture.
- After capturing a screenshot, the app may provide options for editing, cropping, adding annotations, or sharing the screenshot directly from the app.
- To access your captured screenshots later, you can usually find them within the app’s gallery or in your tablet’s photo gallery.
It’s important to note that the process of capturing screenshots may vary from one screenshot app to another, as each app has its own unique set of features and functionalities. Take some time to explore the app’s settings and features to fully utilize its capabilities.
Using a dedicated screenshot app from the app store can be particularly useful if you need advanced editing tools, want to add annotations or effects to your screenshots, or require seamless sharing options across various platforms.
Now that we’ve explored various methods for taking screenshots on a tablet, let’s move on to the next section, where we’ll address common issues you may encounter while taking screenshots and provide troubleshooting tips to resolve them.
Troubleshooting Common Issues with Taking Screenshots
While taking screenshots on a tablet is generally straightforward, you may encounter occasional issues that prevent you from capturing the desired screen. Let’s explore some common issues you may face and provide troubleshooting tips to resolve them:
- Screenshot Not Saving: If you’re unable to find your captured screenshots in the photo gallery or screenshot folder, try restarting your tablet. This can help refresh the system and ensure that the screenshots are properly saved. Additionally, check your tablet’s storage space to ensure it has enough available capacity to save the screenshots.
- Volume Down Button Not Working: If you’re using the Power and Volume Down button combination and the Volume Down button is unresponsive, ensure that you’re pressing it firmly and directly. If the button remains unresponsive, try cleaning the area around the button or consult the device’s user manual for specific troubleshooting steps.
- Screen Flash or Black Screen: Some tablets may display a brief screen flash or a black screen while capturing a screenshot. This is normal behavior and indicates that the screenshot has been successfully captured. The flash or black screen is typically very brief and shouldn’t cause any concerns.
- Unable to Access the Quick Settings Panel: If you’re using the gestures method and can’t access the quick settings panel, ensure that the feature is enabled in your tablet’s settings. Go to the Settings menu, search for “quick settings” or “notification panel,” and make sure the option for accessing the quick settings panel is turned on.
- Error Messages or Crashes: If you encounter error messages or app crashes while using a screenshot app, check for updates to the app in the app store and install any available updates. Additionally, try clearing the app’s cache and data through your tablet’s settings to resolve any conflicting issues.
- Unsupported Features: Some older or budget tablet models may not have built-in screenshot functionalities or may have limited options. If you’re unable to capture screenshots using the methods mentioned, consider using a third-party screenshot app from the app store to gain additional features and functionalities.
If you continue to experience issues with taking screenshots on your tablet, it’s recommended to consult your tablet’s user manual or visit the manufacturer’s support website for further assistance. They can provide specific troubleshooting steps or guide you through resolving any hardware or software-related problems.
By troubleshooting common issues, you can ensure that you’re able to capture screenshots on your tablet seamlessly, allowing you to effortlessly capture and share important information and moments.
Now that we’ve covered troubleshooting tips, we can conclude this article with a brief recap of the methods discussed and the benefits of taking screenshots on a tablet.
Conclusion
Taking screenshots on a tablet is a useful feature that allows you to capture and save what’s on your tablet screen for various purposes. Whether you’re sharing information, troubleshooting technical issues, recording achievements, archiving important data, or gathering design inspiration, the ability to capture screenshots enhances your tablet experience and productivity.
In this article, we explored three common methods for taking screenshots on a tablet:
- Using the Power and Volume Down buttons: This method is widely used among Android tablet users, offering a simple and reliable way to capture screenshots.
- Using gestures or buttons on the screen: Some tablets provide built-in gestures or buttons on the screen, making screenshot capture quick and convenient.
- Using a screenshot app from the app store: For advanced features like editing, annotating, and sharing options, dedicated screenshot apps offer additional functionalities beyond basic screenshot capture.
Additionally, we discussed common issues you may encounter while taking screenshots and provided troubleshooting tips to resolve them, ensuring a smooth screenshot capturing experience.
Remember, the specific method for taking screenshots may vary depending on your tablet’s brand, model, and operating system version. Consult your tablet’s user manual or search online for instructions tailored to your device if you’re unsure about the exact steps.
By mastering the art of taking screenshots on a tablet, you’ll have a powerful tool at your disposal for capturing and sharing important information, troubleshooting technical issues, recording achievements, archiving valuable data, and finding design inspiration. Unlock the potential of your tablet and elevate your digital experience with the art of screenshot capture.