Introduction
Android tablets have become increasingly popular due to their versatility and functionality. Whether you’re using your tablet for work, entertainment, or communication, taking a screenshot can be a handy tool for capturing and sharing information. A screenshot is essentially a snapshot of your tablet’s screen at a specific moment, allowing you to save and share what’s displayed.
In this article, we will explore several methods for taking screenshots on an Android tablet. You’ll learn how to capture your device’s screen using the physical buttons, gestures, the notification panel, and even third-party apps. Whether you’re a seasoned Android user or a beginner, this guide will help you master the art of screenshotting on your Android tablet.
Before we dive into the various methods, it’s important to note that the steps and options may vary depending on the make and model of your Android tablet, as well as the version of the operating system you’re running. The instructions provided here are based on the latest Android OS version, but there might be slight differences on older versions.
Now, without further ado, let’s explore the different ways to capture and save screenshots on your Android tablet. Whether you need to capture an image, save important information, or troubleshoot an issue, knowing how to take a screenshot will be a valuable skill to have at your fingertips.
Overview of Android Tablet Screenshots
Before we delve into the various methods of taking a screenshot on your Android tablet, let’s first understand what exactly a screenshot is and how it can be useful.
A screenshot, also known as a screen capture or screen grab, is a digital image of your Android tablet’s display at a specific point in time. Essentially, it allows you to capture and save whatever is visible on your screen, including apps, web pages, images, or any other content.
Whether you want to save a memorable moment from a game, capture an error message for troubleshooting purposes, or share a funny conversation from a messaging app, screenshots are a practical and convenient feature to have. They enable you to capture and preserve important information or visually communicate with others.
Additionally, taking screenshots can be helpful for various reasons:
- Troubleshooting: If you encounter any technical issues or error messages on your tablet, taking a screenshot can be a valuable tool for documenting and seeking assistance from support forums or customer service.
- Sharing Information: Screenshots allow you to quickly capture and share content from your tablet, such as images, videos, articles, or social media posts with others. It’s an efficient way of communicating and providing visual context.
- Remembering Details: Sometimes you come across information or ideas that you want to refer back to later. Taking a screenshot ensures that you have a visual record of that information, even if it’s a webpage, map, or address.
- Creative Projects: Screenshots can also be useful for creative projects like graphic design, presentations, or creating tutorials. Having the ability to capture specific screens or steps allows for seamless customization and illustration.
Now that you have a better understanding of the benefits of taking screenshots on your Android tablet let’s move on to the different methods you can use to capture those precious moments.
Option 1: Using the Physical Buttons
One of the simplest and most common methods to take a screenshot on an Android tablet is by using the physical buttons. Although the specific button combinations may vary slightly depending on the tablet model and manufacturer, the general process remains the same. Here’s how to do it:
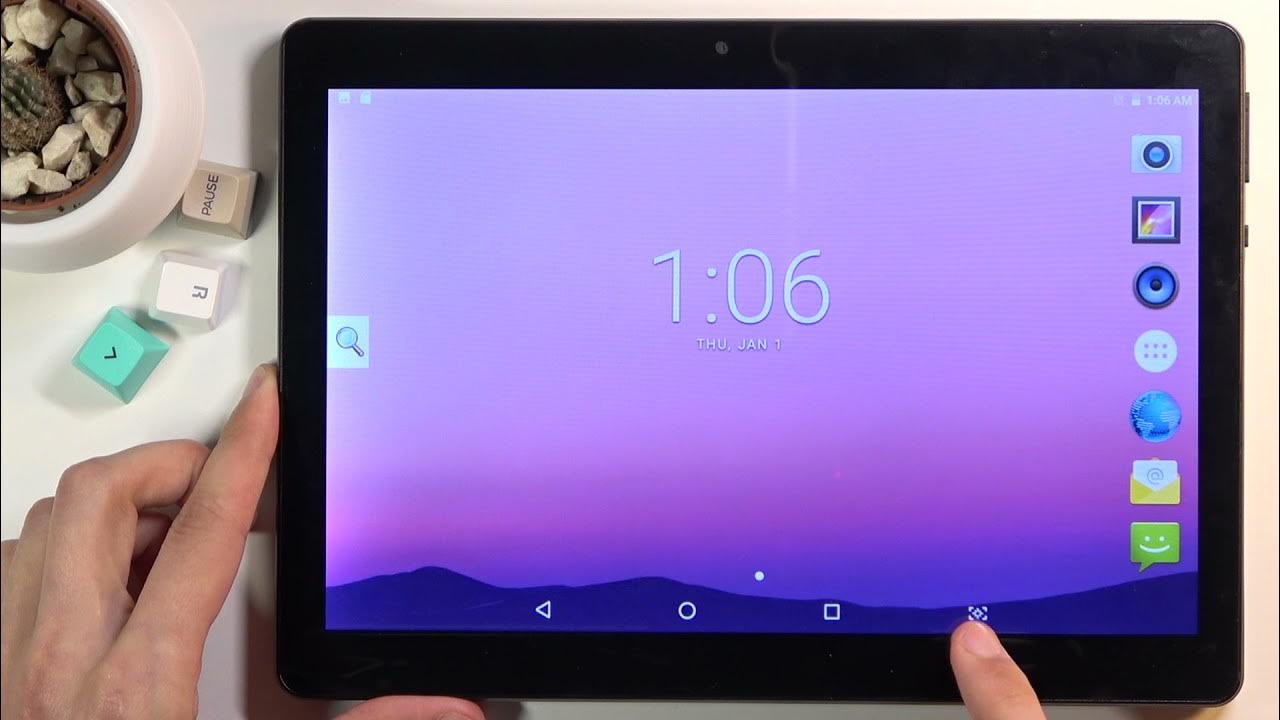
Step 1: Navigate to the screen or content you want to capture. Ensure that everything you want to include in the screenshot is visible on your tablet’s display.
Step 2: Locate the Power button and Volume Down button on your tablet. The Power button is usually found on the side or top of the device, while the Volume Down button is typically located along the edge.
Step 3: Press and hold both the Power button and Volume Down button simultaneously for a few seconds. You’ll notice a brief animation or hear a shutter sound, indicating that the screenshot has been successfully captured.
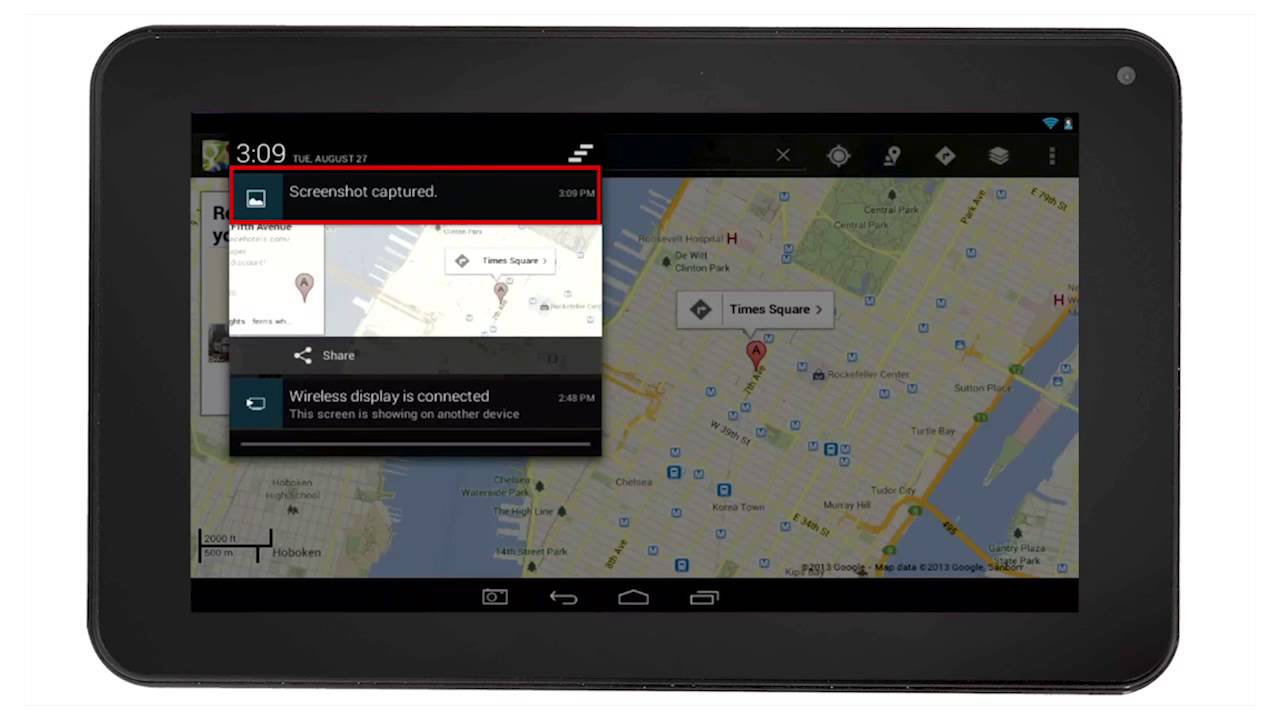
Step 4: Once the screenshot is taken, you can access it by swiping down from the top of the screen to open the notification panel. Look for a notification indicating that a screenshot has been saved. Tap on the notification to view the screenshot or access it later from your device’s gallery or Photos app.
It’s important to note that the Power button and Volume Down button combination is the most common for taking screenshots on Android tablets. However, on some devices, you might need to use a slightly different combination such as the Power button and Home button or the Power button and Volume Up button. If the above combination doesn’t work for your tablet, consult the user manual or do a quick online search to find the specific button combination for your device.
Using the physical buttons is a convenient way to capture screenshots on your Android tablet, especially if you prefer a tactile method. However, if you find it challenging to press the buttons simultaneously or if your tablet’s buttons are not easily accessible, there are alternative methods available, as we’ll explore in the following sections.
Option 2: Using Gestures
Another method to take screenshots on your Android tablet is by using gestures. This option is available on some devices and offers a convenient and intuitive way to capture your screen without having to press physical buttons. Here’s how you can use gestures to take a screenshot:
Step 1: Go to the screen you want to screenshot and ensure that it’s displayed in full view on your tablet.
Step 2: Place your hand vertically along the edge of the tablet’s screen, touching the screen with the side of your palm or the edge of your hand.
Step 3: Swipe your hand horizontally across the screen from the edge towards the center. This gesture is usually referred to as a “palm swipe” or “edge swipe.”
Step 4: You’ll see a visual indication or hear a confirmation sound that the screenshot has been successfully taken. Similar to the previous method, you can access the screenshot by opening the notification panel or navigating to your device’s gallery or Photos app.
Note that the gesture-based screenshot feature may not be available on all Android tablets. It usually depends on the manufacturer and the specific version of the Android OS. If your tablet doesn’t have this feature, you could consider alternative methods like using the physical buttons or exploring third-party apps.
Using gestures to capture screenshots offers a more streamlined and touch-friendly approach. It allows for quick and effortless screen captures, especially if you find using the physical buttons cumbersome or if your tablet’s buttons are hard to reach. However, if your tablet doesn’t support this feature or if you prefer more options and flexibility, let’s move on to the next method, which involves using the notification panel.
Option 3: Using the Notification Panel
Another convenient method for taking screenshots on your Android tablet is through the notification panel. This option is available on many Android devices and provides an easy way to capture your screen without the need for physical buttons or gestures. Here’s how you can use the notification panel to take a screenshot:
Step 1: Open the screen or content you want to capture on your tablet.
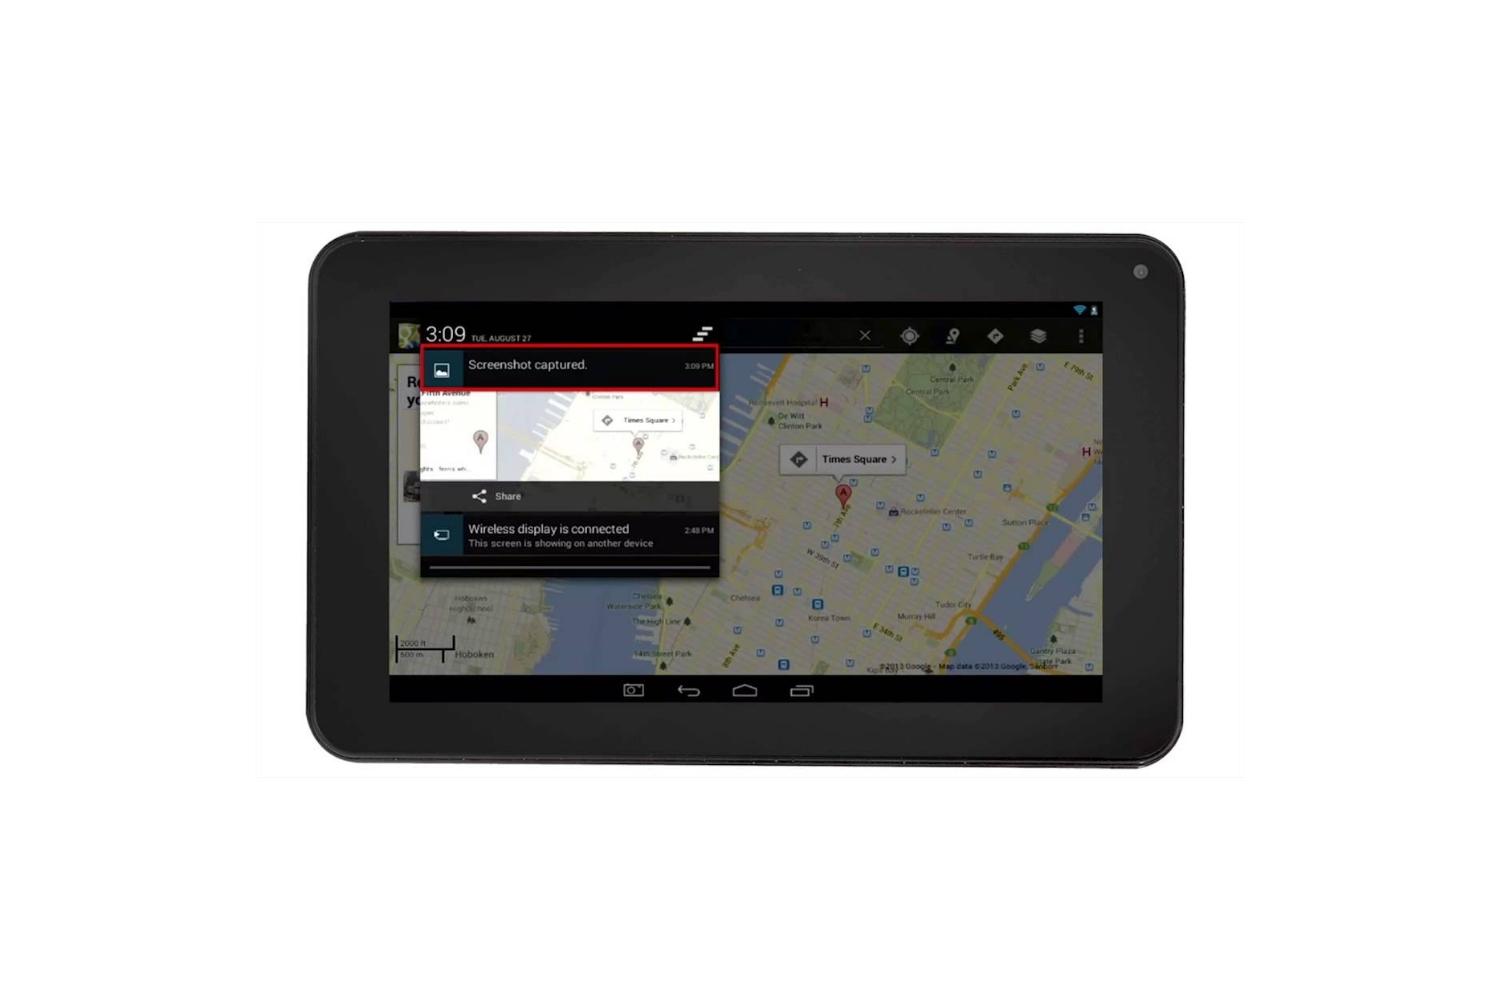
Step 2: Swipe down from the top of the screen to open the notification panel. The notification panel typically displays various icons and shortcuts.
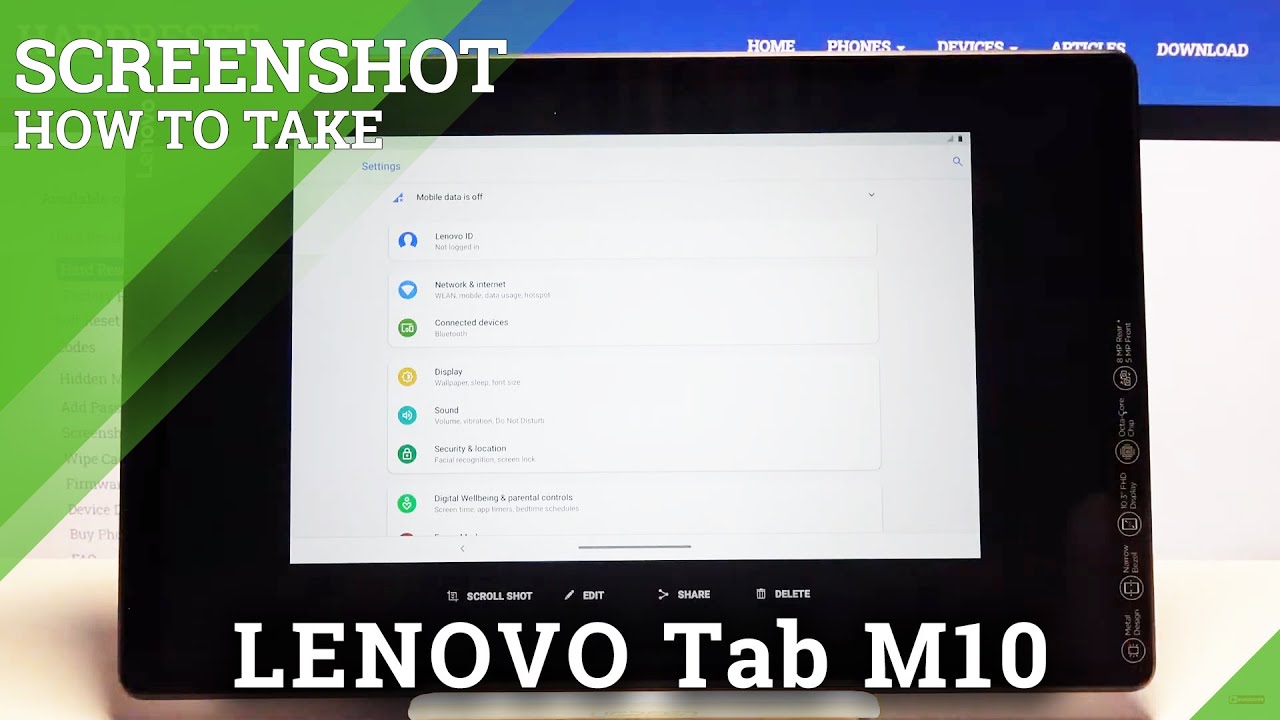
Step 3: Look for a specific icon or shortcut related to screenshots. It’s usually denoted by an icon resembling a square with a pencil or a dotted outline of a phone or tablet screen.
Step 4: Tap on the screenshot icon or shortcut to capture the current screen. You may see a brief animation or receive a notification confirming that the screenshot has been saved.
Step 5: To access the screenshot, you can either tap on the notification or open the gallery or Photos app on your tablet. The screenshot will be saved in your device’s internal storage or in a designated “Screenshots” folder.
If you don’t see a screenshot icon or shortcut in your notification panel, it’s possible that your tablet’s manufacturer has placed it in a different location or removed it altogether. In such cases, you can try the previous methods of using physical buttons or gestures, or explore third-party apps that offer screenshot-taking capabilities.
Using the notification panel to capture screenshots provides a quick and hassle-free way to save your screen contents. It’s especially useful when you need to capture multiple screenshots back-to-back or if you prefer an on-screen method over using physical buttons or gestures. While this option is available on many Android tablets, some devices may offer additional features or customization options in the notification panel for capturing screenshots.
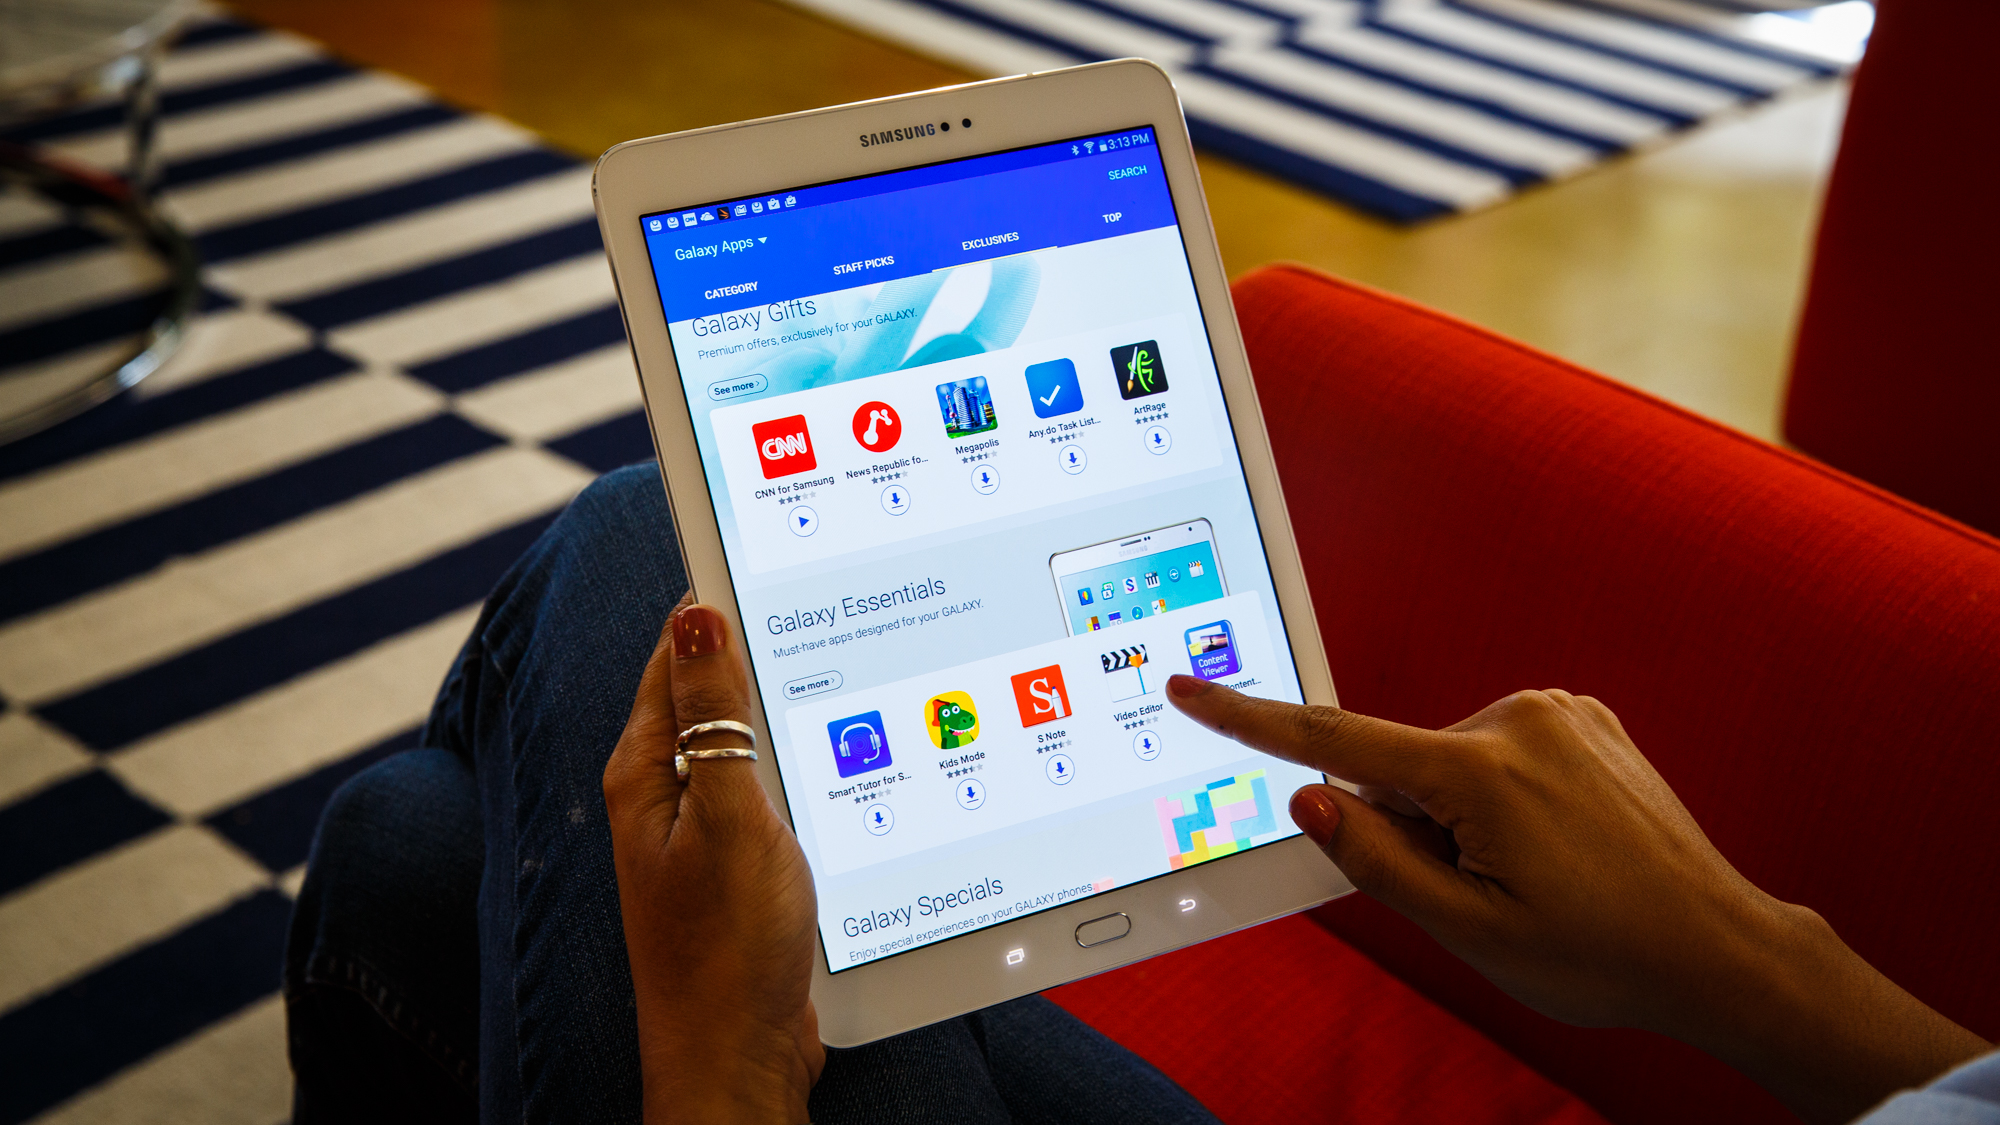
Option 4: Using Third-Party Apps
If the built-in methods of capturing screenshots on your Android tablet don’t meet your needs or if you’re looking for more advanced features and flexibility, you can consider using third-party apps specifically designed for screenshotting. These apps offer additional functionality and customization options that may not be available through the default methods. Here’s how you can use third-party apps to take screenshots:
Step 1: Open the Google Play Store on your Android tablet.
Step 2: Search for “screenshot apps” or “screen capture apps” in the search bar. You’ll find a range of apps available, each with different features and user ratings.
Step 3: Browse through the apps and read the descriptions, reviews, and ratings to find one that suits your needs and preferences. Pay attention to the app’s features, user interface, and compatibility with your tablet model and operating system version.
Step 4: Once you’ve selected an app, tap on the “Install” or “Get” button to download and install it on your tablet. Follow the on-screen instructions to complete the installation process.
Step 5: Open the third-party screenshot app on your tablet. Each app may have a different user interface and set of features.
Step 6: Familiarize yourself with the app’s options and settings for capturing screenshots. Most screenshot apps provide various methods to trigger a screenshot, additional editing tools, and options for sharing or saving the captured images.
Step 7: Use the app’s designated method or shortcut to take a screenshot of the desired screen or content on your tablet. The process may involve tapping on a specific button, using a gesture, or selecting from different capture modes.
Step 8: Once the screenshot is captured, you can follow the app’s instructions to access, edit, or save the screenshot as per your requirements.
Third-party screenshot apps offer a wide range of features and customization options. Some apps may provide advanced editing tools, the ability to capture scrolling screenshots, or even the option to record screen videos. Exploring these apps allows you to tailor your screenshotting experience to your specific needs and preferences.
Just keep in mind that when using third-party apps, it’s important to be mindful of app permissions and to choose reputable apps from trusted developers. Reading user reviews and checking the app’s ratings and reviews can help you make an informed decision.
Conclusion
Taking screenshots on your Android tablet is a useful skill that allows you to capture and save important information, share content with others, troubleshoot technical issues, and enhance your creative projects. In this article, we explored four different methods for capturing screenshots on your Android tablet, including using the physical buttons, gestures, the notification panel, and third-party apps.
Using the physical buttons is a straightforward and common method that doesn’t require any additional apps or settings. It’s great for users who prefer a tactile approach. However, if your tablet supports gestures, using palm swipes or edge swipes can provide a more intuitive and touch-friendly way to capture screenshots.
Alternatively, using the notification panel allows for quick and convenient screenshotting without the need for physical buttons or gestures. It’s especially handy when you want to access multiple screenshots or prefer an on-screen method.
For those seeking more features and customization options, third-party screenshot apps offer advanced editing tools, different capture modes, and additional functionality. These apps can be a great choice for users who want more control over their screenshots and the ability to capture scrolling screenshots or record screen videos.
Remember, the specific methods and options may vary depending on your Android tablet model and operating system version. It’s always a good idea to consult your tablet’s user manual or do a quick online search for device-specific instructions.
Now that you have learned various methods for taking screenshots on your Android tablet, you can choose the method that suits you best and start capturing and saving those memorable moments, important information, or creative endeavors.