Introduction
Tablets have become an essential part of our daily lives, providing us with a convenient way to browse the internet, watch videos, play games, and much more. One common task that tablet users often need to perform is capturing screenshots, which can be helpful for sharing information, troubleshooting issues, or simply capturing a memorable moment.
If you own an RCA tablet and are unsure how to take a screenshot, you’ve come to the right place. In this article, we will explore three different methods that you can use to capture screenshots on your RCA tablet.
Whether you prefer using the physical buttons, utilizing the built-in screen capture feature, or relying on third-party apps, there is a method that will suit your needs and preferences.
Before we dive into the details, it’s important to note that the methods shared in this article are specifically for RCA tablets. While these methods may work on other Android devices, it is always a good idea to consult your device’s user manual or perform an online search for specific instructions tailored to your tablet.
Now, let’s get started with the first method: using the physical buttons on your RCA tablet to capture a screenshot.
Method 1: Using the Physical Buttons
If you prefer a hands-on approach, taking a screenshot on your RCA tablet is as simple as pressing a combination of physical buttons. Here’s how:
- Locate the power button and the volume down button on your RCA tablet. These buttons are usually found on the sides of the device.
- Prepare the screen that you want to capture. Ensure that all the content you want to include in the screenshot is visible on the screen.
- Press and hold the power button and the volume down button simultaneously. Make sure to press both buttons at the same time and hold them for a few seconds.
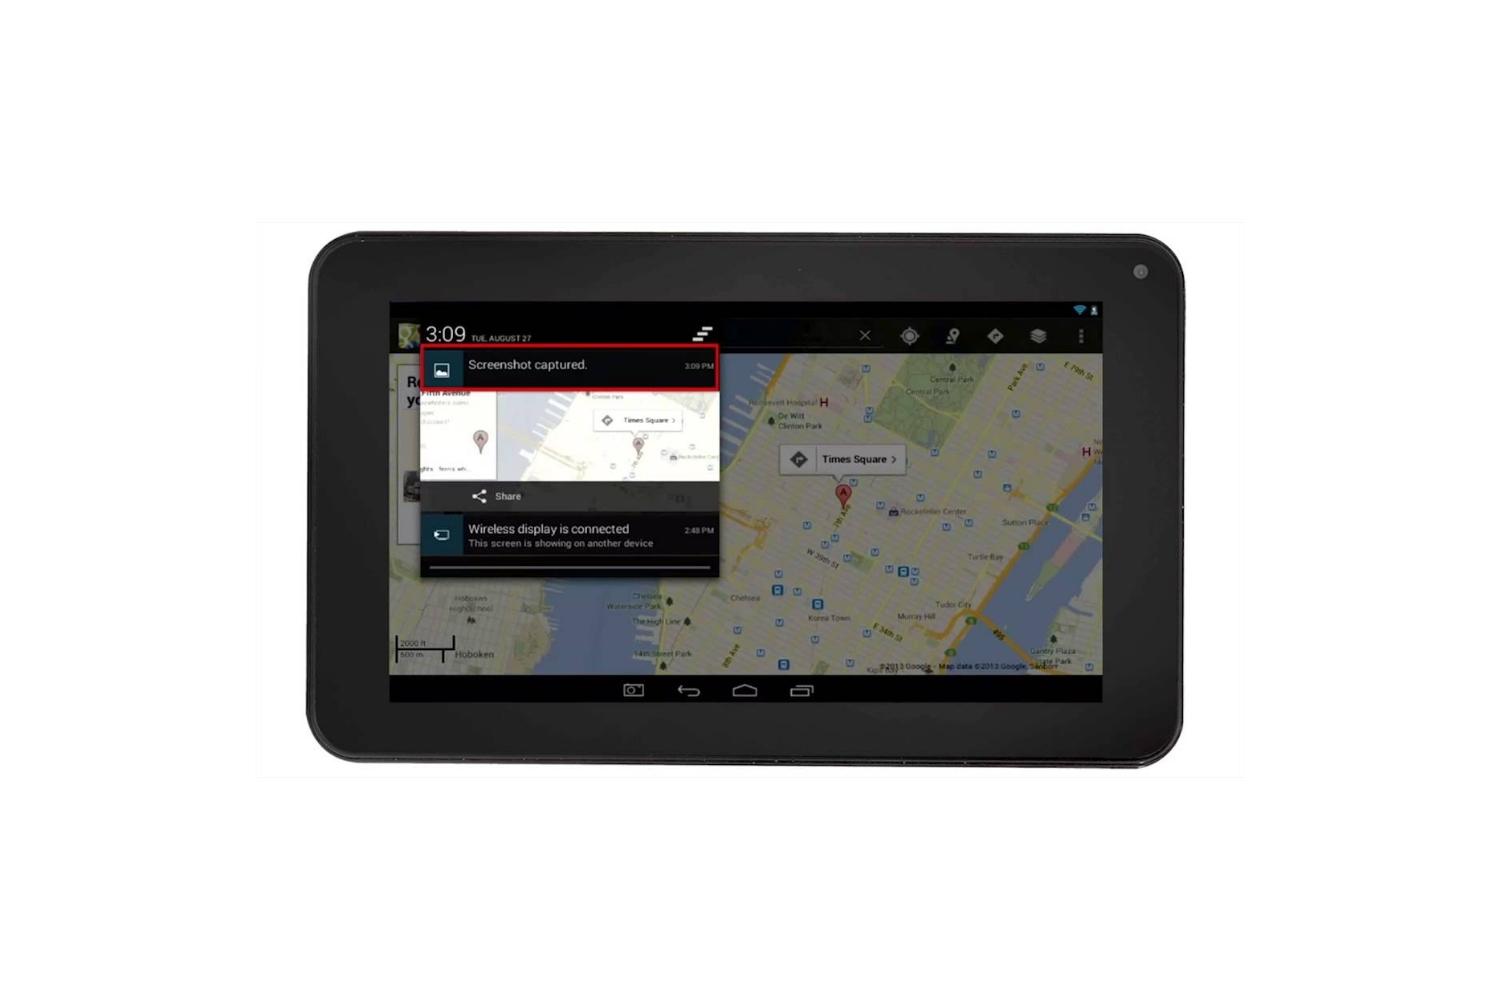
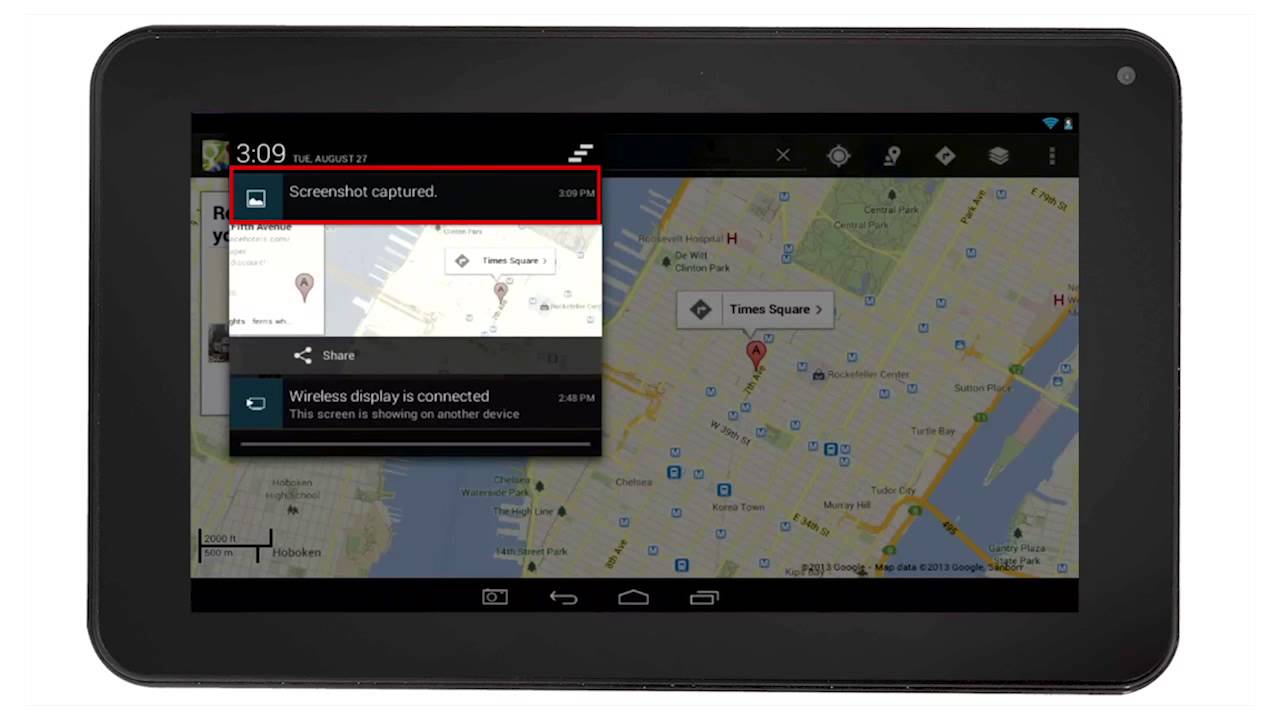
- You will see a brief animation or hear a sound indicating that the screenshot has been successfully taken.
- Access your screenshots by opening the Photos or Gallery app on your RCA tablet. The screenshot should be saved in the Screenshots folder or a similar location.
It’s important to note that the button combination to capture a screenshot may vary slightly depending on the model of your RCA tablet. If the above method doesn’t work for you, consider trying different button combinations such as power button + home button or power button + volume up button. Consult your device’s user manual or perform an online search for specific instructions if needed.
Taking a screenshot using the physical buttons is a quick and straightforward method that works on most Android devices, including RCA tablets. However, if you find this method inconvenient or prefer a more streamlined approach, let’s explore another method using the built-in screen capture feature on your RCA tablet.
Method 2: Using the Screen Capture Feature
If you prefer a simpler way to take screenshots on your RCA tablet without using physical buttons, you can utilize the built-in screen capture feature. Here’s how:
- Ensure that the screen you want to capture is displayed on your RCA tablet.
- Locate the Power/Sleep button on your tablet. This button is typically located on the top or side of the device.
- Press and hold the Power/Sleep button until a menu appears on the screen.
- From the menu, look for the “Screenshot” or “Capture” option, and tap on it.
- You will see a notification or hear a sound confirming that the screenshot has been captured.
- Access your screenshots by opening the Photos or Gallery app on your RCA tablet. The screenshot should be saved in the Screenshots folder or a similar location.
Please note that the method to capture a screenshot using the screen capture feature may vary slightly depending on the version of Android running on your RCA tablet. If you’re unable to find the “Screenshot” or “Capture” option in the menu, consult your tablet’s user manual or perform an online search for specific instructions tailored to your device.
The built-in screen capture feature provides a convenient and straightforward way to capture screenshots on your RCA tablet. However, if you’re looking for additional features and customization options, you may consider using third-party apps. Let’s explore this alternative in the next method.
Method 3: Using Third-Party Apps
If you’re looking for more advanced features, customization options, or additional functionality for capturing screenshots on your RCA tablet, using third-party apps is an excellent option. Here’s how you can use third-party apps to take screenshots:
- Go to the Google Play Store on your RCA tablet and search for “screenshot apps” or “screen capture apps.”
- Browse through the available apps and read reviews to find one that fits your requirements and has positive feedback from users.
- Once you’ve selected an app, tap on the “Install” or “Get” button to download and install it on your RCA tablet.
- Open the app and follow the on-screen instructions or settings to set it up according to your preferences.
- When you’re ready to take a screenshot, open the screen or content you want to capture and use the specified method within the app to take the screenshot.
- Access your screenshots within the app or find them in the Photos or Gallery app on your RCA tablet, depending on how the app saves them.
Using third-party apps for capturing screenshots gives you more control over the process and often offers additional features like editing, annotating, or sharing options. Some popular third-party apps for Android include “Screenshot Easy,” “Screenshot Touch,” and “Screenshot Capture.”
Before installing a third-party app, make sure to read user reviews, check the app’s compatibility with your RCA tablet, and be cautious of any potential privacy or security risks. It’s always a good practice to download apps from trusted sources and to understand the permissions the app requires before granting access.
With third-party apps, you can tailor your screenshot-taking experience on your RCA tablet according to your unique preferences and needs.
Conclusion
Capturing screenshots on your RCA tablet is a useful and straightforward task that can come in handy for various purposes. In this article, we explored three different methods to take screenshots on your RCA tablet: using the physical buttons, utilizing the screen capture feature, and employing third-party apps.
If you prefer a hands-on approach, using the physical buttons is a reliable method. Simply press and hold the power button and volume down button simultaneously to capture a screenshot.
For a more streamlined experience, the screen capture feature built into your RCA tablet provides an easy way to capture screenshots without using physical buttons. Just press and hold the power/sleep button, access the menu, and select the “Screenshot” or “Capture” option.
If you desire additional features or customization options, third-party apps are available on the Google Play Store. These apps offer advanced functionality such as editing, annotating, and sharing options, providing flexibility and enhanced control over your screenshot-taking experience.
Remember to consult your tablet’s user manual or perform an online search for specific instructions tailored to your RCA tablet model and version of Android.
By following these methods, you’ll be able to capture screenshots effortlessly on your RCA tablet, enabling you to save and share important information, troubleshoot issues, or preserve memorable moments.
So go ahead and start capturing those screenshots on your RCA tablet with confidence!