Introduction
Taking a screenshot on your RCA tablet can be a useful way to save and share information, capture memorable moments, or troubleshoot technical issues. Whether you’re a tech-savvy user or a beginner, this guide will walk you through the various methods to take a screenshot on your RCA tablet.
RCA tablets are equipped with different models and operating systems, including Android and Windows. Therefore, the methods for taking screenshots may vary slightly depending on the tablet’s specific model and software version. However, we will cover the most common methods that can be applied to most RCA tablet devices.
In this article, we will explore three main methods to take a screenshot on your RCA tablet. The first method involves pressing specific buttons on your device, the second method utilizes the screenshot option in the notification panel, and the third method relies on third-party apps for screen capture. We will also provide troubleshooting tips to address any potential issues you may encounter while attempting to take screenshots.
Whether you want to capture a funny meme, save important information, or demonstrate a problem to technical support, taking screenshots can be an invaluable tool in today’s digital age. So, let’s dive into the different methods and find the one that suits your needs best.
Method 1: Pressing the Power and Volume Down buttons together
One of the most common and straightforward methods to take a screenshot on your RCA tablet is by simultaneously pressing the Power and Volume Down buttons. This method is widely used across different Android devices and is compatible with most RCA tablets.
To begin, locate the Power button, usually located on the side of your RCA tablet. It may be labeled with a power icon (a circle with a vertical line) or the word “Power.” Next, find the Volume Down button, which is typically positioned near the Power button or on the opposite side of the device. It might be labeled with a minus (-) symbol or the word “Volume Down.”
Once you have identified the Power and Volume Down buttons, follow these step-by-step instructions to capture a screenshot on your RCA tablet:
- Open the screen or app that you want to capture.
- Simultaneously press and hold the Power button and the Volume Down button. Be sure to press and hold both buttons at the same time.
- Keep holding the buttons for a few seconds until you see a notification or hear a capture sound, indicating that the screenshot has been successfully taken.
- Release the buttons once the screenshot is captured.
Upon completion, the screenshot will be saved in your tablet’s gallery or screenshots folder. You can access it by opening the Gallery app or any file manager app on your RCA tablet.
It’s essential to ensure that you press both buttons simultaneously and hold them for a few seconds to guarantee a successful screenshot. If executed correctly, you should see a visual confirmation or hear an audible cue that the screenshot has been captured.
This method is quick, simple, and does not require any additional apps or settings adjustments. However, if this method doesn’t work for your RCA tablet or you encounter any difficulties, don’t worry. There are alternative methods that you can try, which we will cover in the following sections.
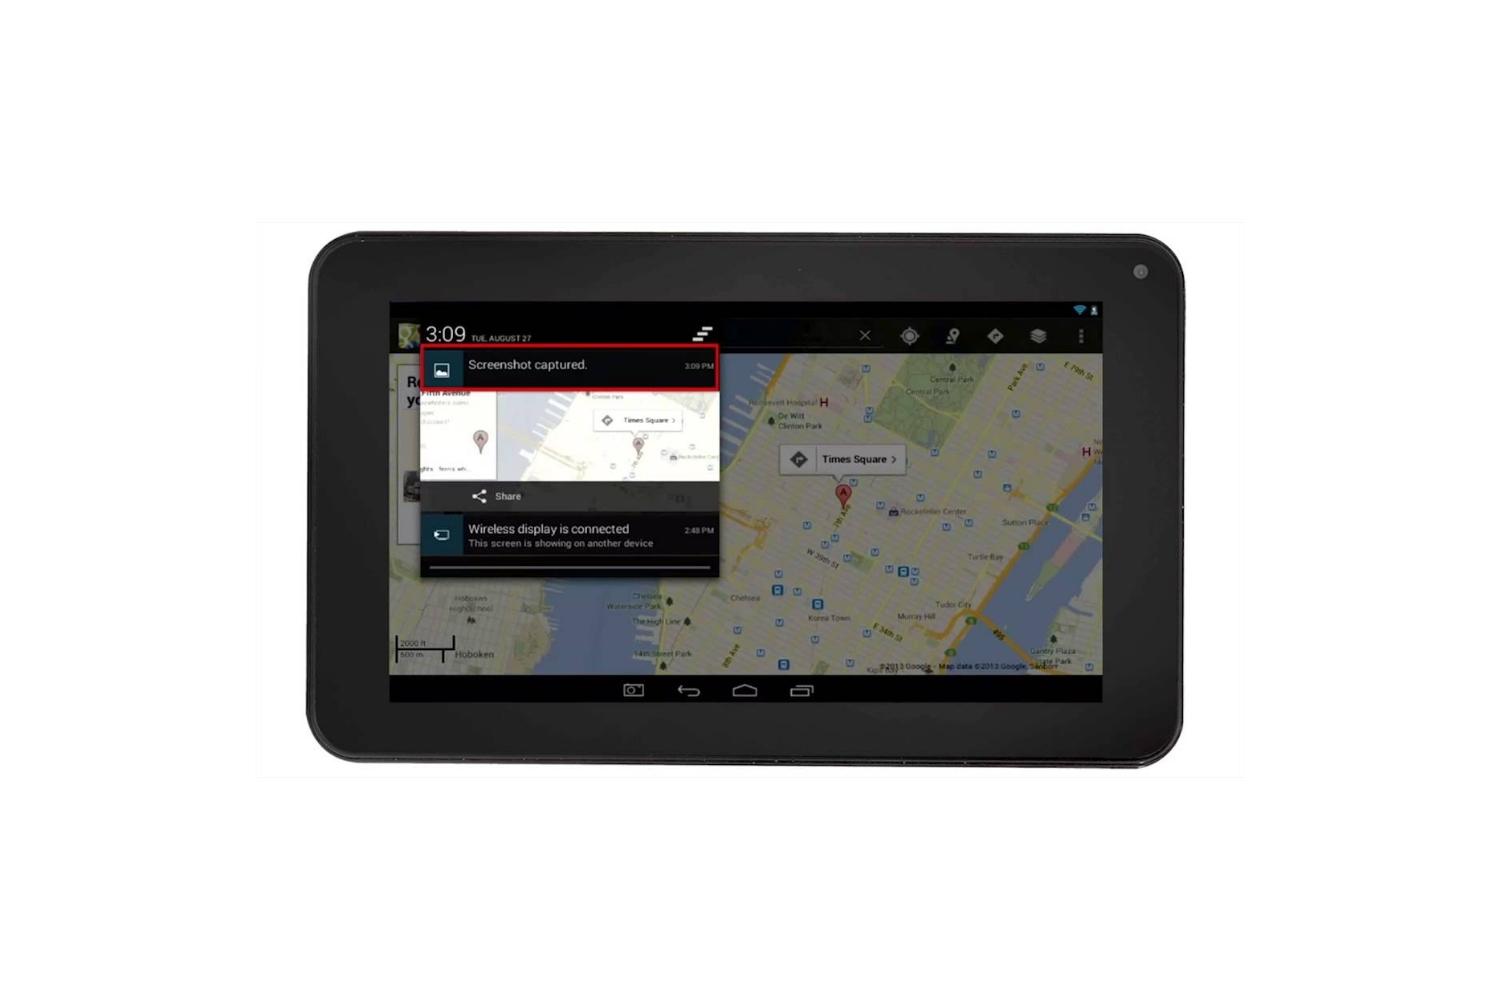
Method 2: Using the Screenshot Option in the Notification Panel
If you prefer a more convenient and quick way to take screenshots on your RCA tablet, utilizing the screenshot option in the notification panel is a great option. This method is available on devices running Android version 4.0 or higher, including most RCA tablets.
To use this method, follow the step-by-step instructions below to capture a screenshot on your RCA tablet:
- Open the screen or app that you want to capture on your RCA tablet.
- Swipe down from the top of the screen to reveal the notification panel.
- Look for the “Screenshot” or “Capture” icon in the notification panel. It typically resembles a phone or tablet screen and may vary slightly depending on your tablet’s software version.
- Tap on the “Screenshot” or “Capture” icon. This action will instantly capture a screenshot of the current screen on your RCA tablet.
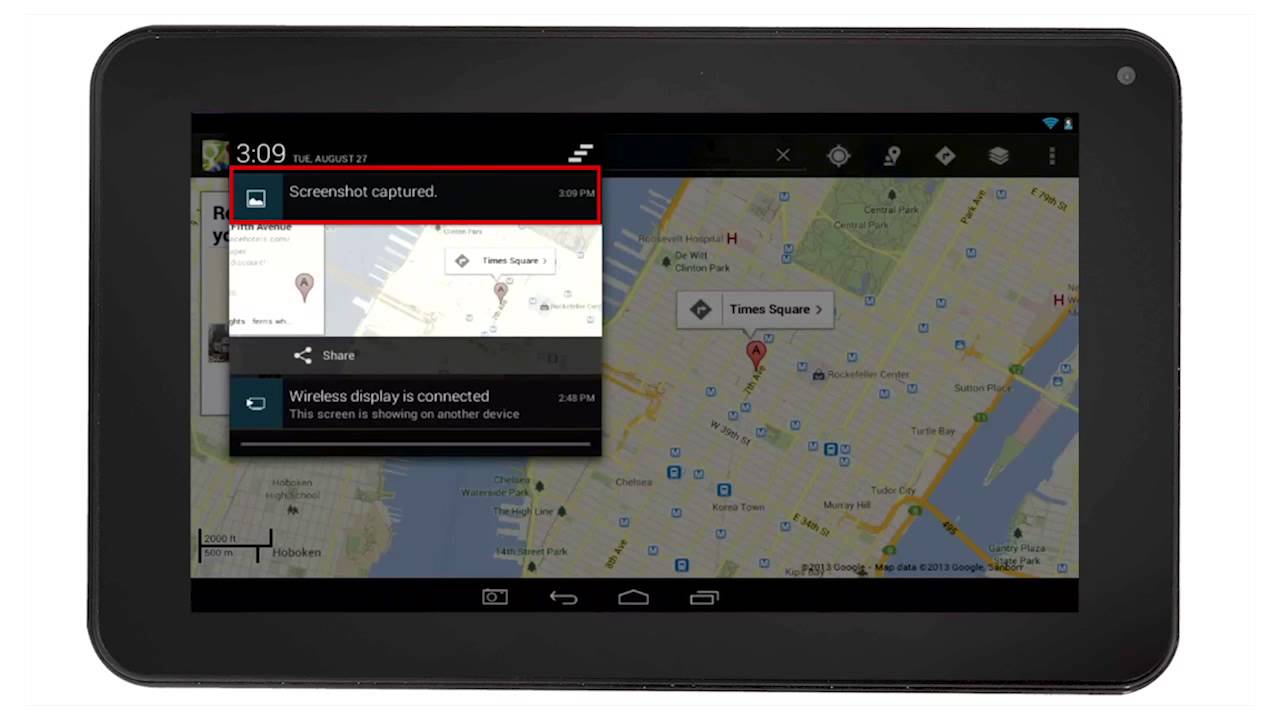
Once the screenshot is taken, you will receive a visual confirmation or a notification indicating that the screenshot has been successfully captured. The captured image will be saved in your tablet’s gallery or screenshots folder, allowing you to access it at any time.
The screenshot option in the notification panel provides a convenient alternative for taking screenshots without the need to press physical buttons. This method allows for quick and easy access to the screenshot feature, making it ideal for capturing spontaneous moments or capturing multiple screenshots in a short period.
However, it’s important to note that the availability of the screenshot option in the notification panel may vary depending on the specific software version and customizations made by RCA on your tablet. If you are unable to locate the screenshot icon or encounter any difficulties, refer to your tablet’s user manual or consider trying the other methods outlined in this article.
Now that we have covered the second method, let’s move on to the third method, which involves using third-party apps to capture screenshots on your RCA tablet.
Method 3: Using Third-Party Apps for Screen Capture
If the previous methods didn’t work for your RCA tablet or you’re looking for additional features and customization options, using third-party apps for screen capture is another viable option. There are various apps available on the Google Play Store that offer advanced screenshot capabilities beyond the native options provided by your tablet’s operating system.
To use third-party apps for screen capture, follow these steps:
- Open the Google Play Store app on your RCA tablet.
- In the search bar, type “screenshot app” or “screen capture app” and hit Enter.
- Browse through the list of apps and read their descriptions, user reviews, and ratings to find the one that suits your needs and has positive feedback.
- Select the desired app, tap on the “Install” button, and follow the on-screen instructions to download and install the app on your RCA tablet.
- Once the app is installed, open it and familiarize yourself with the various features and options it offers.
- Use the app’s interface or designated buttons to capture screenshots according to the provided instructions. The process may vary depending on the specific app you have chosen.
Third-party apps can provide additional functionalities such as screen recording, scrolling screenshots, annotating capabilities, and more. You can explore these apps to find the one that aligns with your preferences and requirements.
It’s important to note that while third-party apps can enhance your screenshot-taking experience, they may also come with ads, in-app purchases, or additional permissions that the native screenshot options do not require. Make sure to review the app’s permissions and user reviews before installing to ensure it is reputable and trustworthy.
If you decide to use a third-party app, it’s recommended to keep a balance between functionality and device performance. Some apps might require more system resources, potentially affecting your tablet’s overall speed and performance. Test different apps and find the one that offers the best balance for your RCA tablet.
Now that you are familiar with three different methods for taking screenshots on your RCA tablet, you have various options to choose from based on your preferences and the specific capabilities of your device. Whether you opt for the button combination, the notification panel shortcut, or a third-party app, capturing screenshots on your RCA tablet has never been easier.
Troubleshooting Tips
While taking screenshots on your RCA tablet is generally a straightforward process, you may encounter some common issues or challenges along the way. Here are some troubleshooting tips to help you overcome any difficulties and ensure a successful screenshot capture:
- Check the button combination: If you’re using the button combination method, make sure you’re pressing the Power and Volume Down buttons simultaneously and holding them for a few seconds until you see a notification or hear a capture sound. Review the user manual or RCA’s support website for specific instructions related to your tablet model.
- Ensure sufficient storage space: If the screenshot is not saving or the tablet displays a “Storage Full” message, check if your device has enough available storage space. Delete unnecessary files or move them to an external storage device to free up space for new screenshots.
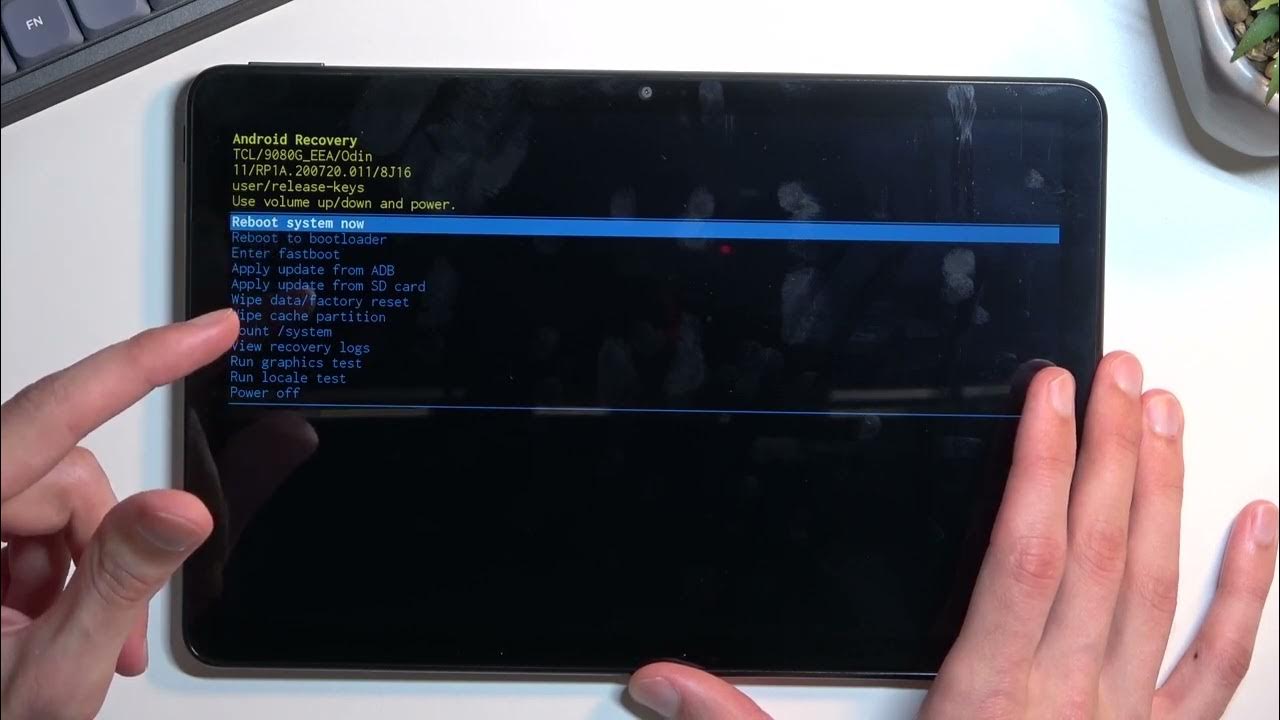
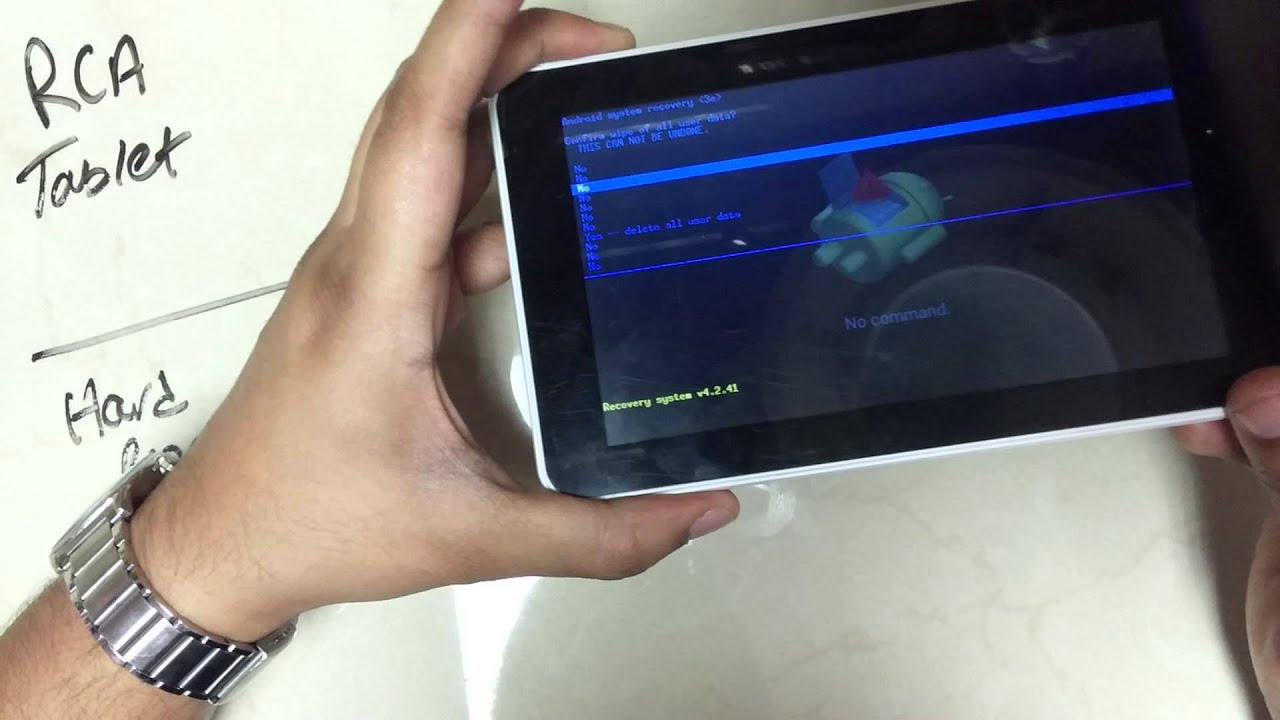
- Restart your tablet: Sometimes, a quick restart can resolve minor software glitches that may affect the screenshot function. Power off your tablet, wait for a few seconds, and then power it back on. Attempt to take a screenshot again after rebooting.
- Update your software: Ensure that your RCA tablet is running the latest software version. Software updates often include bug fixes and improvements, which may address any issues with the screenshot feature. Check for software updates in your tablet’s Settings app and install them if available.
- Clear cache and data: If you are experiencing persistent issues with the screenshot function, clearing the cache and data of the respective app can help. Go to Settings > Apps > [App Name] and tap on “Clear Cache” and “Clear Data.” This action will remove any temporary files or settings related to the app’s functionality.
- Try alternative methods: If the button combination or notification panel methods do not work, try using a third-party app specifically designed for screen capture. Refer to the previous section for instructions on finding and installing compatible apps.
- Contact support: If all else fails or you encounter specific technical issues with your RCA tablet, reach out to RCA’s customer support or consult their online support resources. They can provide further assistance and guidance tailored to your device.
By following these troubleshooting tips, you can overcome common obstacles and ensure a smooth experience when capturing screenshots on your RCA tablet. Remember, each tablet model may have variations in functionality and software, so it’s important to consult the user manual or specific support resources provided by RCA for precise troubleshooting instructions.
Conclusion
Taking screenshots on your RCA tablet is a valuable skill that allows you to capture and preserve important information, share memorable moments, or troubleshoot technical issues. In this article, we explored three different methods for taking screenshots on your RCA tablet: pressing the Power and Volume Down buttons together, utilizing the screenshot option in the notification panel, and using third-party apps for screen capture.
The first method, pressing the Power and Volume Down buttons simultaneously, is a reliable and widely applicable technique that works on most RCA tablets. It offers a simple and quick way to capture screenshots without the need for any additional apps.
For those looking for convenience and ease of access, the second method, using the screenshot option in the notification panel, provides a hassle-free way to capture screenshots with just a swipe and a tap.
Lastly, the third method involves using third-party apps for screen capture, which offer advanced features and customizations beyond the built-in options. These apps can provide additional functionalities such as screen recording and scrolling screenshots, allowing for more flexibility and control.
If you encounter any issues while attempting to take screenshots, we provided troubleshooting tips to help you overcome common obstacles. Remember to check the button combination, ensure sufficient storage space, update your software, clear cache and data, try alternative methods, and seek support if needed.
Regardless of which method you choose, capturing screenshots on your RCA tablet is a skill worth mastering. It enables you to capture and share moments, save important information, and troubleshoot effectively. So go ahead, try out the different methods, and make the most out of your RCA tablet’s screenshot capabilities.