Introduction
Being able to take a screenshot is a handy skill to have, especially when you want to capture and save important information, memorable moments, or interesting content on your Surface tablet. Whether you need to take a screenshot for work, school, or personal use, there are several methods available to capture the screen on your Surface device.
In this article, we will explore four different methods to take a screenshot on a Surface tablet. These methods range from using hardware buttons to utilizing built-in tools like the Snipping Tool and the Windows Game Bar. We will also explore how to take a screenshot with the Surface Pen, a stylus that comes with certain Surface models.
By the end of this article, you will have a solid understanding of how to take screenshots on your Surface tablet, helping you to capture and share information and moments that matter to you. So, let’s dive in and explore these four methods in detail.
Method 1: Using Hardware Buttons
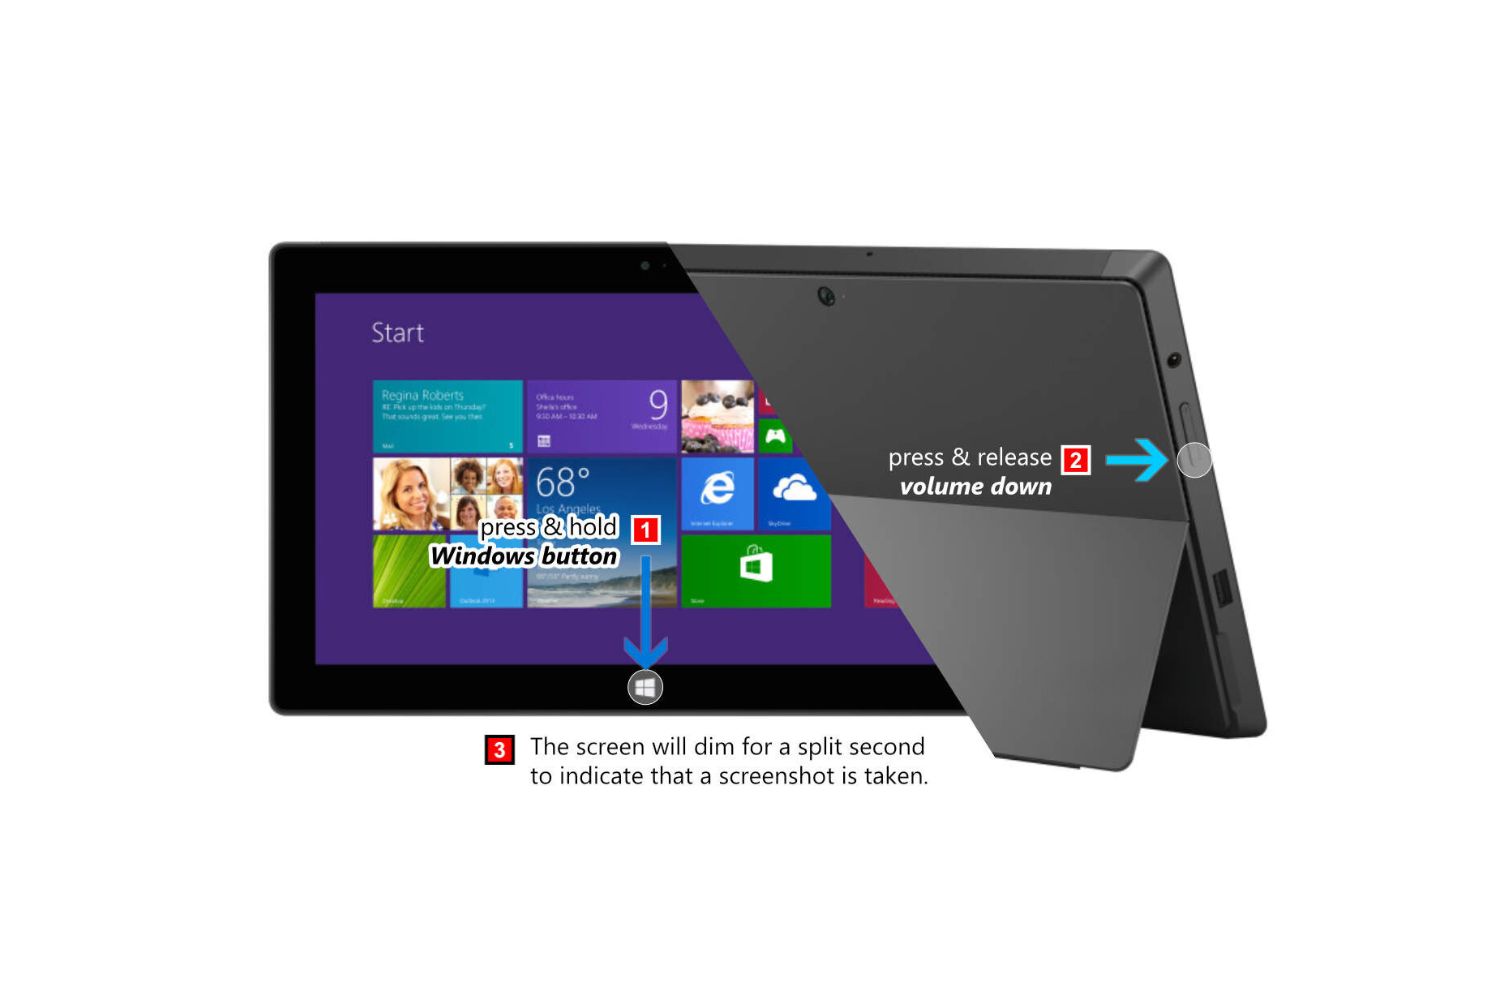
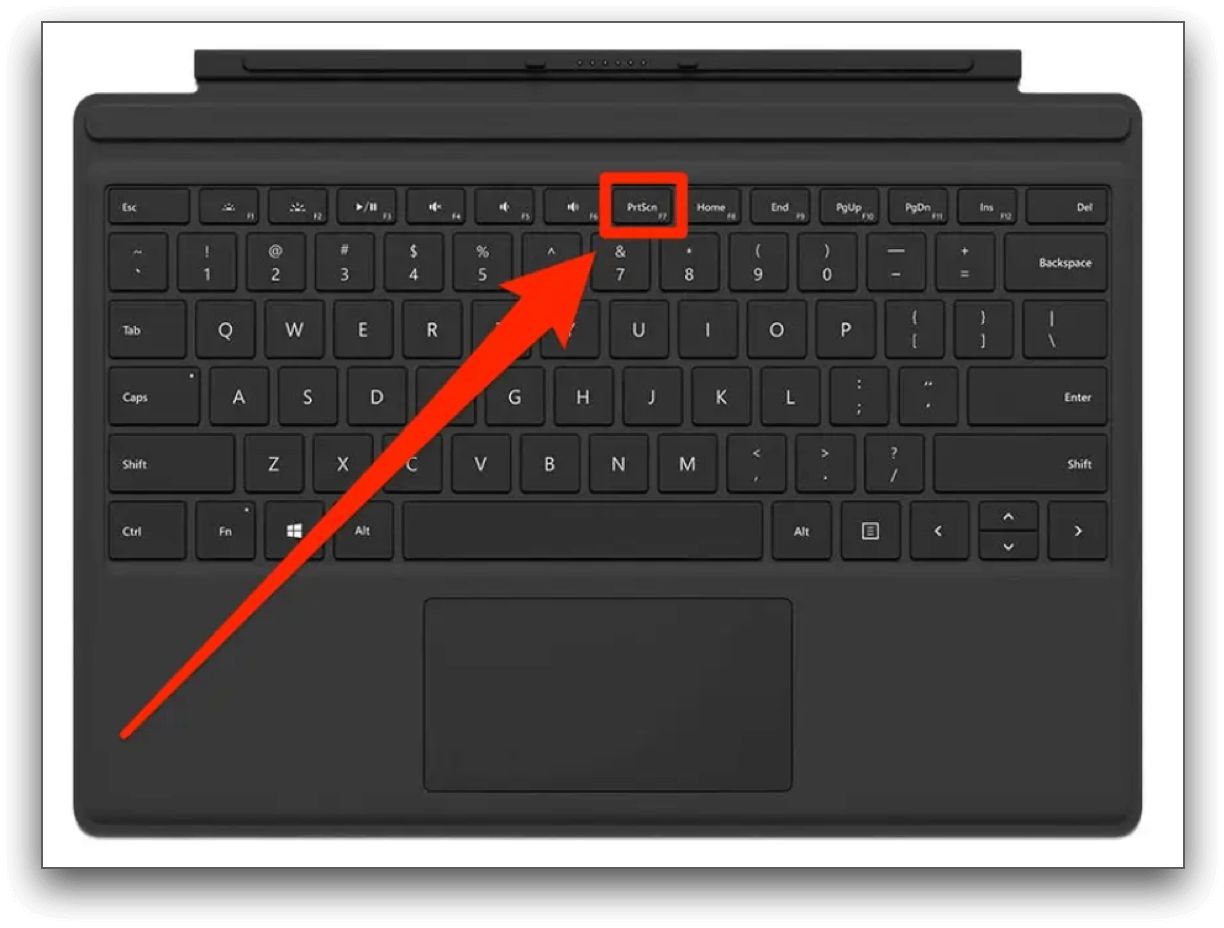
One of the simplest and quickest ways to take a screenshot on your Surface tablet is by using the hardware buttons. Follow the steps below to capture your screen:
- Locate the Power button and the Volume Up button on your Surface tablet.
- Navigate to the page or screen you want to capture.
- Simultaneously press and hold the Power button and the Volume Up button for a few seconds.
- You will see a brief animation or hear a camera shutter sound, indicating that the screenshot has been successfully taken.
- Open the Screenshots folder in the Pictures library to view and access your captured screenshot.
Whether you’re using a Surface Pro, Surface Go, or any other Surface model, this method remains consistent, making it an easy and reliable option for capturing screenshots. It’s worth noting that this method captures the entire screen, including the taskbar and any open windows or applications.
Using the hardware buttons to take a screenshot is particularly useful if you need to capture something quickly or if you want to capture an error message or a specific moment during gameplay. However, if you prefer more flexibility and control over the content you capture, you may want to explore the other methods discussed in this article.
Now that we’ve covered how to take a screenshot using hardware buttons, let’s move on to Method 2: Using the Snipping Tool.
Method 2: Using the Snipping Tool
If you’re looking for more advanced screenshot capabilities, the Snipping Tool is a built-in feature in Windows that offers greater flexibility and customization options. Here’s how you can use the Snipping Tool on your Surface tablet:
- Open the Start menu and search for “Snipping Tool”.
- Click on the Snipping Tool app to open it.
- Click on the “New” button in the Snipping Tool window.
- Drag your cursor around the area you want to capture or select a specific window if needed.
- Release the mouse button to capture the snip.
- You can make annotations, highlight areas, or save the snip directly from the Snipping Tool interface.
The Snipping Tool allows you to capture specific parts of the screen, rather than the entire screen. This can be helpful when you only need to capture a specific portion of a webpage, an image, or any other content on your screen. Additionally, the Snipping Tool provides basic editing features that allow you to annotate and highlight certain areas of your screenshot.
Once you have captured and edited your screenshot using the Snipping Tool, you can save it in various image formats, such as PNG, JPEG, or GIF. This gives you the flexibility to use the screenshot in different contexts, whether it’s sharing it with others, including it in a document, or using it for reference purposes.
The Snipping Tool offers a user-friendly and versatile approach to taking screenshots on your Surface tablet. However, if you’re interested in capturing gameplay or utilizing more advanced features, you may find Method 3: Using the Windows Game Bar more suitable.
Method 3: Using the Windows Game Bar
If you enjoy gaming on your Surface tablet and want to capture gameplay moments or create video tutorials, the Windows Game Bar is a powerful tool at your disposal. Here’s how you can use the Windows Game Bar to capture screenshots:
- While playing your desired game or running any other application, press the Windows key + G to open the Windows Game Bar.
- Click on the camera icon in the Game Bar or use the keyboard shortcut Windows key + Alt + PrtScn to capture a screenshot.
- The screenshot will be automatically saved in the Captures folder within the Videos library on your Surface tablet.
In addition to capturing screenshots, the Windows Game Bar offers various features for recording and broadcasting gameplay, controlling audio settings, and interacting with other applications. It’s a valuable tool for gamers who want to share their gaming experiences with others or create video content.
By default, the Windows Game Bar captures the entire screen, including the game window and any other open applications or windows. However, you can also adjust the settings within the Game Bar to capture only the game window or a specific area of the screen.
With the Windows Game Bar, you can effortlessly capture and share your gaming achievements, memorable moments, or even create tutorials. It provides a seamless and integrated solution for gamers on Surface tablets. However, if you prefer using a stylus to take screenshots, Method 4: Using the Surface Pen might be of interest to you.
Method 4: Using the Surface Pen
If you own a Surface tablet that comes with a Surface Pen, taking screenshots becomes even more intuitive and convenient. The Surface Pen offers a unique way to capture your screen with just a few simple steps:
- First, ensure that your Surface Pen is connected to your Surface tablet and the battery is charged.
- Navigate to the screen or content you want to capture.
- Hold the top button on the Surface Pen and then tap the screen with the pen tip.
- The screen will dim briefly, indicating that a screenshot has been successfully taken.
- The screenshot will be saved in the Screenshots folder within the Pictures library.
The Surface Pen method allows you to take screenshots with precision and control. It’s particularly useful when you want to capture a specific part of the screen or annotate directly on the screen before taking a screenshot.
In addition to taking screenshots, the Surface Pen offers a range of other functionalities that can enhance your productivity and creativity on your Surface tablet. With pressure sensitivity and precise stylus input, you can create digital artwork, take handwritten notes, and navigate your device with greater accuracy.
Using the Surface Pen to take screenshots adds an extra level of interactivity and flexibility to your screen capture process. It’s a fantastic option for artists, designers, or anyone who wants to add a personal touch to their screenshots.
Now that we’ve explored four different methods to take screenshots on a Surface tablet, you have a variety of options to choose from based on your specific needs and preferences. Whether you prefer using hardware buttons for quick captures, the Snipping Tool for customized screenshots, the Windows Game Bar for gaming-related captures, or the Surface Pen for an interactive approach, you can easily capture and save important moments, information, and content on your Surface tablet.
Conclusion
Taking screenshots on your Surface tablet is a simple yet powerful feature that allows you to capture and save important information, memorable moments, and interesting content. Throughout this article, we have explored four different methods to take screenshots on your Surface device.
Method 1 involved using the hardware buttons, a quick and straightforward option that captures the entire screen. Method 2 introduced the Snipping Tool, providing greater flexibility and customization options for capturing specific areas of the screen. Method 3 discussed the Windows Game Bar, which is particularly useful for gamers who want to capture gameplay moments or create video tutorials. Lastly, Method 4 explored using the Surface Pen, offering precision and interactivity when capturing screenshots.
By now, you should have a solid understanding of how to take screenshots on your Surface tablet and which method suits your needs the best. Whether you prefer simplicity, customization, gaming-related captures, or an interactive approach, you can choose the method that aligns with your preferences and requirements.
Remember, each method offers unique features and advantages, so feel free to experiment and find the method that works best for you. Taking screenshots on your Surface tablet is a versatile skill that can aid in work, education, creativity, and personal enjoyment.
Now that you are equipped with the knowledge and tools to capture screenshots on your Surface tablet, go ahead and start preserving and sharing your favorite moments, important information, and engaging content with ease.