Why Show Busy on Google Calendar
Google Calendar is a powerful tool for managing your schedule and staying organized. One of its key features is the ability to show your availability to others. By setting your events and appointments as “busy” on Google Calendar, you can communicate to others that you are not available during those times. This can be incredibly helpful in several situations.
Firstly, showing busy on Google Calendar ensures that others are aware of your availability and respect your time commitments. Whether you have important work tasks, personal appointments, or family obligations, marking these as busy on your calendar lets others know that you are unavailable. This can save you from unnecessary interruptions or scheduling conflicts.
Secondly, displaying your busy time helps you achieve a better work-life balance. By setting boundaries and making it clear when you are not available, you can create dedicated time for yourself, your family, or for activities outside of work. This allows you to recharge and maintain a healthy work-life integration.
Furthermore, showing busy on Google Calendar can help you manage multiple roles or responsibilities. If you have multiple jobs, volunteer commitments, or personal projects, marking your busy time can prevent double-bookings and ensure that you have dedicated time for each responsibility.
Additionally, using the busy feature on Google Calendar can enhance collaboration and facilitate effective teamwork. When working on group projects or coordinating meetings with colleagues, sharing your busy schedule allows others to identify suitable time slots and schedule meetings without conflicts.
Lastly, by showing busy on your calendar, you can prioritize your own tasks and activities. It serves as a visual reminder of your commitments and helps you stay focused on your goals. This way, you can allocate appropriate time to important tasks and prevent overbooking your schedule.
In summary, showing busy on Google Calendar is essential for effective time management, maintaining work-life balance, enhancing collaboration, and prioritizing your tasks. By marking your unavailability, you can create boundaries, communicate your schedule to others, and ensure that you have dedicated time for various responsibilities and personal activities.
How to Set Up Busy Time on Google Calendar
Setting up busy time on Google Calendar is a straightforward process that allows you to indicate your unavailability during specific periods. Here’s a step-by-step guide on how to do it:
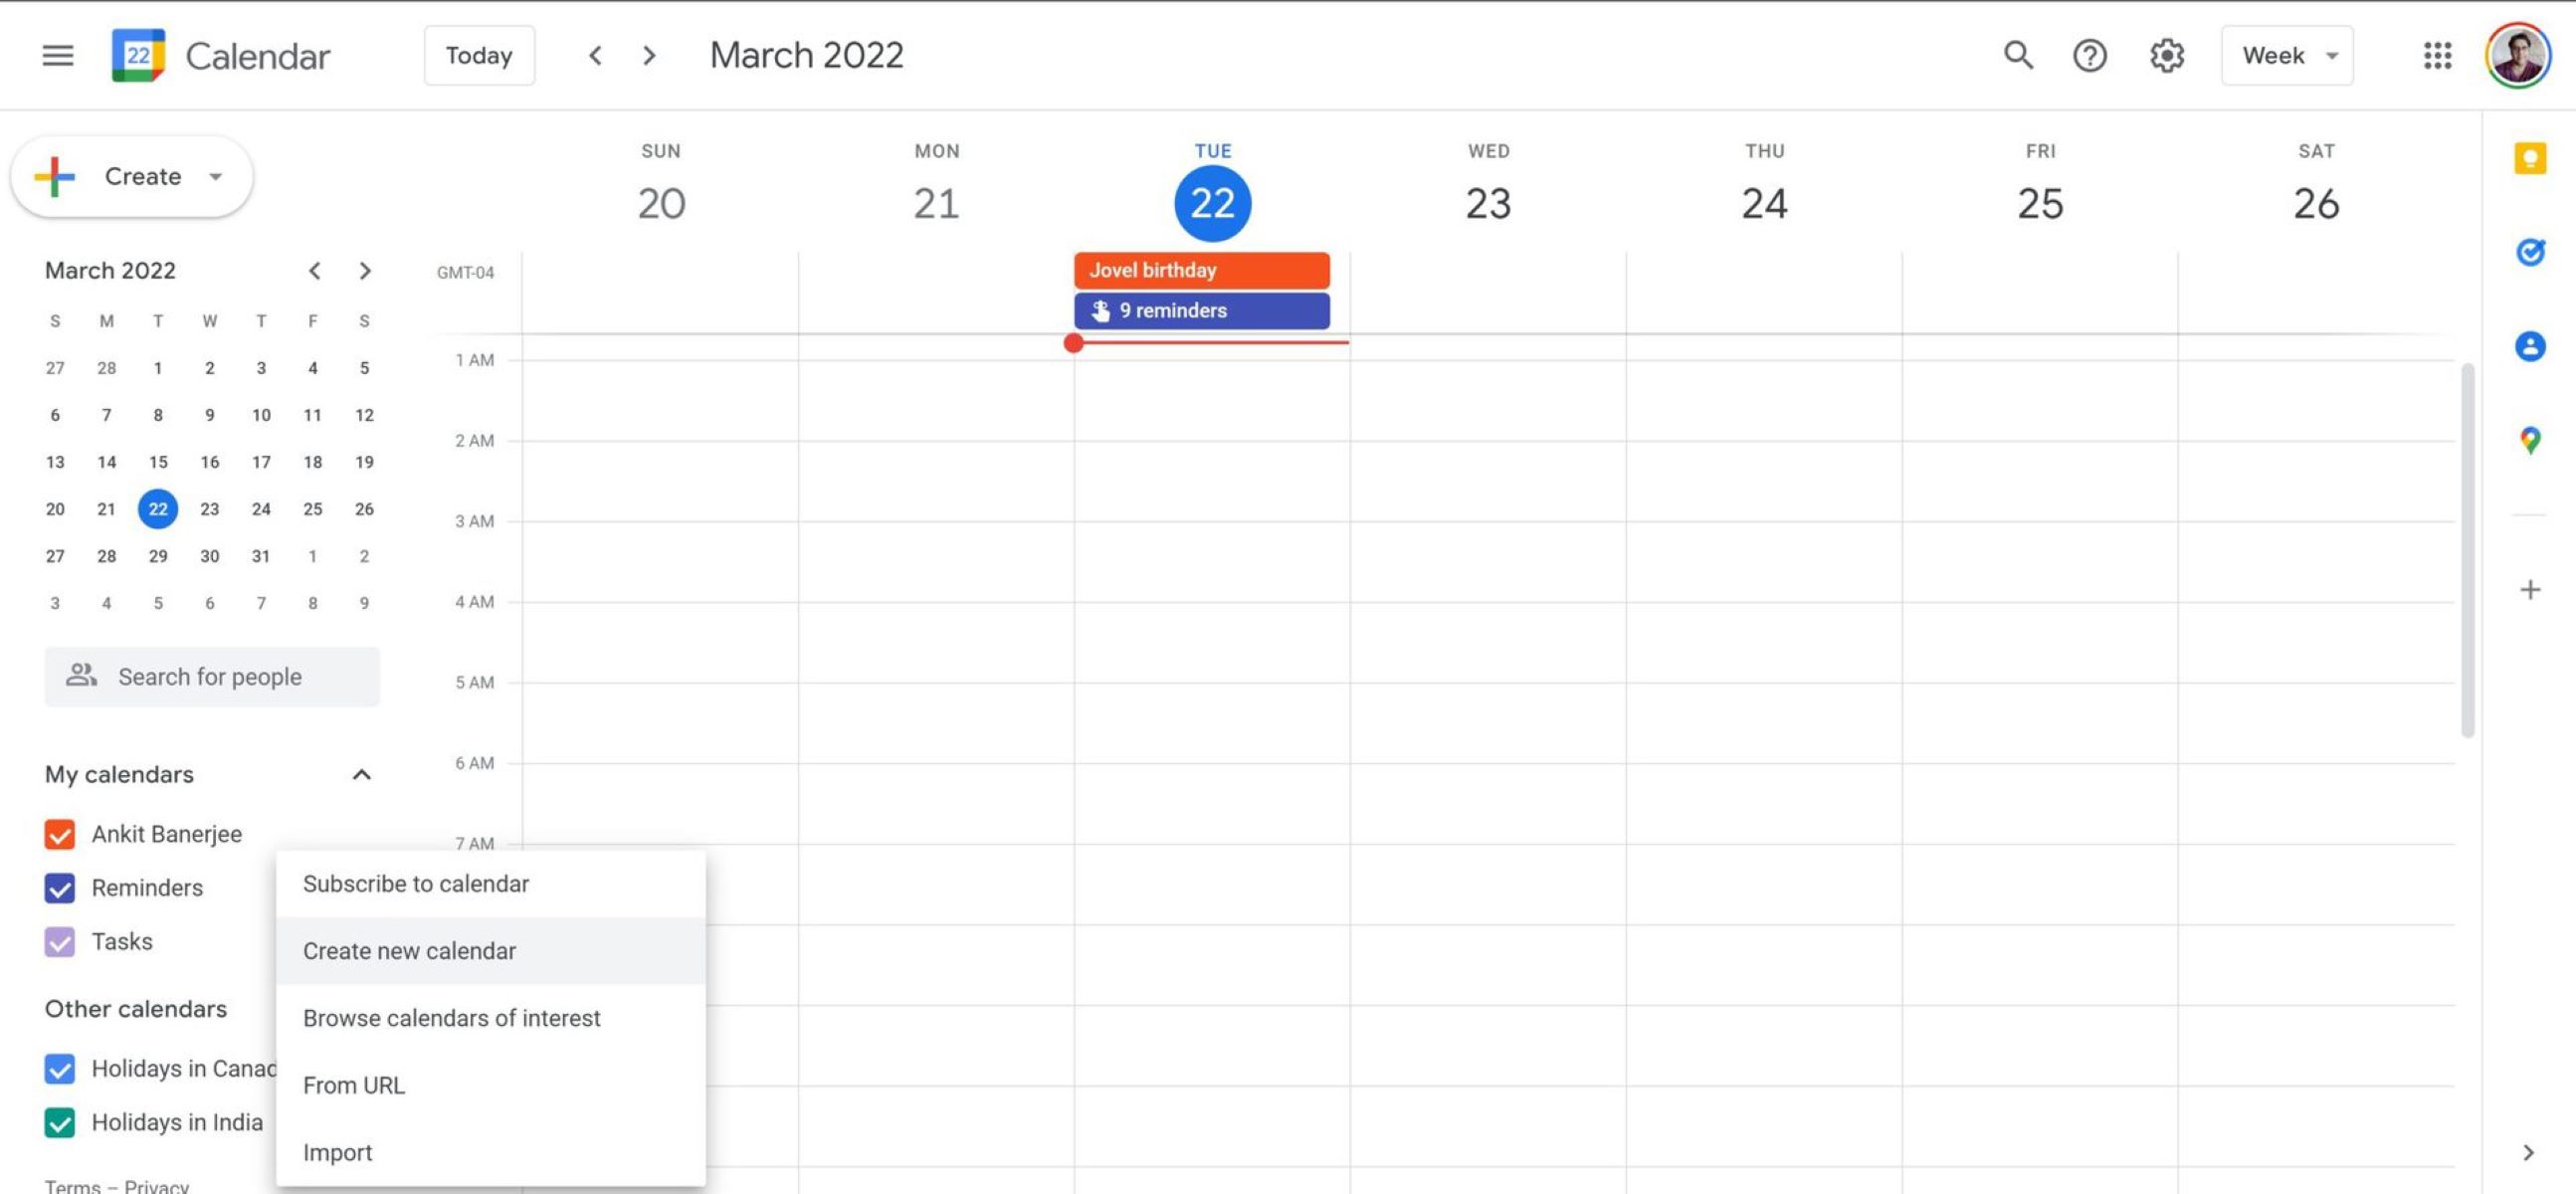
- Open Google Calendar on your computer or mobile device.
- Navigate to the day or time slot when you want to mark yourself as busy.
- Click or tap on the desired time slot to create a new event.
- In the event details window, enter the event title and any additional information.
- Click or tap on the “Busy” option located under the “Availability” section. This will indicate that you are unavailable during this time.
- Choose the appropriate time duration for the event by specifying the start and end times.
- Save the event by clicking the “Save” or “Create” button.
That’s it! You have successfully set up busy time on Google Calendar. The time slot you selected will now be labeled as busy, indicating your unavailability to others.
It’s important to note that you can customize the appearance of your busy events in Google Calendar. For example, you can assign different colors to different types of events, making it easier to identify your availability at a glance. To do this, simply edit the event and choose a color from the color picker.
Additionally, you can set recurring busy events for regular commitments by selecting the “Repeat” option in the event details. This is useful for marking regular meetings, classes, or appointments as busy on your calendar automatically.
Lastly, if you want to make yourself completely unavailable for a specific period, you can block out that time on your calendar. This will prevent others from scheduling appointments or events during that timeframe. To block out time, simply create an all-day event or mark a longer time block as busy.
In summary, setting up busy time on Google Calendar is quick and easy. By following these steps, you can effectively communicate your unavailability to others and manage your schedule with convenience and clarity.
How to Make an Event as Busy on Google Calendar
Google Calendar allows you to make specific events on your calendar appear as busy to signify your unavailability during those times. Here’s a step-by-step guide on how to make an event as busy on Google Calendar:
- Open Google Calendar on your computer or mobile device.
- Click or tap on the desired date and time when you want to create the event.
- Enter the event title and any additional details in the event creation window.
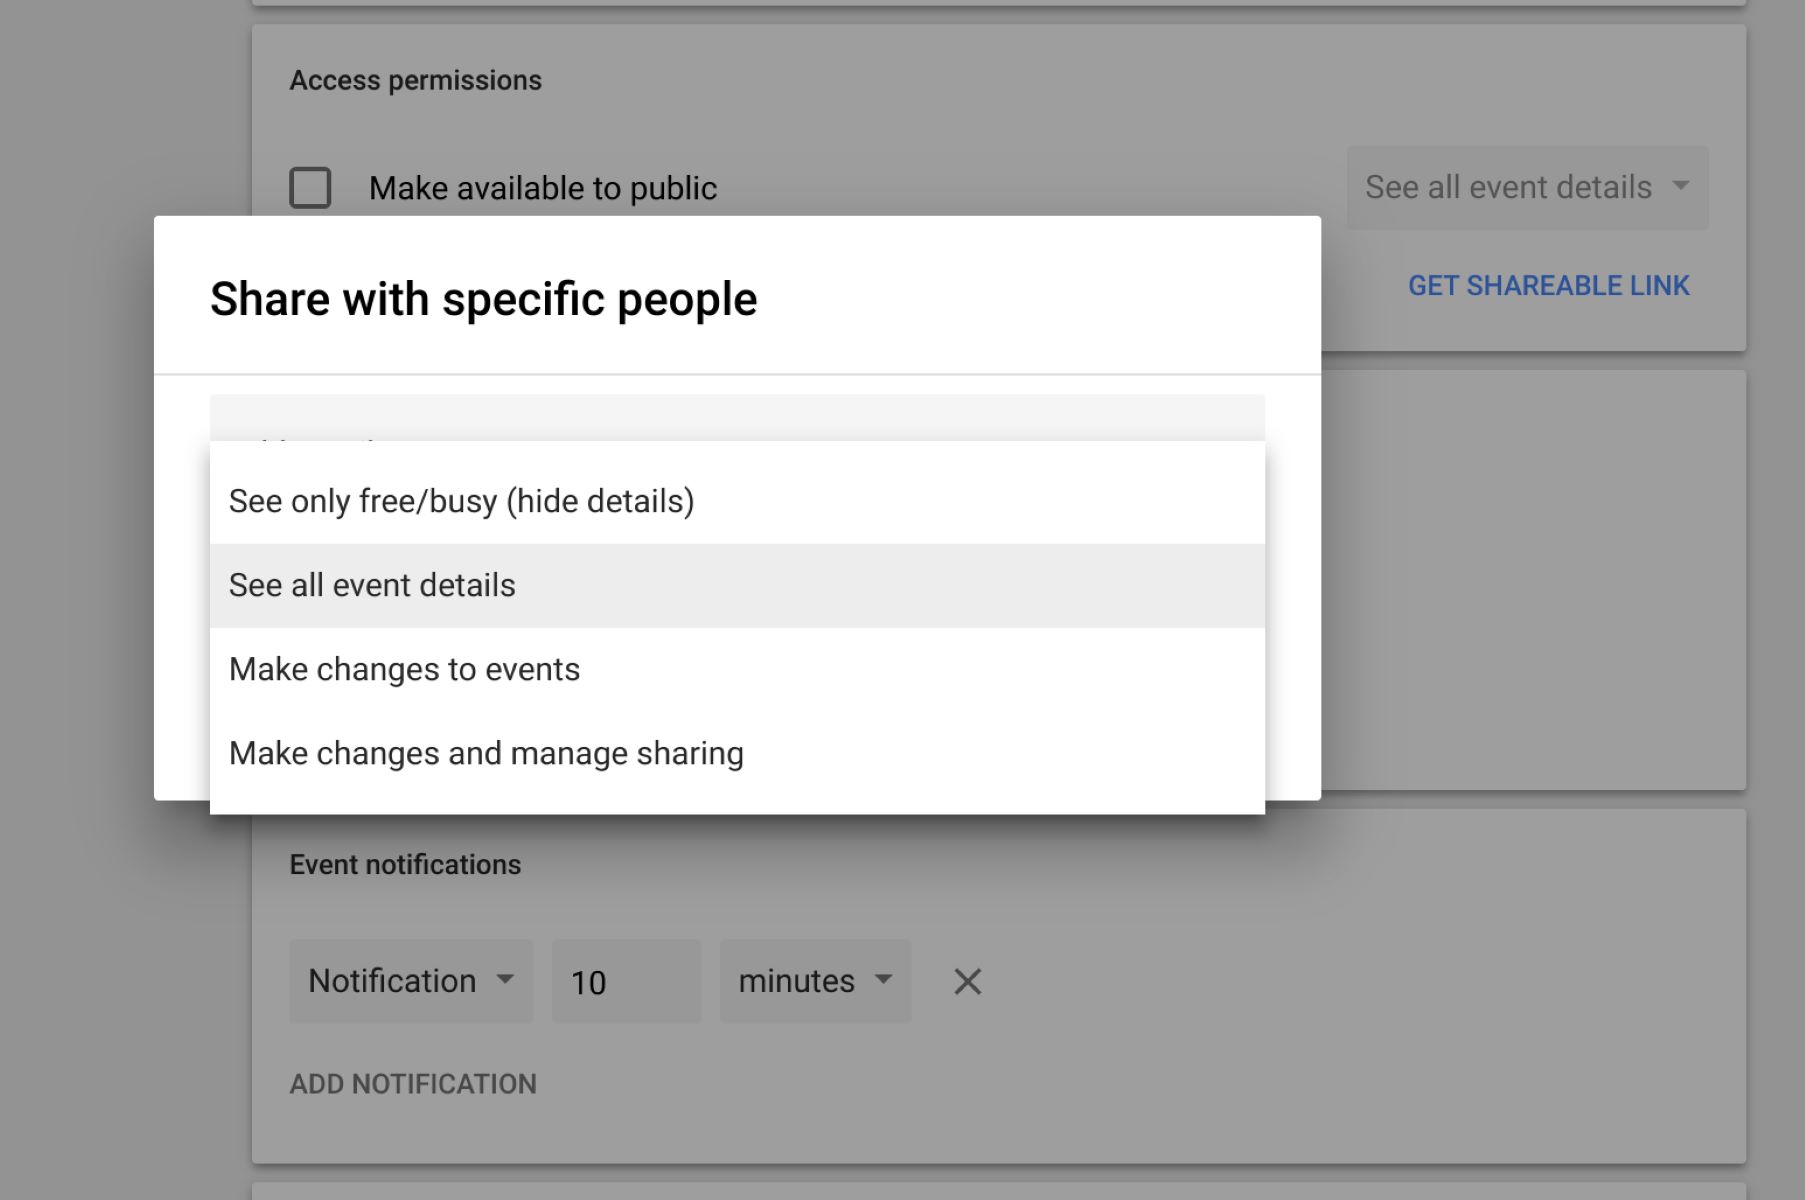
- In the event details window, locate the “Availability” section and click or tap on it to expand the options.
- Choose the “Busy” option from the availability dropdown menu. This will indicate that you are not available during this event.
- Select the appropriate start and end times for the event.
- Optionally, you can set a notification reminder for the event by clicking or tapping on the “Add notification” button and selecting a suitable reminder time.
- Save the event by clicking the “Save” or “Create” button.
That’s it! You have successfully made an event as busy on Google Calendar. The event will now be displayed as “busy” to indicate your unavailability during that time.
It’s worth mentioning that you can customize the appearance and behavior of your busy events. For instance, you can assign different colors to different types of events, making it easier to distinguish between them in your calendar view. Additionally, you can add detailed descriptions, attach files, invite guests, and set up conference call or video meeting links for your busy events.
Furthermore, if you have already created an event but forgot to mark it as busy, you can edit the event and follow the same steps mentioned above to change its availability to “busy”.
In summary, making an event as busy on Google Calendar is a simple process. By following these steps, you can effectively communicate your unavailability during specific events and ensure that others are aware of your schedule.
How to Block Out Time as Busy on Google Calendar
Blocking out time on Google Calendar allows you to reserve specific time slots as completely busy, preventing others from scheduling appointments or events during that timeframe. Here’s a step-by-step guide on how to block out time as busy on Google Calendar:
- Open Google Calendar on your computer or mobile device.
- Select the date or time range you want to block out as busy.
- Click or tap on the “Create” button to create a new event.
- In the event creation window, enter a title for the blocked-out time, such as “Unavailability” or “Blocked Time”.
- Set the appropriate start and end times for the blocked-out interval.
- Under the “Availability” section, choose the “Busy” option to indicate that you are not available during this time slot.
- Optionally, you can add any relevant details, notes, or reminders for the blocked-out time.
- Save the event by clicking the “Save” or “Create” button.
That’s it! You have successfully blocked out time as busy on Google Calendar. The specified time range will now be marked as busy, ensuring that no appointments or events can be scheduled during that period.
It’s important to note that blocked-out time can be useful for various purposes. You can use it to focus on important work tasks, allocate time for self-care or personal activities, or simply create boundaries and maintain work-life balance.
Additionally, you can customize the appearance of blocked-out time on your calendar by assigning different colors to different types of blocked events. This can make it easier to visually distinguish your busy periods from other events.
If you need to modify or remove a blocked-out time slot, simply locate the event on your calendar and edit it accordingly. You can change the duration, availability, or any other details as needed.
In summary, blocking out time as busy on Google Calendar is a valuable feature for effectively managing your schedule and ensuring uninterrupted time for your priorities. By following these steps, you can establish clear boundaries and protect valuable time slots on your calendar.
How to Customize Busy Settings on Google Calendar
Google Calendar provides several options to customize the busy settings, allowing you to personalize the way your busy events are displayed and managed. Here’s a step-by-step guide on how to customize busy settings on Google Calendar:
- Open Google Calendar on your computer or mobile device.
- Click or tap on the gear icon located in the top right corner of the screen to access the settings menu.
- From the dropdown menu, select “Settings”.
- Navigate to the “General” tab, which should be selected by default.
- Scroll down until you find the “Event settings” section.
- Under the “Event display” sub-section, you can choose how you want your busy events to appear.
- Select the preferred visibility option, such as showing event details, displaying only the availability, or hiding the event altogether.
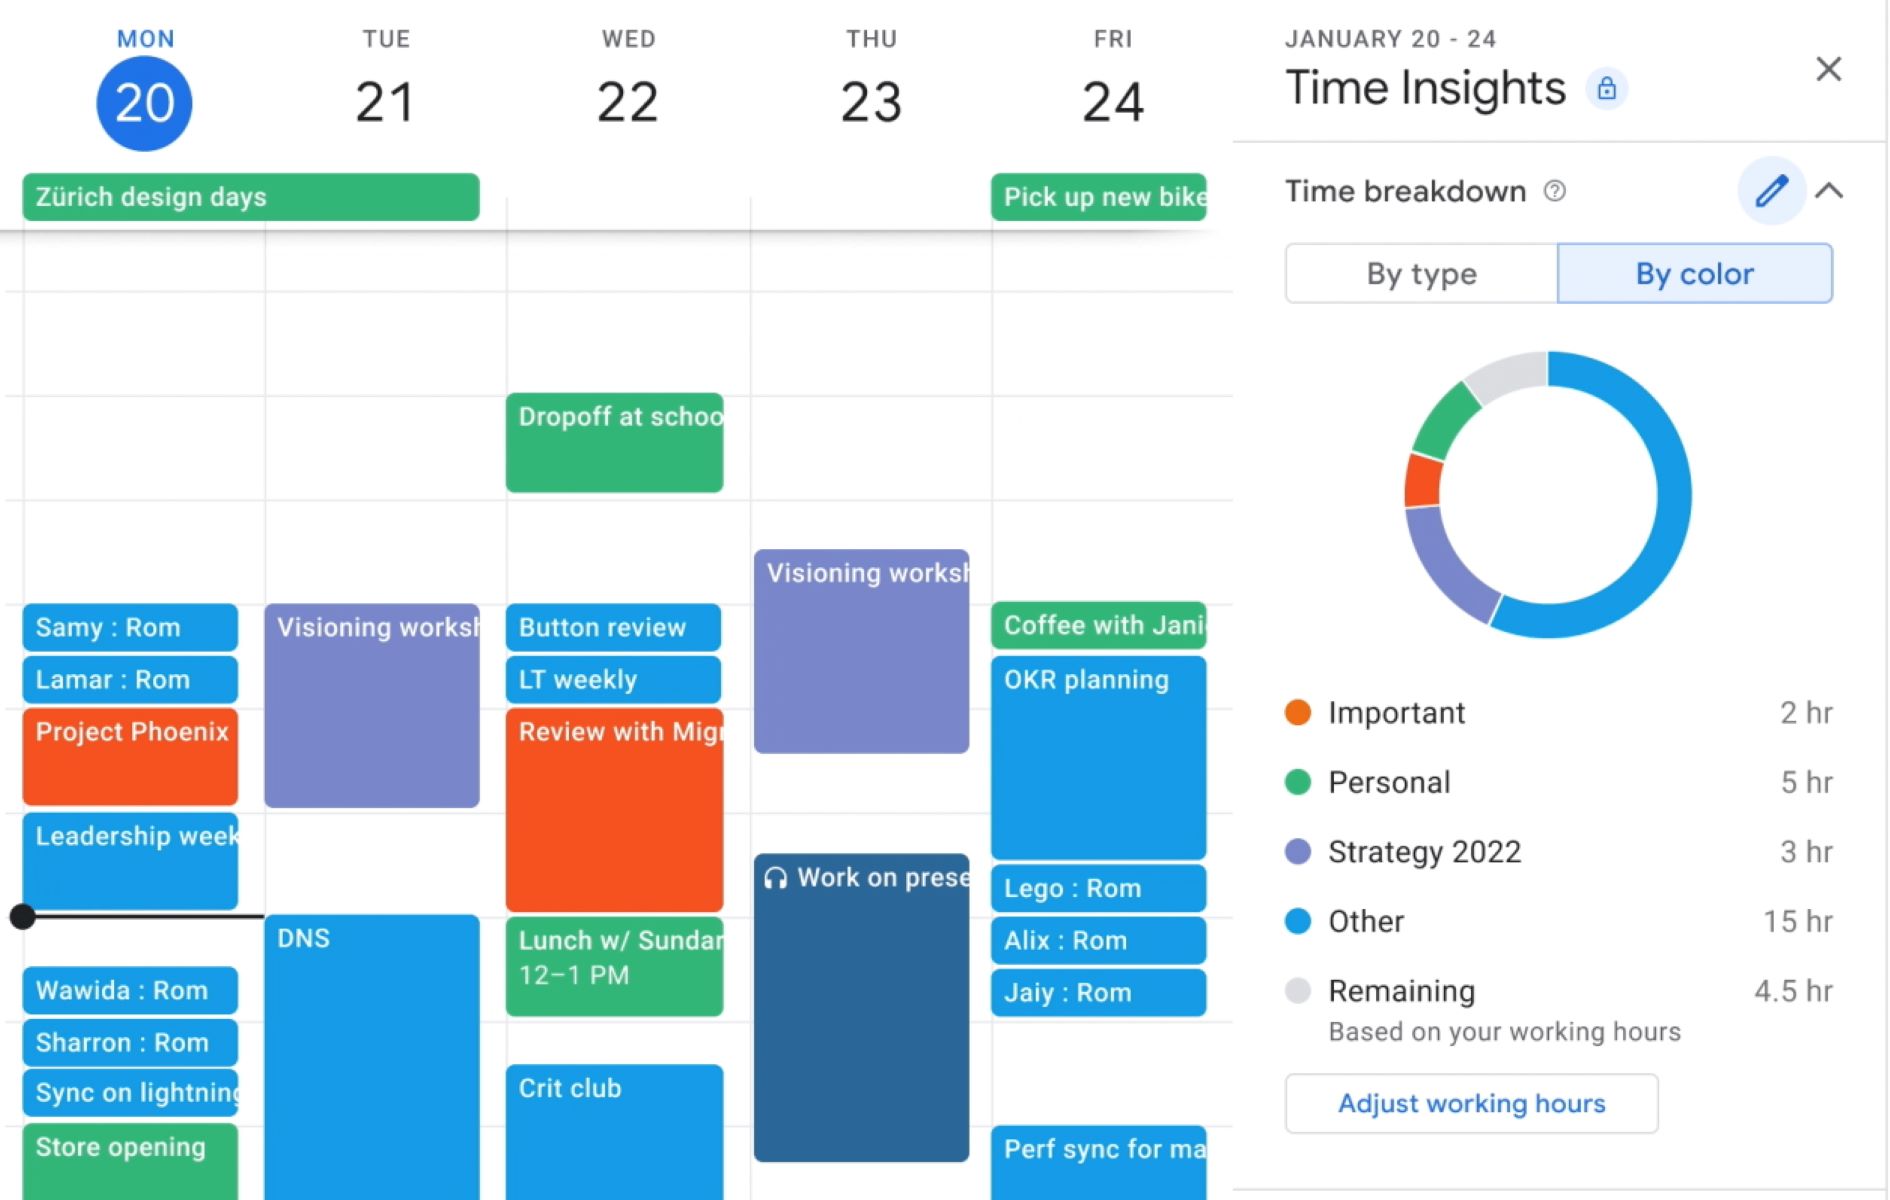
- Additionally, you can customize the color of your busy events by clicking or tapping on the color selector next to “Event color”. Choose a color that suits your preferences or use color coding to differentiate types of events.
- Scroll further down to the “Default duration” sub-section. Here, you can set the default duration for your events by entering the desired value.
- Save your changes by clicking or tapping on the “Save” or “Done” button.
That’s it! You have successfully customized the busy settings on Google Calendar. Your busy events will now be displayed and managed according to your preferences.
In addition to these general customization options, Google Calendar offers advanced features and integration with other tools. For example, you can integrate your calendar with third-party applications to enhance functionality and sync events across different platforms.
Furthermore, you can explore the “Notifications” settings within Google Calendar to customize the way you receive reminders and notifications for your busy events. This ensures that you stay informed about upcoming commitments and avoid scheduling conflicts.
Remember that these customization settings are not only applicable to busy events but can also be used to personalize the display and behavior of all events on your Google Calendar.
In summary, customizing busy settings on Google Calendar allows you to tailor the display and management of your busy events according to your preferences. By following these steps, you can ensure that your calendar is optimized for your needs and helps you stay organized and efficient.
Tips for Effectively Using Busy Time on Google Calendar
Utilizing the busy time feature on Google Calendar can greatly enhance your productivity and time management. Here are some helpful tips for effectively using busy time on Google Calendar:
- Be consistent: Make it a habit to mark all your important commitments as busy on your calendar. Consistency helps you and others understand your availability and prevents scheduling conflicts.
- Plan ahead: Take the time to schedule your events and tasks in advance. By blocking out specific time slots as busy, you can ensure you have dedicated time for important activities and avoid feeling overwhelmed.
- Use different colors: Assign different colors to different types of events or commitments. This visual distinction helps you quickly identify your various responsibilities and prioritize your time accordingly.
- Add detailed descriptions: Provide additional information or context for your busy events. This can be helpful for others who may need to understand the nature or purpose of your unavailability.
- Set reminders: Use the built-in reminder feature to receive notifications before your busy events. This ensures you stay on track and don’t forget any important commitments.
- Share your calendar: If appropriate, share your calendar with colleagues, family, or friends. This helps them understand your availability and prevents unnecessary interruptions or conflicts.
- Consider buffer time: Allocate buffer time between back-to-back events or appointments. This provides flexibility and allows for unexpected delays or breaks to regroup and recharge.
- Review and adjust: Regularly review your calendar to assess your schedule and make any necessary adjustments. This helps you identify any overbooked or conflicting time slots and allows for better planning.
- Integrate with other tools: Explore integrations with other productivity tools or services that can enhance your Google Calendar experience. This can include task managers, project management platforms, or communication apps.
- Communicate changes: If you need to modify or cancel a busy event, make sure to inform any relevant parties or stakeholders. Effective communication helps manage expectations and avoids misunderstandings.
By incorporating these tips into your usage of busy time on Google Calendar, you can maximize its effectiveness and enjoy better organization and productivity in your daily life.
Troubleshooting Busy Time on Google Calendar
While Google Calendar is a reliable tool, you may encounter some issues or challenges when using the busy time feature. Here are some common troubleshooting tips to help resolve any problems:
- Ensure proper synchronization: Verify that your Google Calendar is properly synchronized across all your devices. Confirm that any changes made on one device are reflected on all other devices.
- Check event privacy settings: If your busy events are not appearing as “busy” to others, double-check the event privacy settings. Ensure that the event is set to be visible and not marked as private or only visible to specific individuals.
- Refresh your calendar view: If you don’t see the busy indicator on your calendar, try refreshing the calendar view in your browser or app. This can help resolve any display-related issues.
- Review overlapping events: If you have overlapping events, it may cause confusion or conflicts in your busy time display. Make sure to adjust the start and end times of your events to accurately reflect your availability.
- Clear cache and cookies: If you’re experiencing persistent issues with Google Calendar, try clearing the cache and cookies in your browser. This can help resolve any temporary data-related issues.
- Update your Google Calendar app: If you’re using the mobile app, ensure that you have the latest version installed. Updating the app can often resolve any bugs or glitches.
- Check for conflicting extensions or add-ons: If you have extensions or add-ons installed on your browser, they may interfere with Google Calendar’s functionality. Temporarily disable them to see if the issue persists.
- Contact support: If you’ve tried the troubleshooting tips above and still can’t resolve the issue, reach out to Google support for further assistance. They can provide additional guidance based on your specific situation.
Remember to thoroughly check your settings and verify that you’re following the correct steps when using the busy time feature. Pay attention to any error messages or notifications that may provide insight into the issue.
By troubleshooting any problems that arise with busy time on Google Calendar, you can ensure a smooth and efficient scheduling experience.
Conclusion
Google Calendar’s busy time feature is a valuable tool for managing your schedule and communicating your availability to others. By utilizing this feature effectively, you can streamline your time management, maintain work-life balance, and enhance collaboration with colleagues and friends.
We explored the various aspects of using busy time on Google Calendar, including why it’s important to show busy, how to set up busy time, make an event as busy, block out time, and customize busy settings. We also discussed tips for effectively using busy time and troubleshooting common issues that may arise.
By consistently marking your important commitments as busy, planning ahead, and customizing your preferences, you can better organize and prioritize your schedule. Communicating your availability to others is essential for avoiding conflicts and interruptions.
Remember to take advantage of the additional features and integrations available in Google Calendar to further enhance your productivity and organization. Whether it’s color-coding events, setting reminders, or sharing your calendar, there are many ways to fine-tune your experience.
Overall, Google Calendar’s busy time feature is a valuable asset for effectively managing your time and maintaining a well-structured schedule. By implementing the tips and techniques discussed in this guide, you can maximize your productivity, achieve a healthy work-life balance, and ensure that your time is well-utilized.