Introduction
Welcome to the digital age where smartphones have become an integral part of our lives, helping us stay organized and efficient. If you’re an iPhone user, you’re probably familiar with the default Calendar app that comes pre-installed on your device. While it serves its purpose, you may find that Google Calendar offers a more comprehensive and user-friendly experience. In this article, we will guide you through the process of setting Google Calendar as the default calendar on your iPhone.
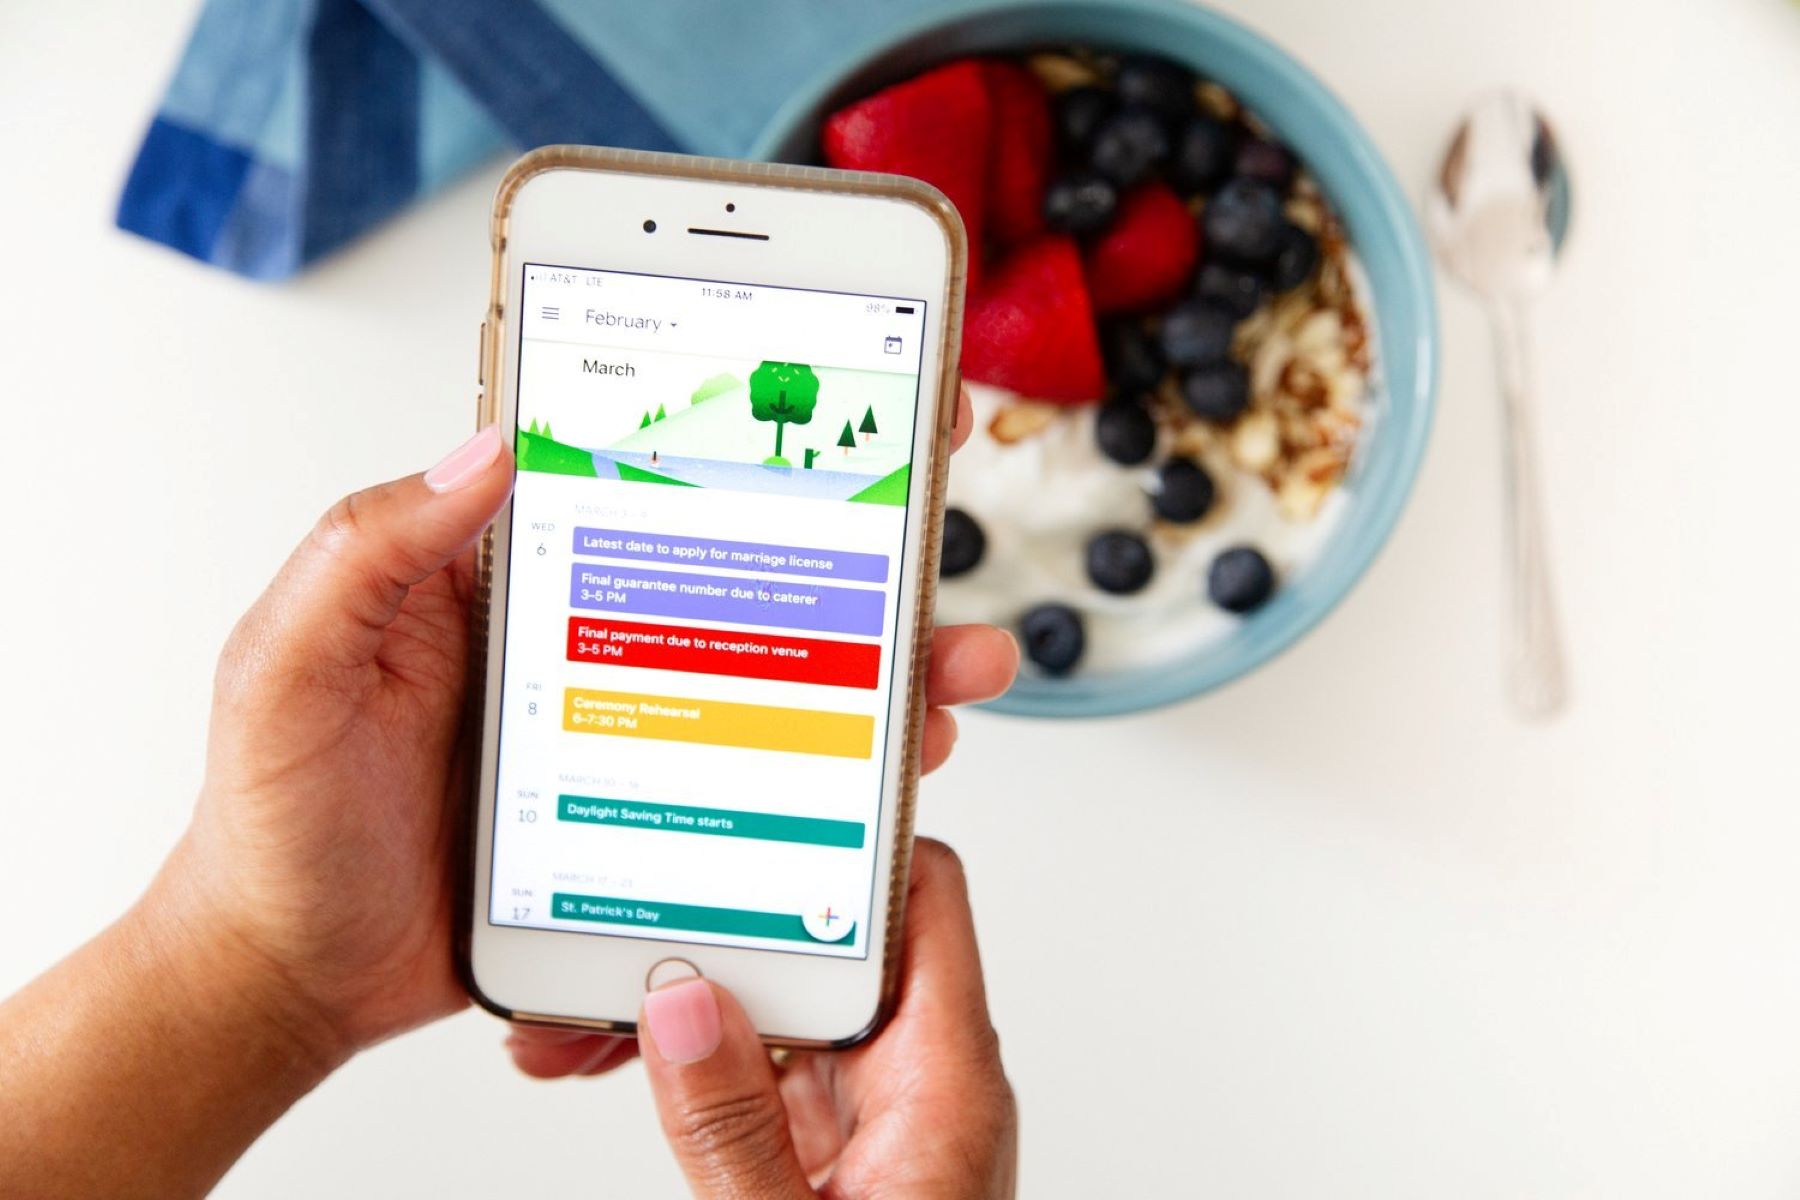
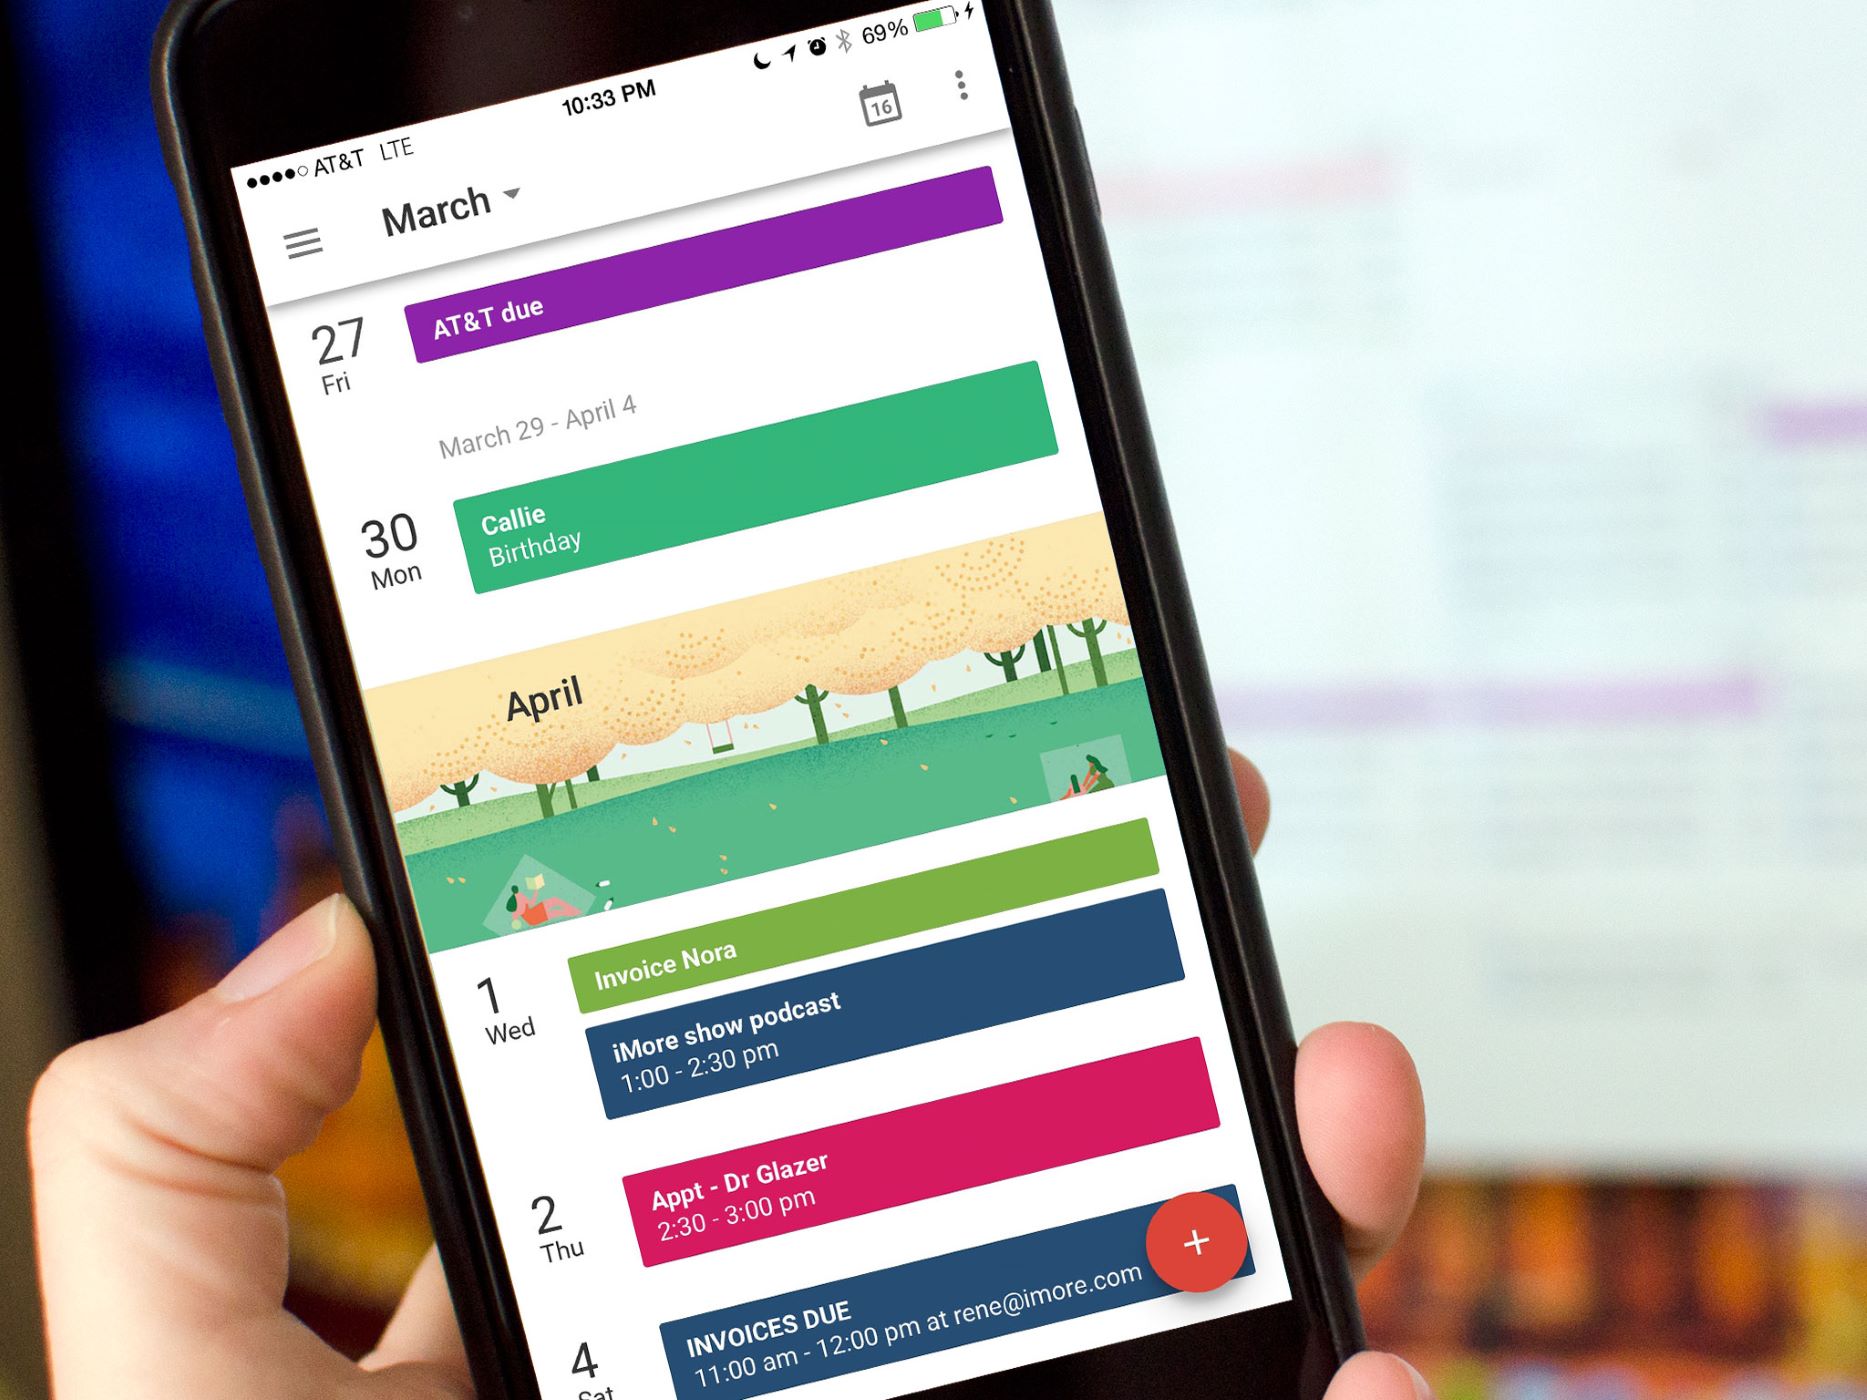
Google Calendar is a powerful tool that allows you to easily manage and organize your schedule. With features like reminders, event invitations, and shared calendars, it helps you stay on top of your appointments, deadlines, and important events. By making Google Calendar your default calendar, you can ensure that all events and reminders are seamlessly synced across your devices, providing a unified and efficient scheduling experience.
Setting Google Calendar as the default on your iPhone has several benefits. Firstly, it allows you to easily add, edit, and view events directly from the Google Calendar app. Secondly, it ensures that any event invitations or reminders you receive via email are automatically added to your Google Calendar. Thirdly, by syncing your Google Calendar with the iOS Calendar app, you can access your schedule from various other iPhone apps, such as Siri, Mail, and Safari.
In the following sections, we will provide a step-by-step guide on how to set Google Calendar as the default on your iPhone. Whether you’re a busy professional, a student, or simply someone who values an efficient and organized schedule, this tutorial will help you streamline your workflow and enhance your productivity.
Step 1: Download and Install the Google Calendar App
The first step towards setting Google Calendar as the default on your iPhone is to download and install the Google Calendar app from the App Store. Here’s how you can do it:
- Launch the App Store on your iPhone by tapping on the App Store icon.
- Tap on the “Search” tab located at the bottom of the screen.
- In the search bar at the top of the screen, type “Google Calendar” and tap on the search button.
- From the search results, locate the Google Calendar app and tap on it.
- On the app page, tap the “Get” button to download and install the app.
- You may be prompted to enter your Apple ID password or use Touch ID/Face ID to authorize the download. Follow the on-screen instructions to complete the installation process.
- Once the installation is complete, you will find the Google Calendar app on your home screen. Tap on it to open the app.
Congratulations! You’ve successfully downloaded and installed the Google Calendar app on your iPhone. In the next step, we will guide you through the process of granting access to Google Calendar.
Step 2: Grant Access to Google Calendar
Now that you have the Google Calendar app installed on your iPhone, the next step is to grant it access to your Google Calendar account. Here’s how you can do it:
- Open the Google Calendar app on your iPhone by tapping on its icon.
- You will be prompted to sign in to your Google account. Enter your email address and password, and tap “Sign in” to proceed. If you have multiple Google accounts, make sure to sign in with the account that you want to sync with the Google Calendar app.
- Once you sign in, you will see a pop-up message asking for permission to access your Google Calendar. Tap “Allow” to grant the app access.
- In the next screen, you will be asked to choose the calendars you want to sync with the Google Calendar app. Select the calendars you want to include and tap “OK” to continue.
- The Google Calendar app will now sync with your Google account and fetch all your events and reminders. This may take a few moments depending on the size of your calendar.
- Once the sync is complete, you will be taken to the main screen of the Google Calendar app, where you can start managing and scheduling your events.
That’s it! You have successfully granted access to Google Calendar on your iPhone. In the next step, we will show you how to set Google Calendar as the default calendar.
Step 3: Set Google Calendar as Default
Now that you have the Google Calendar app installed and access to your Google Calendar granted, it’s time to set it as the default calendar on your iPhone. Follow the steps below to do so:
- Go to the “Settings” app on your iPhone, which can be found on your home screen.
- Scroll down and tap on “Calendar”.
- In the “Calendar” settings, tap on “Default Calendar”.
- You will see a list of available calendars. Select “Google Calendar” from the list.
- Exit the “Settings” app and open your iPhone’s default Calendar app by tapping on the “Calendar” icon on your home screen.
That’s it! You have successfully set Google Calendar as the default calendar on your iPhone. Any new events or reminders that you create will now automatically be added to your Google Calendar. In the next step, we will guide you on how to adjust the calendar settings to personalize your experience.
Step 4: Adjust Calendar Settings
After setting Google Calendar as the default on your iPhone, you may want to customize certain settings to tailor your calendar experience. Here are some key settings you can adjust:
- Open the Google Calendar app on your iPhone.
- Tap on the menu icon located in the top-left corner of the screen.
- From the slide-out menu, select “Settings”.
- In the “Settings” menu, you will find various options to personalize your calendar. Here are a few notable settings you may want to adjust:
- Event notifications: Choose how you want to be notified about upcoming events, such as through push notifications or email reminders.
- Default event duration: Set a default duration for your events, so you don’t have to manually adjust it each time you create a new event.
- Time format: Customize the time format to either 12-hour or 24-hour format, depending on your preference.
- Week starts on: Select the day on which you want your calendar week to begin.
- Make any desired changes to the settings based on your preferences.
- Exit the “Settings” menu and your changes will be automatically saved.
By adjusting these settings, you can personalize your Google Calendar experience and tailor it to suit your needs. Take some time to explore the different options and make changes according to your preferences. In the next step, we will show you how to sync Google Calendar with the iOS Calendar app.
Step 5: Sync Google Calendar with iOS Calendar App
Syncing your Google Calendar with the iOS Calendar app will allow you to access and manage your events seamlessly from various apps on your iPhone. Follow the steps below to sync Google Calendar with the iOS Calendar app:
- Open the “Settings” app on your iPhone.
- Scroll down and tap on “Calendar”.
- In the “Calendar” settings, tap on “Accounts”.
- Under the “Accounts” section, tap on “Add Account”.
- Choose “Google” from the list of available account types.
- Enter your Google account credentials and sign in.
- Toggle on the switch next to “Calendar” to enable the syncing of your Google Calendar with the iOS Calendar app.
- Tap “Save” to complete the setup.
- Now, open the iOS Calendar app on your iPhone.
- You will find your Google Calendar events and reminders synced with the iOS Calendar app.
With Google Calendar now synced with the iOS Calendar app, you can access your schedule from various other iPhone apps, such as Siri, Mail, and Safari. Any changes or updates made in the Google Calendar app will automatically reflect in the iOS Calendar app as well.
Congratulations! You have successfully synced Google Calendar with the iOS Calendar app. You can now enjoy the convenience of managing and accessing your events and reminders from multiple apps on your iPhone. Feel free to explore the features and functionalities of the iOS Calendar app to optimize your scheduling experience.
Conclusion
Setting Google Calendar as the default calendar on your iPhone can greatly enhance your scheduling and organization capabilities. By following the step-by-step guide outlined in this article, you can seamlessly integrate Google Calendar into your daily routine and streamline your workflow.
With Google Calendar as your default calendar, you can easily manage and view your events, receive notifications and reminders, and synchronize your schedule across devices. The flexibility and user-friendly features of Google Calendar will help you stay on top of your commitments and deadlines, ensuring that you never miss an important event.
By downloading and installing the Google Calendar app, granting access to your Google Calendar, and setting it as the default calendar on your iPhone, you can enjoy the benefits of a comprehensive and synchronized scheduling system. Additionally, adjusting the calendar settings and syncing it with the iOS Calendar app further enhances your productivity and convenience.
So, take control of your schedule and make the most out of your iPhone’s capabilities by setting Google Calendar as the default calendar. Enjoy the seamless integration, personalized settings, and effortless synchronization that Google Calendar offers.
Start today and experience the power of efficient scheduling with Google Calendar on your iPhone!